All Projects
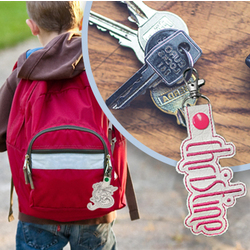


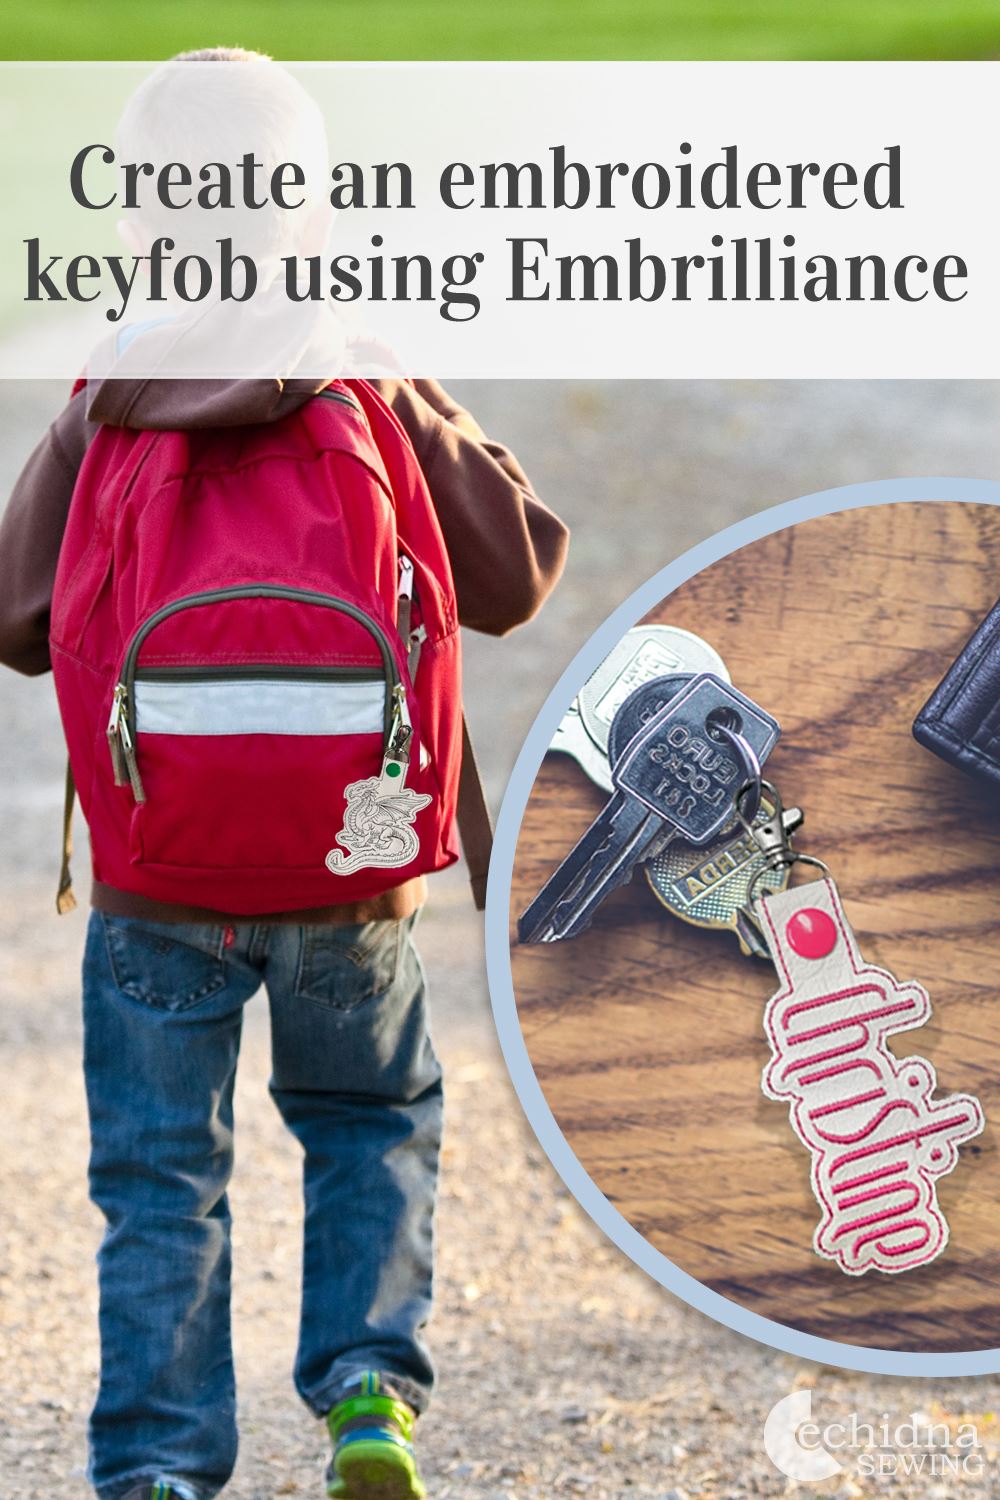
Embroidered key fob
Date Posted:22 August 2025
This tutorial will show you how to create a personalised key fob using Embrilliance. This is a great gift idea for a loved one, teachers or is the perfect addition to a child's bag so that they can easily identify which is theirs. This 'In-The-Hoop' project uses Embrilliance Essentials, Enthusiast and StitchArtist to create an embroidered key fob with no sewing required.
Using Hatch Embroidery Digitizer?
We've put together a tutorial on how to achieve the same project using Hatch. Click here to download the tutorial →WHAT YOU WILL NEED
- An embroidery machine
- Embroidery software - we've used Embrilliance Essentials, Enthusiast and StitchArtist
- Soft vinyl
- Softaway stabilizer
- Popper studs/Snap fasteners
- Key fob hardware
- Applique scissors
CHECK YOUR EMBRILLIANCE IS UP TO DATE
Before starting, check the Embrilliance version you are running to make sure it is up to date:
- Open Embrilliance, go to Help > About and check version.
- Check what the latest version number of the software is by going to Software Trials and Updates - click here.
- If necessary, download the latest version and follow prompts to update to the latest version.
Or you can grab a free trial version here →
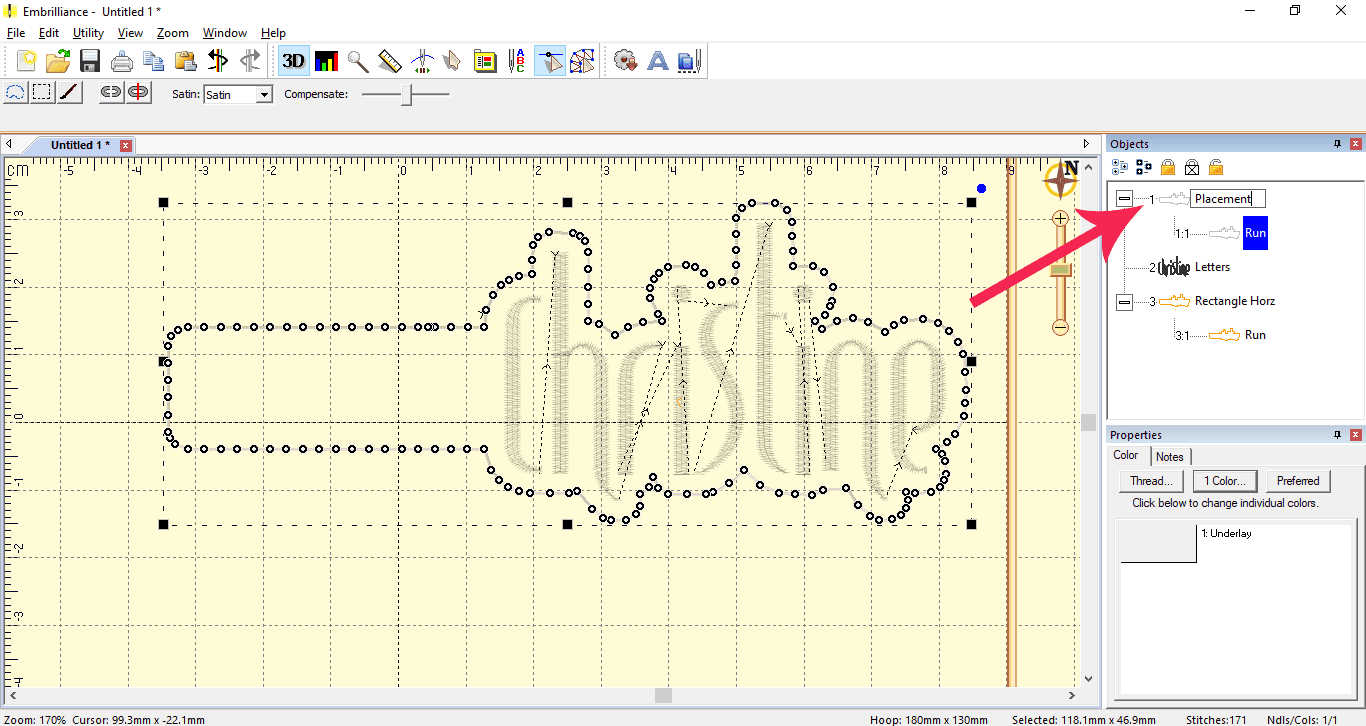
CREATING THE KEY FOB DESIGN IN EMBRILLIANCE
- Open Embrilliance. Edit > Preferences.
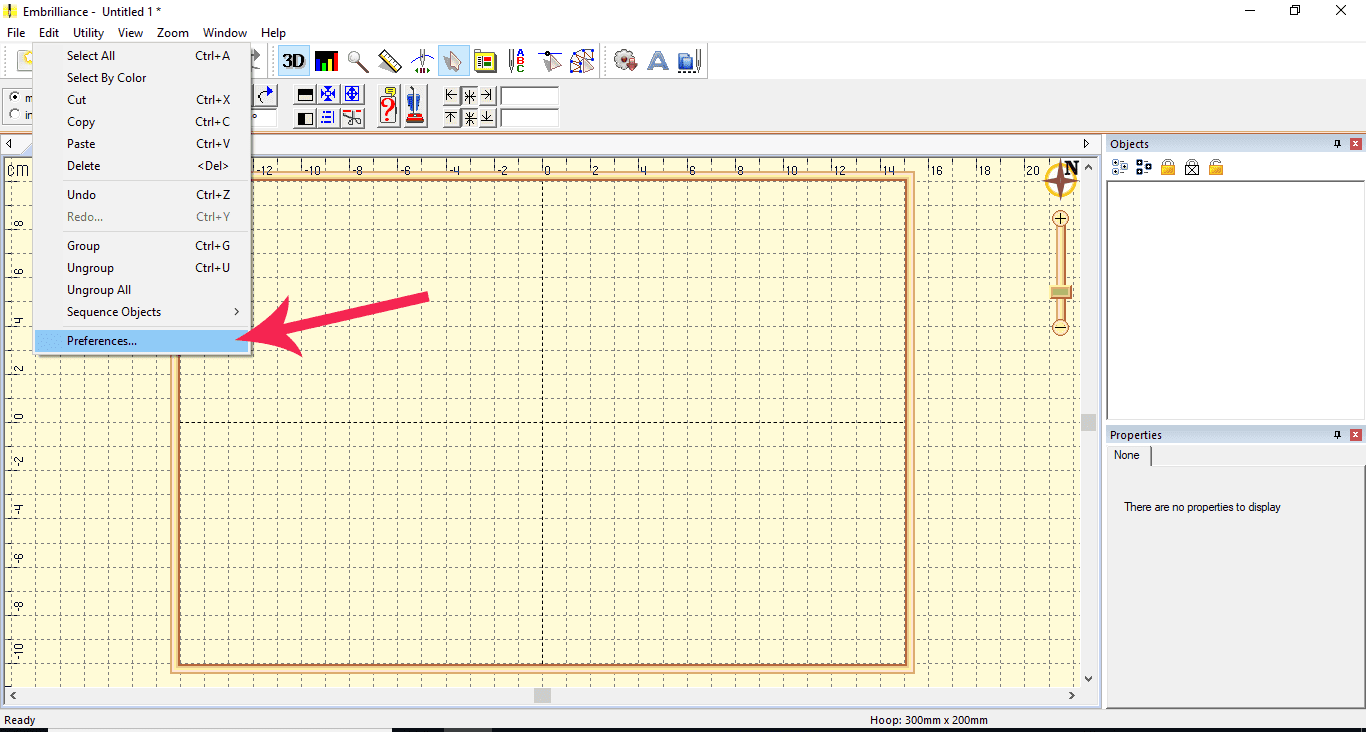
- Choose hoop size 130mm x 180mm and set the hoop to horizontal by ticking the Rotate 90 option.
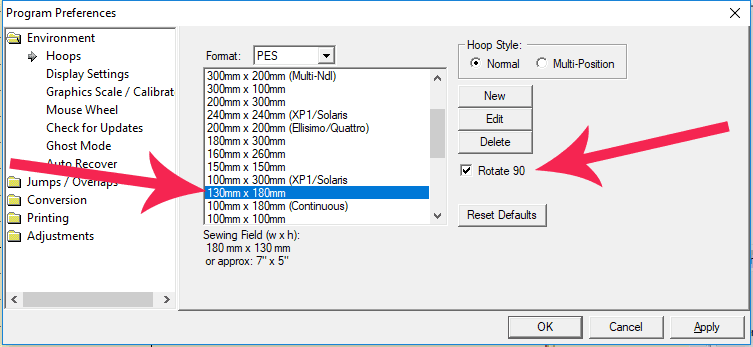
- Choose the lettering icon
 .
.
"ABC" will appear in the work area and also in the text box on the right of your screen. Double click on this text, type your name and press Set (or Enter on your keyboard). Choose your font directly under the text box by selecting the down arrow and scroll through fonts. Select desired font (we have used Narrow Retro Embroidery Font in this example), resize by dragging corners and position on the right side of hoop.
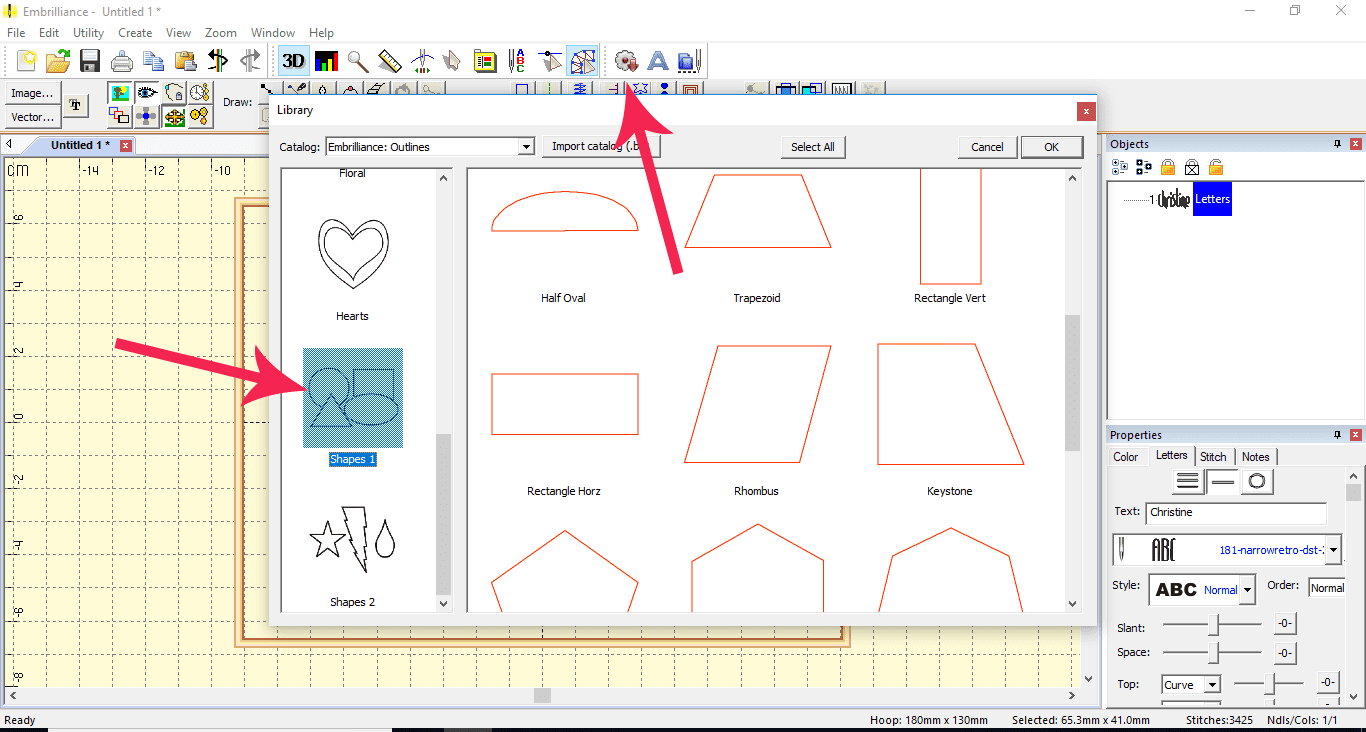
- Select the StitchArtist icon
 , then Merge Design
  Shapes 1. Choose the horizontal rectangle. Resize to approx. 12mm high and 40-50mm long and drag to left side of the name, nice and close.
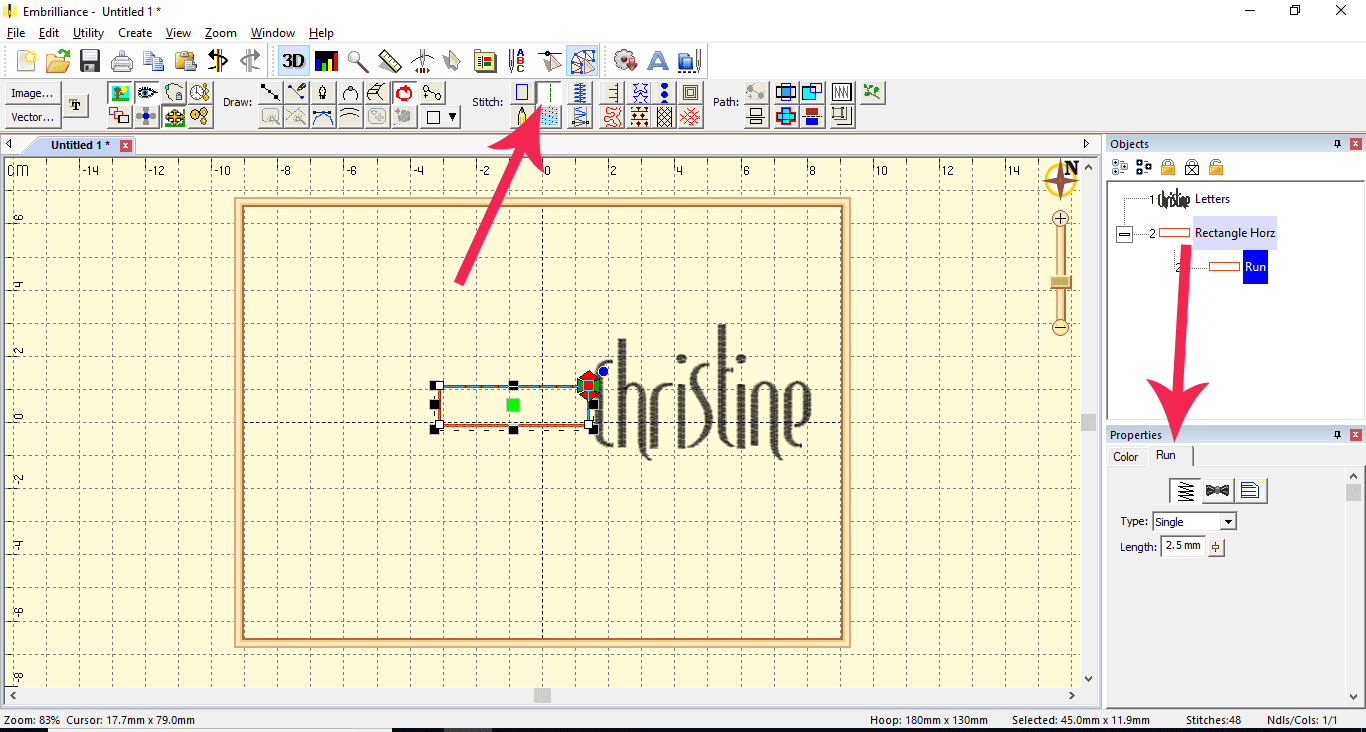
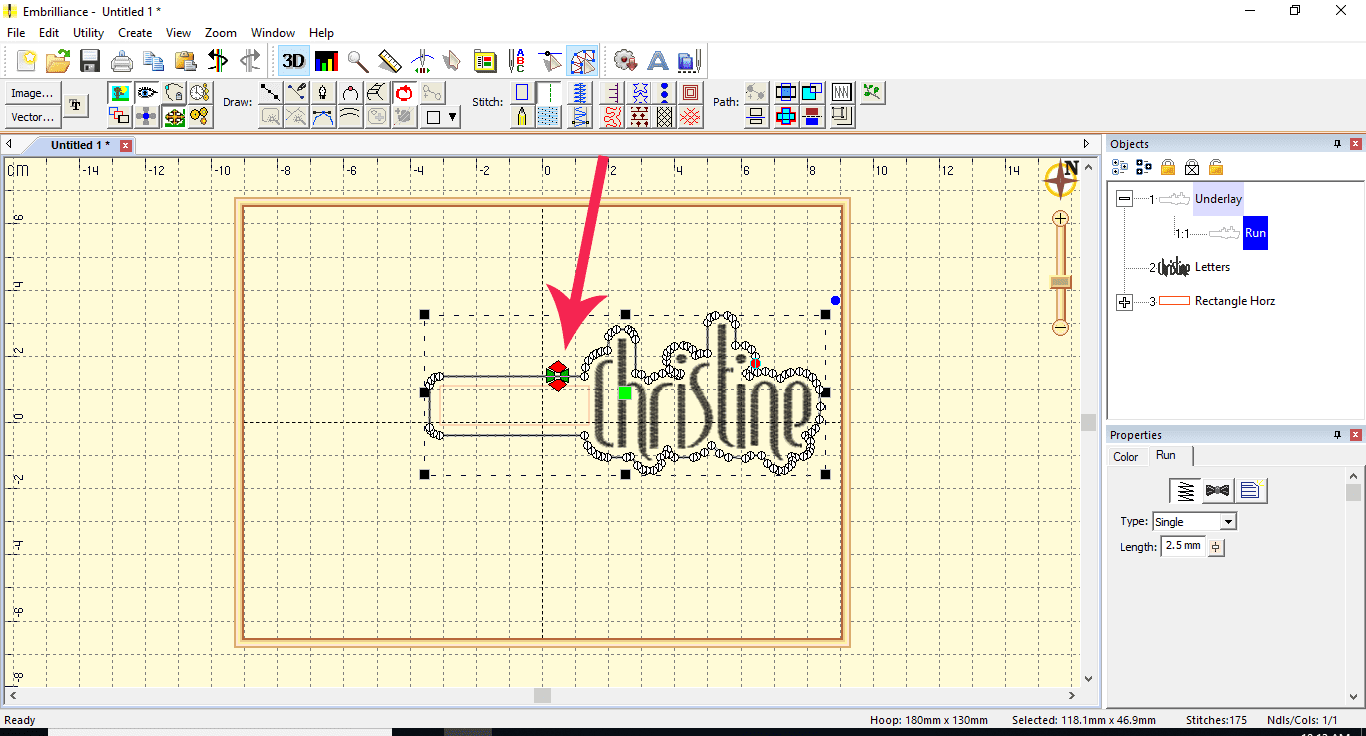
- In StitchArtist , make sure you have the rectangle selected and choose Run for rectangle outline from the Stitch tools.
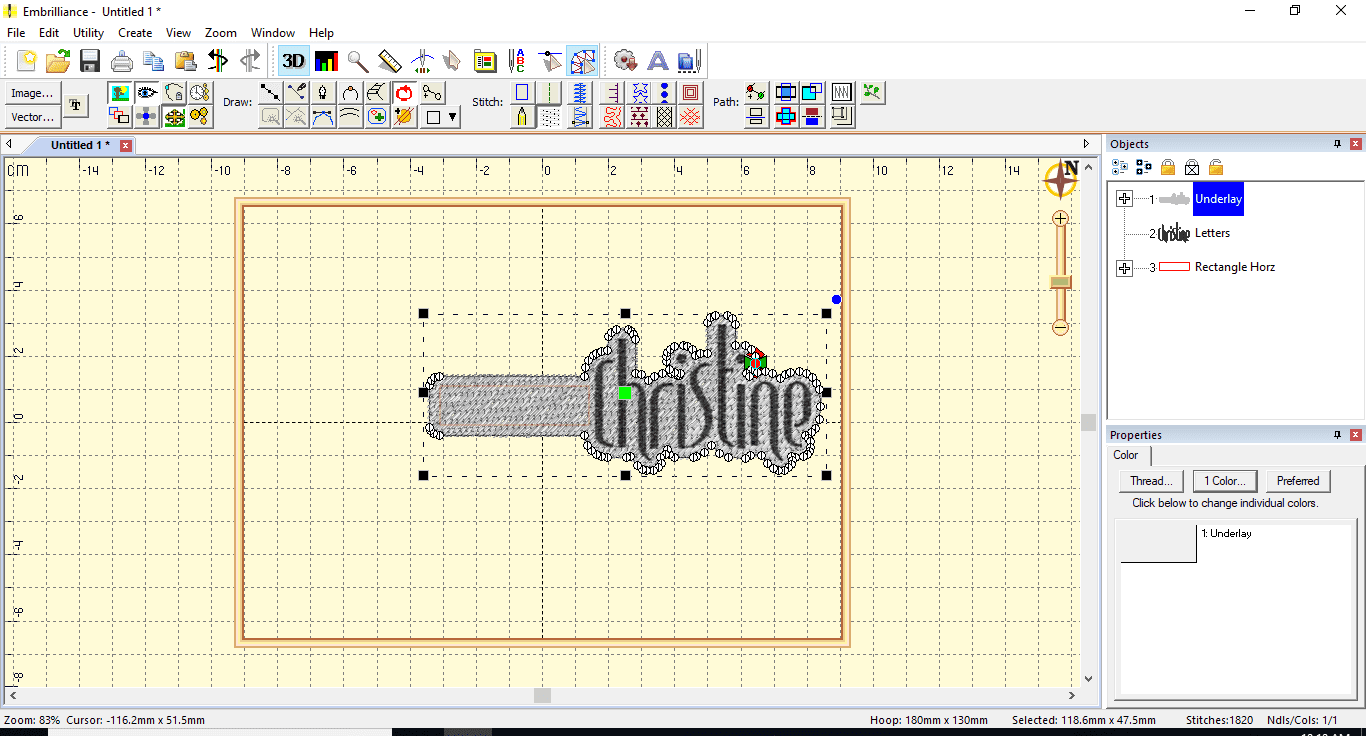
- From Enthusiast, Go to Utility > Add Knockdown Stitching.
- Go back to Stitch Artist and choose “Run” again to make the knockdown stitch an outline and leave selected. In the Properties box on the bottom right of your screen make sure run type is set to single. The START and STOP points on the stitches are indicated by the GREEN and RED arrows.
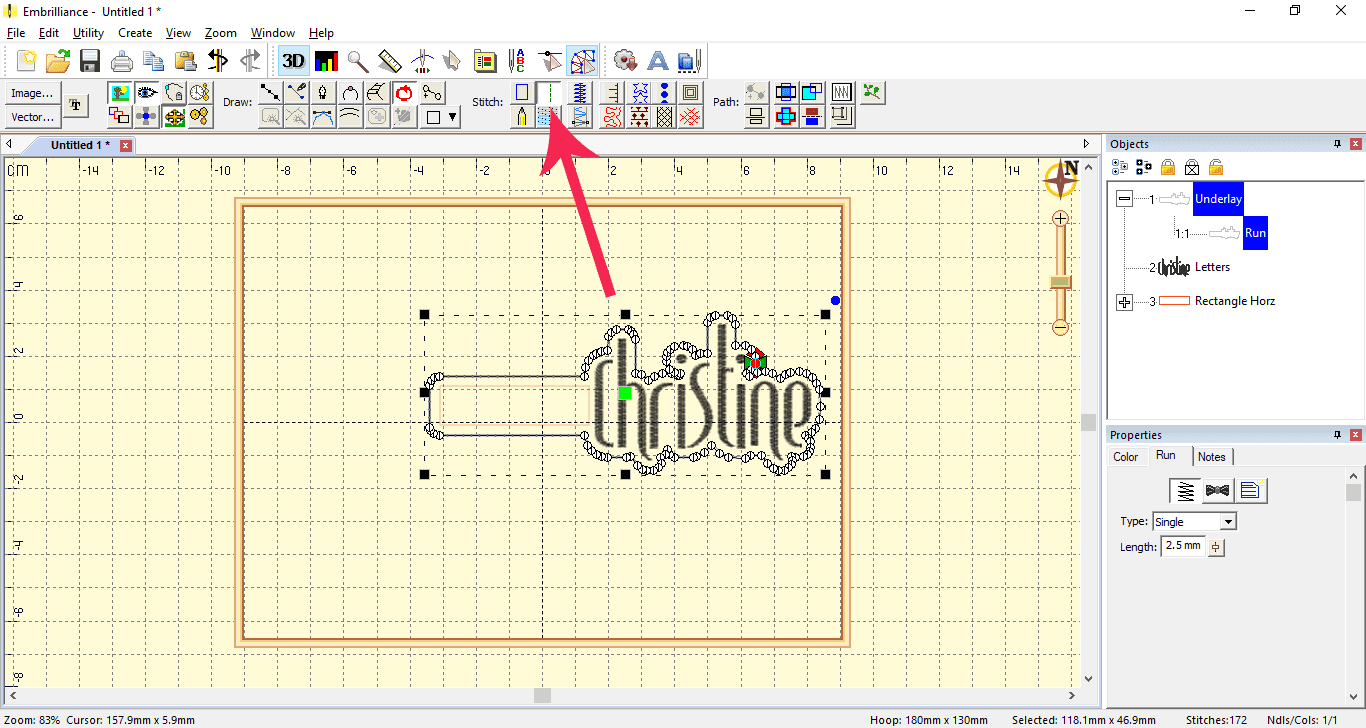
- Move the Start and Stop points to back of the tab so they will not be seen.
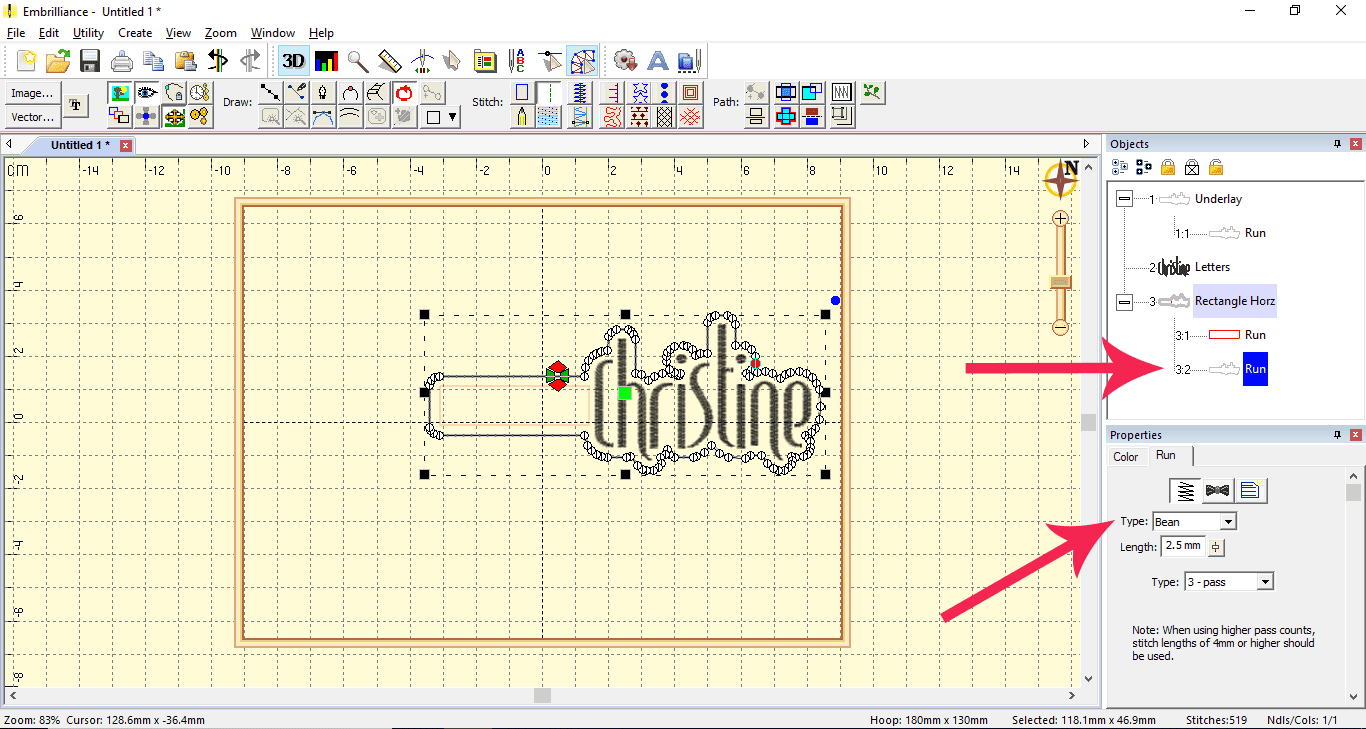
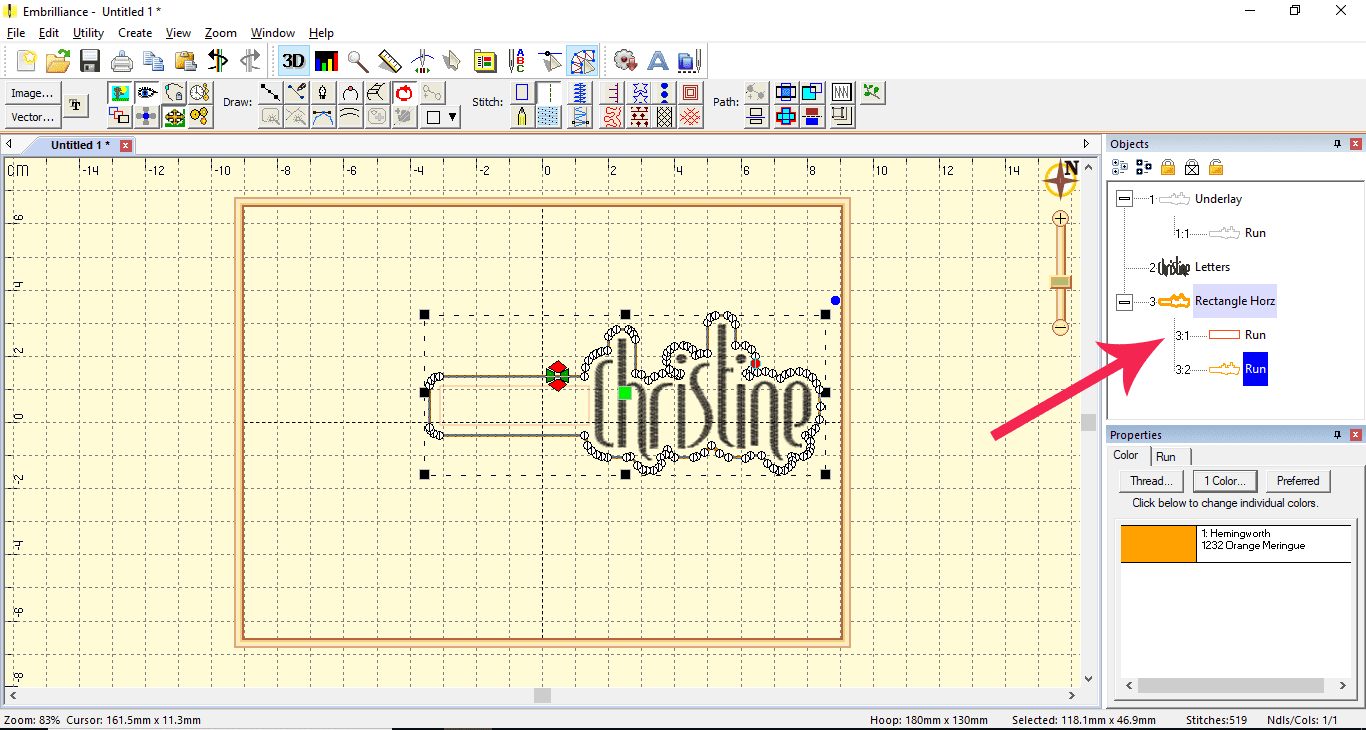
- Copy and paste outline (you will see the second one in the Objects box). Make this outline a bean stitch in the properties box. Change colour by selecting the colour tab at the bottom of the screen. Click outside of design to deselect.
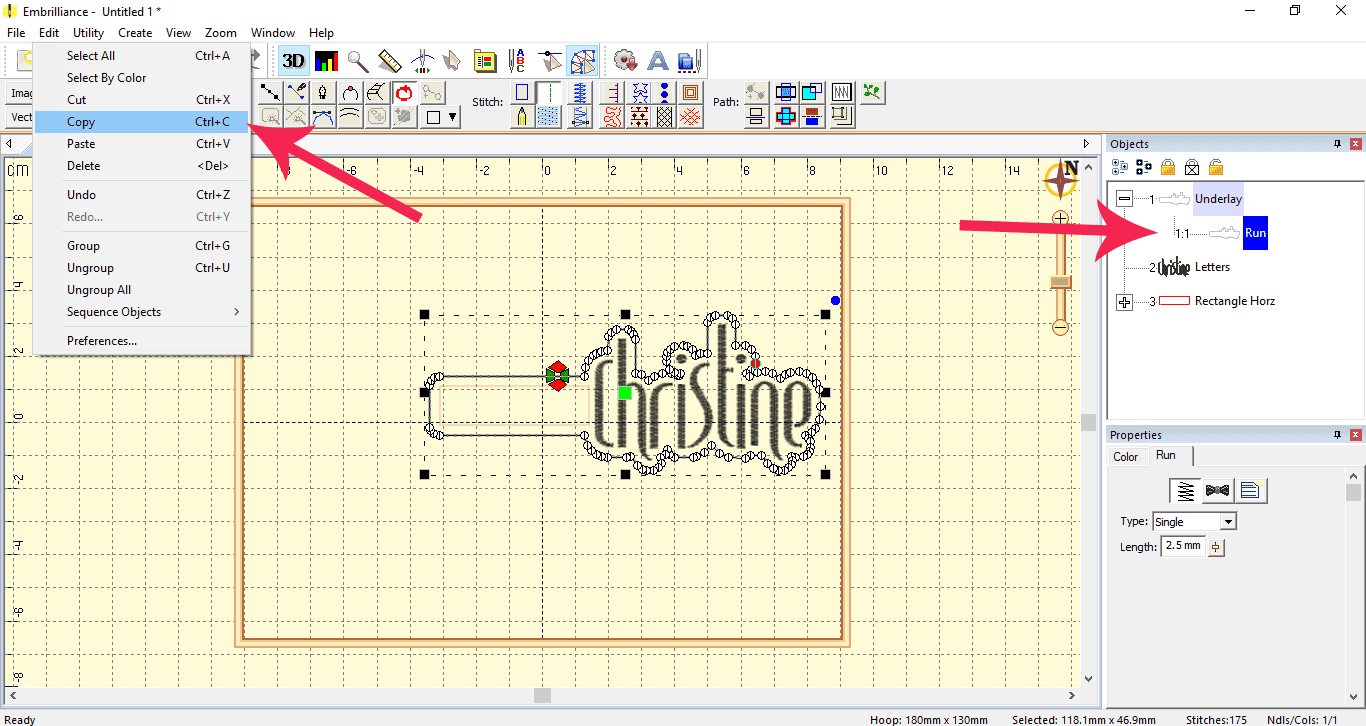
- In Objects box, select the original rectangle and Delete on your keyboard.
- Choose Edit Stitches in Enthusiast
 and delete any unnecessary stitches if required by selecting stitch and then press delete as before.
 - In Objects box, rename outlines by clicking on “Underlay” twice slowly. Call first outline “Placement” and second outline “Final Outline”
- Check stitchout order by running Stitchplayer
 and then play.
SAVING YOUR FILE IN EMBRILLIANCE
Go to File > Save as (Stitch and Working) to have a BE file for editing and a separate machine file for stitching out.
- Save Working File: to have an editing file to come back to later.
- Save Stitch File: to have a stitching file only
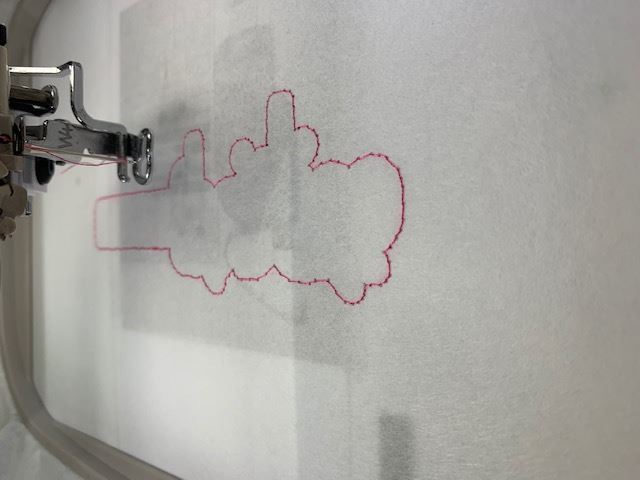
STITCHING OUT THE DESIGN
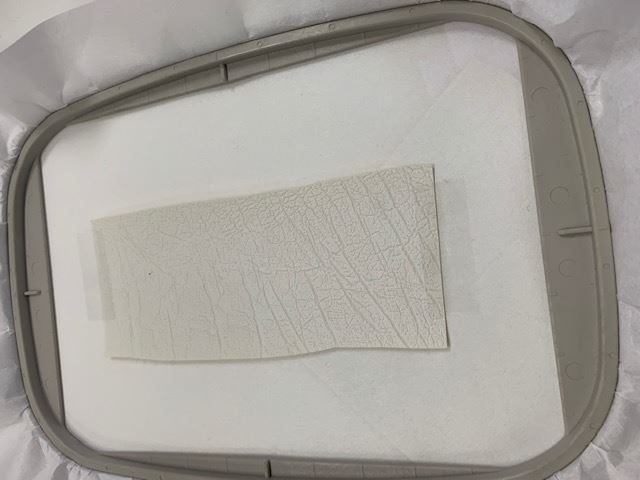
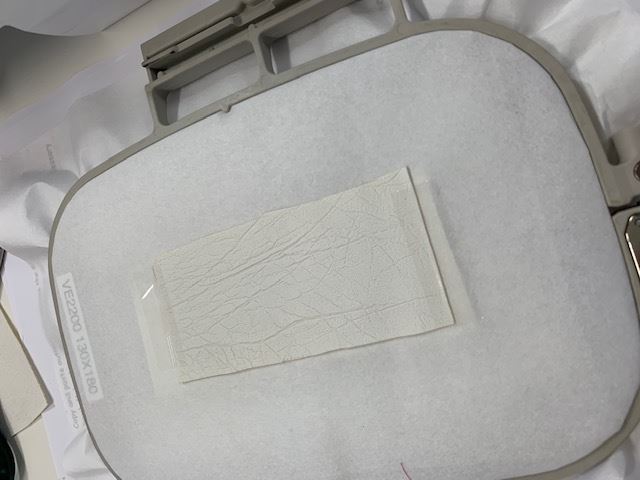
- Hoop 130 x 180mm hoop with tearaway stabiliser.
- Stitch Placement Line onto stabiliser.
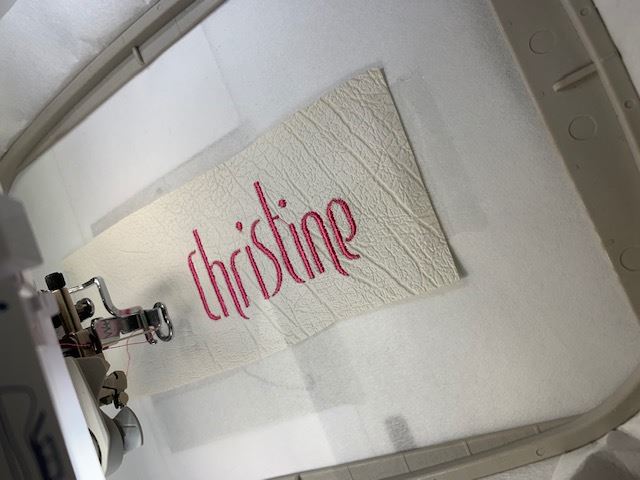
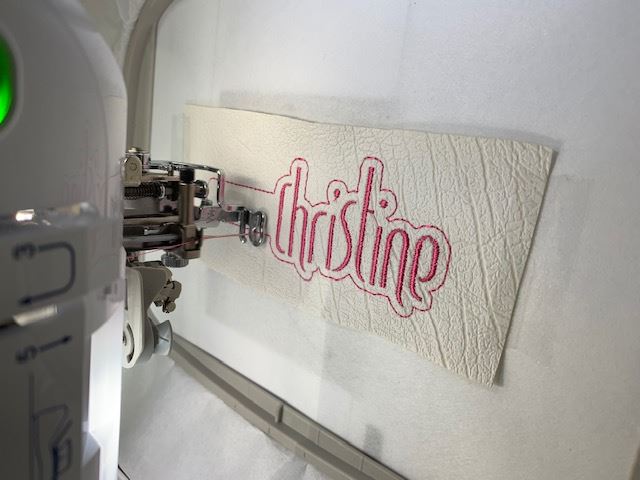
- Place a piece of vinyl down to cover placement line, stick down with tape and stitch out the name/design.
- Remove hoop from machine (do not unhoop key fob!) and stick another piece of vinyl on back of hoop to cover placement line.
 /p>
/p> - Reattach hoop and stitch Final outline. Make sure you have a bobbin with the same colour as your top thread for this step as the outline will be seen from both sides.
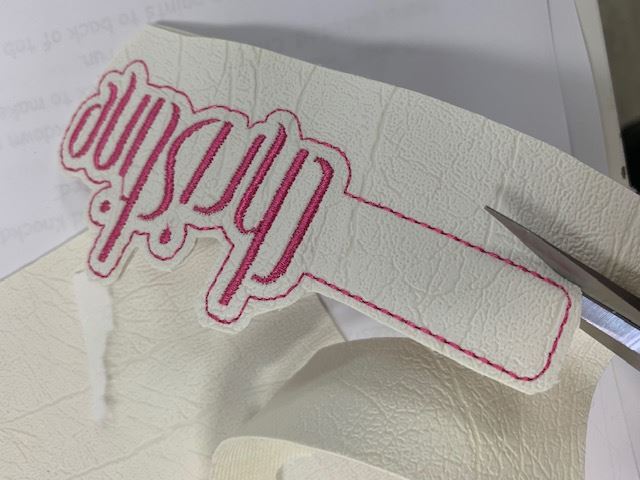
- Remove from hoop, rip away the excess tearaway and cut around your key fob a few millimetres away from outline.
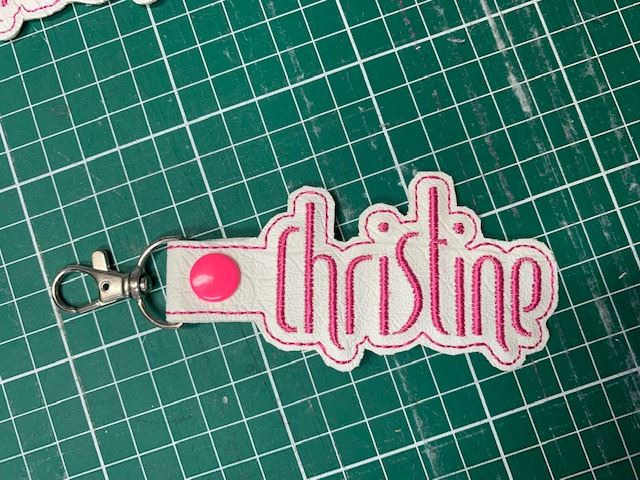
- Attach snap fasteners and your key fob is done!
Need more Embrilliance tutorials?
View our Embrilliance videos →Free Embroidery Designs
We're excited to offer our free Echidna designs available for download. These free designs are perfect for those at a beginner or an advanced level. Add these designs to your stash and create incredible embroidery!
View all free designs >
Sewing, Quilting and Embroidery Machines
Interested in learning how to sew, quilt or embroider? Take a look at the innovative Brother machines available for purchase at Echidna Sewing. Wherever possible we will beat any deal and you will always receive ongoing service and support!
Find out more >
Learn to Sew or Embroider with Echidna Sewing
Come along to our fun-filled classes to learn more about sewing, embroidery and crafting. Classes cater for all skill levels, whether you're just starting out or already have advanced knowledge.
Find out more >
Echidna project material/ fabric requirements are an indication only and can seem to be generous. This has been intentional. Should you make a cutting or embroidery mistake you will have sufficient fabric to rectify your error.


