All Articles
.jpg)
.jpg)
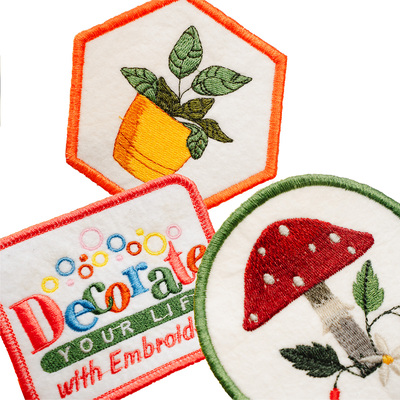
How to create an embroidered patch or badge
Embroidered badges have been around for centuries and are still used to this day. They can be used in a variety of ways such as decorations, logos on garments, mementos, identification and much more. They're a great alternative for when you can't fit your garment into the hoop or when you want to sell or gift someone else your embroidered patches. Check out this tutorial to see how easy it is to achieve an embroidered badge and how to attach the badge to the fabric.
Materials & Supplies
What is a badge typically made of? The answer is: not much!
To create your badge, you'll need:
- An embroidery design
- A stable backing fabric, eg: heavy woven drill, denim, Stiff Felt or Bag Batting
- A non-woven washaway stabilizer, eg: Echidna Washaway
- A satin border design (download our free designs or you can purchase Lindee Goodall’s Badge and Frame set with a variety of different shapes)
- Hot Melt Film (if you're attaching your badge to a garment)
- Applique mat
- Embroidery thread
- 505 Spray (optional)
- Bowl of warm water or paint brush
Stitching the badge
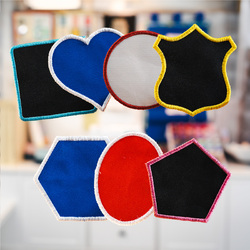
Step 1: Size, shape & design
Decide on the size and shape of your badge and choose/design the embroidery that you wish to feature on the badge. Your embroidery will need to stay within the size of the border you have chosen.
Step 2: Merge
The stitching sequence is important so we recommend that you start with the border design and then merge your chosen embroidery design. Some machines will allow you to add/merge designs on screen, or you can merge designs easily on your computer using your customizing or editing software.
![]()
Step 3: Hoop and stitch
If you used software to merge your badge border and an embroidery design, you’ll need to load it onto your machine. Use the smallest hoop suitable for the job at hand and hoop one layer of Echidna Washaway stabiliser or equivalent.
![]()
Tip: Two layers is often better for high stitch count designs.
Once your stabilizer is hooped, stitch the first colour only - this is the fabric placement stitch. If you are using a multi-needle machine, be sure to stop the machine after the first colour.
![]()
Step 4: Position badge material
Cut in the hoop technique
Take the badge material and lay it flat on top of the placement stitch ensuring you cover the entire placement stitch.
Tip: You can apply a very light coat of 505 adhesive spray, washi tape or equivalent. This will help hold the badge material during the tack down step. Always use adhesives sparingly as overuse can harm your machine. Never spray in close proximity to valuable machinery or equipment.
![]()
Pre-cut technique
If you have pre-cut your badge fabric to the exact shape, position (stick) the pre-cut badge material precisely in alignment with the placement stitches. You may find it easier to remove the hoop from the machine to do this.
Step 5: Complete your outline and fill your badge
Go ahead and stitch the next colour - this is called the tack-down stitch. It will anchor your badge material to the stabilizer. Once stitching is complete, cut off the excess badge material from around the edge of the tack down stitch, as close as you can without cutting any of the tack down stitches.
![]()
Then, proceed to stitch the badge border and the embroidery design inside the badge shape.
![]()
Step 6: Remove the excess washaway
Once stitching is finished, remove from the hoop and cut away the excess washaway. Soak the completed badge in warm water for a minute or two and allow it to dry.
![]()
Tip: Use a paintbrush and wet the washaway stabilizer around the edge of the badge, this will cause the washaway to dissolve and leave you with a badge.
![]()
Step 7: Allow badge to dry flat
![]()
Step 7: Attaching the badge to an item
There are two ways to apply your finished badge to a garment or other item such as a sports bag. We use and recommend Echidna Hot Melt Film. It’s easy to apply and very permanent. You could also stitch the badge to the intended item.
Applying the badge using Hot Melt Film
Step one
Place the finished badge face down on the backing paper side of the Hot Melt Film and trace the shape using a pencil. Cut out the required shape.
Step two
Place the badge face down on a pressing mat and position the Hot Melt Film on the badge with the backing paper facing up and press with a hot iron (no steam) for approximately 10 seconds.
Step three
Allow the badge to cool and remove the backing paper.
Step four
Now it is time to attach the badge to the fabric. It is important to press the fabric to the badge and not the badge to the fabric. Place the badge face down on a pressing mat and position the fabric on top of the badge. Press with a hot iron for approximately 10 seconds. This time will vary depending on the thickness of the fabric. For example heavy denim may require 15 to 20 seconds.
Check out our quick video below on how to attach your embroidered badge to a garment using Hot Melt Film.
Tips for creating a bulk quantity of badges
Tip 1: Create a template to pre-cut your badge material
This will eliminate any trimming of excess badge material during the process. You can use the PDF provided in our free designs download or if you have created your own border design you will need to print the placement stitch as a template. The placement stitch is the very first colour change of the badge border design. This can be easily achieved with embroidery software.
We recommend you cut a template using a heavy card or even a thin but firm plastic as you can use this template repeatedly for future badge projects. Use the template to mark and cut your material to make as many badges as you wish to embroider.
Tip 2: Use a cutting machine such as a Brother ScanNCut
With a Brother ScanNCut you can easily cut your badge fabric to the perfect shape. This is a real time saver and gives great results. There are many online tutorials showing how to do this.