All Projects


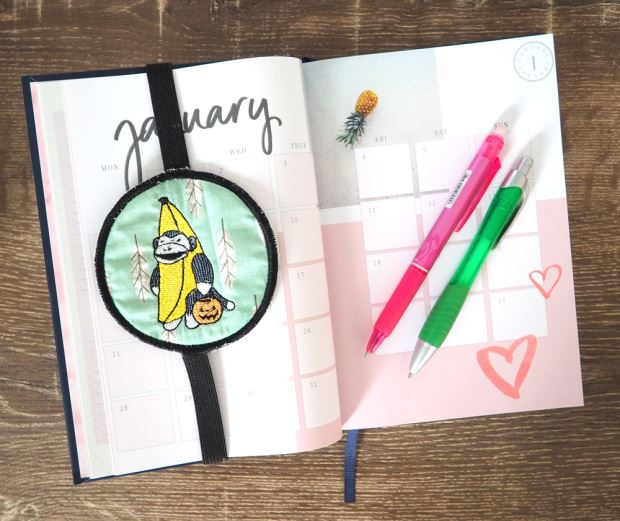
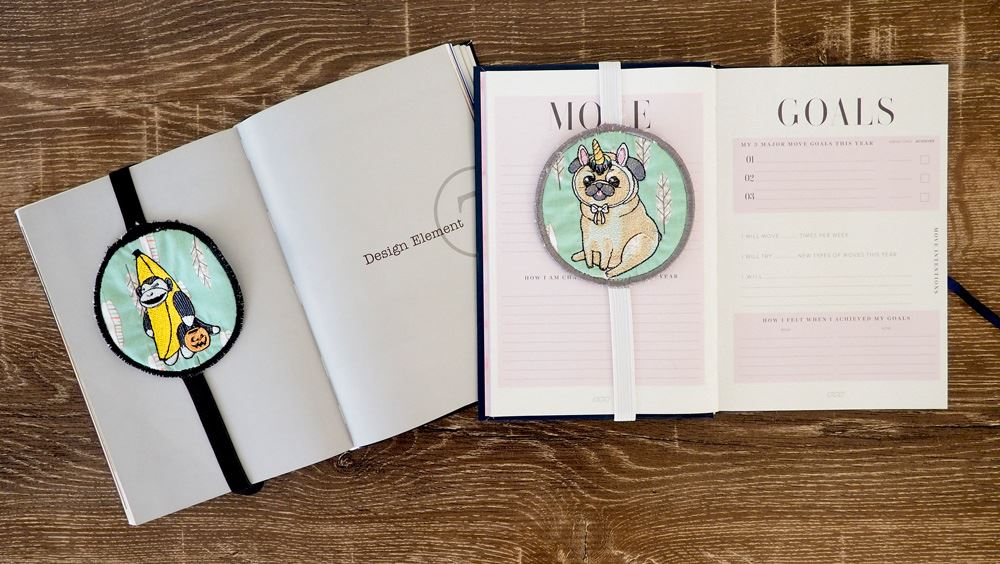
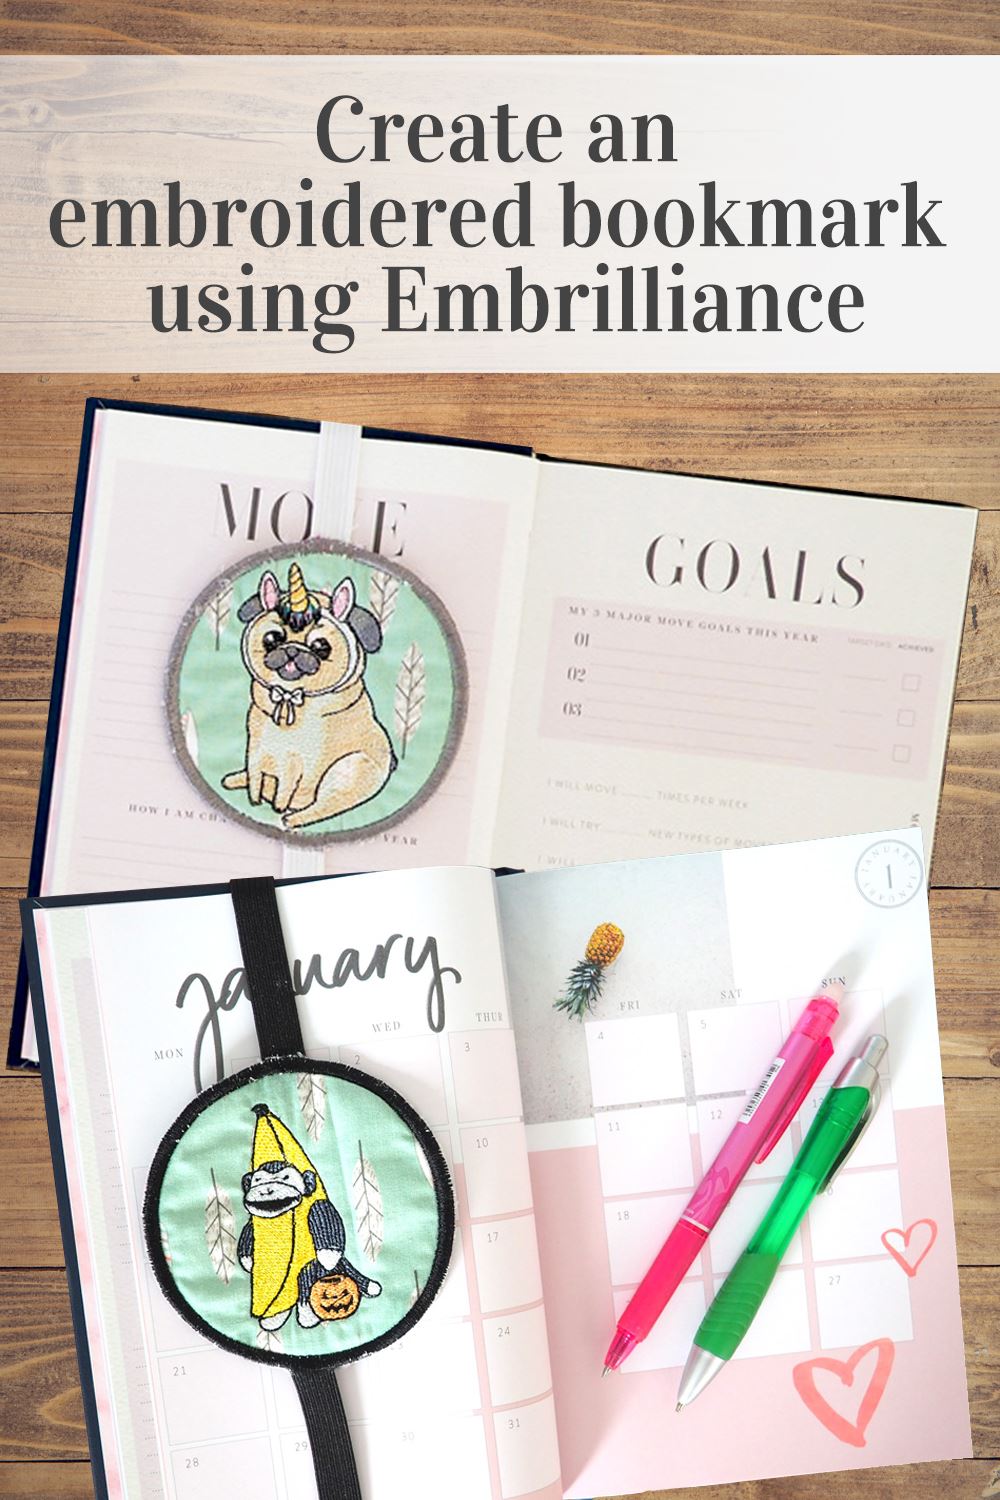
Embroidered bookmark
Date Posted:7 January 2020
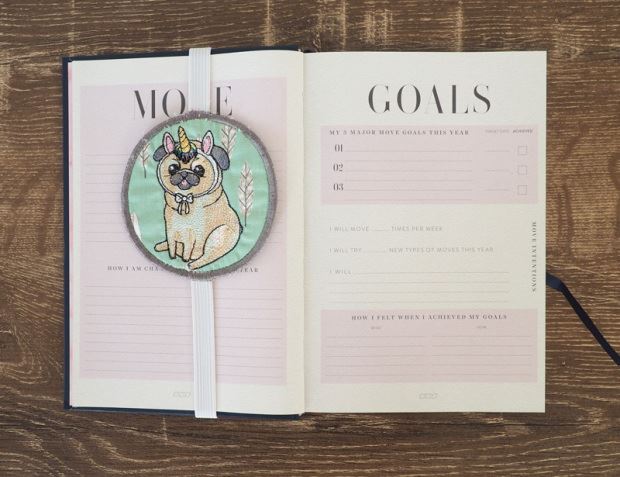
This tutorial will show you how to create your own embroidered bookmark using Embrilliance StitchArtist software. This is the perfect back-to-school project for your kids! Choose any embroidery design that you like and we will show you how to insert it into a bookmark shape of your choice!
WHAT YOU WILL NEED
- Embroidery machine with a 4″ x 4″ embroidered hoop
- Any 70mm x 70mm embroidery design or similar (we can resize it if it’s slightly larger)
- Embroidery thread
- 10cm x 10cm Material x 2
- Embrilliance Software with StitchArtist 1
- Double Curve Scissors
- Wash away and tear away stabiliser
- Elastic (36mm for A5, 54cm for A4)
SETTING UP YOUR EMBROIDERY DESIGN
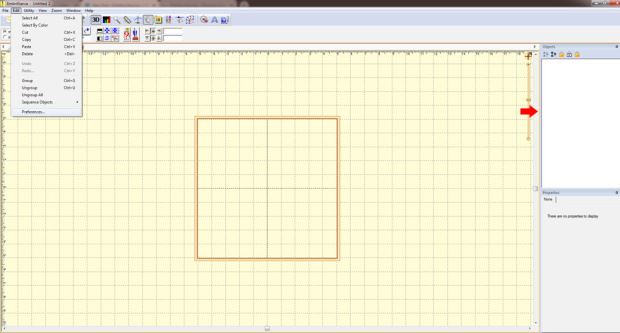
First, open up Embrilliance StitchArtist Level 1 and select your embroidery size hoop by going to Edit – Preferences.
We are using the 100mm x 100mm size embroidery hoop, which is the perfect size for this project.
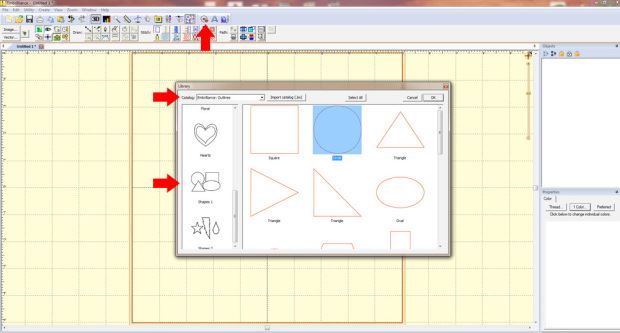
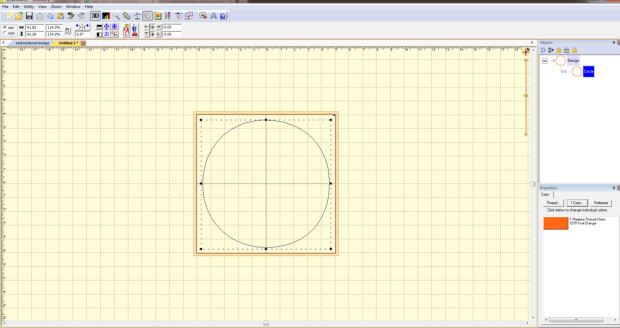
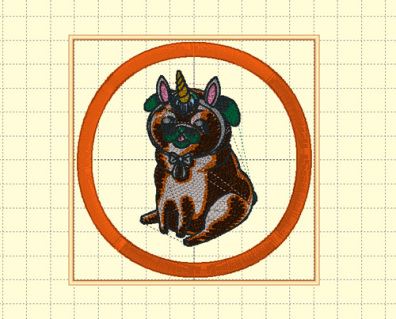
Once we have the right size embroidery hoop we are going to select the Merge Design tool. Then select from the Catalog drop down the Embrilliance: Outlines options. This will give you a selection of shapes to use as your bookmark. For this project, we have selected the circle option.
It depends on what size your embroidery design is you will just need your bookmark to be larger than it. For our project, we have resized the circle to be approximately 92mm x 92mm.

Now that you have this outline selected, choose the Create tool which will give you a number of stitch options. You can now select your circle and click on the run stitch option.
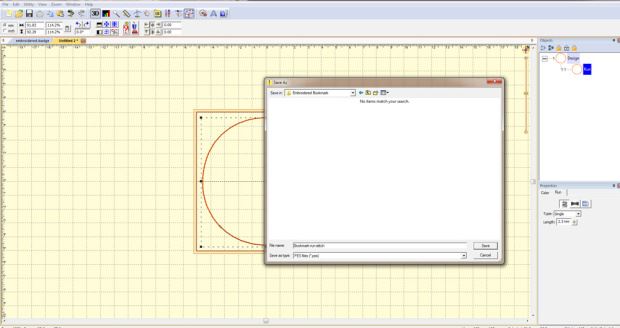
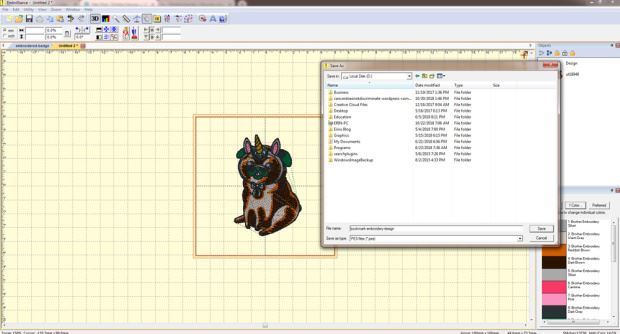
You can now save this file as your run stitch. Select File, Save As which will open your save settings. Choose the embroidery file that your machine takes. For example, a Brother machine will be .pes. Save this as your bookmark-runstitch.pes file.
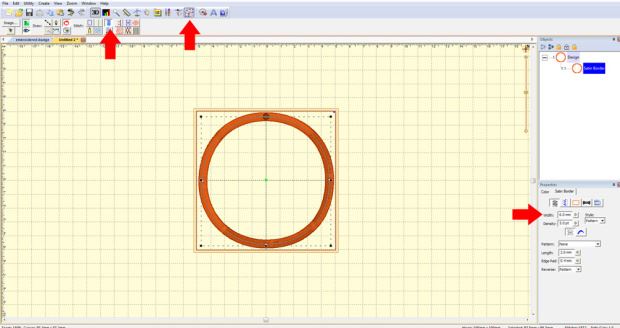
Now that you have the run stitch saved let’s create the applique file. Click on the Create tool again and select your circle shape. Now choose the Satin border option. This will now give you a satin border for your circle shape. We want to adjust the stitch settings to be width 6.0mm and density 5.0mm.

Select the File, Save As and save this as your bookmark-applique.pes file.
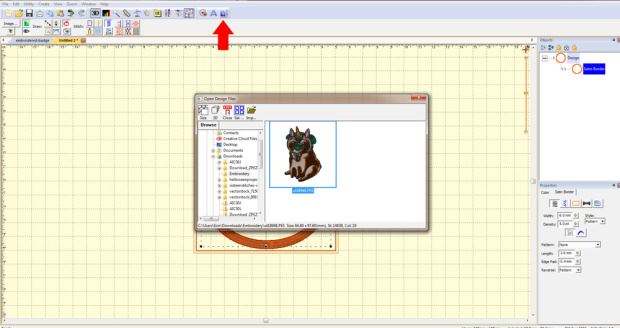
Now we have created the two border embroidery files. We now want to place your embroidery design inside it! Select the Merge File tool, and then locate your embroidery file that you want to put inside the bookmark.
Tip: Make sure that the embroidery file isn’t too close to your applique border. We would suggest going with a maximum 70mm x 70mm embroidery design.
If your heart it set on an embroidery design such as the one we have chosen from Urban Threads, then you can resize this in Embrilliance to make it slightly smaller to fit.
Now that you have the embroidery design inside your applique stitch, as per the size you want, you can now delete the applique stitch and save your embroidery design as bookmark-design.pes.
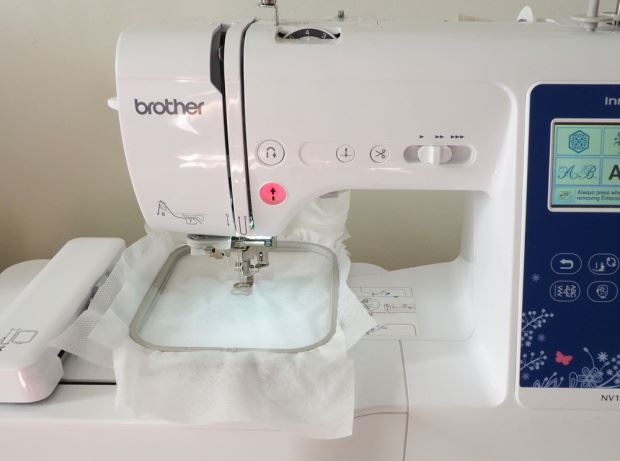
Place all three of these embroidery design files onto a USB and transfer to your embroidery machine. We have used the Brother NV180 sewing and embroidery machine.
HOW TO EMBROIDER YOUR BADGE
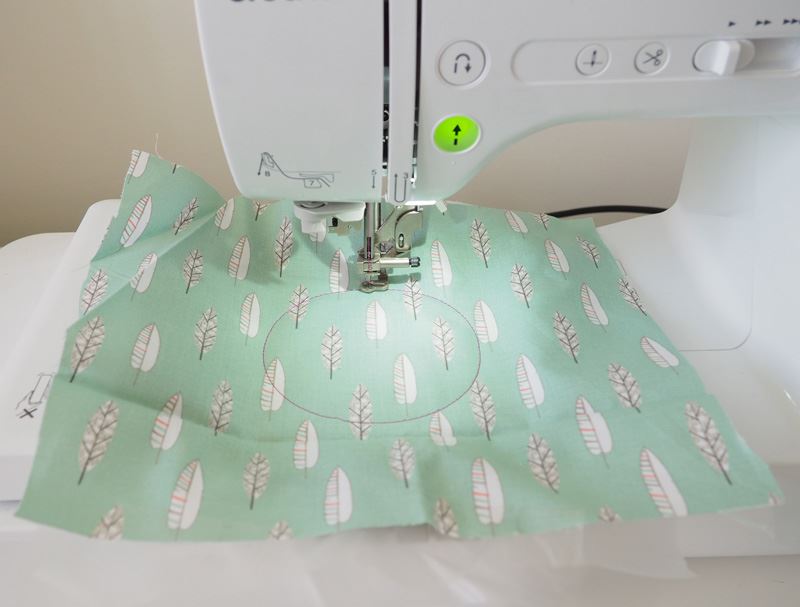
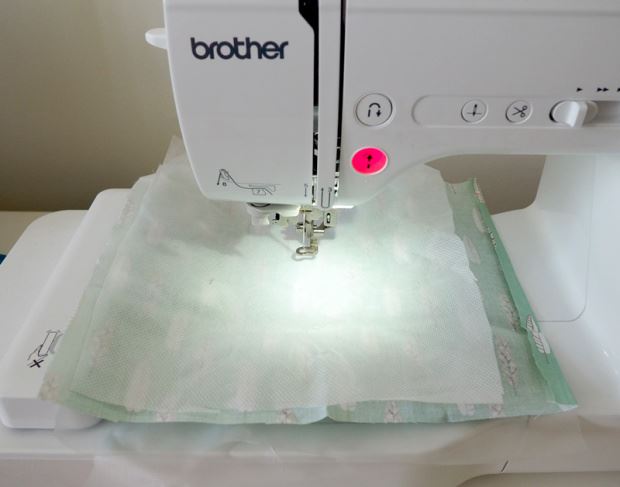
First hoop up two layers of Echidna Wash Away stabiliser into your 4″ x 4″ hoop.
Place a piece of tear away stabiliser and your material over the top of the hoop with right side of the fabric facing you.
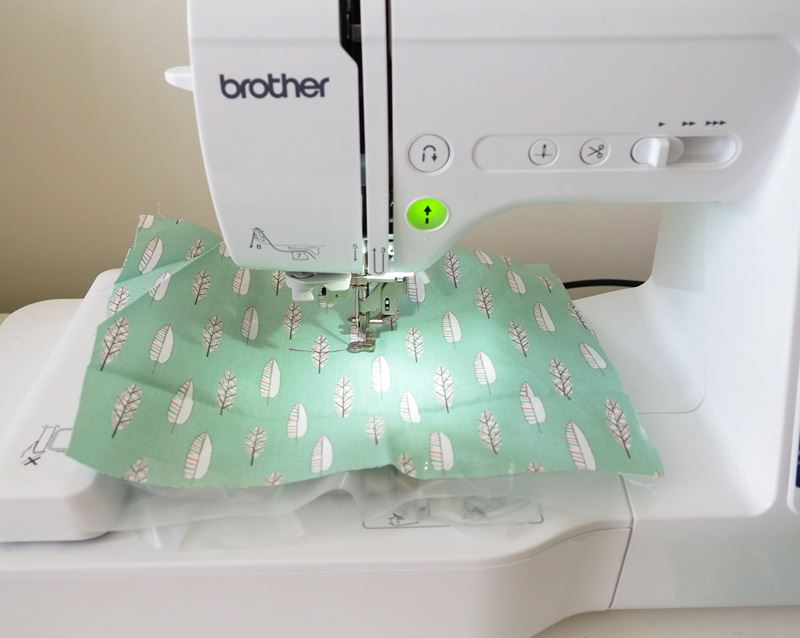
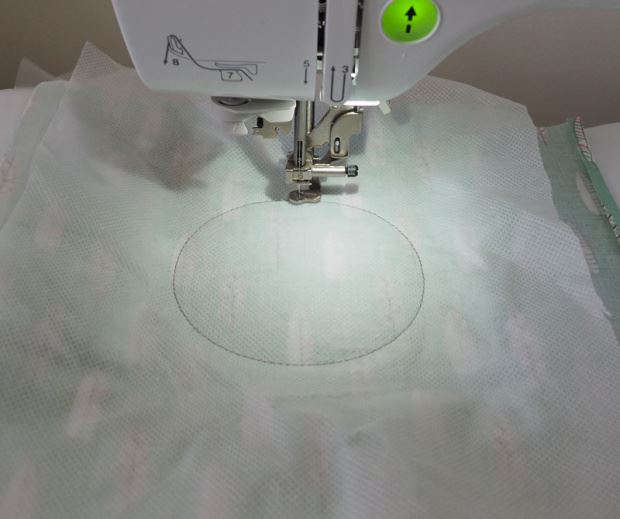
You can choose to sticky tape your fabric down onto the wash away stabiliser or simply hold your material down while it does the run stitch. Select the run stitch embroidery design on your USB and press start. Hold the material down and ensure that it’s nice and flat as your circle embroiders around the fabric.
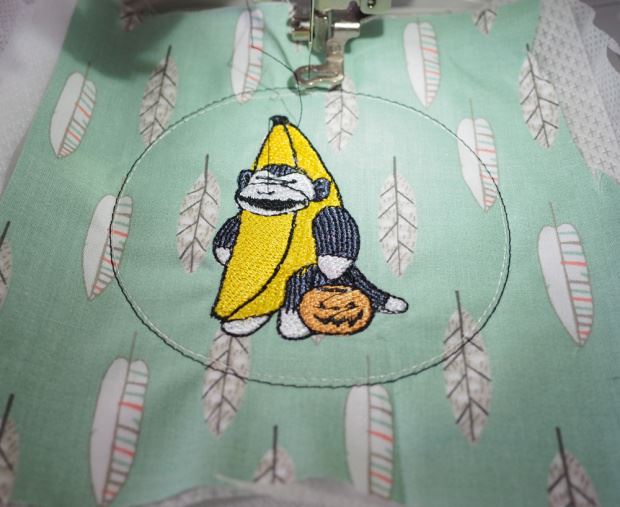
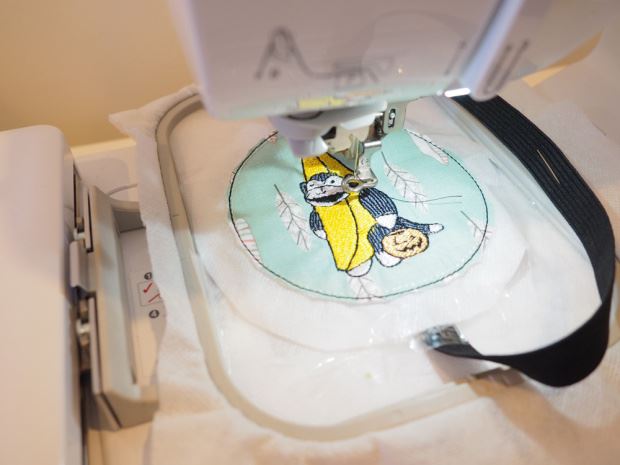
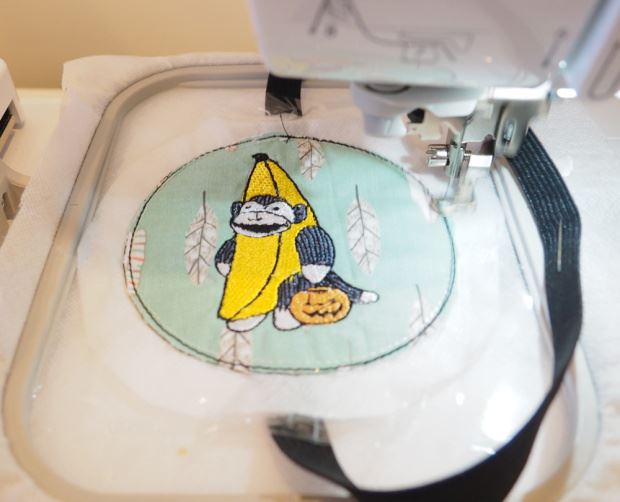
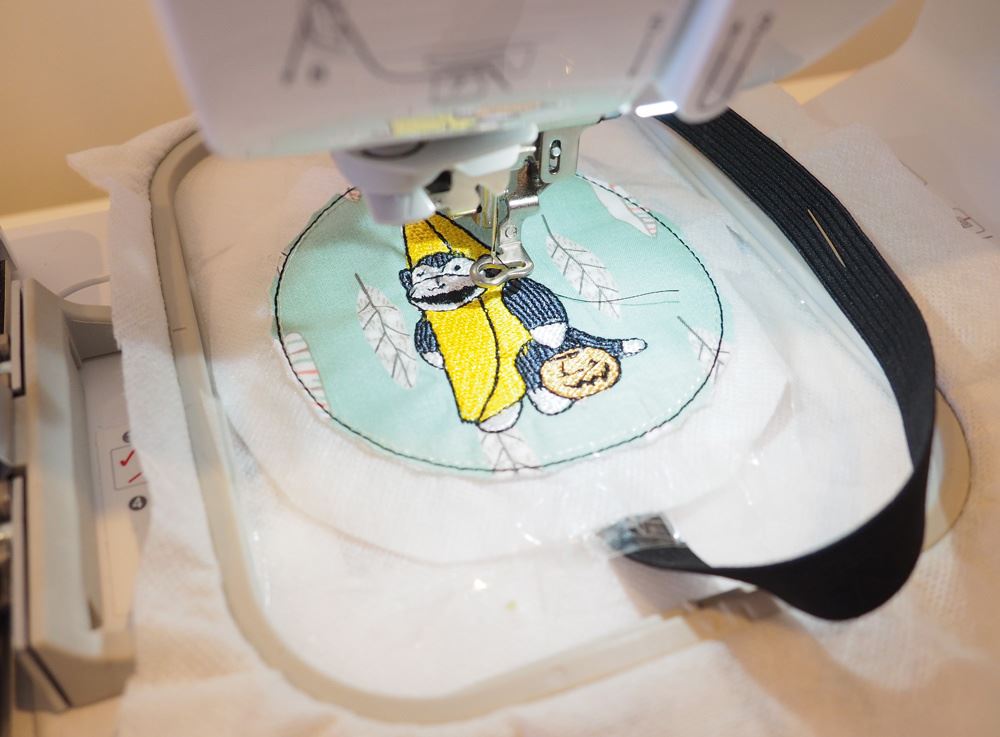
Now choose your embroidery design and embroider this as per the colours required. Once your embroidery design is finished select the circle run stitch and apply it one more time to your fabric.
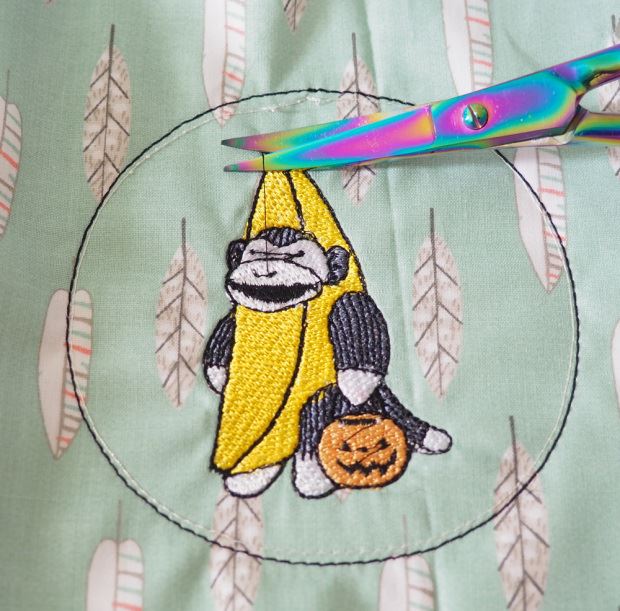
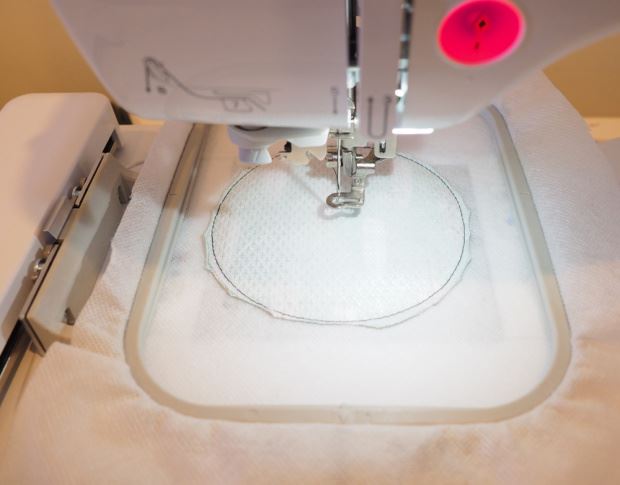
Unhoop your embroidery hoop from the machine. Using the Double Curved scissors trim away any unwanted jump stitches from your embroidery design.
Using the Double Curved scissors carefully cut around the outside of the circle removing the top layer of fabric and tear away stabiliser. It doesn’t have to be exactly on the circle stitching, preferably just outside it so you leave a millimetres of fabric.
Tip: If you cut too close or into the stitching it may impact the applique stitch at the end, ensuring that it meets the fabric. So try and cut carefully and not too close to the circle stitch line.
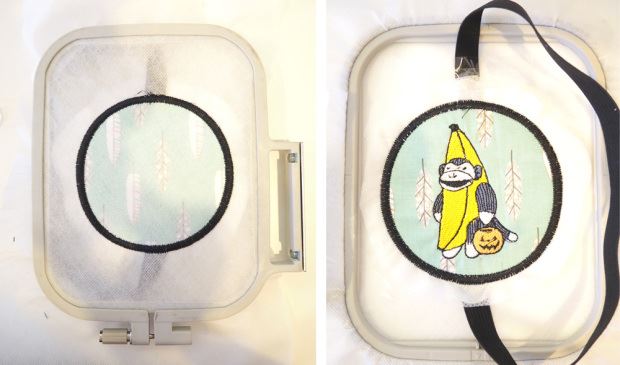
You can now cut around the wash away stabiliser about an inch from the edge of the bookmark badge, as shown above.

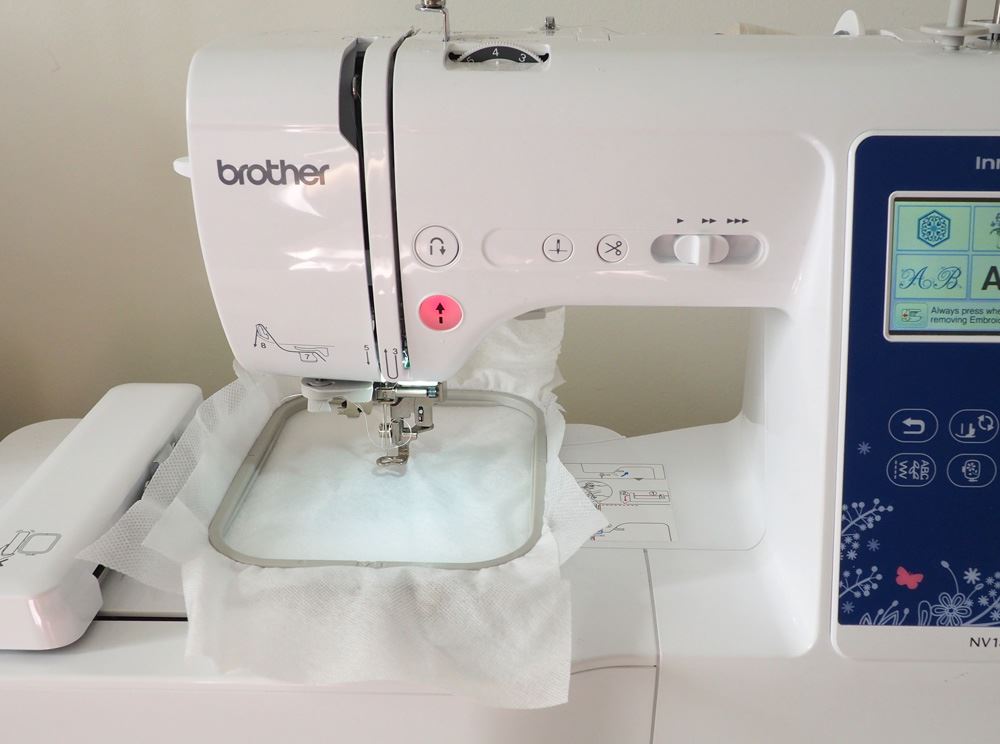
Now hoop up another two layers of wash away stabiliser.

Now add your material down (right side facing downwards) and a piece of tearaway stabiliser on top of this. Select your run stitch embroidery design and guide the circle stitching, ensuring that your fabric sits nice and flat.
We suggest removing the embroidery hoop from the machine and cutting around the fabric using your Double Curved scissors.
Tip: Do not cut too closely to the stitch line as per our recommendations above. Please leave a millimetre of fabric around the stitch line.
Before you return your embroidery hoop back to the machine, make sure that you have the correct embroidery colour thread that you plan on using for the applique border. Also, whatever colour you choose it’s recommended that you also choose that same colour as the bobbin thread.
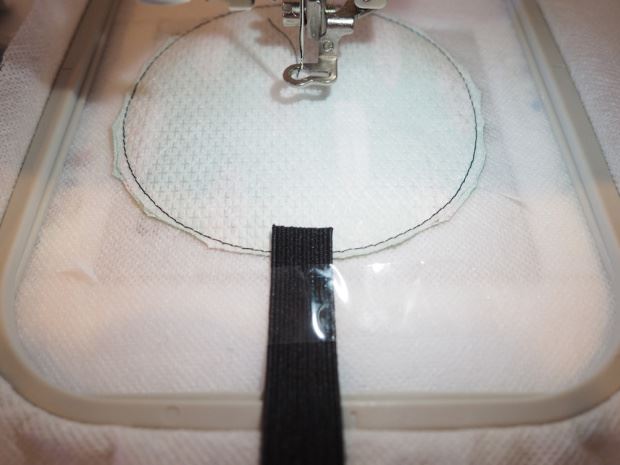
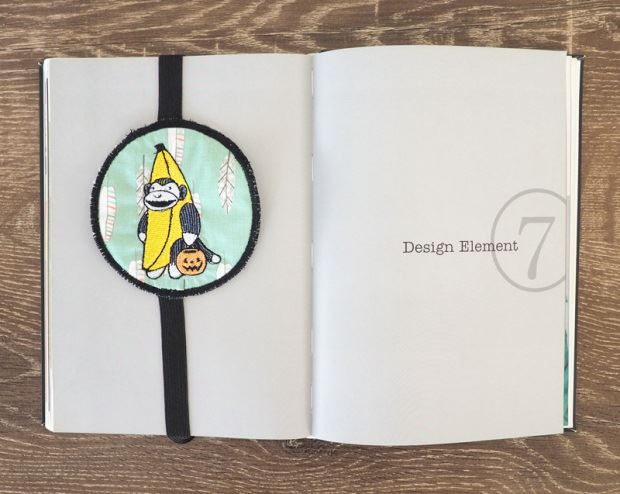
Cut the elastic 36cm long for an A5 size and 54cm long for an A5 size. Otherwise, you can measure around your book page and simply minus the height of your embroidered bookmark badge to get the right length.
Position the elastic at the top and bottom of your embroidered badge, as shown above, making sure that it’s secured to the washaway stabiliser with some sticky tape.
Now place your top bookmark badge over this and line it up so that both circles sit directly above one another. Sticky tape around the edges of the wash away stabiliser to ensure that it’s secure.

You can now pin the elastic out of the way, onto the side of the washaway stabiliser so that it doesn’t get caught when embroidering. Once you have it all firmly in place select the run stitch design and press start. This will stitch all of your fabric together, prior to us doing the applique stitch.
Finally, select your applique stitch and press start. This will finish off your embroidered bookmark.
Now remove it from the hoop and you will be able to notice that the stitching has gone through to both sides, since we’ve used the same colour bobbin thread as the top thread.
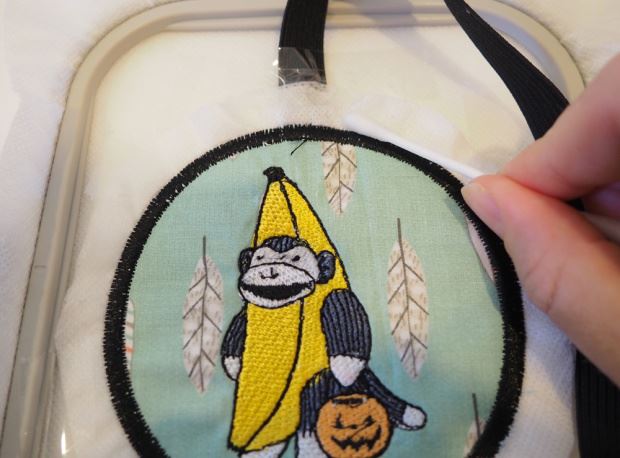
Now using a cotton wool bud, wet it with water and gently remove the wash away stabiliser from your embroidered bookmark fabric badge. You may also need to wet a paper towel to get any excess stabiliser off and to avoid any sticky residue.
Embroidery Design from Urban Threads
Free Embroidery Designs
We're excited to offer our free Echidna designs available for download. These free designs are perfect for those at a beginner or an advanced level. Add these designs to your stash and create incredible embroidery!
View all free designs >
Sewing, Quilting and Embroidery Machines
Interested in learning how to sew, quilt or embroider? Take a look at the innovative Brother machines available for purchase at Echidna Sewing. Wherever possible we will beat any deal and you will always receive ongoing service and support!
Find out more >
Learn to Sew or Embroider with Echidna Sewing
Come along to our fun-filled classes to learn more about sewing, embroidery and crafting. Classes cater for all skill levels, whether you're just starting out or already have advanced knowledge.
Find out more >
Echidna project material/ fabric requirements are an indication only and can seem to be generous. This has been intentional. Should you make a cutting or embroidery mistake you will have sufficient fabric to rectify your error.


