All Projects
 Previous Next


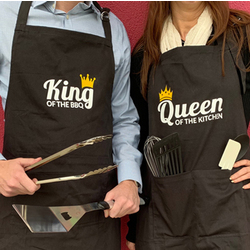
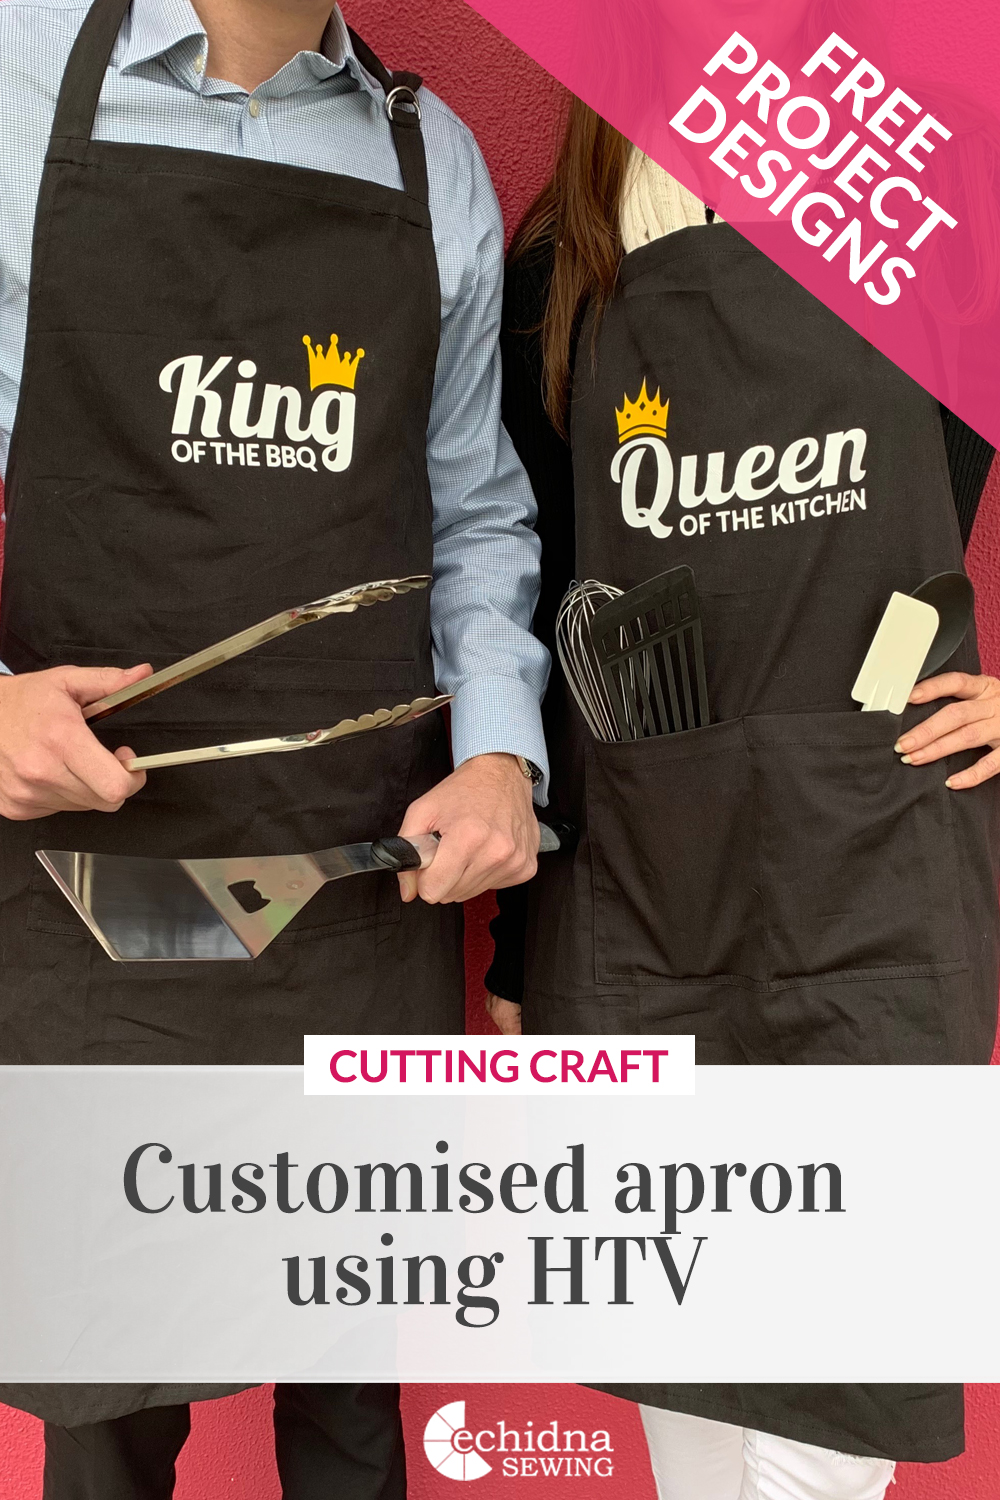
Personalise an apron with HTV
Date Posted:14 February 2020
They say it's the thought that counts - and that's why personalised presents are so special. Now you can easily create custom gifts at home using your very own cutting machine. Created with care and meaning it will show you’ve put a little extra thought into your gift. .
In this project we'll look at how to apply heat transfer vinyl (HTV) using two FREE designs we have created.
Download the files for this project →
Free design files:
These include:
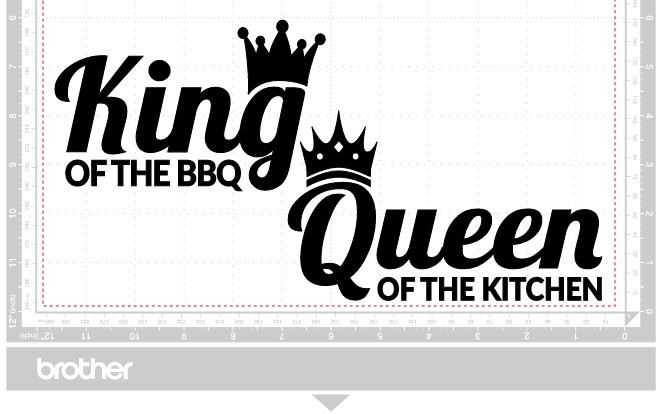
- "King of the BBQ" (.svg)
- "Queen of the kitchen" (.svg)
What you will need:
- Cutting machine (Brother ScanNCut, Cricut, Silhouette etc)
- Black apron (If you can sew, why not create your own! We have some great tutorials available here)
- 1 x Sheet of white heat transfer vinyl (HTV)
- 1 x Sheet of yellow heat transfer vinyl (HTV)
- Brayer
- Weeding tools
- Heat press (or domestic iron)
- Design files Download here →
Shop online:


Preparing your surface:
It's best to give your apron a quick iron to remove any creases and provide a flat surface to minimize any wrinkles or bubbles in the media when applied.
NOTE: The item must be cool before applying the heat transfer vinyl, otherwise the heat will activate the fabric adhesive before you have correctly positioned the item.
Step Overview:
Important: When working with heat transfer vinyl (HTV) it is important to remember that your design will need to be mirrored as the media is cut from the back. When we iron the cut media to the fabric, the design is flipped making it display correctly once on the apron.
Step one
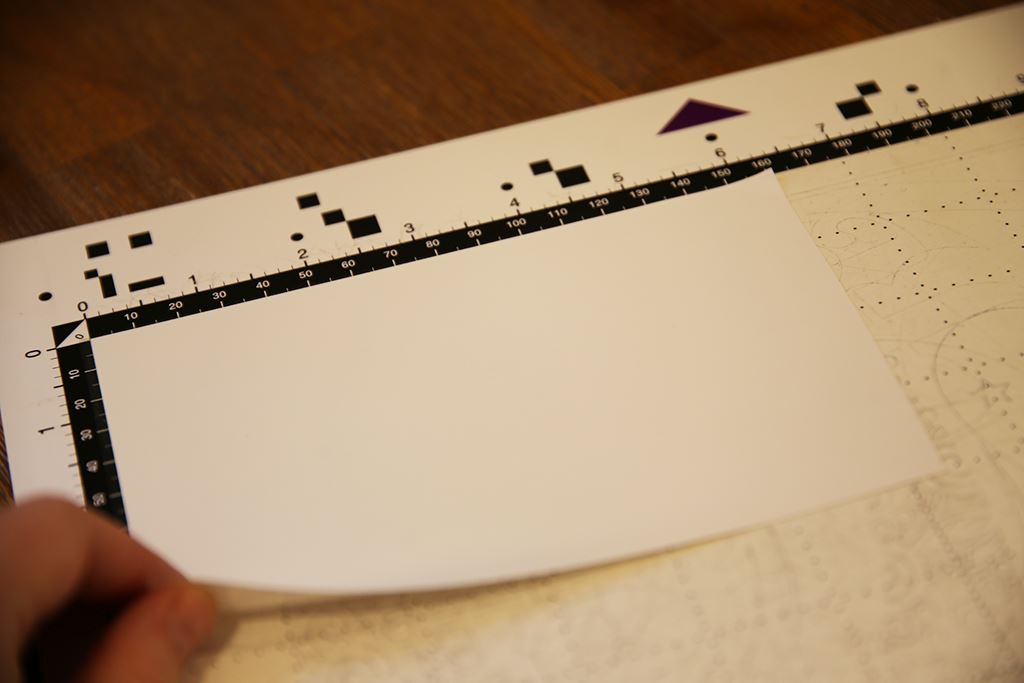
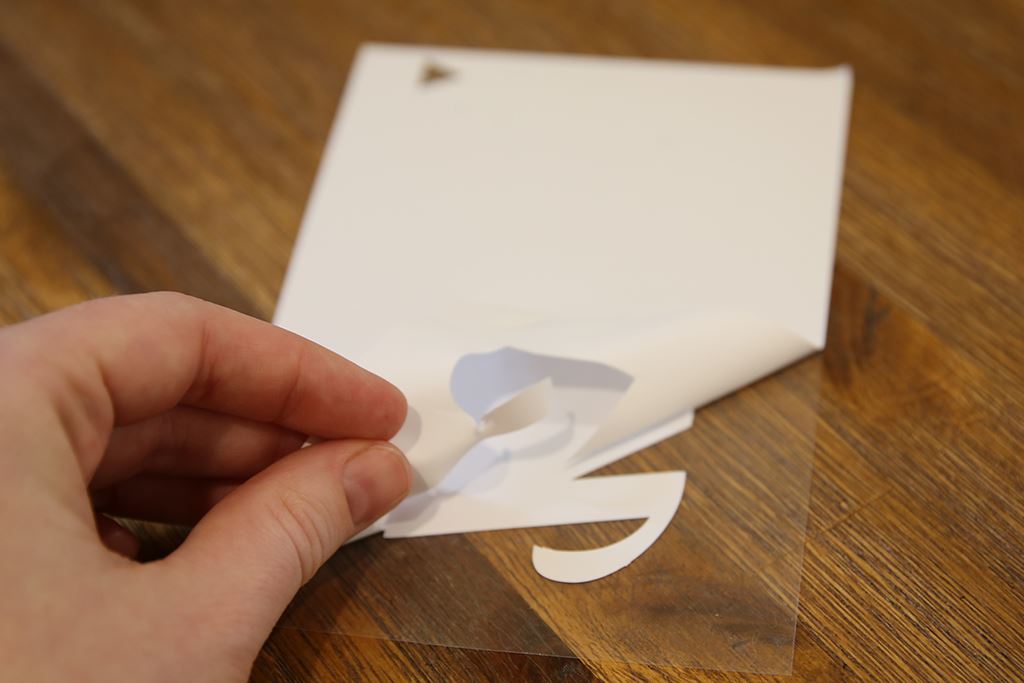
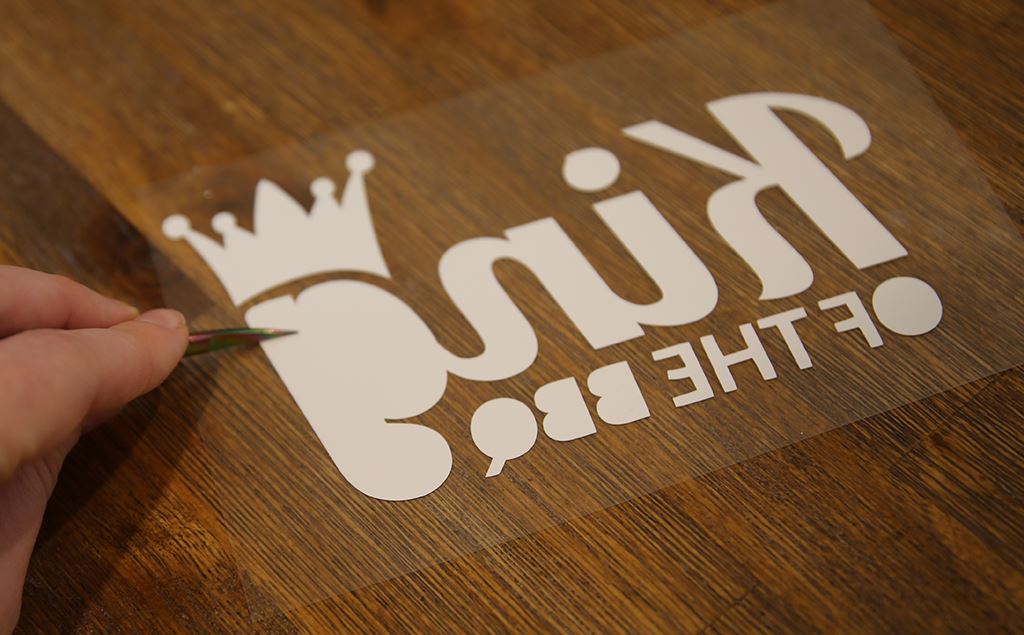
Cut out the design on a piece of white HTV (shiny side down). Once completed, unload the mat from the cutting machine and gently peel off the transfer media sheet off as a whole.
Step two
Starting from one corner of the media, peeling the unwanted coloured layer away from the clear backing (also known as ‘weeding’).
Step three
Tweezers or fine scissors may be helpful to get into the inner parts of the design or are often helpful to get you started.
Step four
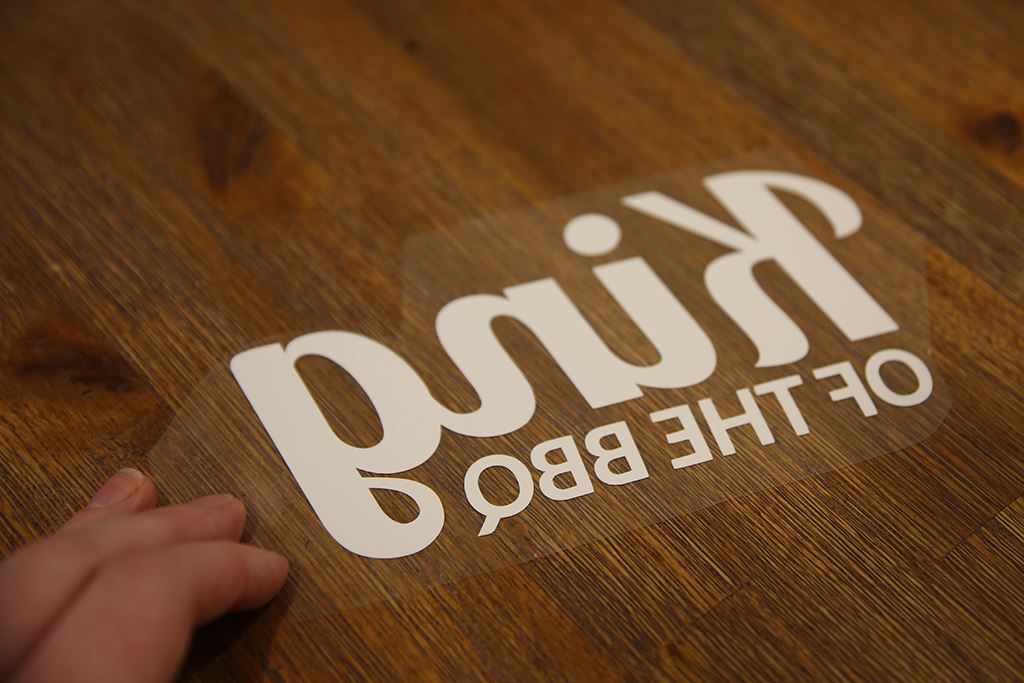
Keep peeling the unwanted sections away, leaving the finished design stuck to the clear protective backing. For this particular design, we have removed the crown so that it can be done in a different colour.
Step five
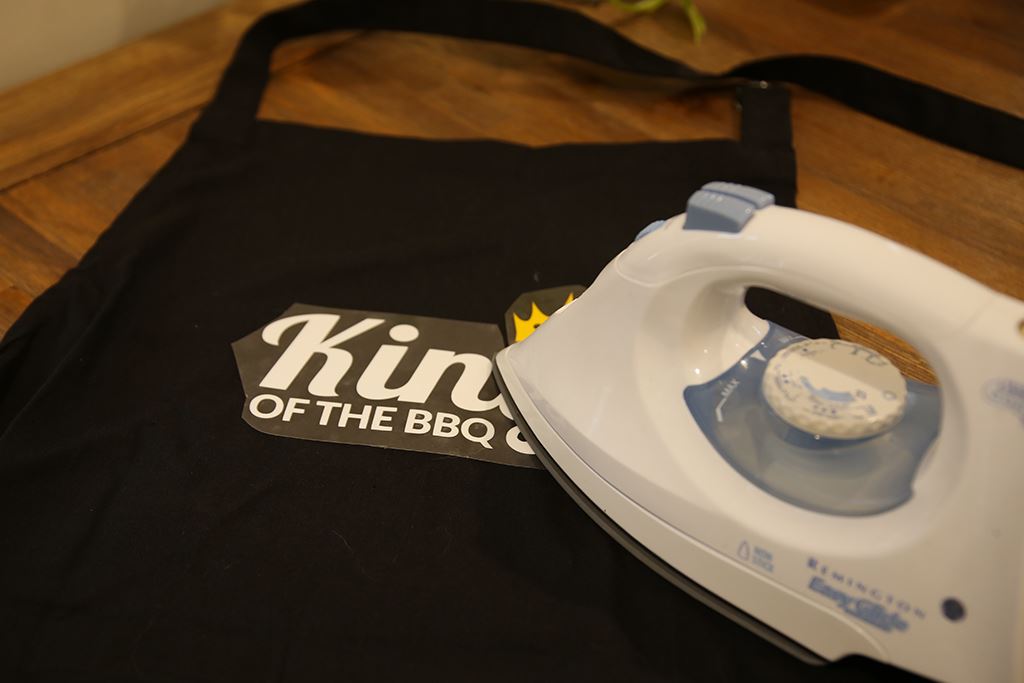
Place the design on the pre-ironed item (refer to preparing your project surface) and position the design to achieve your desired outcome. Use a domestic iron set to “cotton” with no steam for 17-20sec, pressing down firmly and evenly whilst moving the iron back and forth over the design. Alternatively you can use a heat press at 160°C (warm iron) for 12 - 15 seconds.
Step six
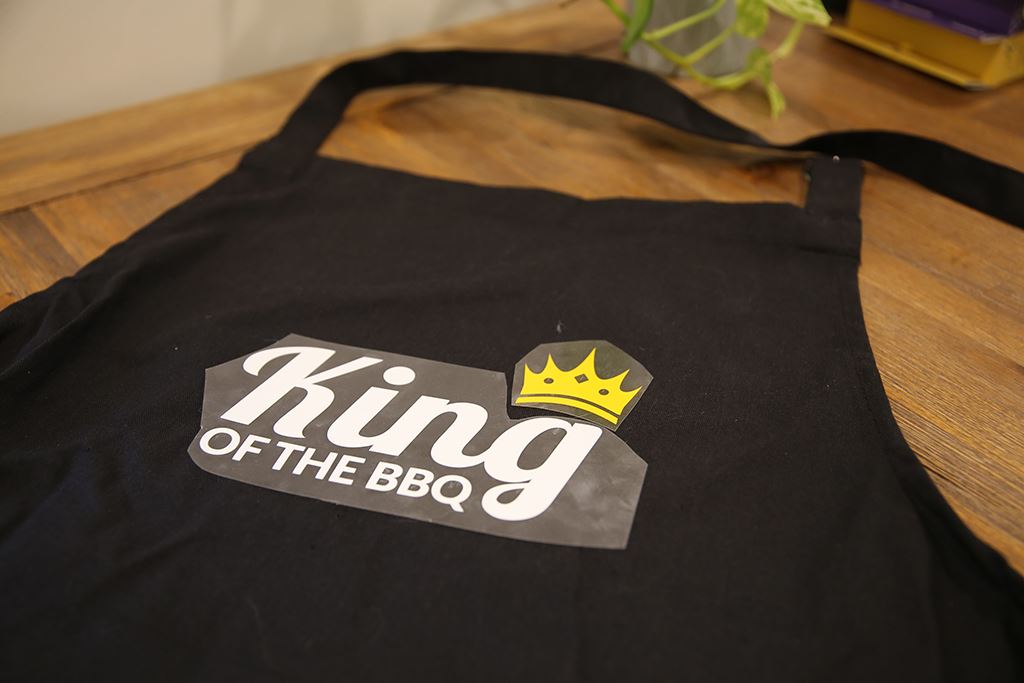
Once the design is cooled, gently peel away the clear backing sheet and you're done!
Learn how to cut and apply HTV
We have put together step by step instructions on how to apply heat transfer vinyl to a garment. These instructions can be used as a guide when applying HTV to any fabric garment.
Detailed Instructions:
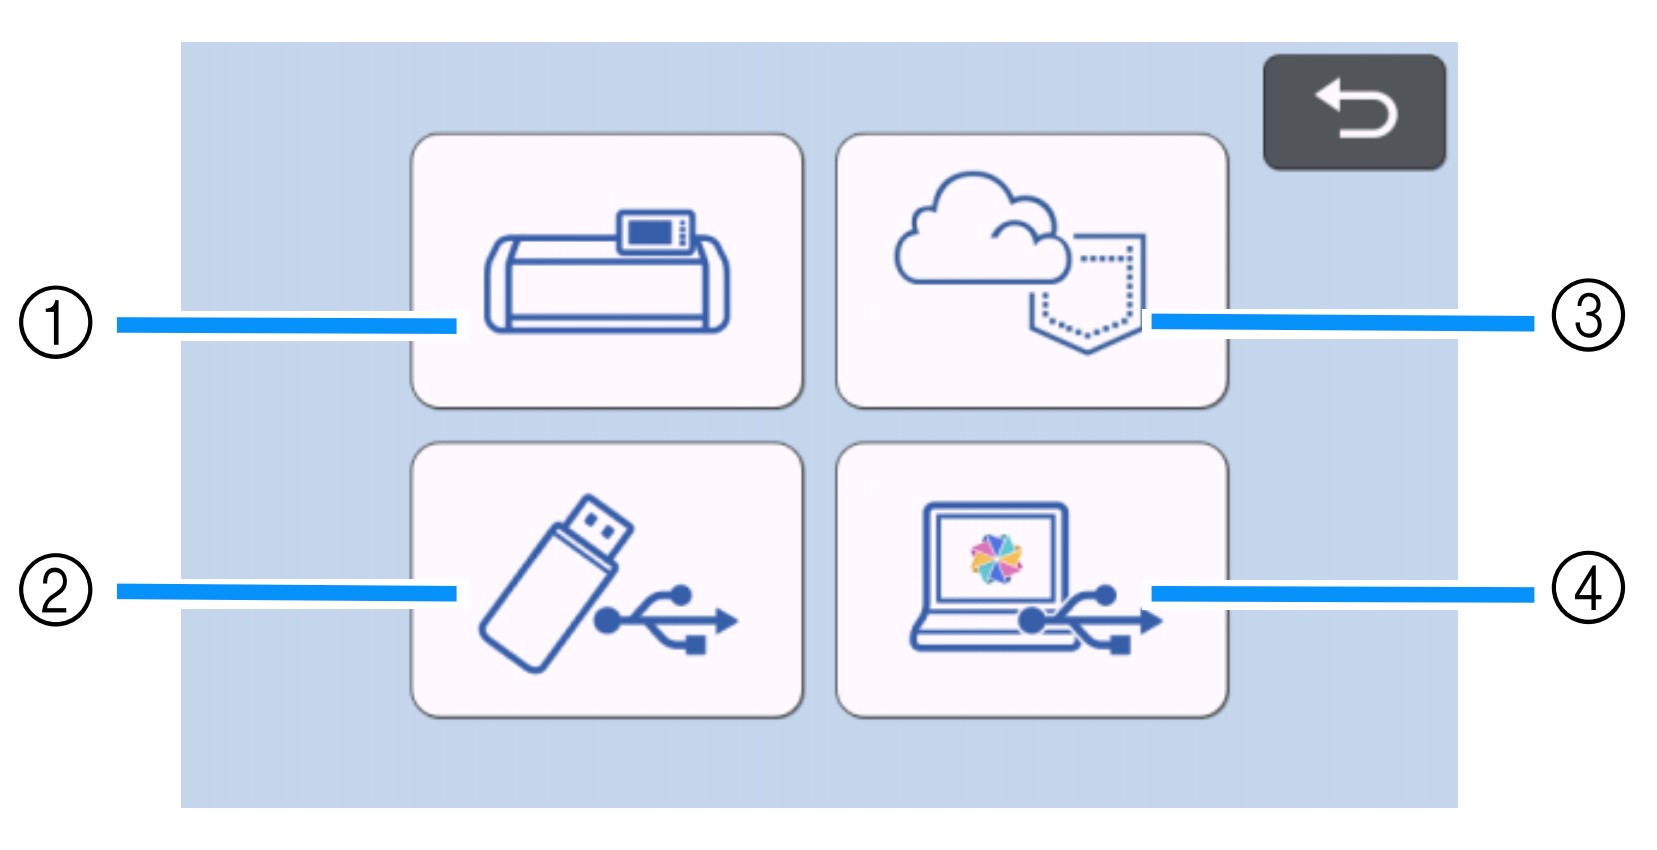
- Download the project files and save these onto a USB to plug directly into your cutting machine. For this project we have used a Brother ScanNCut, however the steps are essentially the same on any cutting machine.
- Place a piece of white HTV media in the top left-hand corner of your Standard mat; making sure the media is large enough for the required design. Ensure the HTV is stuck with the clear protective backing facing down (shiny side down) using a brayer will help make the media stick.

- Load the mat into your cutting machine by following the steps outlined in your machines quick reference guide (remember to hold the mat level while loading)
- Load the design from the USB (2)
-
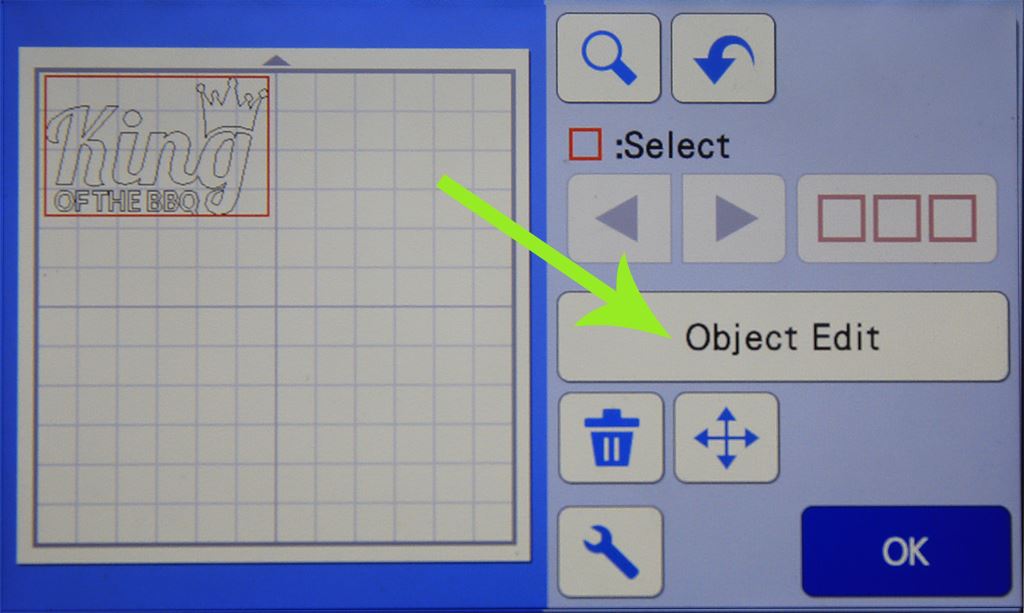
- Firstly we need to mirror the design by selecting your design and clicking Object Edit
- Select the flip design icon (SDX pictured)
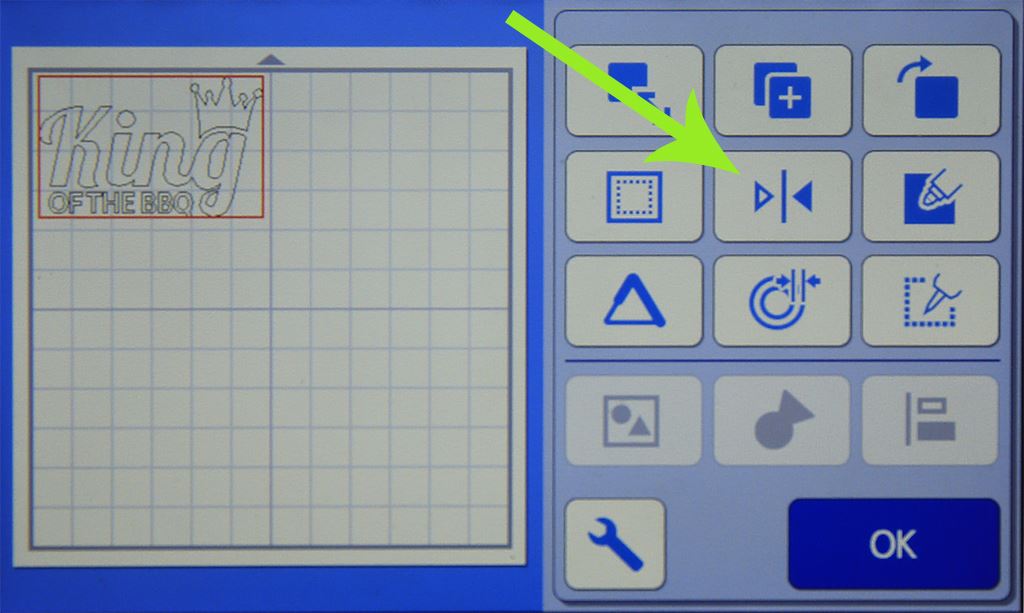
- When active the design will be flipped and the button will be highlighted. Click OK to continue.

- Firstly we need to mirror the design by selecting your design and clicking Object Edit
- Do a scan of the mat to ensure that the design does not go over the edge of the mat and is within the HTV.
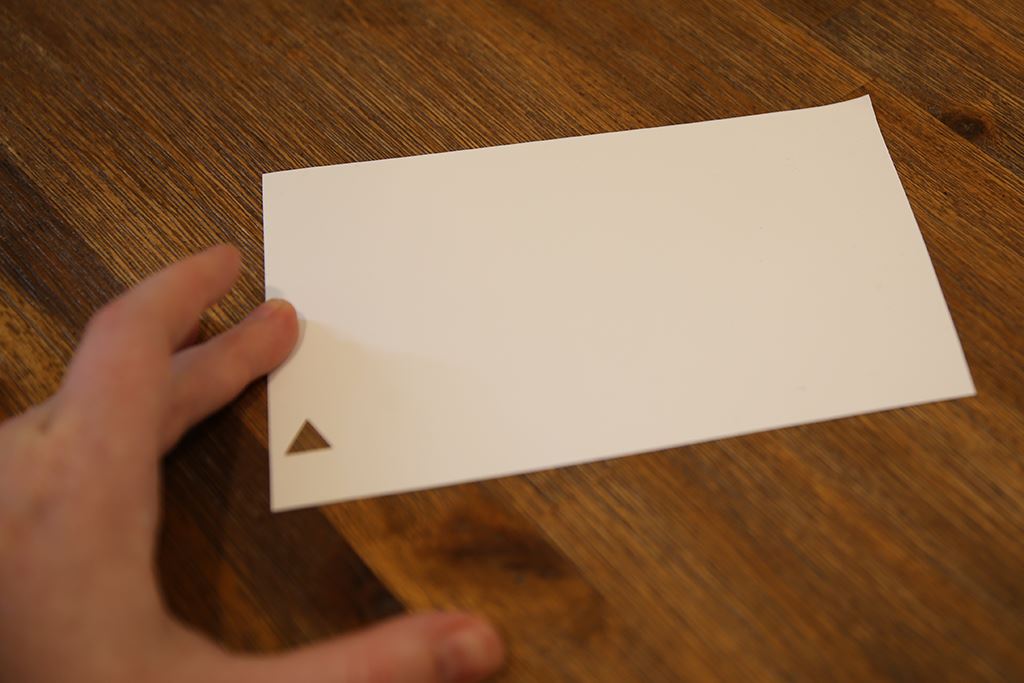
- We suggest doing a test cut to ensure you have your settings correct for the media you are using. On the main screen choose the ‘test’ button. We usually use the ‘triangle’ test and place it towards the edge of the media so that you can check if the cut was correct.
SDX Settings: The SDX models feature a ‘Half Cut’ setting. We recommend using this setting with HTV so that it will cut through the first two layers and ensure the clear protective backing remains intact. The thickness of the transfer media can vary so you may find you need to adjust the ‘Cut Pressure’ for the ‘Half Cut’ setting.
- Once you have the design lined up on the media, choose the ‘cut’ option and select ‘Start’ or press play to cut out your design.
- Once the machine has completed cutting the design, unload the mat from the ScanNCut and gently peel the transfer media sheet off as a whole.
- Starting from one corner of the media, peel the unwanted coloured layer away from the clear backing (also known as ‘weeding’).

- Tweezers or fine scissors may be helpful to get into the inner parts of the design or are often helpful to get you started.

- Keep peeling the unwanted sections away, leaving the finished design stuck to the clear protective backing. For this particular design we have removed the crown so that it can be done in a different colour.

- Repeat the above steps with the yellow HTV in order to finish with a yellow crown
- Place the design onto your apron and position the design to achieve your desired outcome.

- Use a domestic iron set to “cotton” with no steam for 17-20sec, pressing down firmly and evenly whilst moving the iron back and forth over the design. Alternatively you can use a heat press at 160°C (warm iron) for 12 - 15 seconds.
Note: HTV cannot tolerate heat without the clear backing sheet so ensure you have covered the whole design as you cannot go back over it once the clear backing sheet has been removed.

- Once the design is cooled, gently peel away the clear backing sheet and you're done!

- Now why not have a go at creating you own design in CanvasWorkspace.
Free Embroidery Designs
We're excited to offer our free Echidna designs available for download. These free designs are perfect for those at a beginner or an advanced level. Add these designs to your stash and create incredible embroidery!
View all free designs >
Sewing, Quilting and Embroidery Machines
Interested in learning how to sew, quilt or embroider? Take a look at the innovative Brother machines available for purchase at Echidna Sewing. Wherever possible we will beat any deal and you will always receive ongoing service and support!
Find out more >
Learn to Sew or Embroider with Echidna Sewing
Come along to our fun-filled classes to learn more about sewing, embroidery and crafting. Classes cater for all skill levels, whether you're just starting out or already have advanced knowledge.
Find out more >
Echidna project material/ fabric requirements are an indication only and can seem to be generous. This has been intentional. Should you make a cutting or embroidery mistake you will have sufficient fabric to rectify your error.


