All Articles
Stabilizer Explained
Author: Gary Walker
Is it 'stabiliser'? Or 'backing'? What are these mysterious words that haunt all embroiderers? Which word is correct? Truth is, they are both correct. A stabilizer or backing is fundamental to good machine embroidery but what type of backing should you use out of the literally hundreds available. The first thing to realize is that stabilizing your embroidery is definitely not “rocket science” it is however, sometimes very confusing. But fear not! as there are 4 basic stabilizers that should form part of everyones' embroidery stash:
These, combined with the following 4 basic rules for embroidery will cover perhaps 98% of your embroidery needs.
Rules
- Use a stabilizer as it supports the fabric during the stitching process and in most cases during the life of the garment.
- As a general rule you should use Cutaway on Unstable (e.g. stretchy or knitted) fabrics and Tearaway on Stable (e.g. woven) fabrics. Use Washaway for freestanding lace or garments where you don’t want any residual stabilizer after completing the embroidery. Finally, use a quality topping such as water soluble plastic film, for example, on top of towels and many knits.
- Always hoop the fabric with the stabilizer wherever practical to do so, ensuring that the stabilizer is cut large enough to fit the hoop selected and do NOT stretch the fabric. It should be smooth but not stretched. You should be able to comfortably insert the hoop and then finger tighten the hoop screw.
- Always use the smallest hoop for the task at hand. This not only saves you money but ensures better stitching and registration of the design. These are the basic rules that will apply to most embroidery but what about the fabrics that simply can’t be hooped because of “hoop burn” or marking of the fabric (e.g. satin or velour).
Just use sticky-back stabilizer—right !
Well, if you wish! But I wouldn’t let my machine stitch through glues and gums. Often the glue residue gums the needle (some worse than others) and it does get dragged by the thread into the machine.
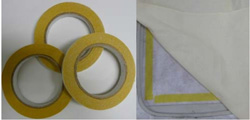 So, what is the answer? – Use double sided tape! It’s easy and effective.
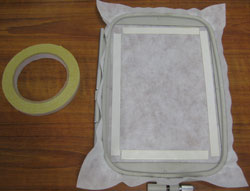
- Simply hoop the appropriate stabilizer for the task at hand.
- Cut and adhere strips of double sided tape to the perimeter of the hooped stabilizer ensuring that it is not in the design stitching area. You can check this by simply using a printed design template.
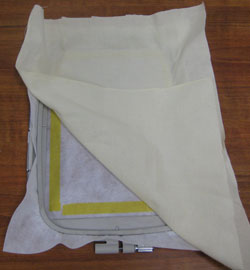
- Peel off the backing paper and carefully place the fabric on the stabilizer, smooth out and press firmly on the areas where it contacts the tape.
- The tape will hold the fabric firmly to the stabilizer during the stitching process and easily peel away from the fabric on completion.
| Step 2 | Step 3 | Step 4 |
 |
 |
 |
The best thing is that your needle will not be stitching through any glue or adhesive residue. Double-sided tape has been a old favourite in the commercial embroidery world for years and is readily available.