All Articles

Using HTV Vinyl Scraps
Author: Nicole H Date Posted:10 May 2025
Looking for creative ways to make the most of your heat transfer vinyl scraps? Don't throw them away just yet! With a cutting machine like the ScanNCut or Cricut, you can turn those offcuts into unique and personalized projects. By combining different colors, patterns, and textures of HTV vinyl scraps, you can create stunning designs. Whether you're a seasoned crafter or just starting out, reusing your vinyl scraps is a cost-effective and eco-friendly solution.
In this article, we'll explore a technique for using HTV vinyl scraps, allowing you to unleash your creativity and make the most of your materials. Get ready to transform your scraps into something beautiful and functional!
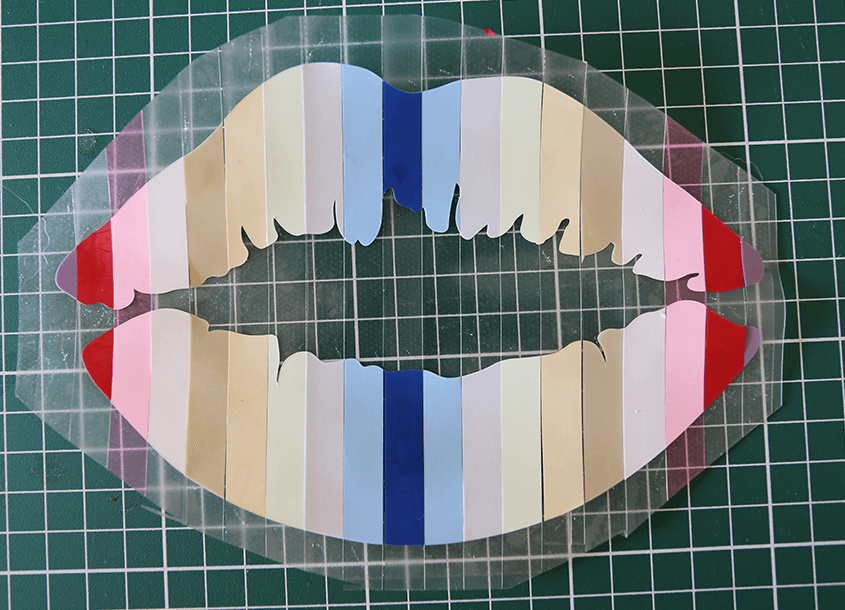
We'll be using the lips design available in our FREE SVG pack 1. This design will serve as the perfect artwork for combining your scraps. Learn how to access your downloads from your Echidna account.
Products Used:


Firstly, gather all your scraps. It is easiest if all the scraps are the same kind of HTV. For example Poli-Flex Turbo HTV. 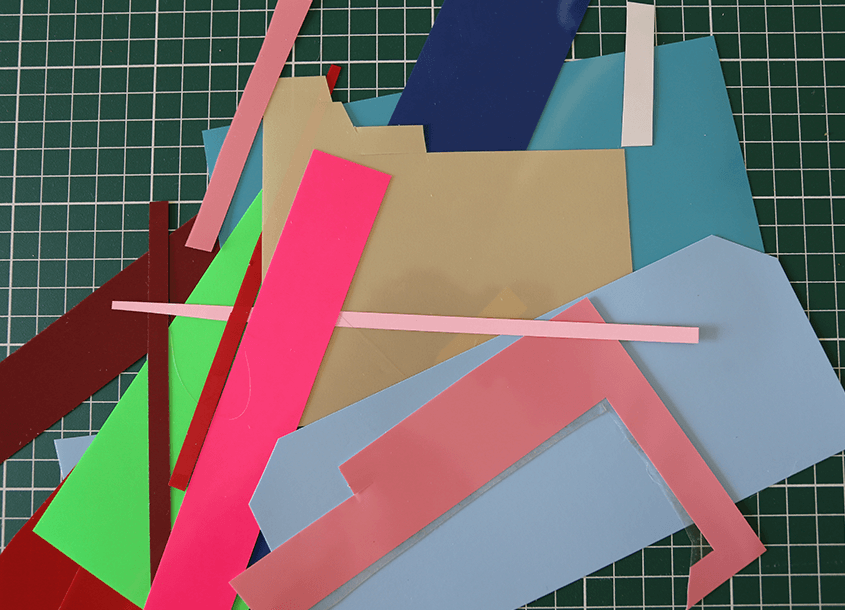
The best scraps to use for this type of project are long and skinny strips. Trim scraps with rotary cutter and quilt ruler if necessary. 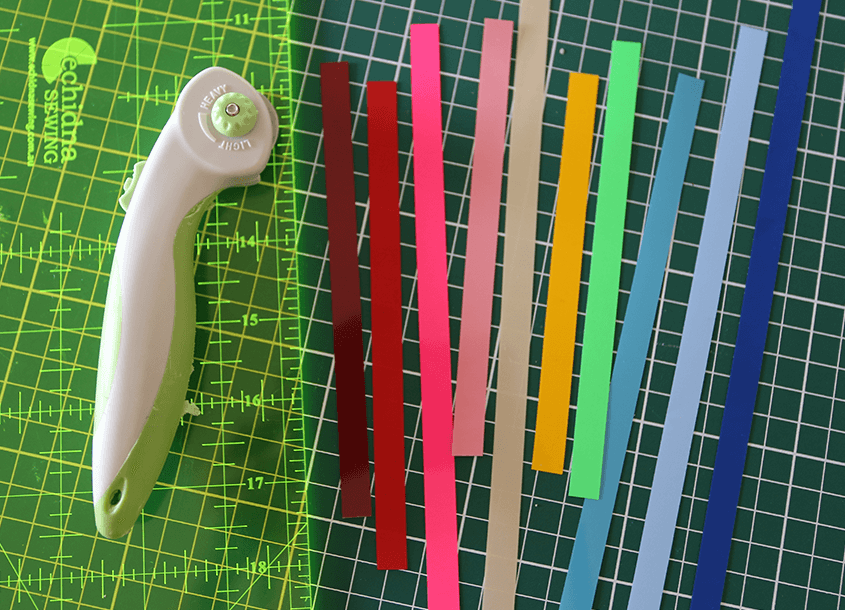
Cut a piece of hot fix transfer tape to the desired size for your project, this will be used to hold all the HTV together. Place the piece of hot fix transfer tape on your cutting machine's mat, clear side down, this is helpful to stop the tape from moving while you add the HTV strips. 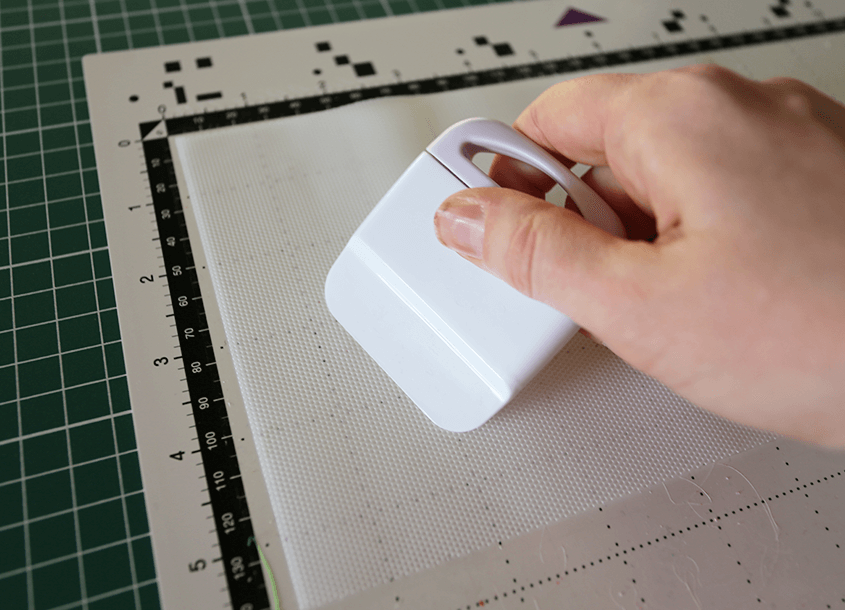
Remove the backing from the hot fix transfer tape to expose the sticky side. 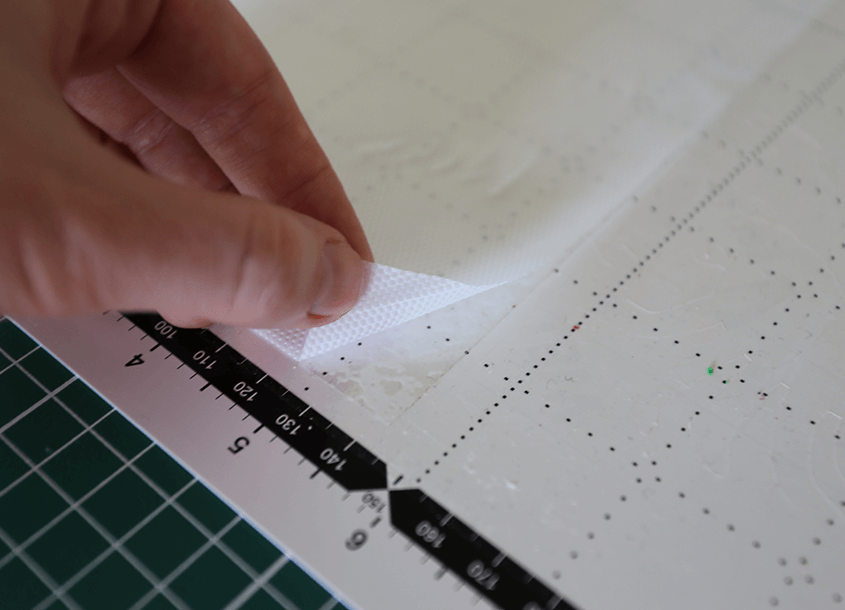
Place your HTV strips onto the hot fix transfer tape, clear backing side down; be sure not to overlap these otherwise they will not press properly. You can purposely leave gaps if that is the look you desire. 
Continue repeating until the exposed hot fix transfer tape has been covered with HTV strips. 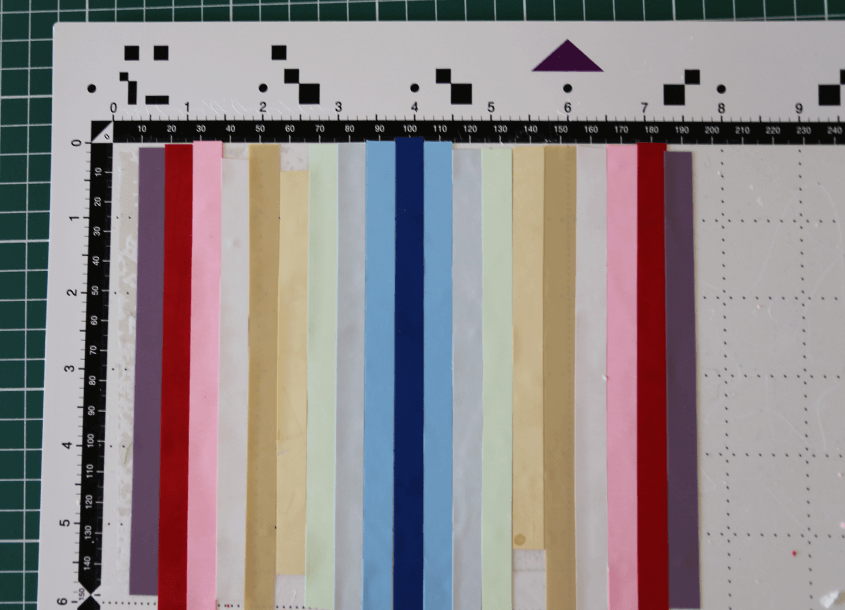
Load your design onto your cutting machine, adjust your settings for HTV, and proceed with cutting. For Brother ScanNCut users simply load the .svg into CanvasWorkspace and send it to your machine via Wireless. For HTV remember you will need to mirror the design and turn on the half-cut option. Learn more about cutting HTV with the ScanNCut.
Using your vinyl weeding tool simply remove the excess vinyl, this is known as weeding. 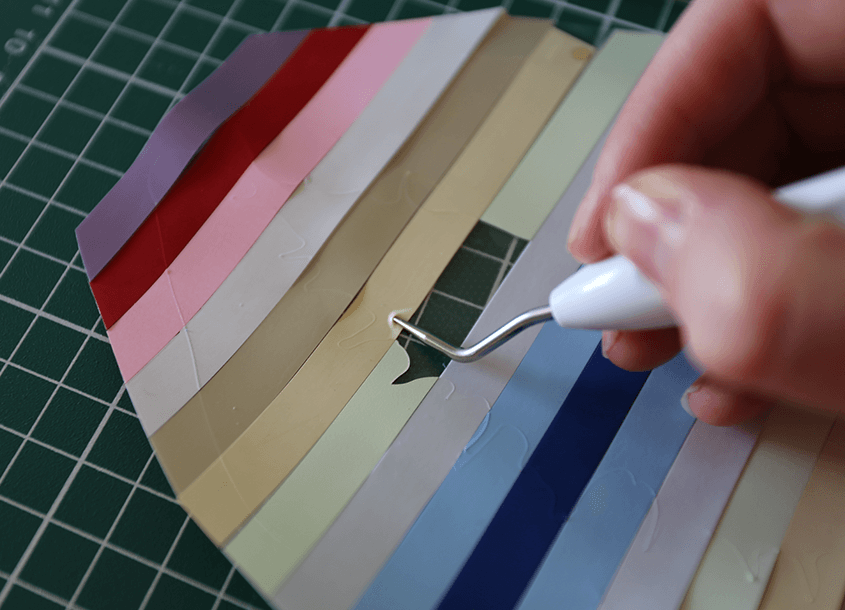
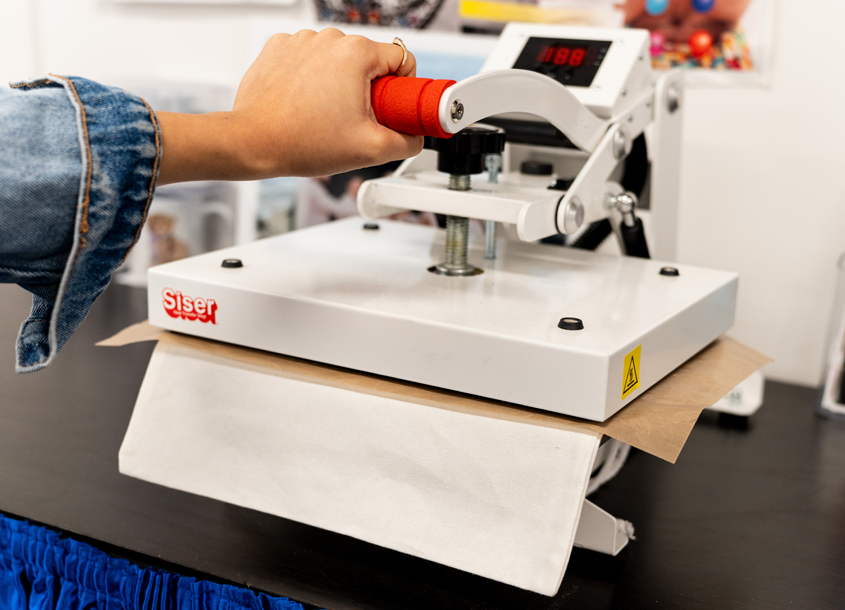
Now to press our HTV creation onto a fabric garment. We will be using a cotton drawstring bag. Place the item onto the press and cover it with your protective applique sheet. Preheat the garment by pressing for 2-3 seconds. Open the press, move the protective applique sheet to the side, and place your HTV scrap creation onto the garment, media side down in the desired location. Again cover with your protective applique sheet and press. The amount of time needed will depend on the HTV used. View our HTV pressing times guide. 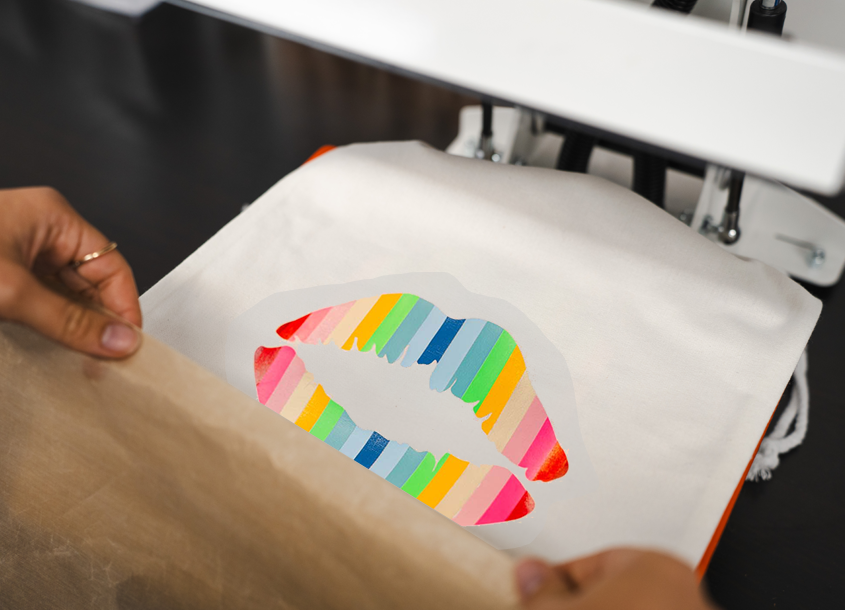
Open the press, remove the protective applique sheet and take the garment out of the press. You will now need to remove the two layers of protective backing from the design (one from the HTV and the hot fix transfer tape), exposing the finished design. 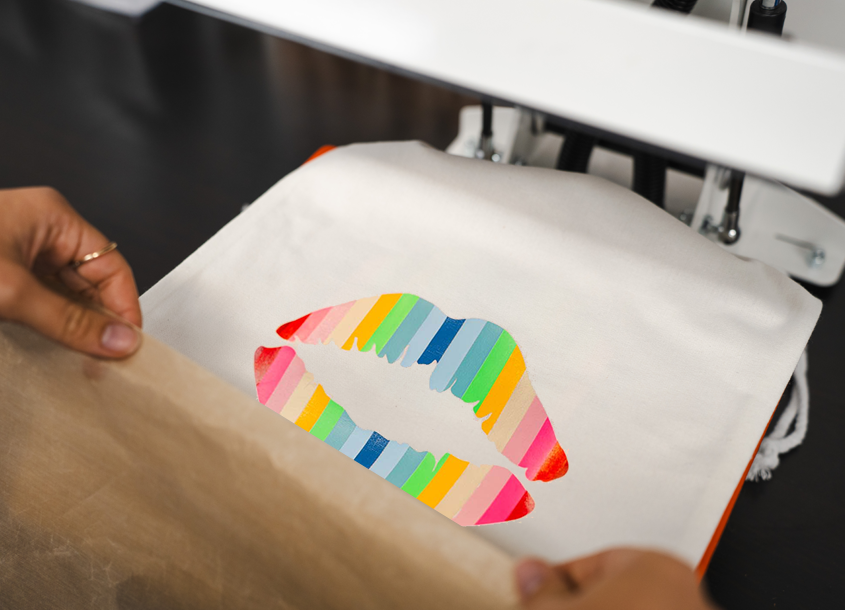
You have now created a one-of-a-kind creation using all your HTV scraps.