All Projects
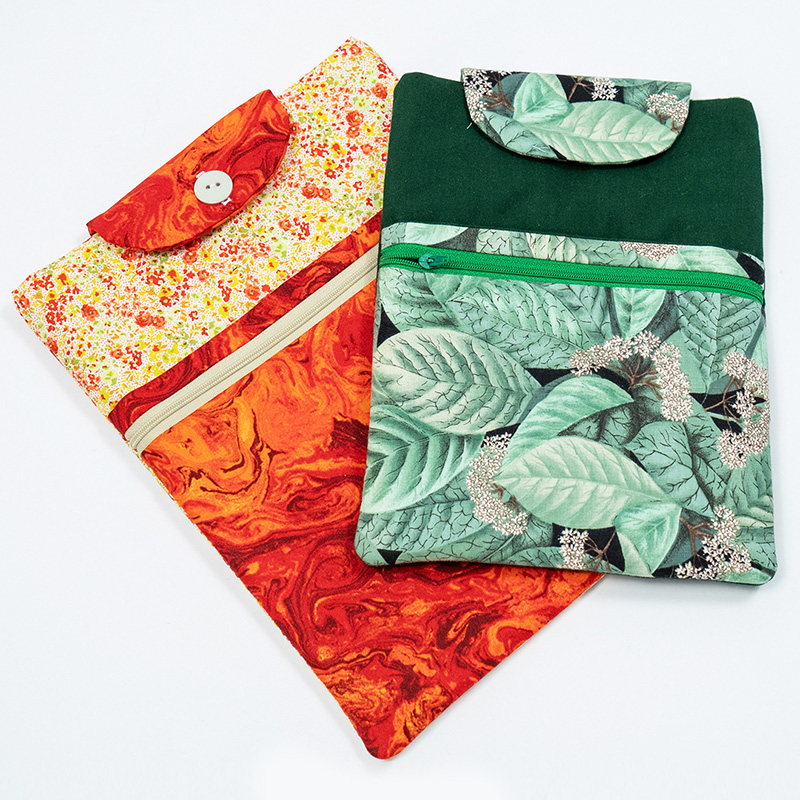
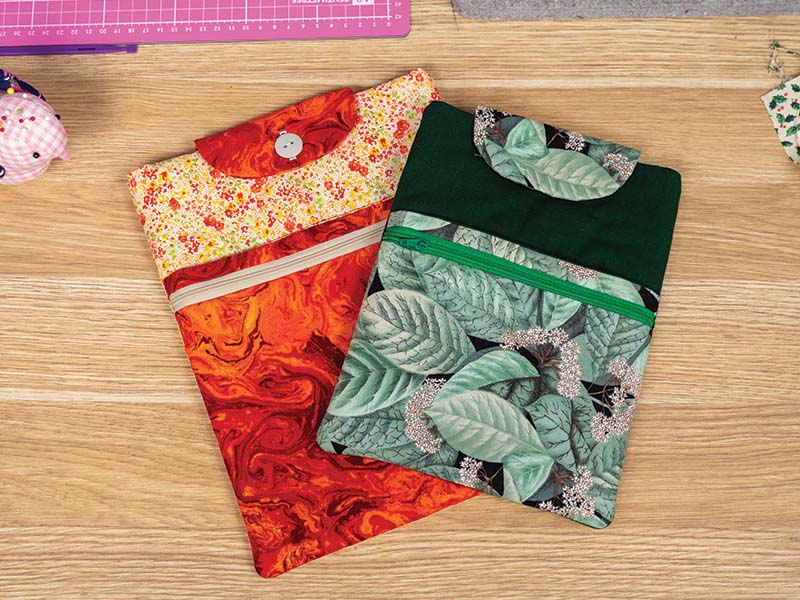


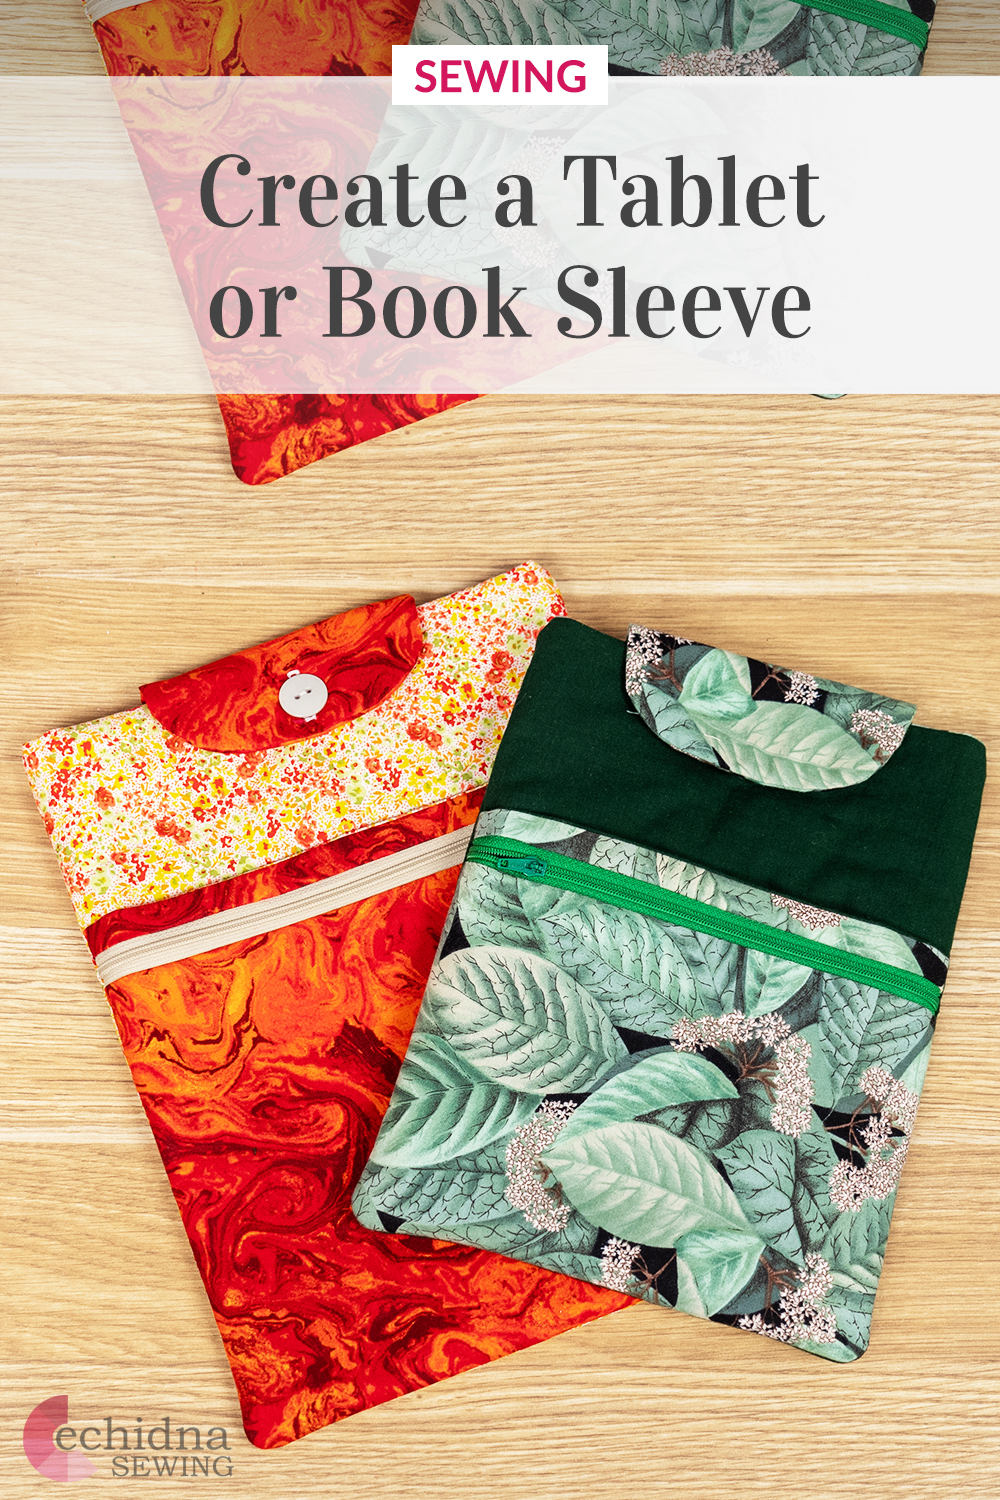
Closed Tablet Sleeve
Date Posted:1 August 2025
If you or your family own a tablet, why not give it a little extra protection and make a personalised tablet sleeve? With three sizes to choose from, you can fit kindles, all the way up to a small iPad. This project is also great for storing diaries, journals and books!
We recommend using a cotton type fabric or a lightweight denim as this project can get quite thick with the fusible fleece, and while you want it to be protective, we don't want any excess bulk that will make it difficult to sew.
What you'll need:
- Sewing machine
- Fabric 1 (WOF 15”)
- Fabric 2 (WOF 15”)
- Fusible fleece/batting
- Thread to match your fabric
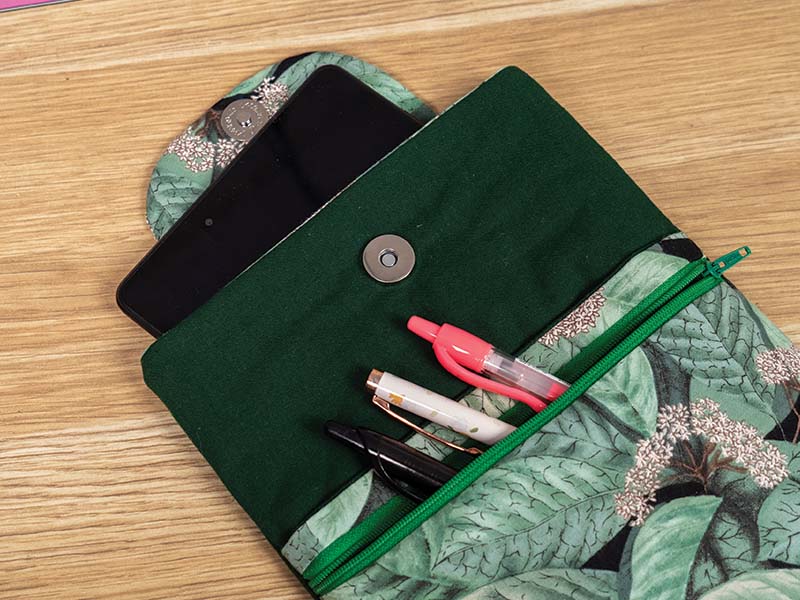
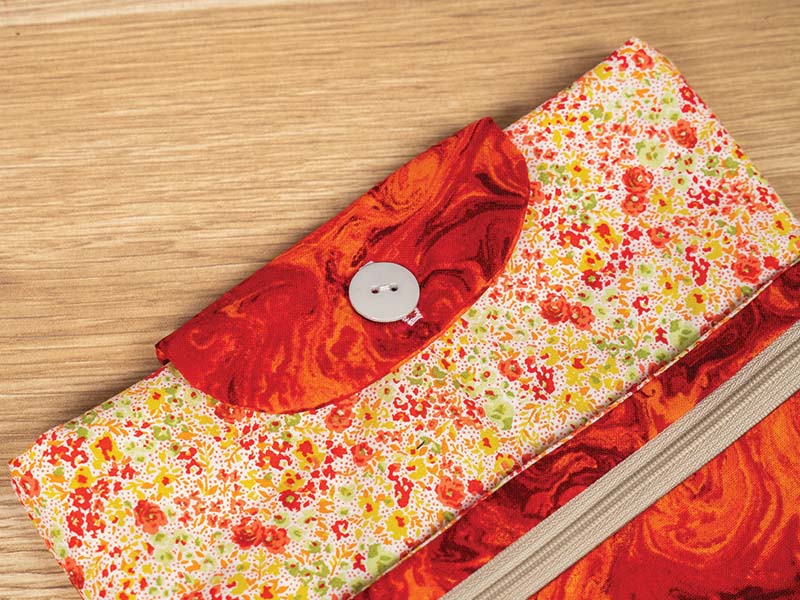
- Button or magnetic snap
- Sewing scissors
- Rotary cutter and cutting mat
- Iron and wool pressing mat
- Purple thang
- Zip (we recommend using a 10" zip for all sizes and trimming down afterwards)
- Frixion pen or chalk
- Medium Iron-on Stabilizer - 5" square piece
- Sewing pattern →
Step Overview
The steps below are just an overview of the project instructions and must be used in conjunction with the tutorial video. Print these steps out to have beside you when watching the video as a reminder.
- Download and cut out the pattern in your desired size.
- Cut out fabric pieces according to the pattern pieces.
- Cut out your pattern pieces from the fusible fleece.
- Fuse the fleece to the wrong side of your tab, and your main body lining fabrics.
- If adding a magnetic closure, iron on a small square (approx 2” x 2”) of stabiliser or interfacing to the wrong side of the fabric and add male/female ends here on the X mark at this step.
- Place your tab pieces right sides together. Pin or clip to secure.
- Stitch tab pieces together with a ¼” seam allowance, along the curved edge, leaving the straight edge open.
- Cut notches within the seam allowance to reduce the bulk.
- Turn tab piece right side out and use your purple thang to push out the curves.
- Press the tab piece flat with your iron.
- Add buttonhole here if using a button closure.
- Place your zip face down on your main front pocket piece and your front pocket lining face down on top of the zip and the main fabric. Stitch together with a straight stitch.
- Open up and press seams flat.
- Place your back pocket piece face up, and your newly sewn pocket front on top, aligning the top edge with the zip.
- Place your pocket top face down on top of the zip, pin all layers together.
- Stitch along the top edge (zip enclosed) with a ¼” seam allowance and a straight stitch.
- Open up the pocket top piece ONLY and press with your iron.
- Place your other pocket back piece right side down with the pocket top. Pin or clip to secure.
- Stitch top edge with a ¼” seam allowance and a straight stitch.
- Open to the right side out and press flat with your iron. Your pocket piece is now done.
- Place your Main body main fabric piece face up and your pocket piece face up on top, aligning the bottom edges. Pin or clip to secure.
- Stitch together both sides and bottom edge, with a ⅛” seam allowance.
- If you are adding a magnetic closure, add the male/female end on the X mark now. Or, sew on your desired button.
- Align the main body lining fabric along the top edge of your main body piece you have just sewn your pocket piece to. Pin or clip to secure.
- Sew top edge with a straight stitch and a ¼” seam allowance.
- With your other main body main fabric piece, align your tab piece right sides together, in the centre along the top edge, pin or clip to secure.
- Stitch tab piece to main body piece with a straight stitch and a ⅛” seam allowance.
- Place your remaining main body lining fabric right side down along the top edge, making sure the tab piece is enclosed. Pin or clip to secure.
- Stitch top edge with a straight stitch and a ¼” seam allowance.
- Place main body pieces right sides together, making sure the lining and main fabrics are facing their respective fabric. Pin or clip to secure.
- Stitch around the entire perimeter of the sleeve with a ¼” seam allowance, leaving a 3” gap at the bottom of the lining so you can turn the sleeve right side out.
- Trim off the corners and seam allowance surrounding to reduce bulk.
- Turn your sleeve right side out and use your purple thang to push out the corners.
- Press all seams flat with your iron.
- Stitch the turning hole shut.
- Tuck your lining inside the main fabric, press top seams with your iron.
- All done!
Don’t forget to show us your finished projects on Instagram or Facebook #echidnasewing #madebyme


Free Embroidery Designs
We're excited to offer our free Echidna designs available for download. These free designs are perfect for those at a beginner or an advanced level. Add these designs to your stash and create incredible embroidery!
View all free designs >
Sewing, Quilting and Embroidery Machines
Interested in learning how to sew, quilt or embroider? Take a look at the innovative Brother machines available for purchase at Echidna Sewing. Wherever possible we will beat any deal and you will always receive ongoing service and support!
Find out more >
Learn to Sew or Embroider with Echidna Sewing
Come along to our fun-filled classes to learn more about sewing, embroidery and crafting. Classes cater for all skill levels, whether you're just starting out or already have advanced knowledge.
Find out more >
Echidna project material/ fabric requirements are an indication only and can seem to be generous. This has been intentional. Should you make a cutting or embroidery mistake you will have sufficient fabric to rectify your error.


