All Projects
 Lantern Shapes
 Previous Next


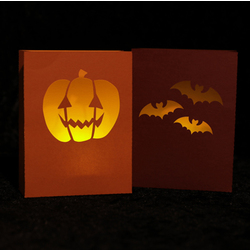
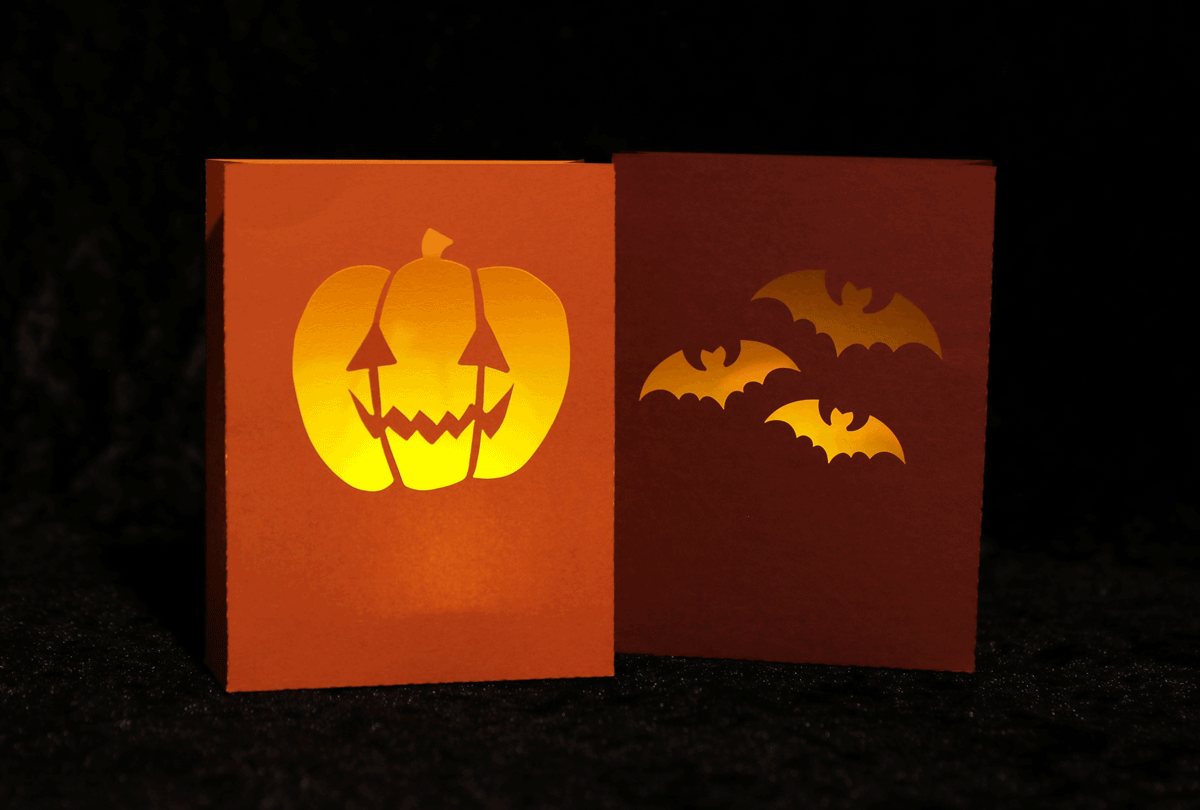
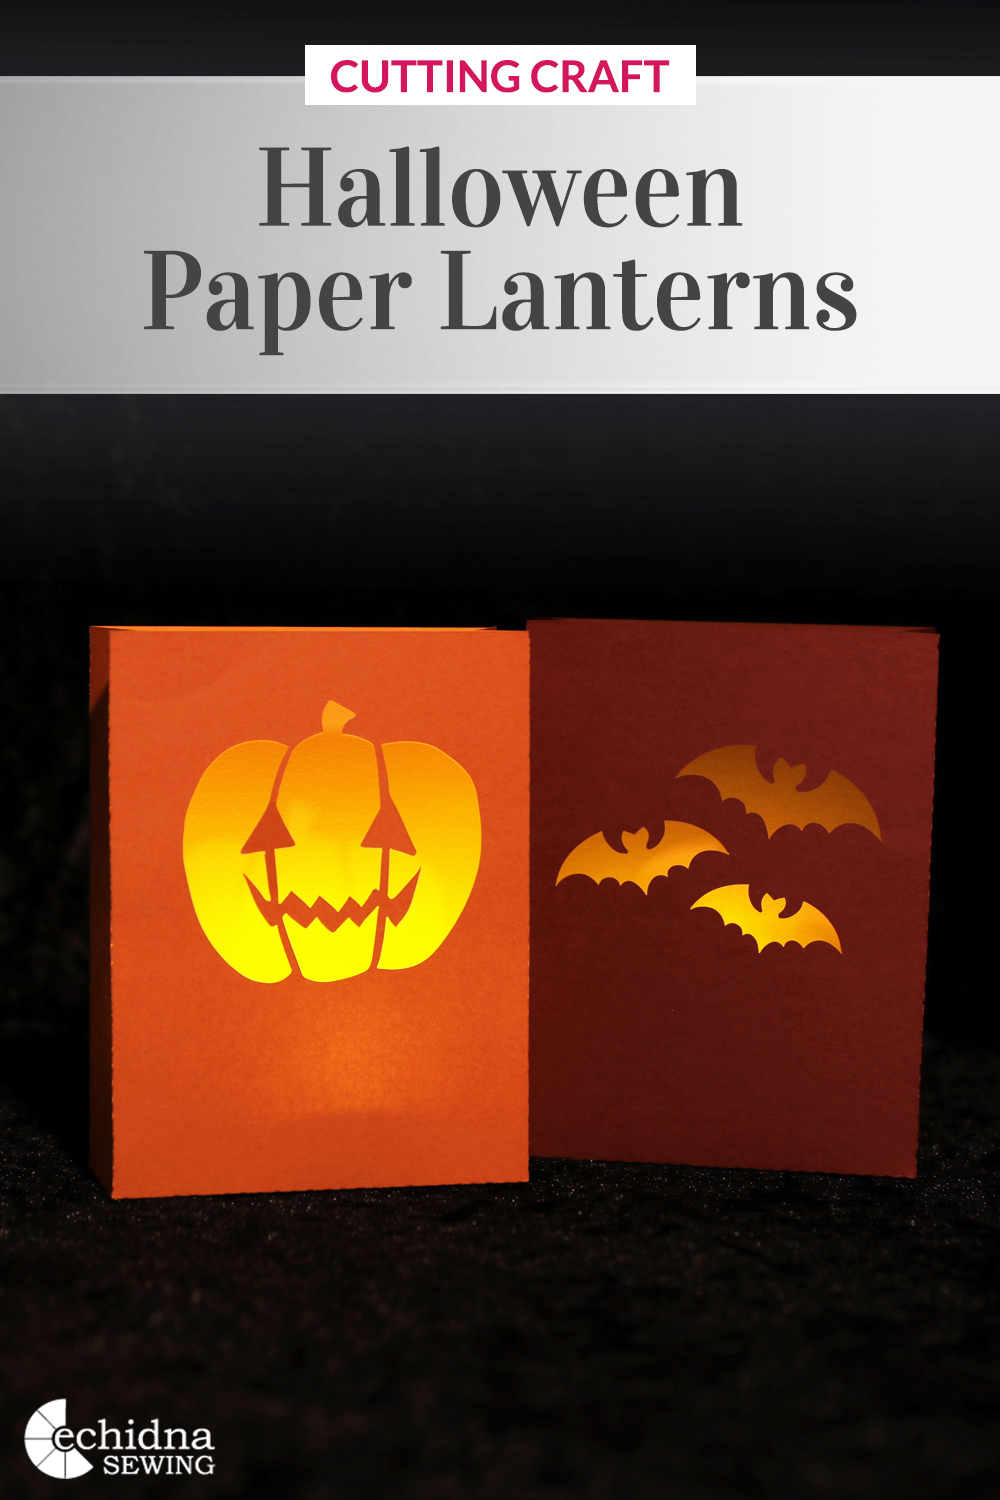
Halloween Paper Lanterns
Author: Nicole H Date Posted:26 October 2024
Are you searching for a unique way to decorate your home for Halloween? Look no further! With the help of your Brother ScanNCut, you can create beautiful paper lanterns to bring festive charm to your Halloween gathering or to greet trick or treaters at your door.
Making paper lanterns is a simple project that even the most novice crafters can complete, and with a few basic materials, you can whip up decorations that will bring a smile to everyone’s face. Read on to find out how to make your own paper lanterns with your Brother ScanNCut.
Download the files for this project →
Free design files:
These include:
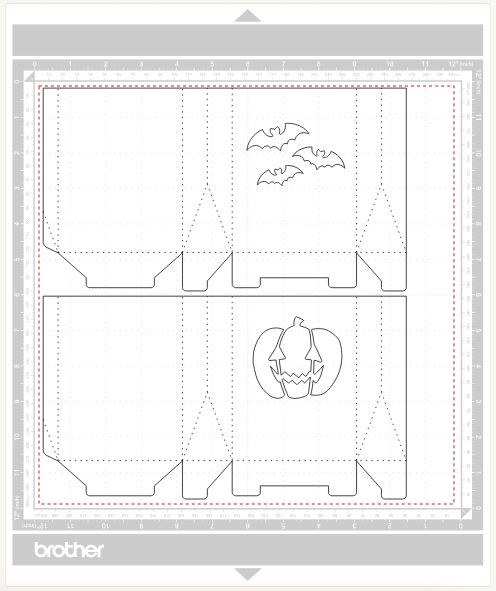
- Bat lantern (.fcm)
- Pumpkin lantern (.fcm)
Please note .svg files are not provided with this project.
Lantern ShapesWhat you will need:
- Any model of the Brother ScanNCut
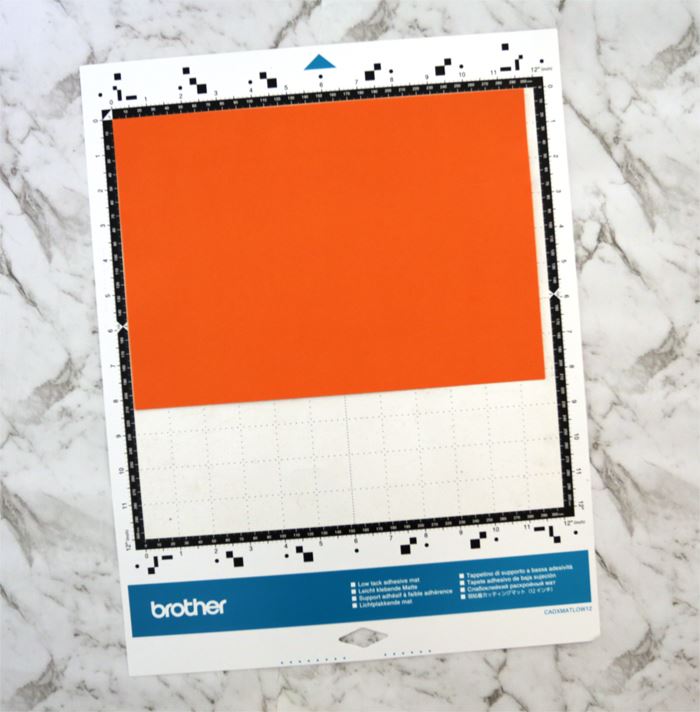
- Your Low Tack 12″ x 12″ ScanNCut Mat (suitable for your model)
- Your Standard ScanNCut Blade (suitable for your model)
- Brayer/Roller for ScanNCut
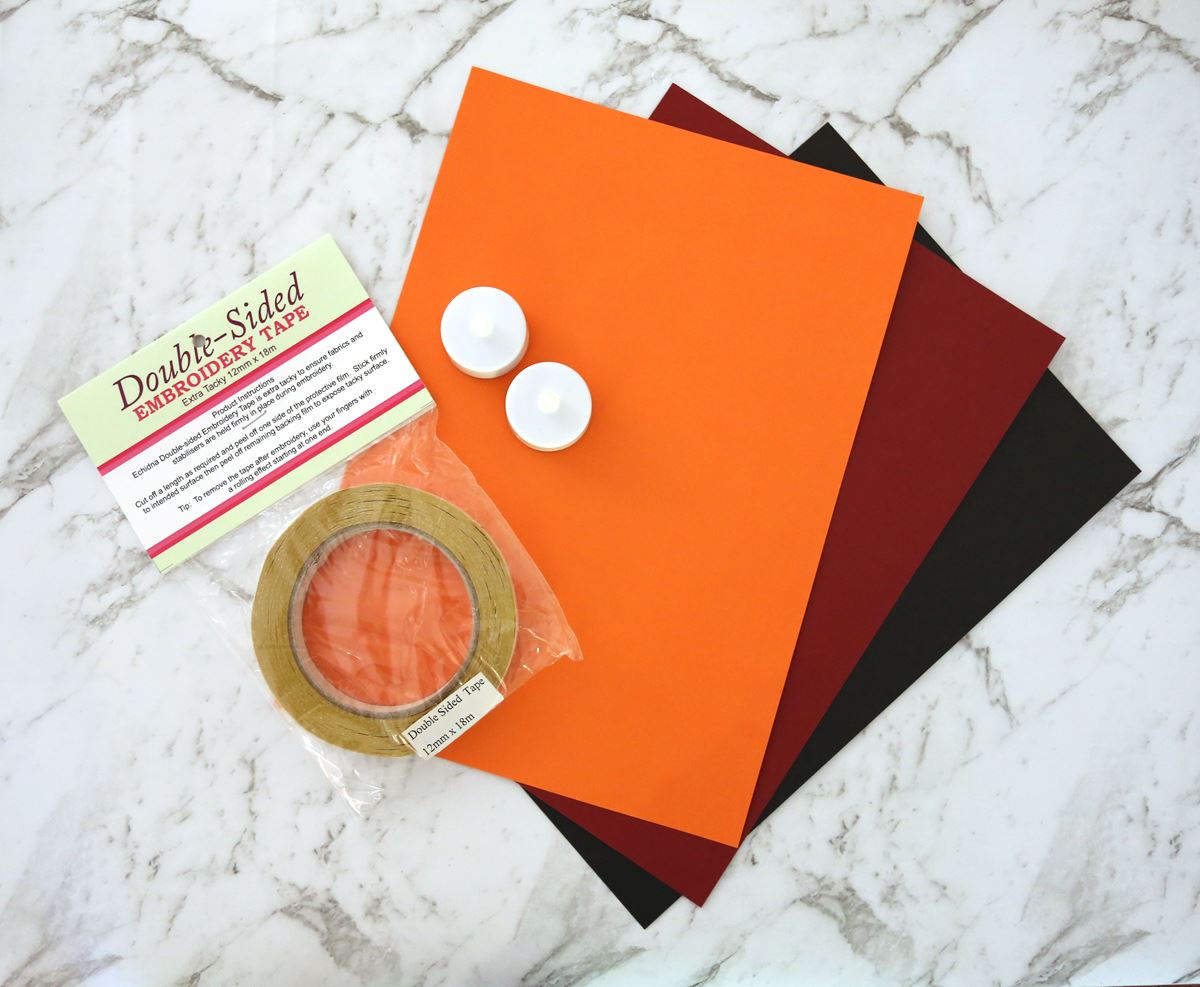
- 1 x sheet of colour card stock (black, orange & purple suggested) per lantern
- Paper glue or double sided tape
- LED tea lights
WARNING: Paper is flammable, please use LED tea lights.
Shop online:

Step overview:
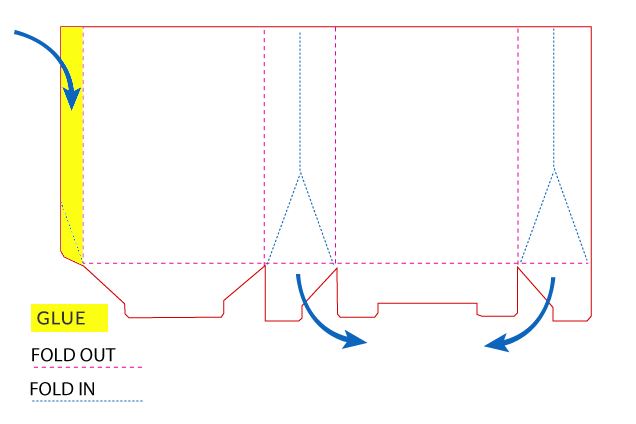
Step one
Cut out the lanterns shapes from a piece of thick cardstock. Once completed, unload the mat from the machine and and gently remove the cut cardstock
Step two
Fold along the dotted lines and and then glue the tabs to form a box.
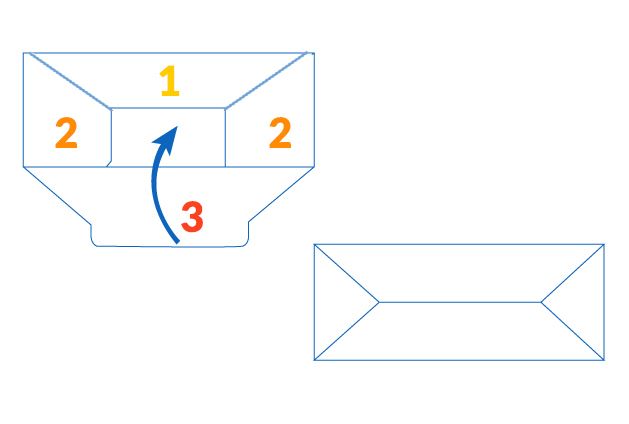
Step three
Assemble the bottom of the lanten.
Step four
Pop in the LED tea light and watch it glow.
Detailed instructions:
- Download the ScanNCut files (.fcm) and save this onto a USB to plug it directly into your ScanNCut machine.
- Install the Standard ScanNCut Blade into your ScanNCut by following the steps outlined in your machine's quick reference guide.
- Place the card landscape onto a Low tack adhesive mat, starting in the top left hand corner making sure it sticks well. Feel free to use a roller to secure the card in place if needed.
Tip: Using painters/masking tape can help keep the card stuck to your mat should it begin to lose its tack. However, it is important to note that the more fibrous your paper is the more likely it is to tear when you peel the tape off. Using high quality paper will minimise this risk.
- Load the mat into the ScanNCut by following the steps outlined in your machines quick reference guide (remember to hold the mat level while loading)
- Load the chosen design from your USB and do a scan of the mat to position the design on the card. The designs provided for this project are the perfect size for an A4 piece of paper. Note: We suggest doing a test cut to ensure you have your settings correct for the medium you are using. Cutting a small hole in the corner of your mat is a lot less upsetting than cutting a large design straight through your mat.
- Once you have the design lined up on the media, choose the ‘cut’ option and select ‘Start’ or press play to cut out your design.
- Once the machine has completed cutting the design, unload the mat from the ScanNCut and gently peel off the card and you will have the lantern cutout. Remove any painters/masking tape if you used this.
- Fold along the dotted lines, as shown below, and then glue the tabs to form a box.
- Assemble the bottom as shown.
- Your lantern is now complete, simply pop in the LED tea light and watch it glow!
Free Embroidery Designs
We're excited to offer our free Echidna designs available for download. These free designs are perfect for those at a beginner or an advanced level. Add these designs to your stash and create incredible embroidery!
View all free designs >
Sewing, Quilting and Embroidery Machines
Interested in learning how to sew, quilt or embroider? Take a look at the innovative Brother machines available for purchase at Echidna Sewing. Wherever possible we will beat any deal and you will always receive ongoing service and support!
Find out more >
Learn to Sew or Embroider with Echidna Sewing
Come along to our fun-filled classes to learn more about sewing, embroidery and crafting. Classes cater for all skill levels, whether you're just starting out or already have advanced knowledge.
Find out more >
Echidna project material/ fabric requirements are an indication only and can seem to be generous. This has been intentional. Should you make a cutting or embroidery mistake you will have sufficient fabric to rectify your error.


