Add sparkle to your embroidery projects with Opal Film
Date Posted:20 November 2024
If you’re looking to take your embroidery to the next level, Opal Film—commonly known as Mylar—might be just the secret ingredient you need. This stunning material can add a reflective, shimmering effect to your designs, giving them a unique, eye-catching appearance. Whether you're creating custom gifts, home décor, or fashion pieces, Opal Film can help bring your projects to life with added dimension and shine.
To use Opal Film, your embroidery design must be digitized specifically for it. Suitable designs typically feature an open fill section to highlight the embellishment.
In this guide, we’ll walk you through everything you need to know about Opal Film, how to use it in your embroidery, and why it’s such a fantastic material for making your creations stand out.
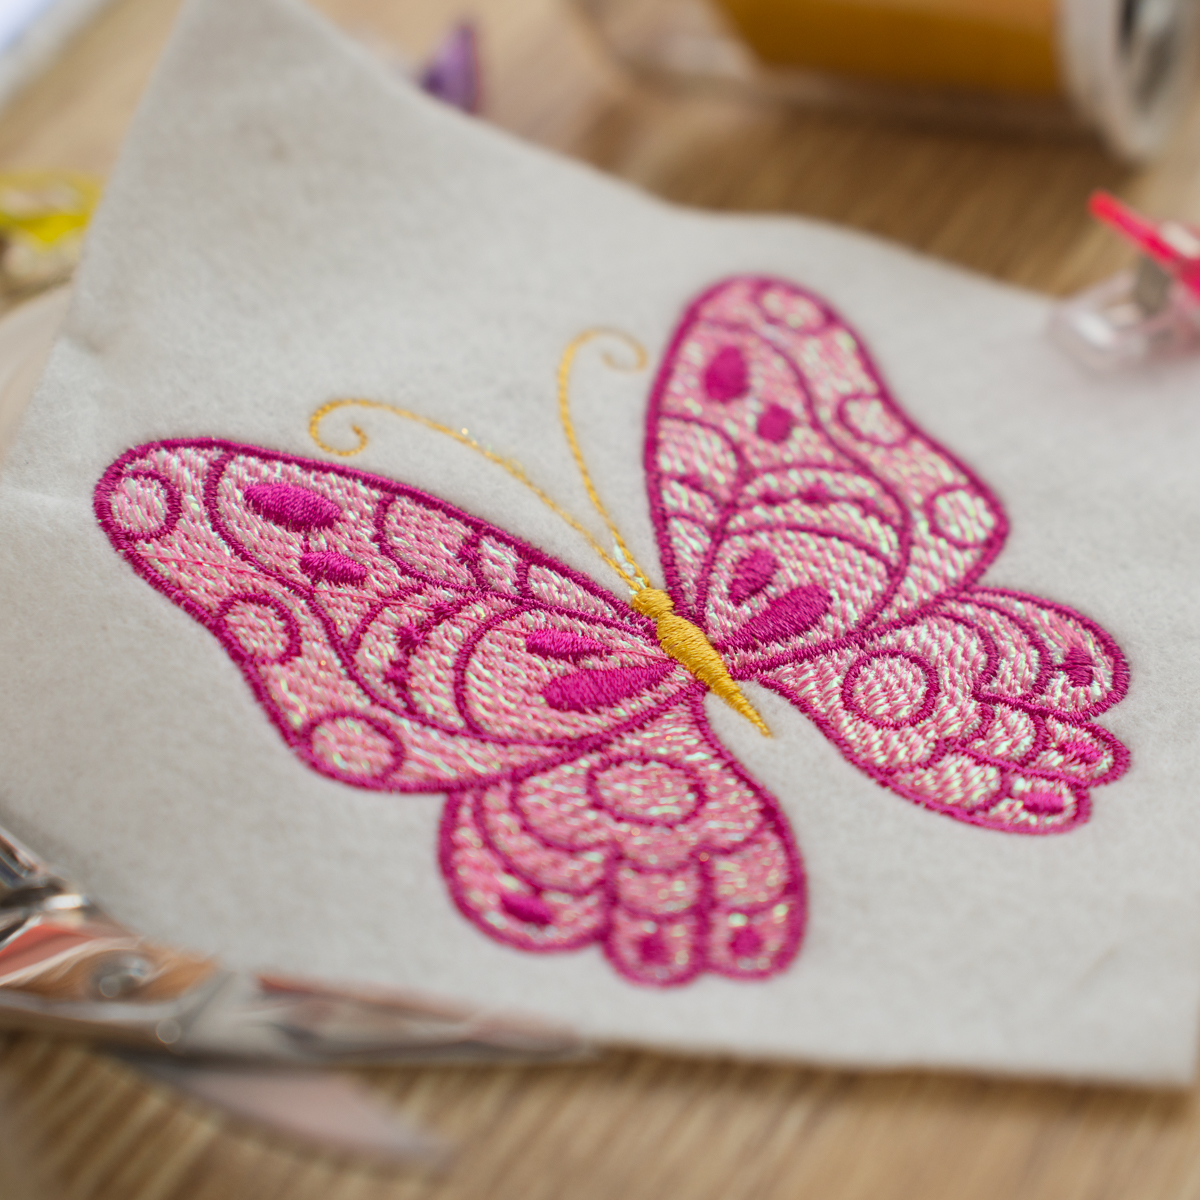
What is Opal Film (Mylar)?
Opal Film is a polyester-based material that comes in a shiny, metallic, or iridescent finish. It’s often used in embroidery to add a sparkling, iridescent effect to your designs. While Mylar is the brand name for this material, it’s often referred to as Opal Film because of its shimmering, pearlescent quality, much like the iridescence found in opals.
When stitched into your embroidery projects, Opal Film catches the light and reflects a beautiful, high-gloss shine that can make any design stand out. It's perfect for adding that extra "wow factor" to your embroidery, whether you're stitching a logo, a monogram, or a decorative pattern.
How does Opal Film enhance embroidery designs?
Opal Film is a game-changer for embroidery, offering several benefits to your designs:
- Shimmer and Shine: The most obvious benefit of Opal Film is its sparkle and shine. This reflective material catches the light beautifully, giving your embroidery a high-end, professional look and enhancing the hue of the thread colour.
- Added Texture and Dimension: Opal Film can add a unique, almost three-dimensional effect to your designs. It gives a subtle texture that makes your stitches stand out more vividly.
- Perfect for Special Occasions: Because of its shiny, metallic finish, Opal Film is an excellent choice for special occasions such as weddings, holidays, or celebrations. It’s a perfect way to add glamour to custom designs.
- Versatility: Opal Film is incredibly versatile and can be used in a variety of designs, including logos, monograms, floral patterns, holiday-themed designs, and even fashion accessories. The glossy effect adds sophistication to everything from clothing to home décor.
How to stitch an Opal Film embroidery design
Materials needed:
- Opal Film
- Embroidery machine (with a suitable hoop size for your design)
- Embroidery design (Must be compatible for Opal Film. View our suitable designs →)
- Embroidery stabilizer (Use a stabilizer that matches your fabric type. View our stabilizer guide →)
- Fabric (Opal film works best on non-stretch fabrics such as cotton. It will not work on fabrics with a high pile (eg. towels)
- Embroidery thread (Choose colours that complement the Opal Film for optimal reflective effects)
- 75/11 embroidery needle
Step-by-step guide
- Prepare the fabric and stabilizer:
Select your fabric and attach the appropriate stabilizer. Hoop them together securely to avoid shifting during the embroidery process.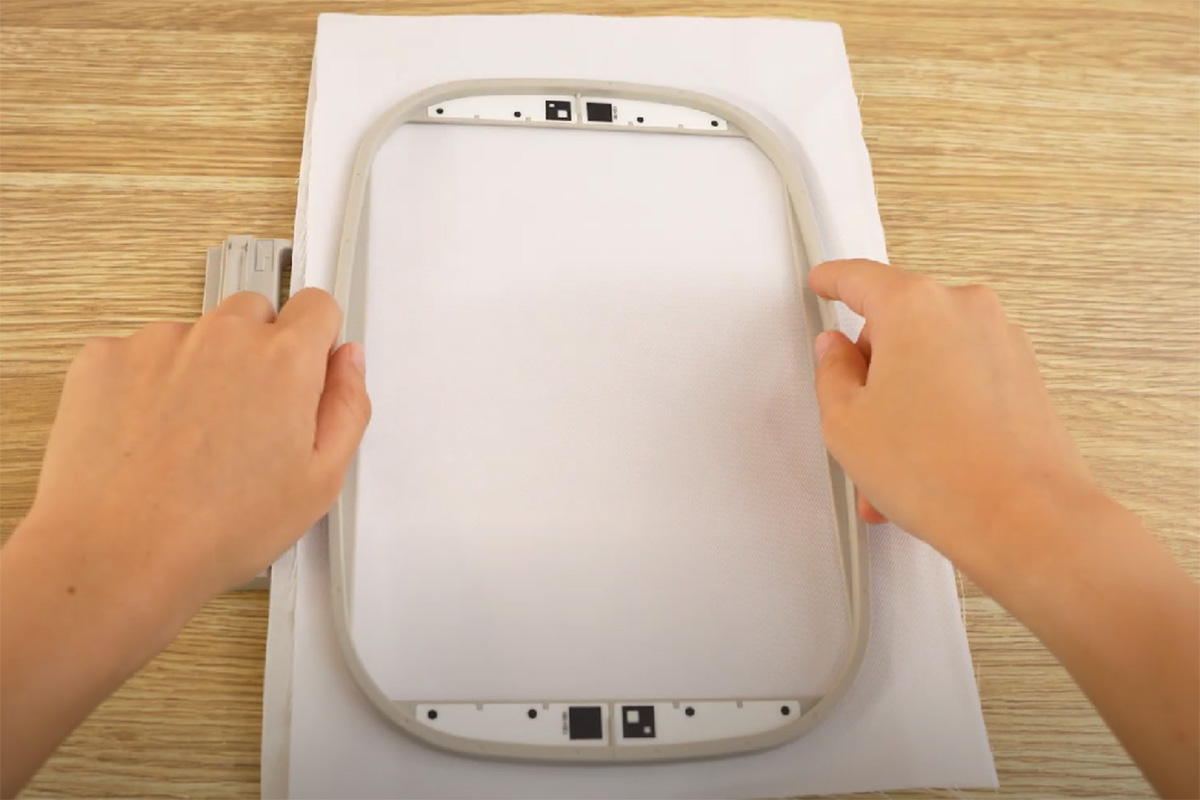
- Prepare the embroidery design:
Load an Opal Film-compatible design onto your embroidery machine. These designs will have sections specifically made for Opal Film placement, usually digitized with open fill areas to let the Opal Film shine through, also known as open fill. - Begin stitching the placement line:
Start with the first colour layer, which typically outlines the design. This outline will act as a placement guide for the Opal Film.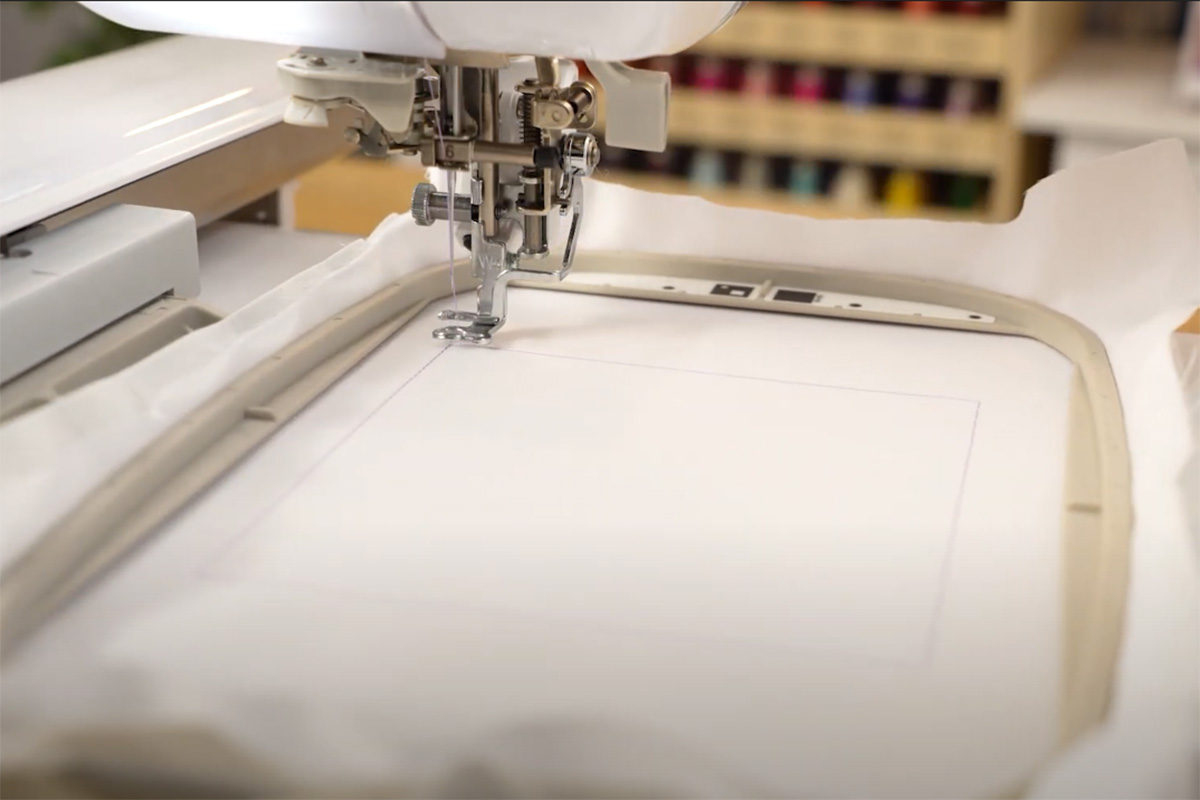
- Place the Opal Film sheet:
Please note: The placement of your opal film will depend on the design. This step can be done at the beginning, middle, or end of the design, based on where the open fill is in the design stitchout.
After the initial outline stitches are complete, pause the machine. Lay a piece of Opal Film over the outlined area. Make sure it fully covers the section where Opal Film will be embroidered. Use Washi Tape to secure the opal film in place if needed.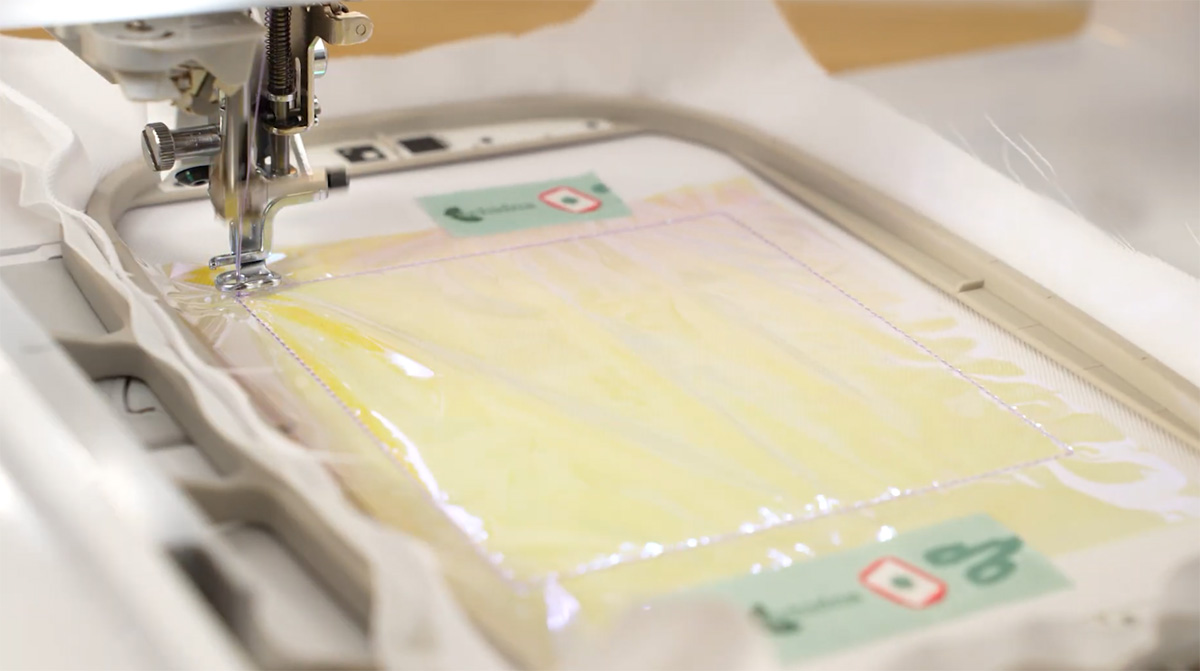
- Stitch the design over Opal Film:
Resume stitching. The next part of the design will secure the Opal Film sheet to the fabric and create the desired effect. A design may have a Tackdown stitch, this is to hold the Opal Film in place. - Remove excess Opal Film:
After the machine has finished stitching over the Opal Film, carefully tear away the excess Opal Film outside of the stitched areas. Opal Film is designed to tear easily along the stitch lines, making this step simple. Be gentle to avoid pulling or distorting the stitches.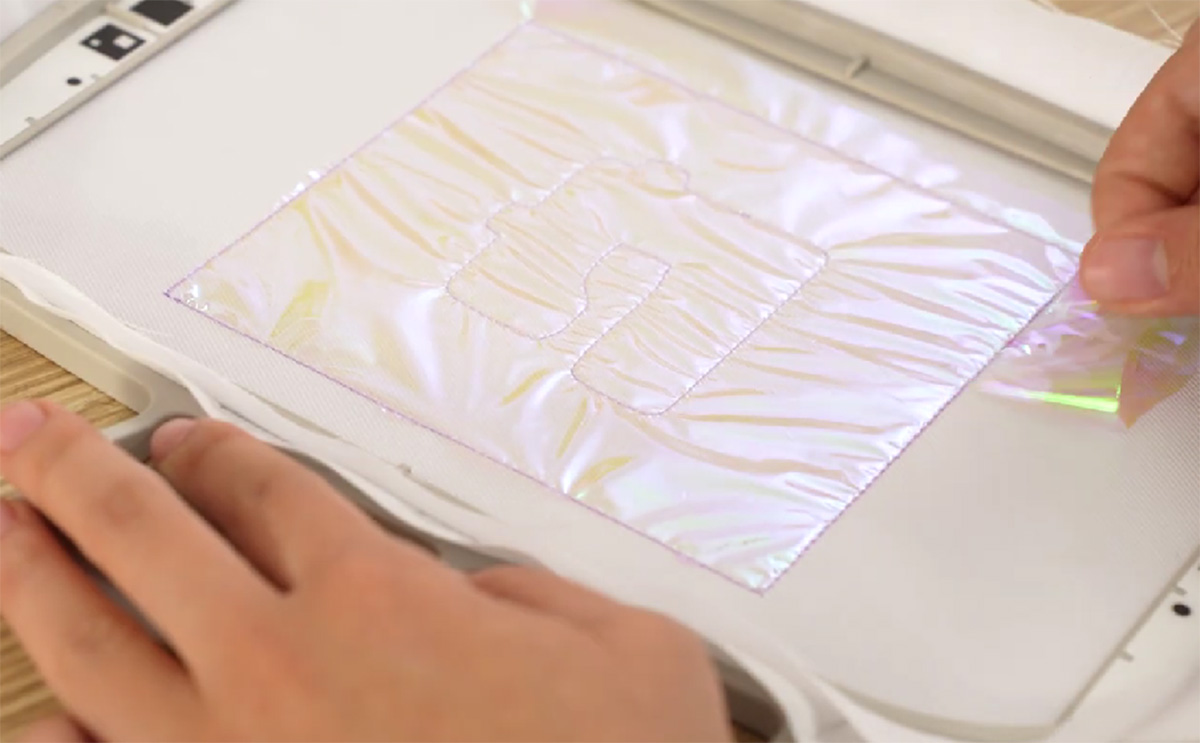
- Continue with the remaining design stitches:
The design may have additional layers or details, such as satin stitching or shading. Continue following the machine’s prompts to complete the design.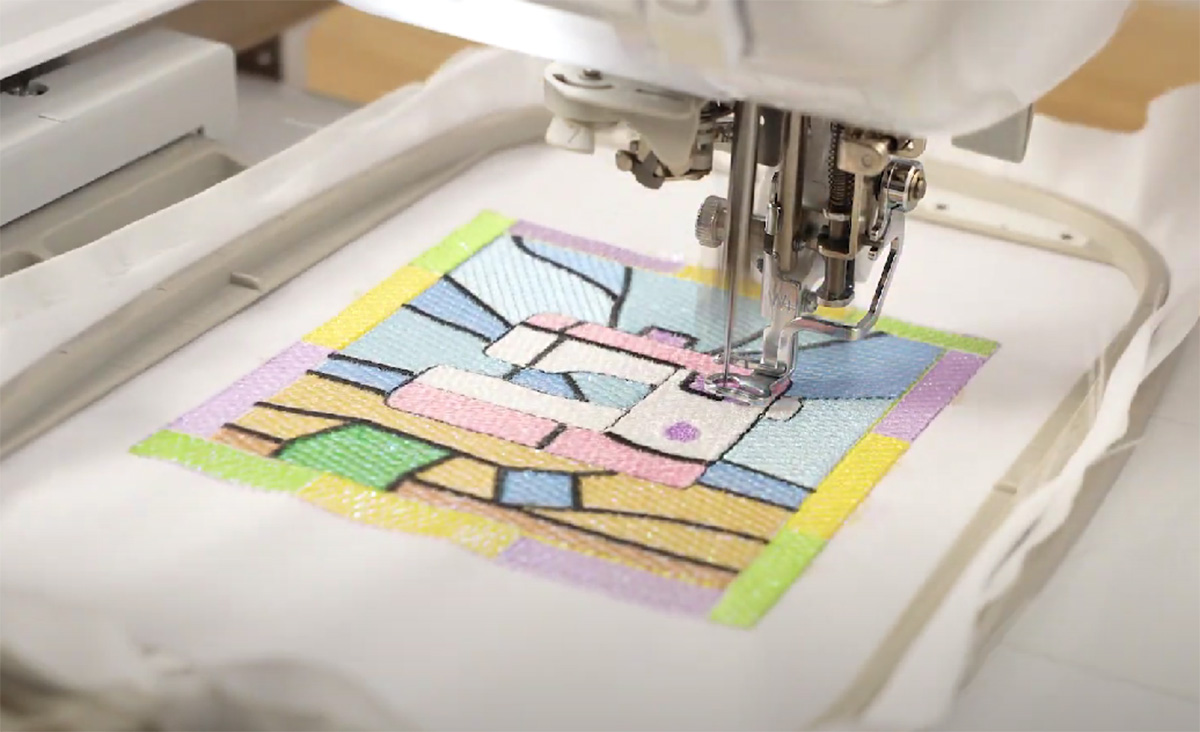
- Final touches:
Once stitching is complete, remove the project from the hoop and carefully trim away any remaining stabilizer if needed.
.jpg)
.jpg)
Care instructions for Opal Film embroidery
Because Opal Film can be more delicate than traditional embroidery threads, keep the following care tips in mind:
- Hand Wash or Gentle Cycle: Wash embroidered items in cold water on a gentle cycle.
- Avoid High Heat: Air-drying is ideal, but if you need to iron, do so on a low setting and avoid direct contact with the embroidered area. You can use a protective ironing sheet to shield the embroidery.
- Store Carefully: Opal Film can crinkle if stored poorly, so keep your finished projects flat or rolled loosely.
Adding Opal Film to embroidery projects can open up new possibilities for shimmer and style. With these steps and a little practice, you’ll create eye-catching designs that sparkle and delight.
Whether you’re embroidering a bag, garment, or home decor item, a touch of Opal Film can give your project a high-end look with minimal effort.


