All Articles

Placement & Size for (HTV) on T-Shirts
Date Posted:12 March 2026
Getting the size and placement right can make the difference between a professional, balanced finish and a design that feels awkward or off-centre. This guide will walk you through how to size your HTV designs correctly and place them neatly on t-shirts every time.
Why HTV Size & Placement Matters
The size and placement of your Heat Transfer Vinyl design can make or break the final look of a t-shirt. Even a great design can feel off if it isn’t sized or positioned correctly.
- A design that’s too small can look lost on the shirt.
- A design that’s too large may feel overwhelming or can become distorted when worn.
- It’s also worth remembering that not all t-shirts are created equal. Differences in cut, fit, and fabric can change how a design sits once the shirt is worn.
For example:
- V-neck shirts usually need the design placed slightly lower
- Ladies’ fitted tees often suit slightly smaller, more proportioned designs
- Oversized shirts can handle larger designs without looking crowded
When in doubt, size for the body rather than the shirt size on the tag, and focus on how the design looks overall rather than relying on exact measurements.
Common HTV Design Placements
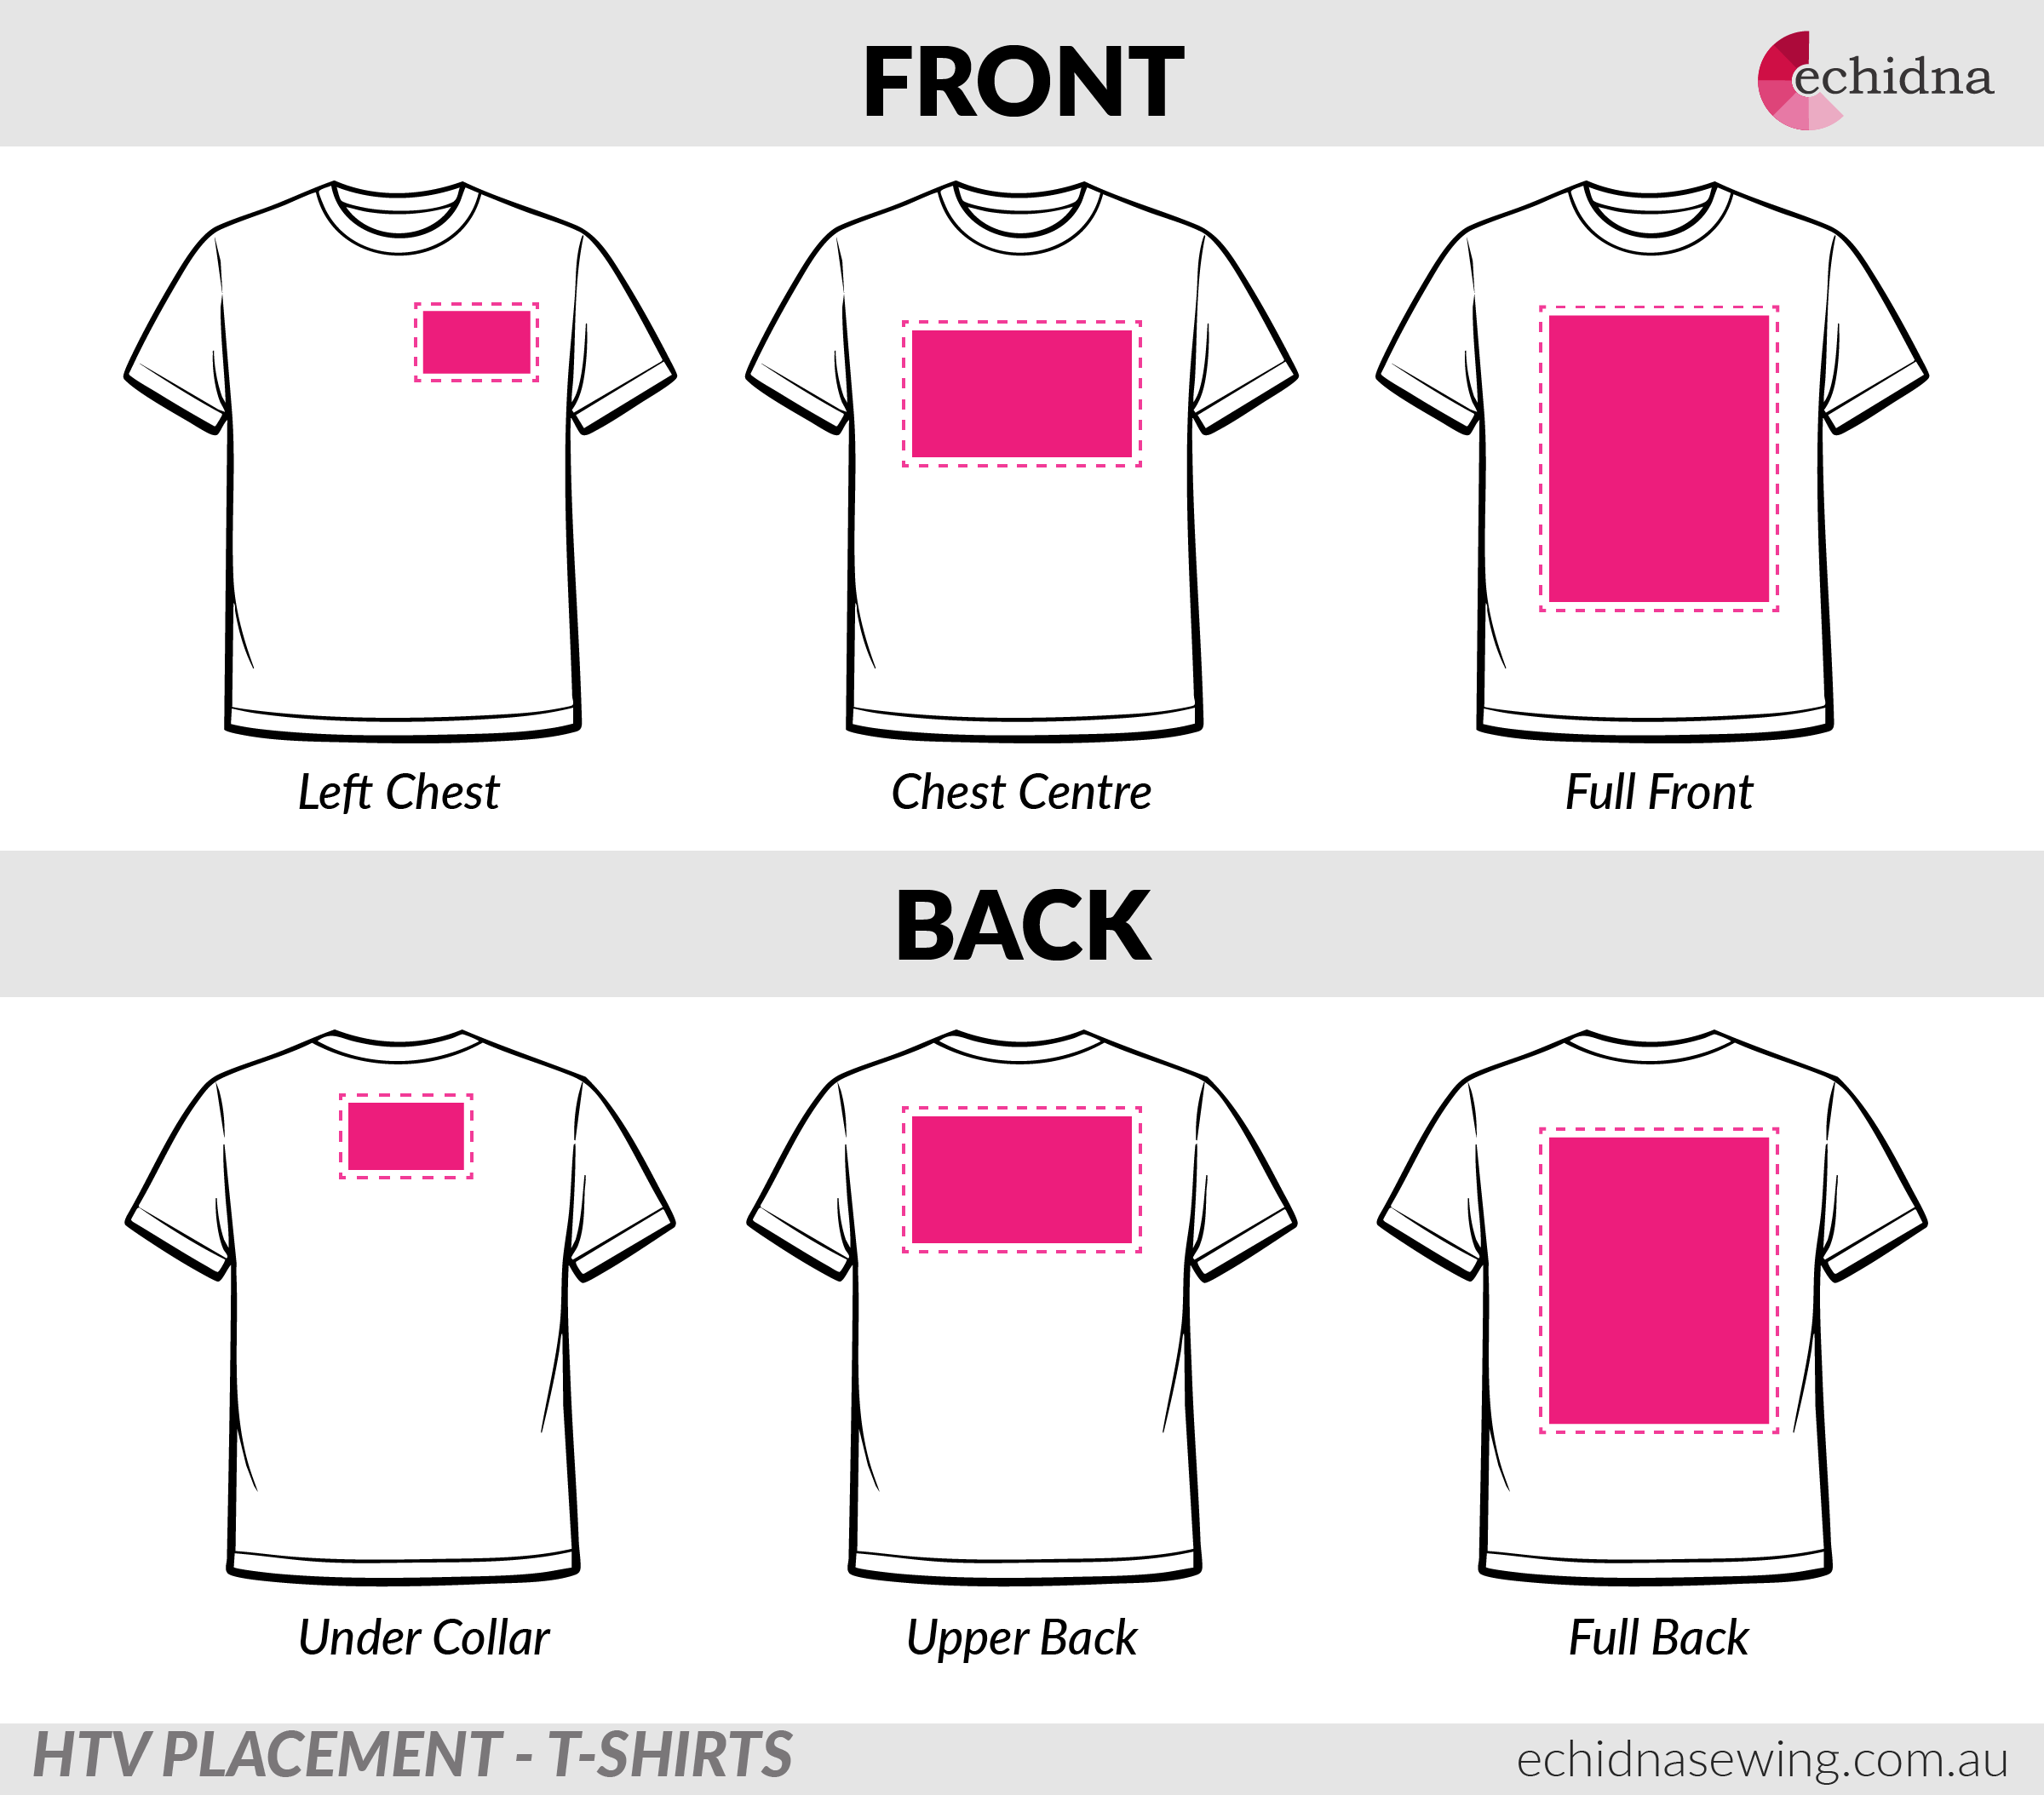
- Left Chest
- Small logos or text
- Common for workwear and uniforms
- Centre Chest
- Positioned just below the collar
- Best for logos, quotes, and feature designs
- Full Front
- Larger statement designs
- Often used for bold graphics or promotional shirts
- Back (Under Collar, Upper or Full)
- Often paired with a left-chest front logo
- Great for team names, slogans, or numbers
HTV Design Sizes (Guide Only)
The size of your HTV design plays a big role in how balanced it looks on a finished t-shirt. These guidelines are a starting point, not strict rules, and should always be adjusted based on the design shape and the style of the shirt.
Design Width
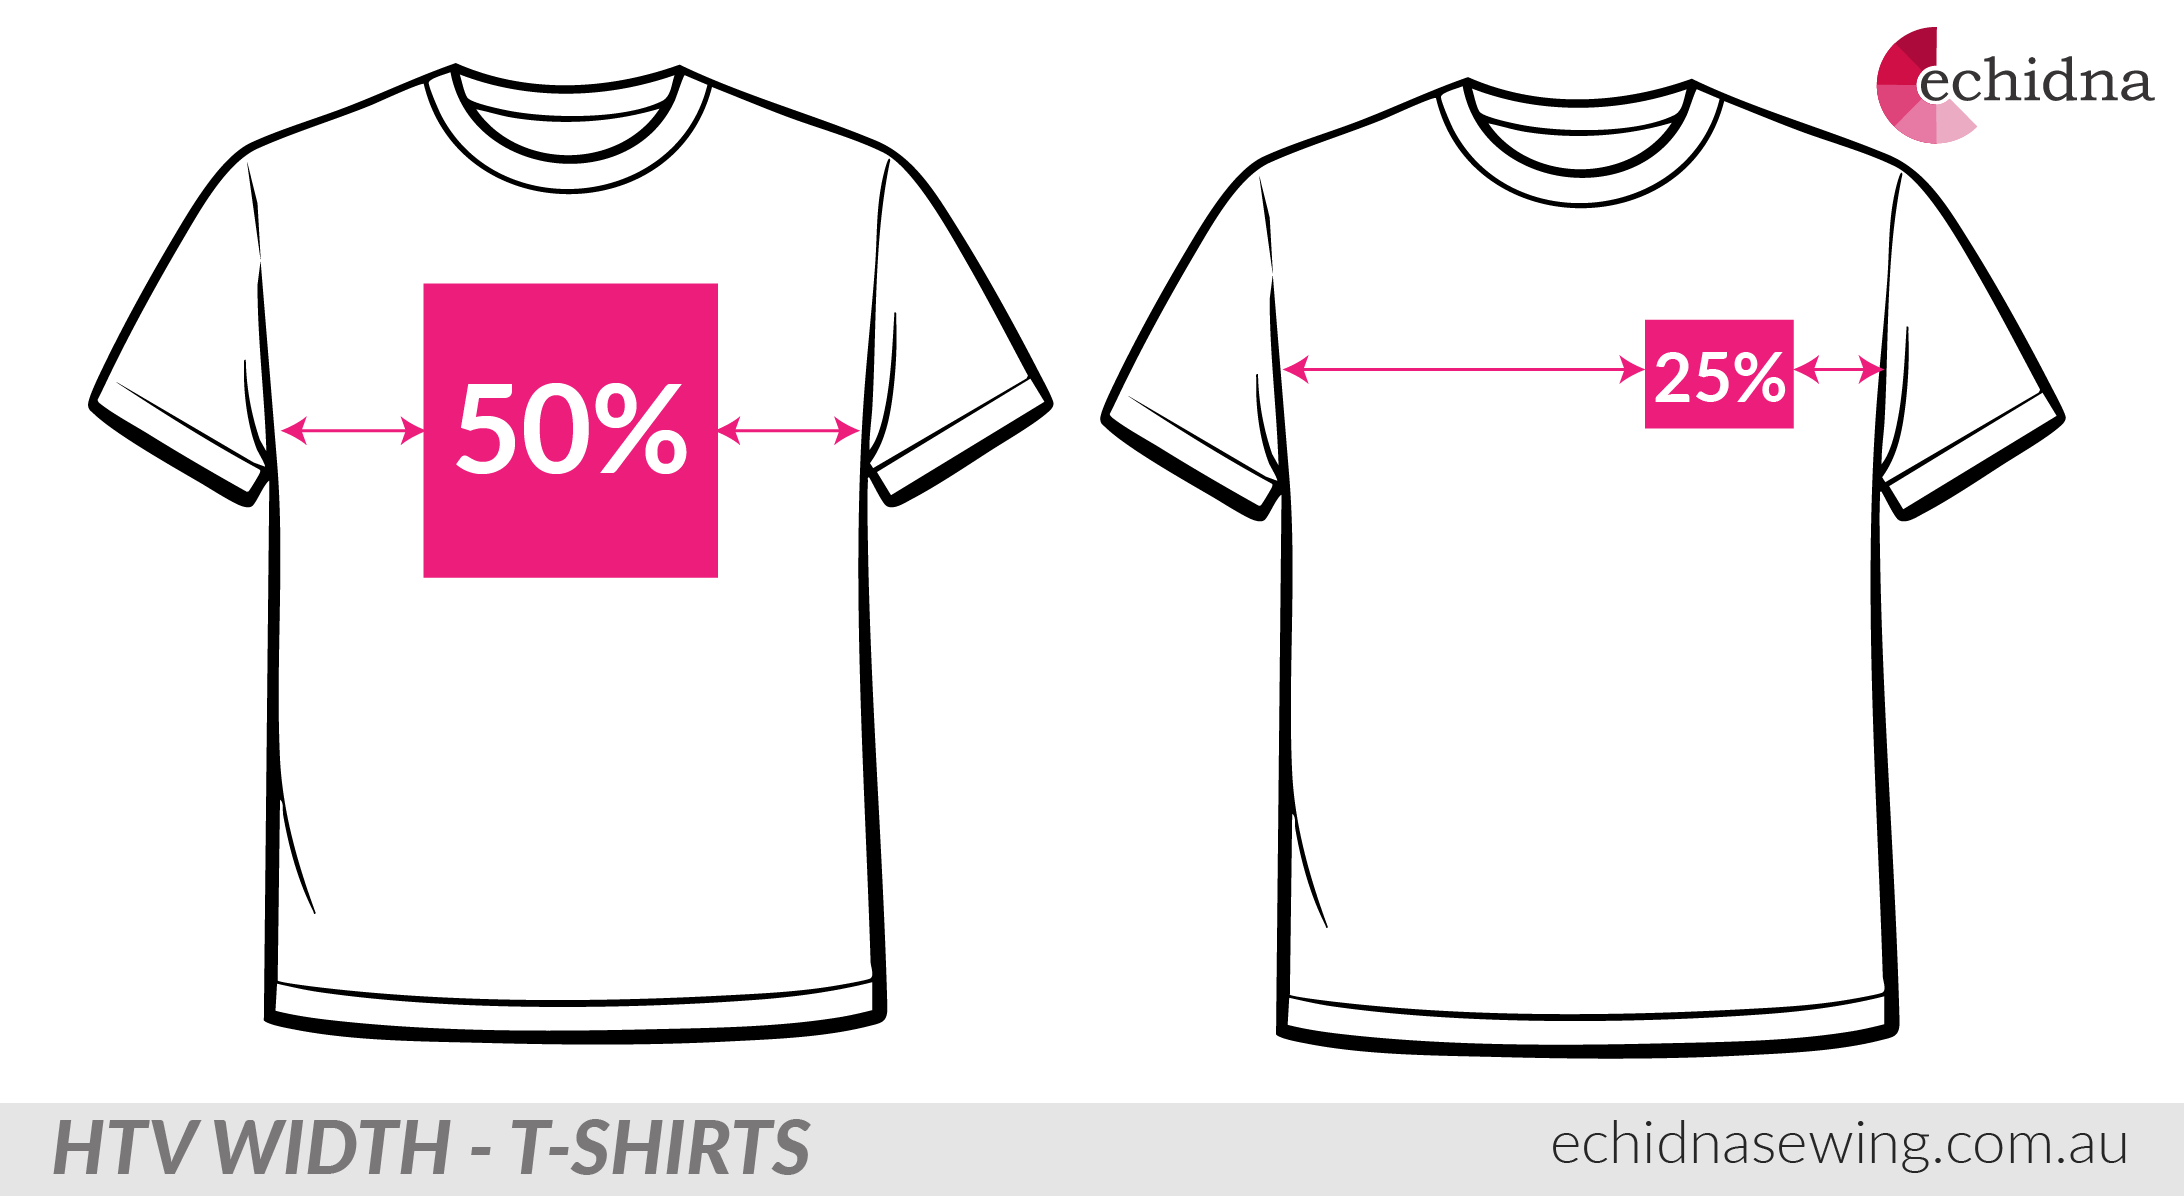
For most full-width front designs, a good rule of thumb is to size the design to around 50% of the width of the shirt, centred. This helps the design look balanced without overwhelming the garment.
For left-chest designs, a simple guideline is to size the design to around 25% of the width of the shirt. This keeps the design neat and proportional without stretching across the chest area.
Design Height (Square vs Rectangle)
We’ve talked about the width of a design, but height matters just as much.
Designs that are square, wide, or compact will sit differently on a shirt compared to designs that are tall and narrow. A long vertical design can appear smaller than expected, even if the width seems correct.
Tip: Tall, narrow designs may need to be slightly wider than square designs to look balanced on the shirt.
As with width, it’s always best to do a visual check before pressing to make sure the design feels well-proportioned once the shirt is worn.
Where Should the Design Sit Vertically?
Getting the vertical placement right is just as important as sizing your HTV design. A design placed too high can feel cramped, while one placed too low can look unbalanced.
Vertical Alignment Guidelines
As a general guide, position the top of your design based on the shirt style:
- Crew neck shirts: Start about 5-7 cm (2-3 inches) down from the bottom of the collar
- V-neck shirts: Place the design slightly lower so it sits comfortably below the V shape
- Kids’ shirts: Start around 2.5-5 cm (1-2 inches) down, depending on the shirt size
These measurements are a guide only and may need slight adjustment depending on the design shape and shirt style.
Centre Chest Placement Rule
To centre your design accurately:
- Lay the t-shirt flat on a table or pressing surface
- Fold the shirt vertically to find the centre, then smooth it flat
- Measure 5-7 cm down from the bottom of the collar
- Place the top of your design at that point
This helps ensure the design sits naturally on the chest and not too close to the neckline.
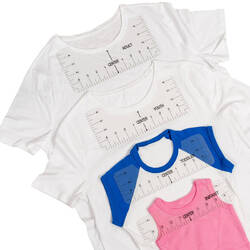
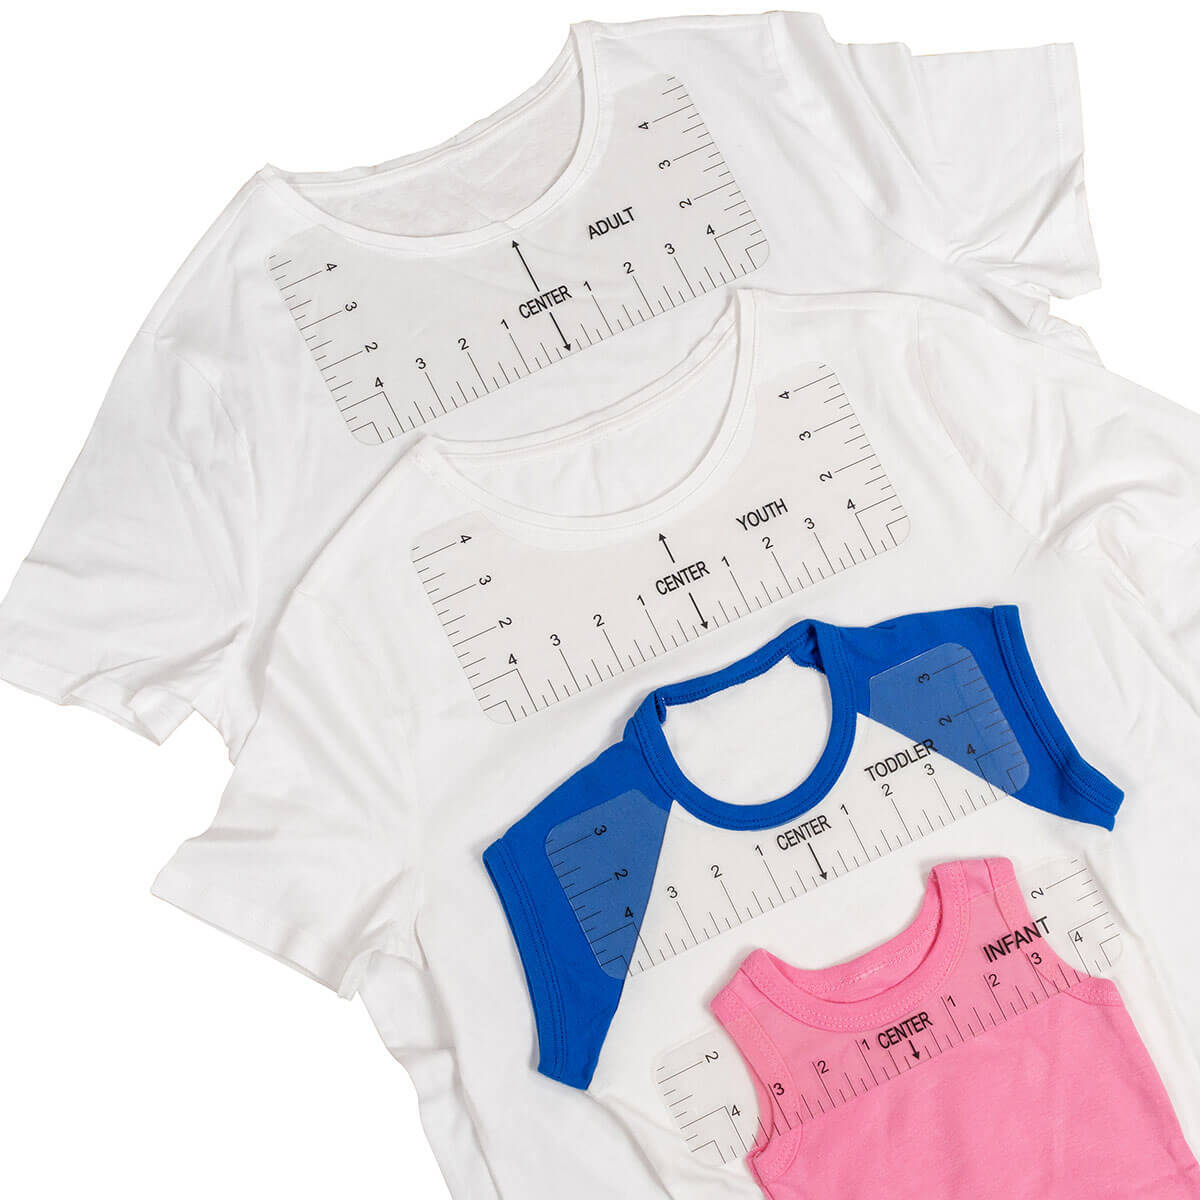
Using an Alignment Ruler
If you want a quick and consistent way to centre your HTV designs, a T-Shirt Alignment Ruler can be a handy tool. It sits against the collar and clearly marks the centre line, helping you position designs at the correct height without guesswork.
How to Use an Alignment Ruler with HTV
- Lay the t-shirt flat on your pressing surface
- Fold the shirt vertically to find the centre, then smooth it flat
- Place the alignment ruler against the collar seam
- Line up your HTV design with the centre markings
- Remove the ruler and heat press as normal
That’s it — no measuring tapes, no eyeballing, no redoing shirts.
How to Test Your HTV Design Before Pressing
Before committing with heat, always do a visual test.
Easy Testing Methods
- Cut the design from paper or cardstock
- Print the design at actual size
- Place it on the shirt and hold it up or try it on
Step back and ask:
- Does it look centred?
- Does it feel too big or too small?
- Does it sit comfortably when worn?
Measurements are helpful, but your eye is the best tool. If something looks off before pressing, it will still look off after pressing.
Once you understand sizing and placement basics, pressing HTV becomes quicker, more confident, and far more consistent.