How to Use Baking Paper to Layer Adhesive Vinyl Designs
Layering adhesive vinyl can be fiddly, especially when working with multi-colour or multi-piece designs. Fortunately, there’s a simple trick that makes alignment easier and reduces waste: baking paper. Yes, the same baking paper you use in the kitchen. Its semi-transparency makes it ideal for lining up layers before you commit to sticking anything down.
If you are looking for a way to achieve layered vinyl by using registration marks created in your design software you can look at our How To Layer Adhesive Vinyl Using Registration Marks article
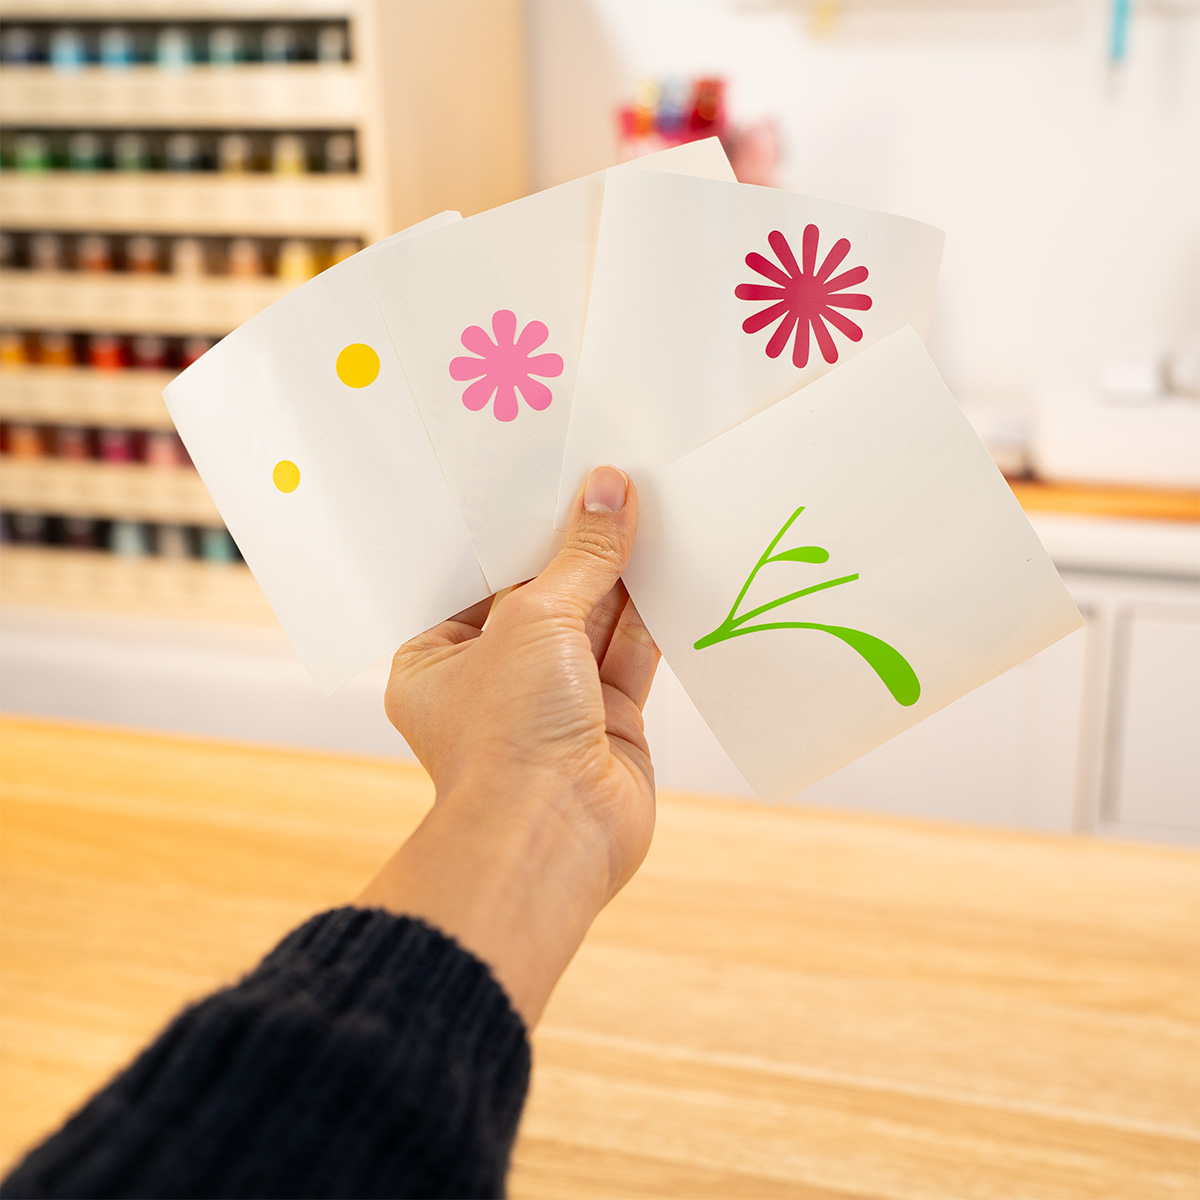
To get started, we'll be using the flower design available in our Hoppy Treasures SVG Designs Pack. This design is the perfect artwork for showcasing your newfound layering skills. Learn how to access your downloads from your Echidna account.
Why Use Baking Paper for Vinyl Layering?
When layering vinyl, precision is everything. Without proper alignment, your design might end up crooked or misaligned. Baking paper acts as a temporary barrier between the sticky transfer tape and the lower vinyl layers. It gives you the chance to preview the alignment and make small adjustments before anything is permanently stuck down.
What You’ll Need
- All colours/layers of your adhesive vinyl design cut
- Transfer tape
- Baking paper (non-waxed)
- Squeegee or scraper tool
Step-by-Step Guide
1. Cut and Weed All Vinyl Layers
Start by cutting and weeding each layer of your design. Make sure they’re all prepared and ready to go.
2. Apply Transfer Tape to the Top Layer
Take the topmost layer and apply transfer tape over it. Use a scraper to press the tape firmly down so it lifts cleanly from the backing paper.
![]()
Tip: Make sure your transfer tape is large enough to cover the entire final design, not just the top layer, as it will eventually be used to lift and apply all the layers together.
3. Remove the Backing Paper
Flip the design over and gently peel away the backing paper. You’ll be left with the vinyl on the transfer tape.
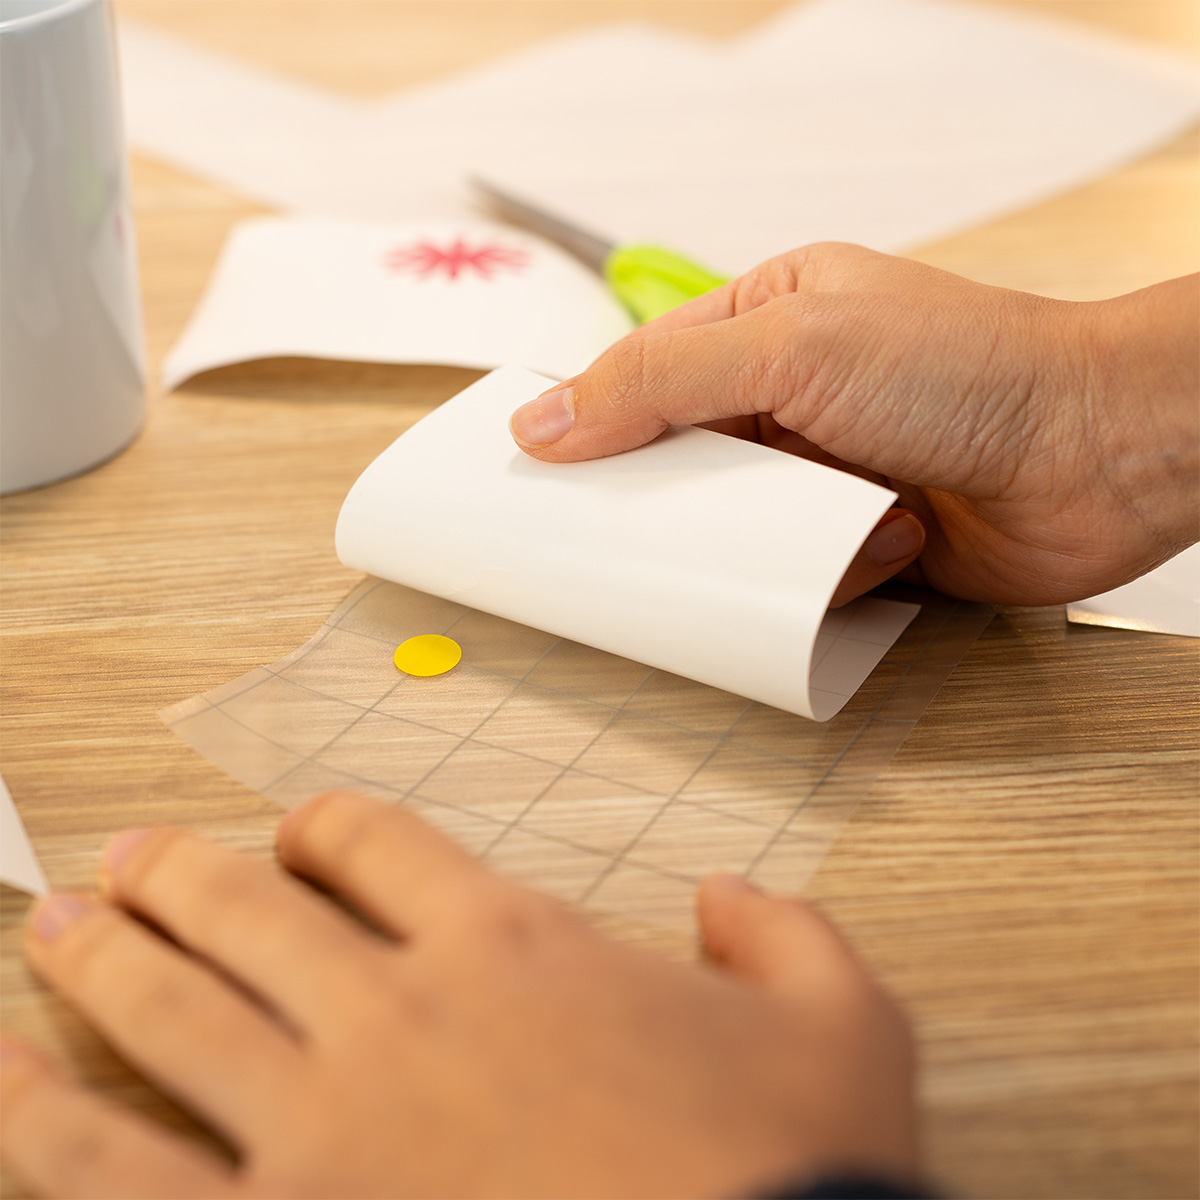
4. Place Baking Paper Over the Next Design Layer
Lay a piece of baking paper on top of the second layer of your design, covering the majority of the adhesive vinyl but leaving a small section exposed along one edge. This exposed part will help you tack the top layer in place for alignment onto the layer below.
Tip: Trim the baking paper so it’s easy to handle but large enough to cover most of the adhesive area of your total design.
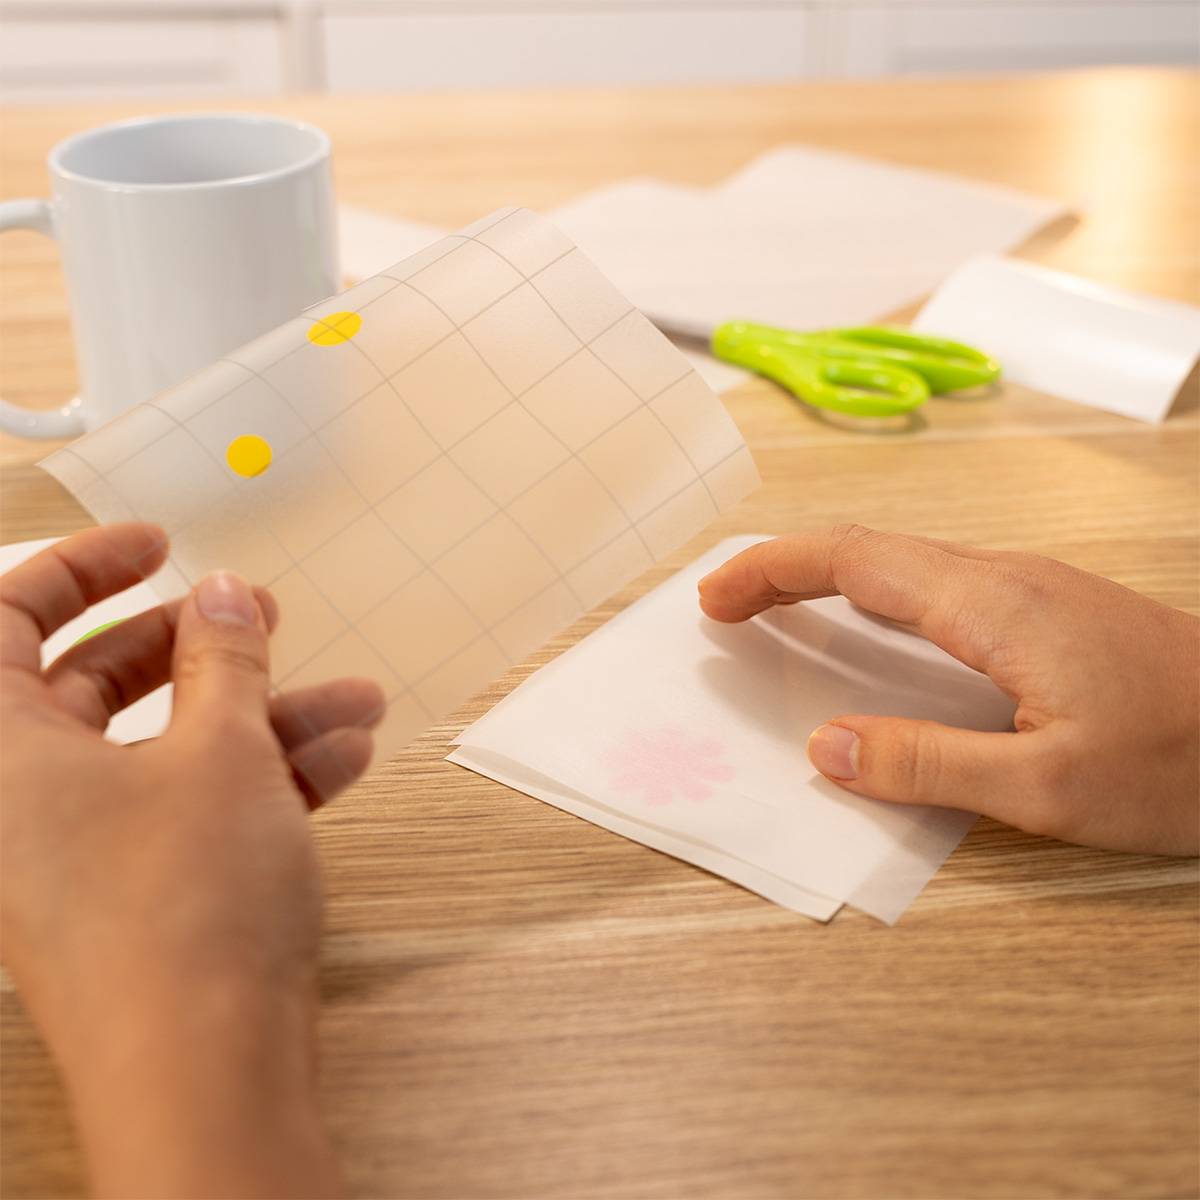
5. Align with the Second Vinyl Layer
Place your second vinyl layer (still on its backing) sticky side up on your workspace. Use the semi-transparent baking paper to position the top layer accurately. Once it’s aligned, press down the small exposed section to tack it into place.
Tip:If the backing paper on the lower vinyl layer doesn't reach far enough to meet the exposed section of the top layer, you can temporarily extend it by taping on a scrap piece of backing paper or baking paper. This gives you a surface to align and tack the vinyl onto before removing the baking paper and pressing the full layer into place.

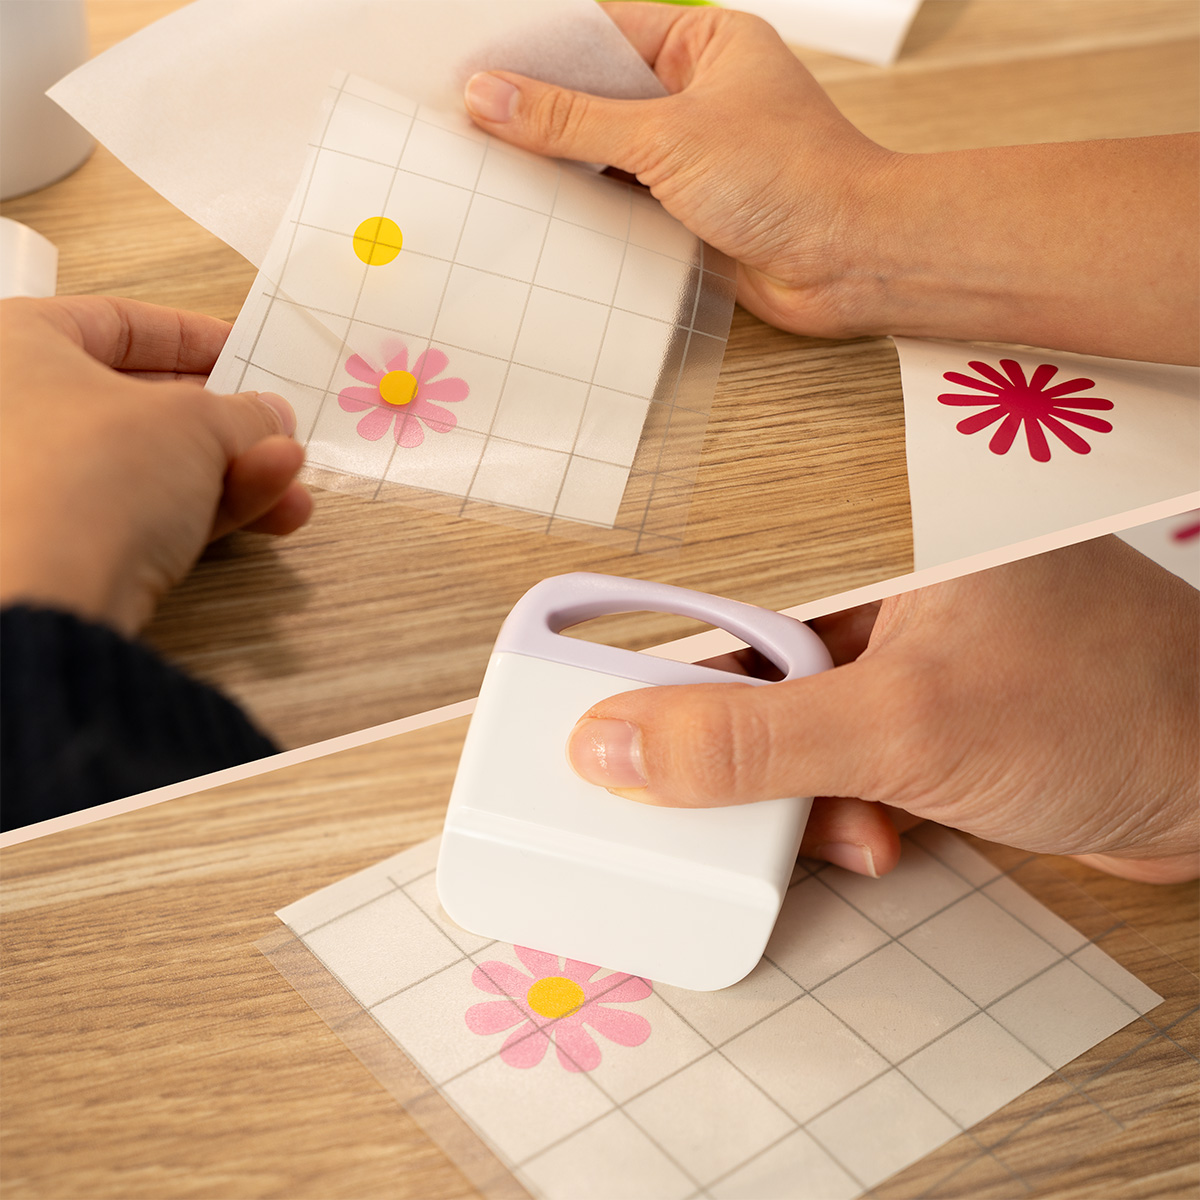
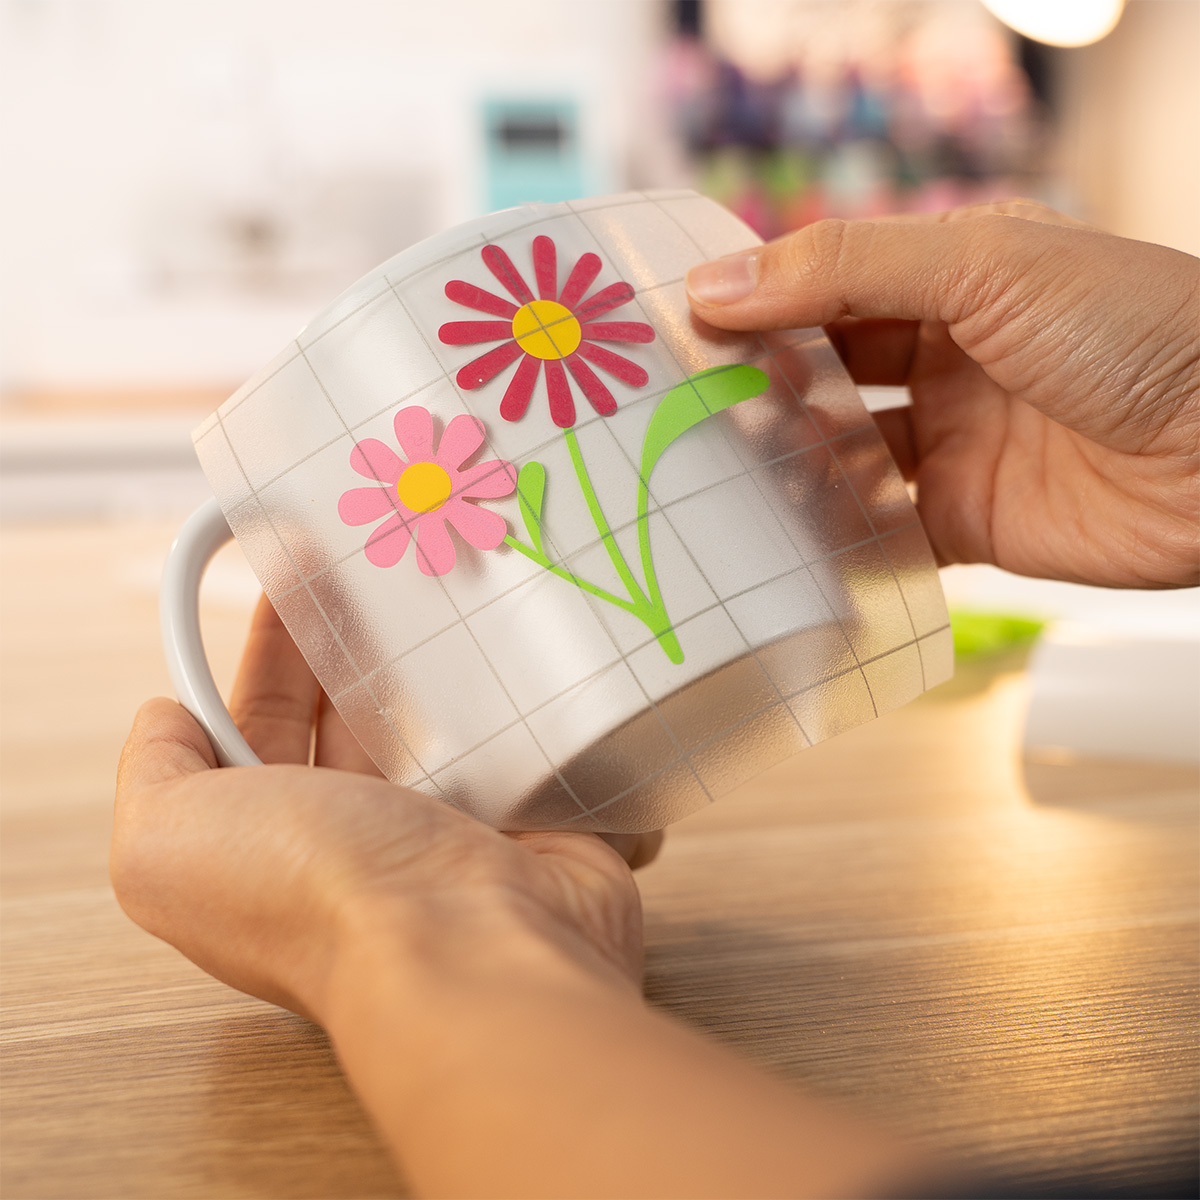
6. Remove Baking Paper and Stick
Slowly slide the baking paper out from underneath while pressing down the transfer tape. This allows the top vinyl layer to stick smoothly and cleanly onto the second layer.
Use your scraper to burnish the layers together and ensure good adhesion.
7. Repeat for Additional Layers
Continue this process for each additional layer, always working from top to bottom. Each time, use transfer tape, baking paper, and careful alignment for accurate placement. Once all your layers are in place, carefully remove the last backing paper, leaving the vinyl neatly adhered to the transfer sheet.
Final Application
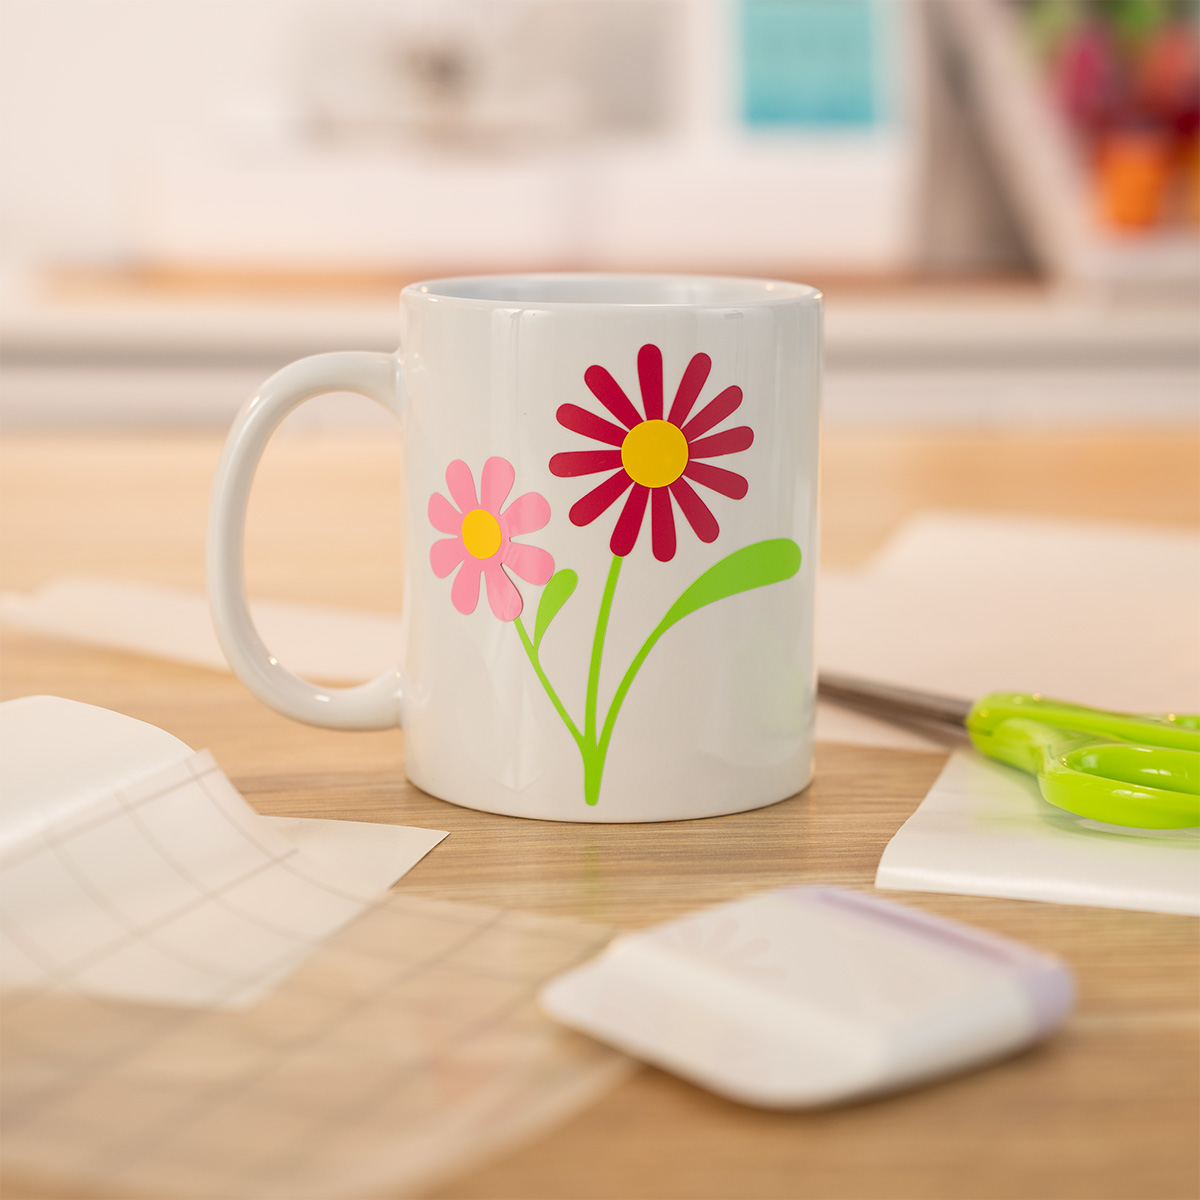
Once all your layers are assembled, apply the completed design to your final surface, whether it’s a tumbler, a sign, or a wall decal, using your usual method.
Pro Tips
If your baking paper isn’t transparent enough, try using a lightbox or holding your design up to a window. Work slowly and carefully, especially on detailed or multi-part designs. Practice on a simple two-layer design before attempting more complex projects.
Using baking paper is a simple but highly effective technique for layering adhesive vinyl. It gives you greater control and helps you avoid costly mistakes by letting you preview and adjust your placement before committing. Whether you’re working on a multi-colour decal or a layered monogram, this method makes the process more manageable and professional-looking.


