All Articles
How To Layer Adhesive Vinyl Using Registration Marks
Author: Nicole H Date Posted:27 September 2023
Are you ready to take your crafting projects to the next level? If you've been working with adhesive vinyl and want to learn how to create professional-looking layered designs, you've come to the right place. In this guide, we'll walk you through the process of layering adhesive vinyl and show you how to add registration marks in CanvasWorkspace, making it easier than ever to line up your designs perfectly.
If you are looking for a way to achieve layered vinyl without the use of CanvasWorkspace you simply add registration marks in a similar way directly on the machine or you can look at How to use baking paper to assist in layering vinyl.
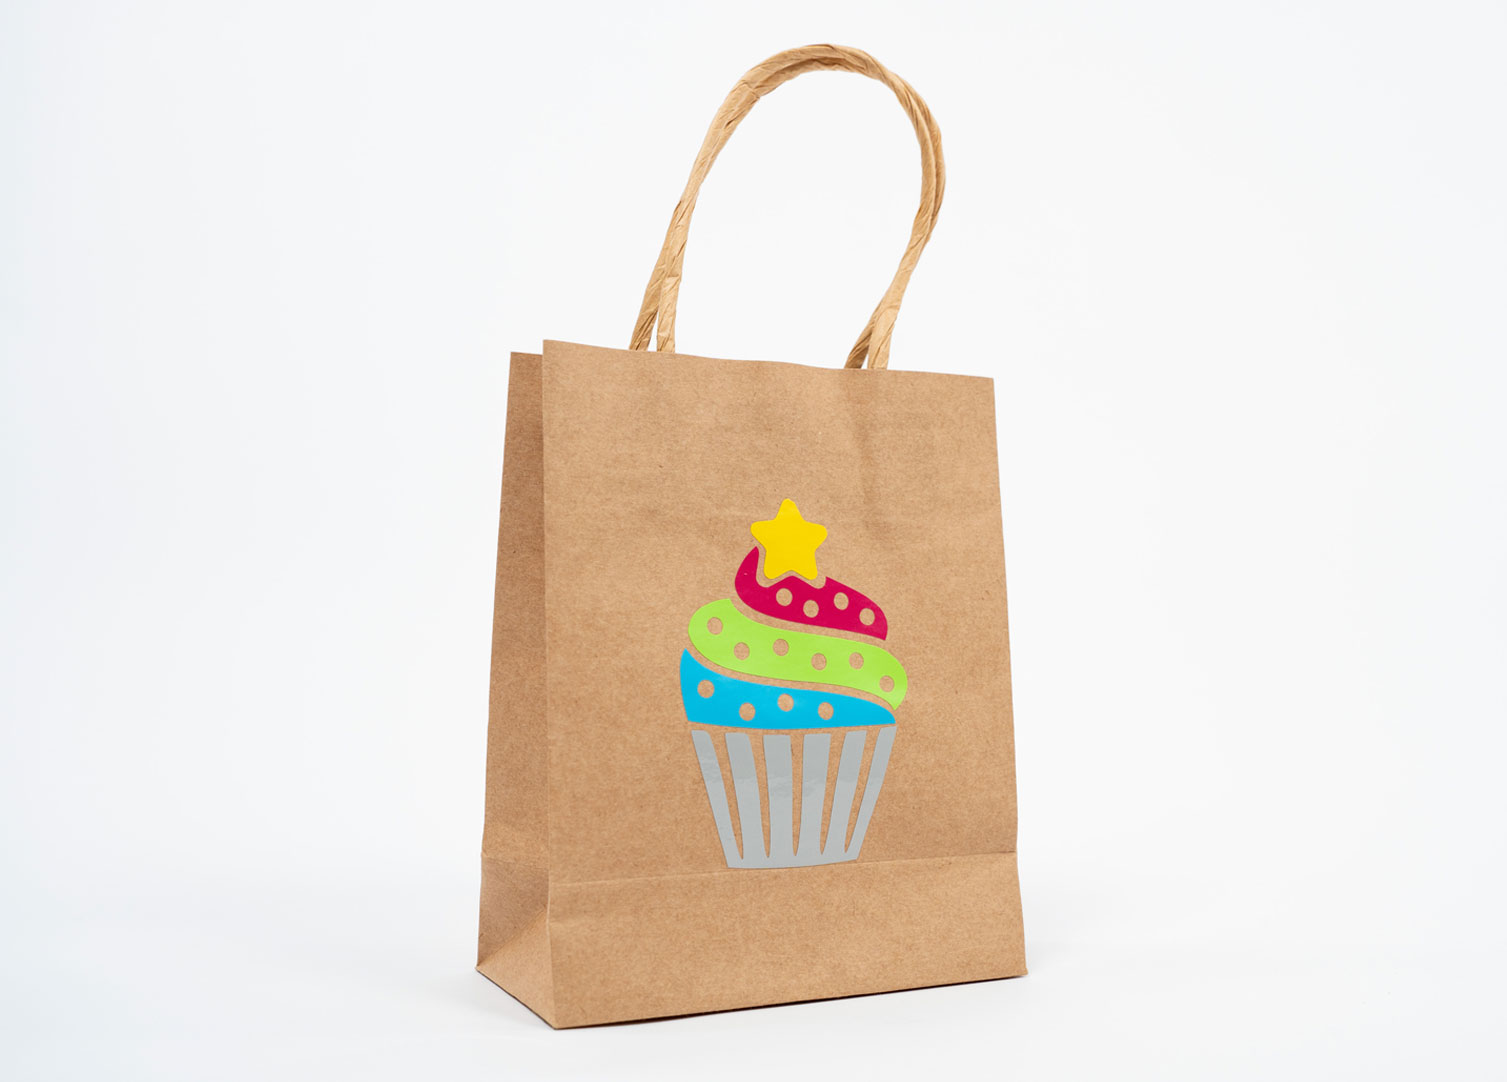
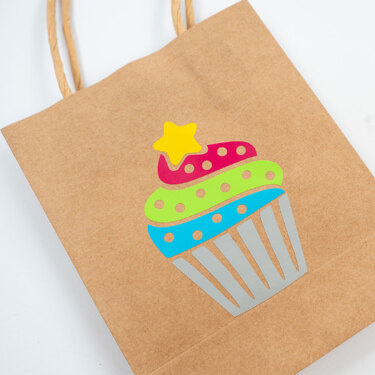
To get started, we'll be using the cupcake design available in our FREE SVG pack 1. This design will serve as the perfect artwork for showcasing your newfound layering skills. It is also important to understand that not all SVGs can be split into different colours, this is due to the way the designer of the SVG has saved it and is often intentional to stop people altering the file. We will cover how to check to see if the SVG has layers during this tutorial which is an indication that it can be split into multiple colours. Learn how to access your downloads from your Echidna account.
Let's get started. Firstly we want to open a new project in the desktop version of CanvasWorkspace.
Then we want to import the cupcake SVG. Do this by clicking on the SVG symbol located in the left menu and select the desired SVG from your computer.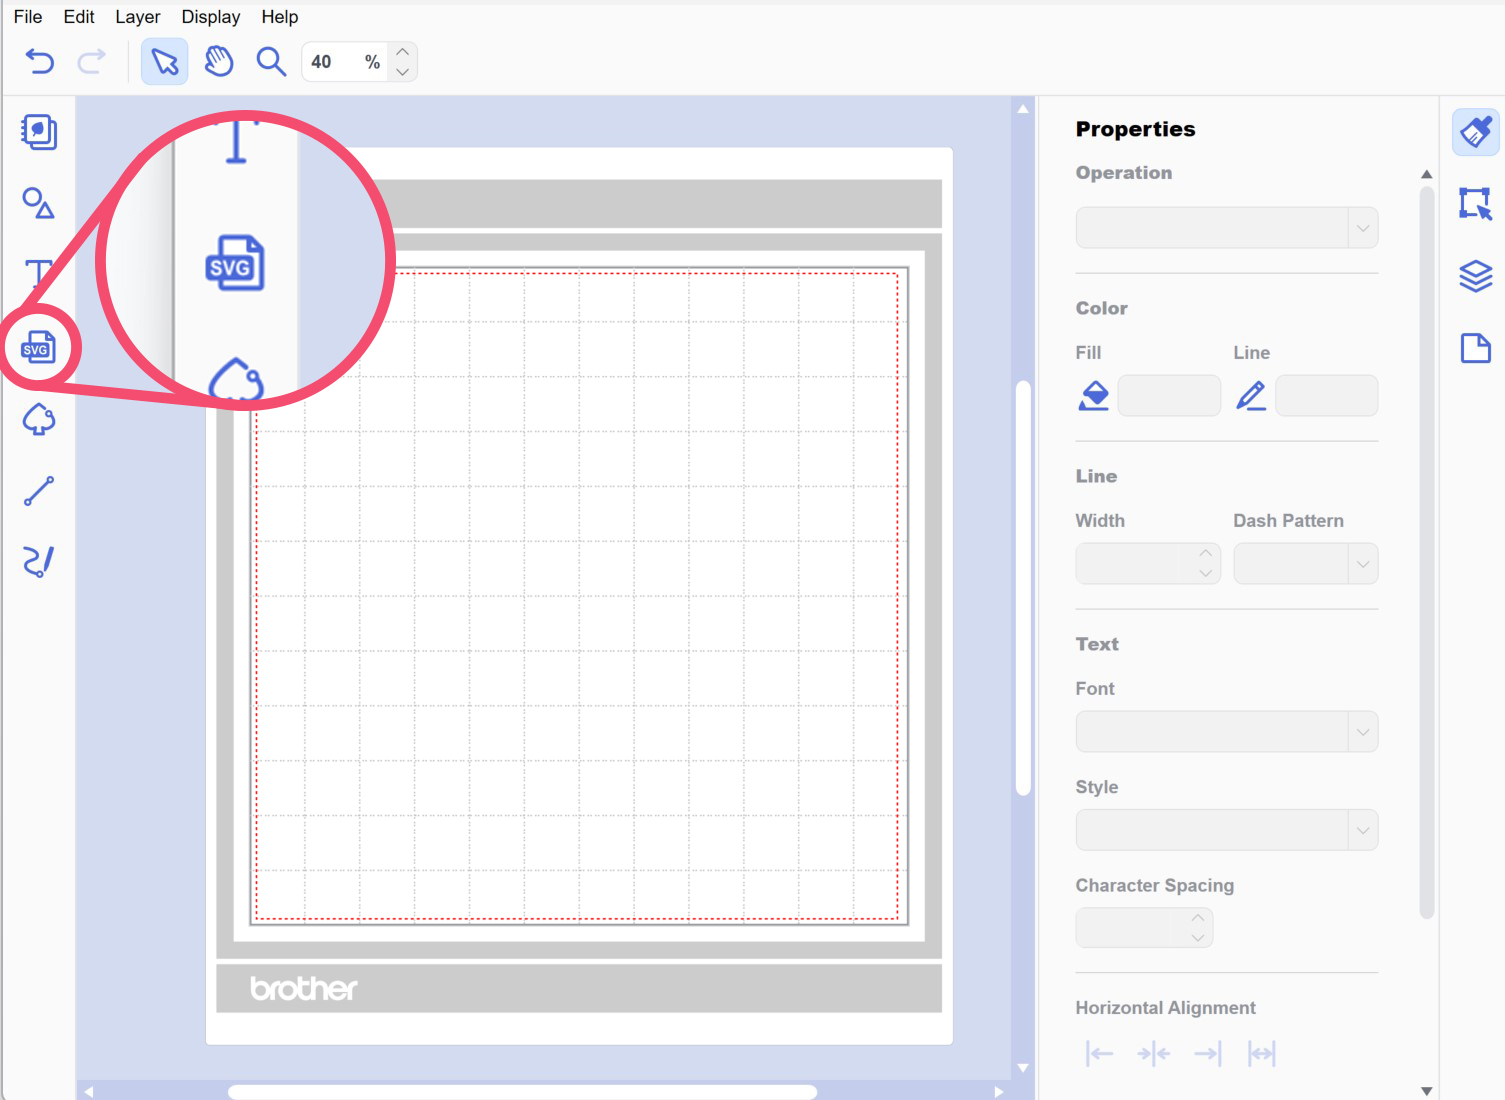
The SVG will now be placed in the top left corner of the project artboard. 
Next we want to check that the design does have layers, meaning it is possible for us to split it into different colours. Do this by clicking on the layers icon on the right side of the screen.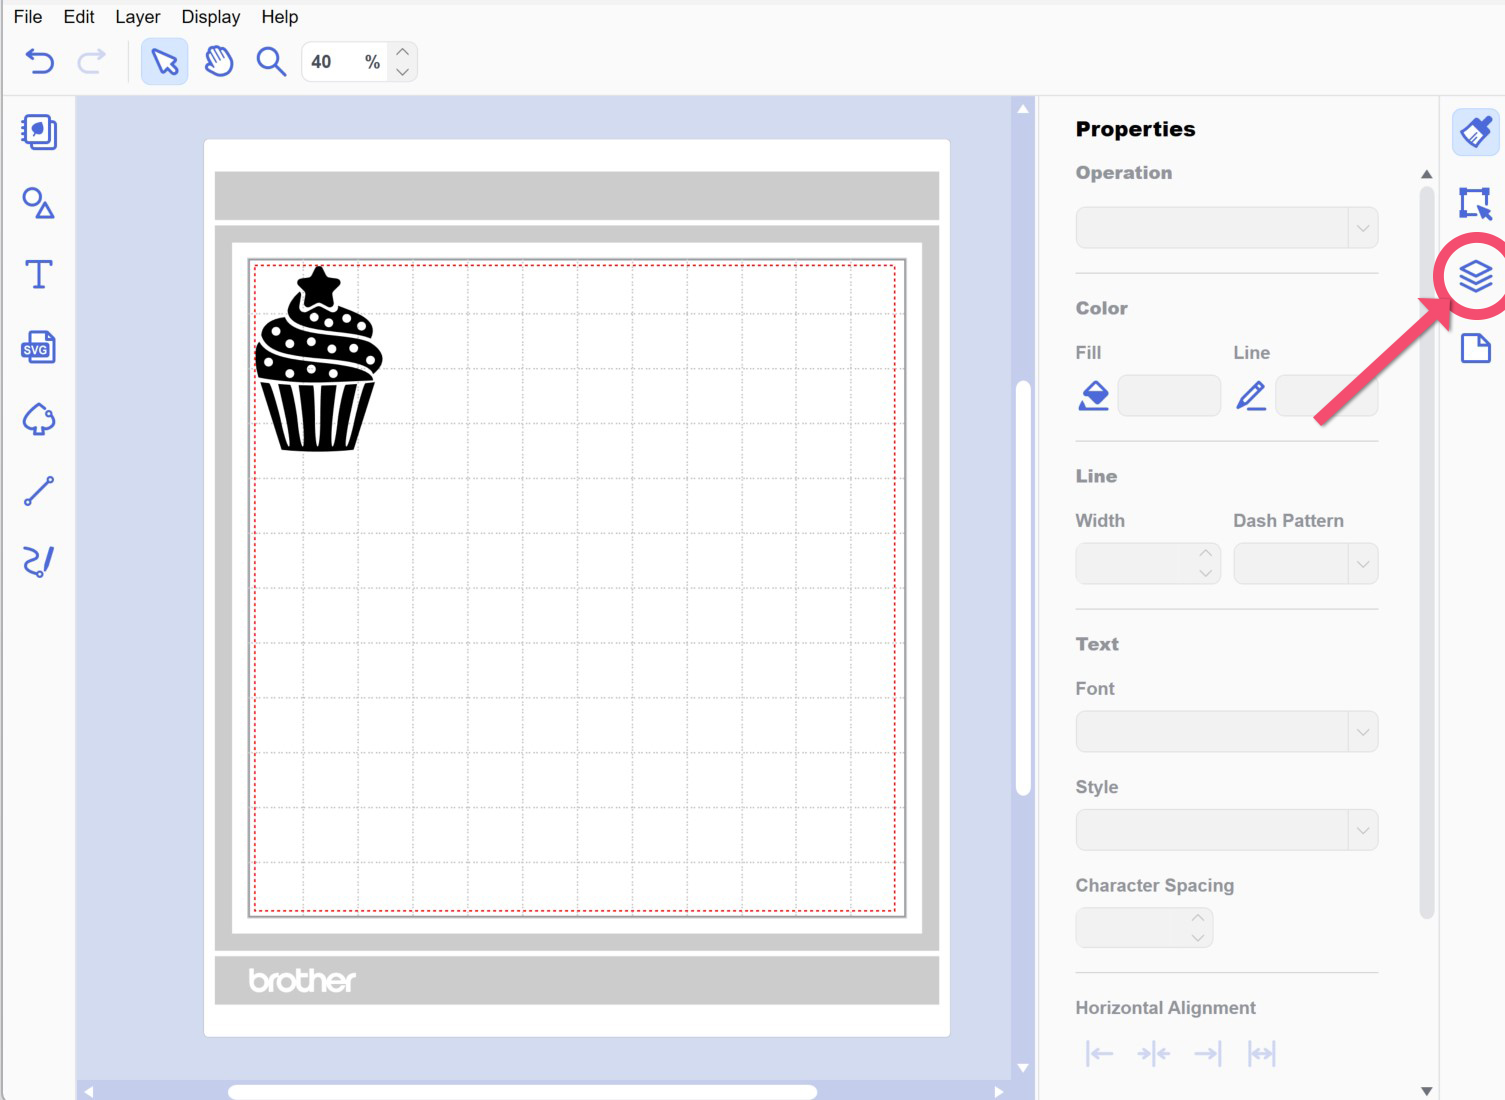
If you see multiple layers then this means that it is possible to create this particular design with multiple colours. If you only see one layer then unfortunately that design cannot be split into different colours.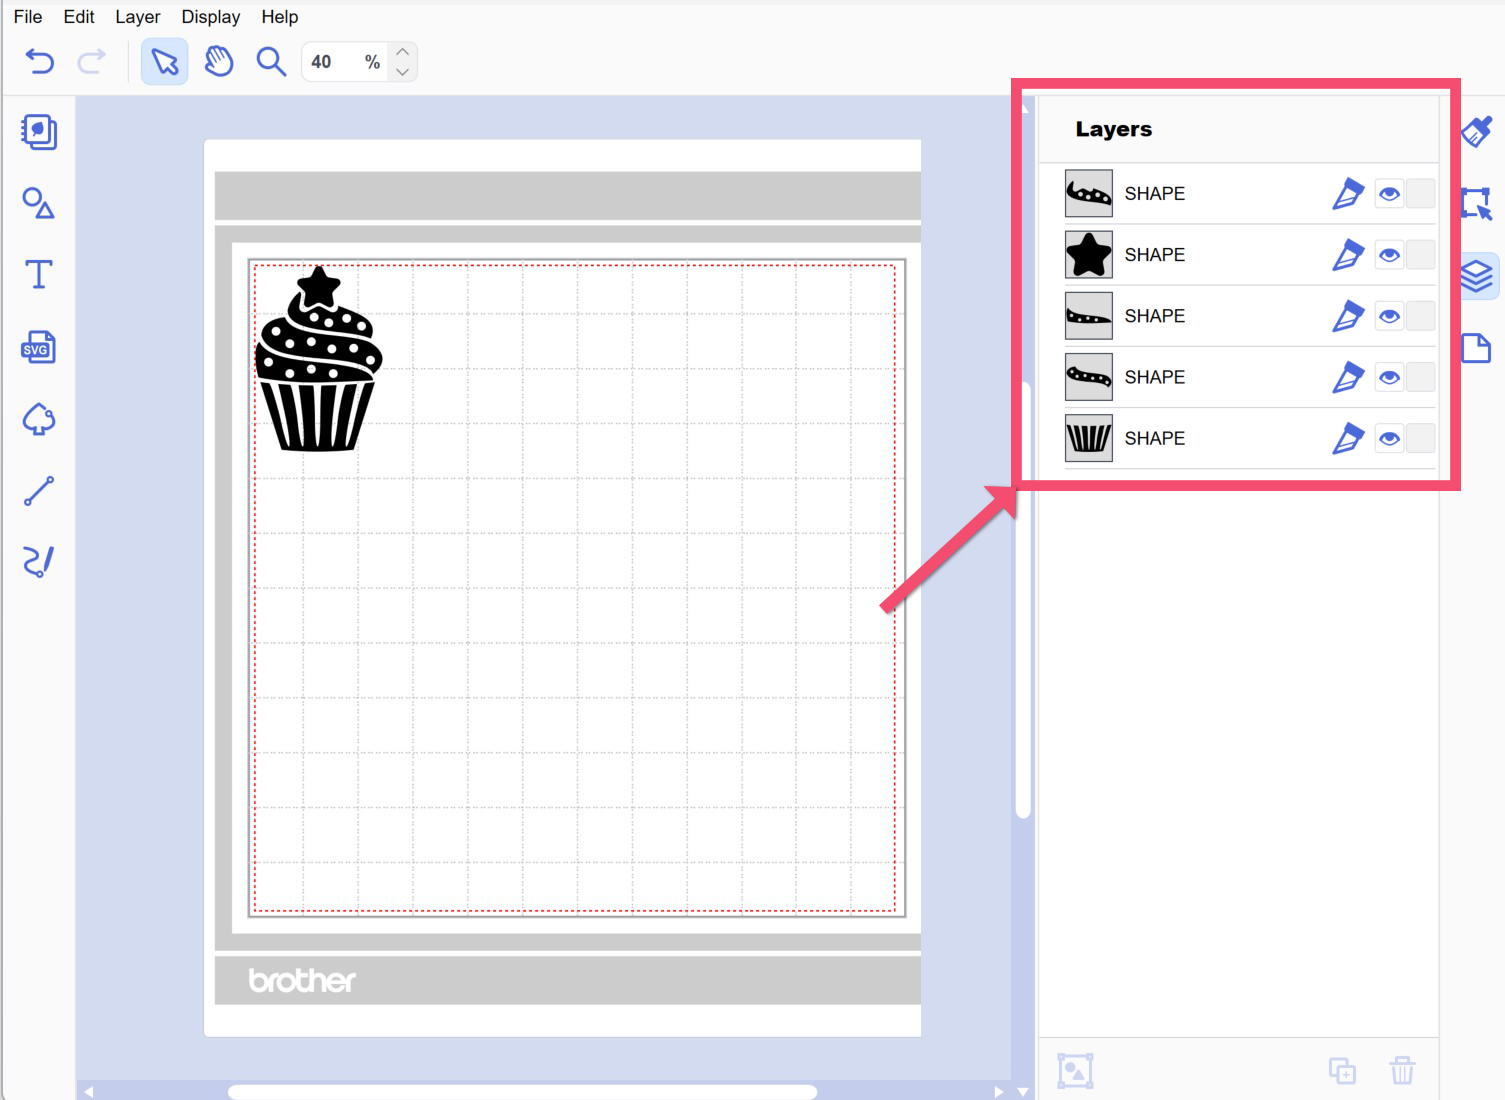
Our cupcake design has 5 layers, which means we can create this design so that it is split into 5 different colours. To achieve this we essentially want to duplicate the design 5 times and add registration marks to ensure that the multiple layers of vinyl will align perfectly to create the whole image again.
Let’s start by highlighting the whole design and moving it 1” down and 1” to the right to make room for our registration marks. Do this by clicking using your mouse in the top left corner and dragging your mouse over the design to the bottom right. Once the design is highlighted click anywhere within the design and drag it using your mouse or move it using the arrow keys on your keyboard. 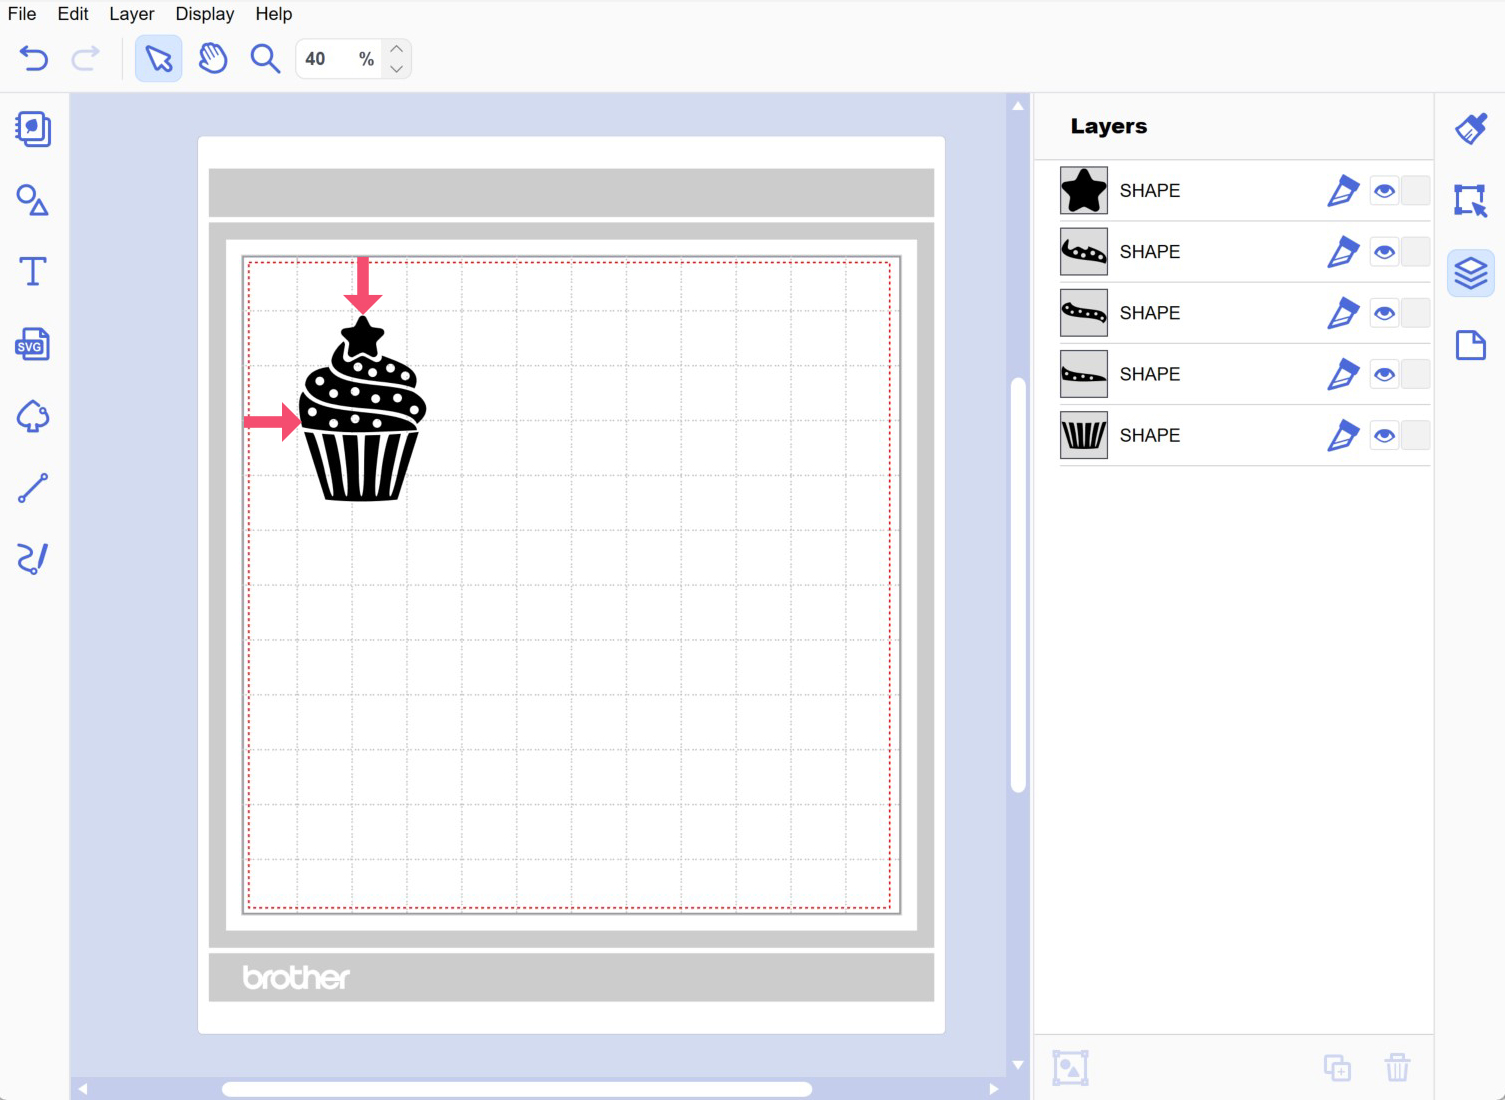
We now need to add a couple of small shapes to the design as our registration marks. We prefer to use triangles as there are 3 points to line up which means you are less likely to get the direction of your layers mixed up than say if you were using a circle. To add a triangle click on the shapes icon from the left menu. 
Scroll down and find the triangle shape and click on it to place it on the project artboard. 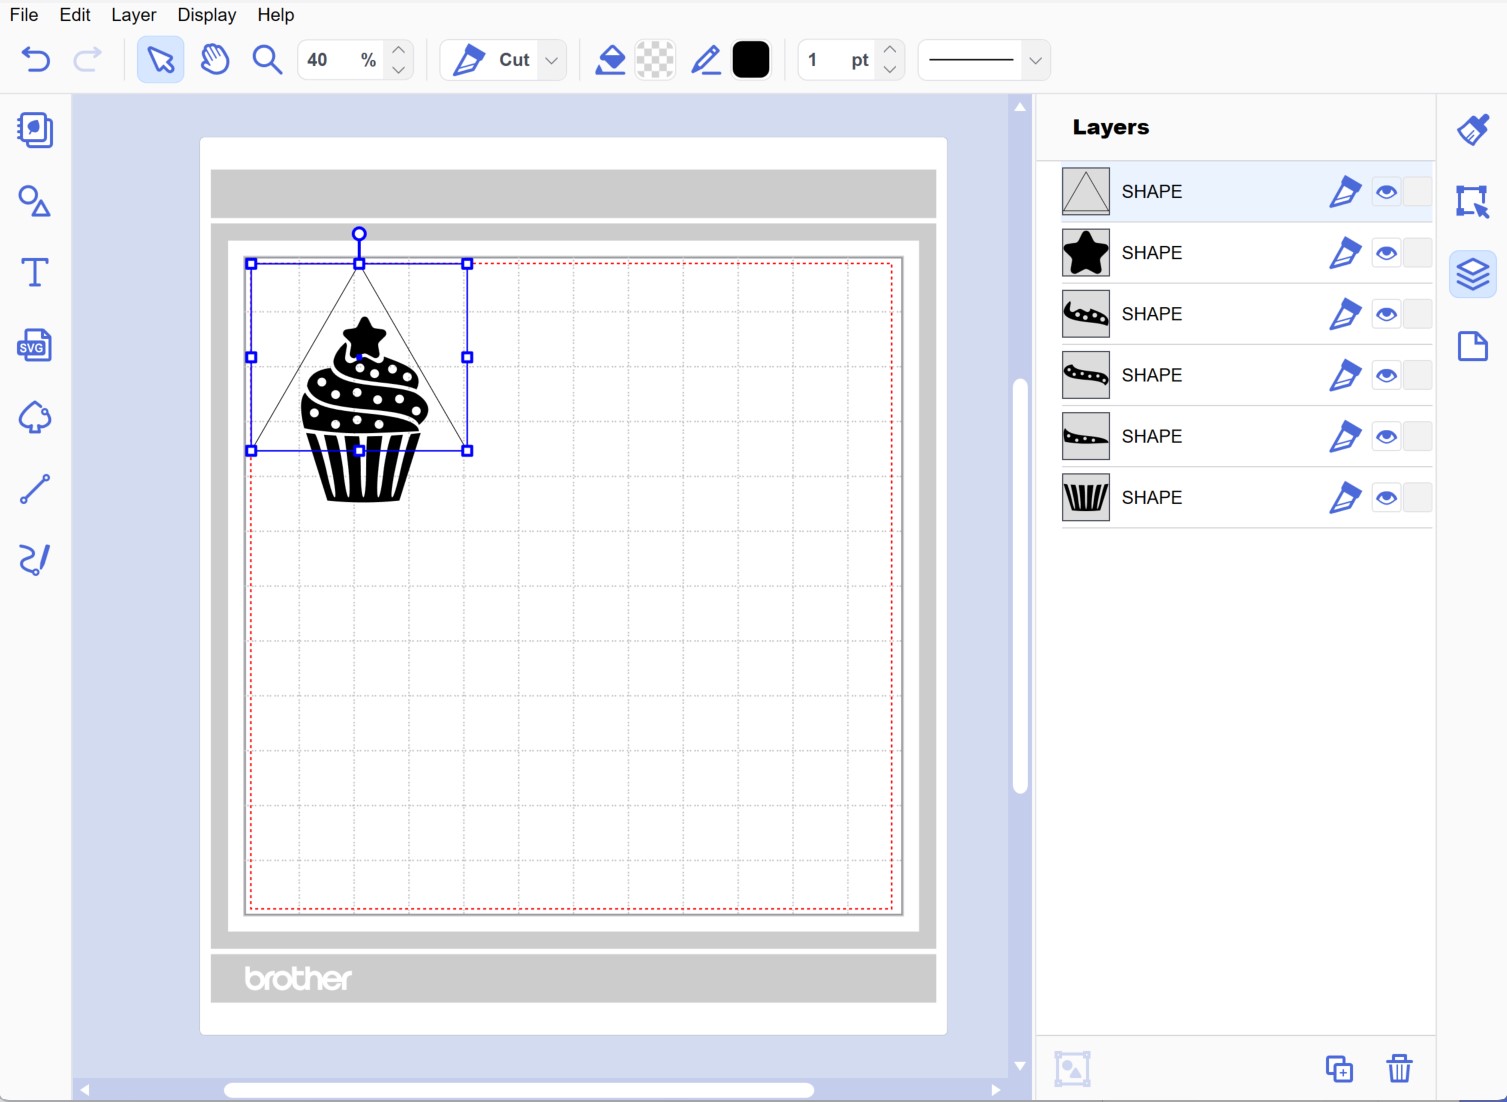
Next, we want to make the triangle smaller by clicking on the bottom right node and dragging it towards the top left. 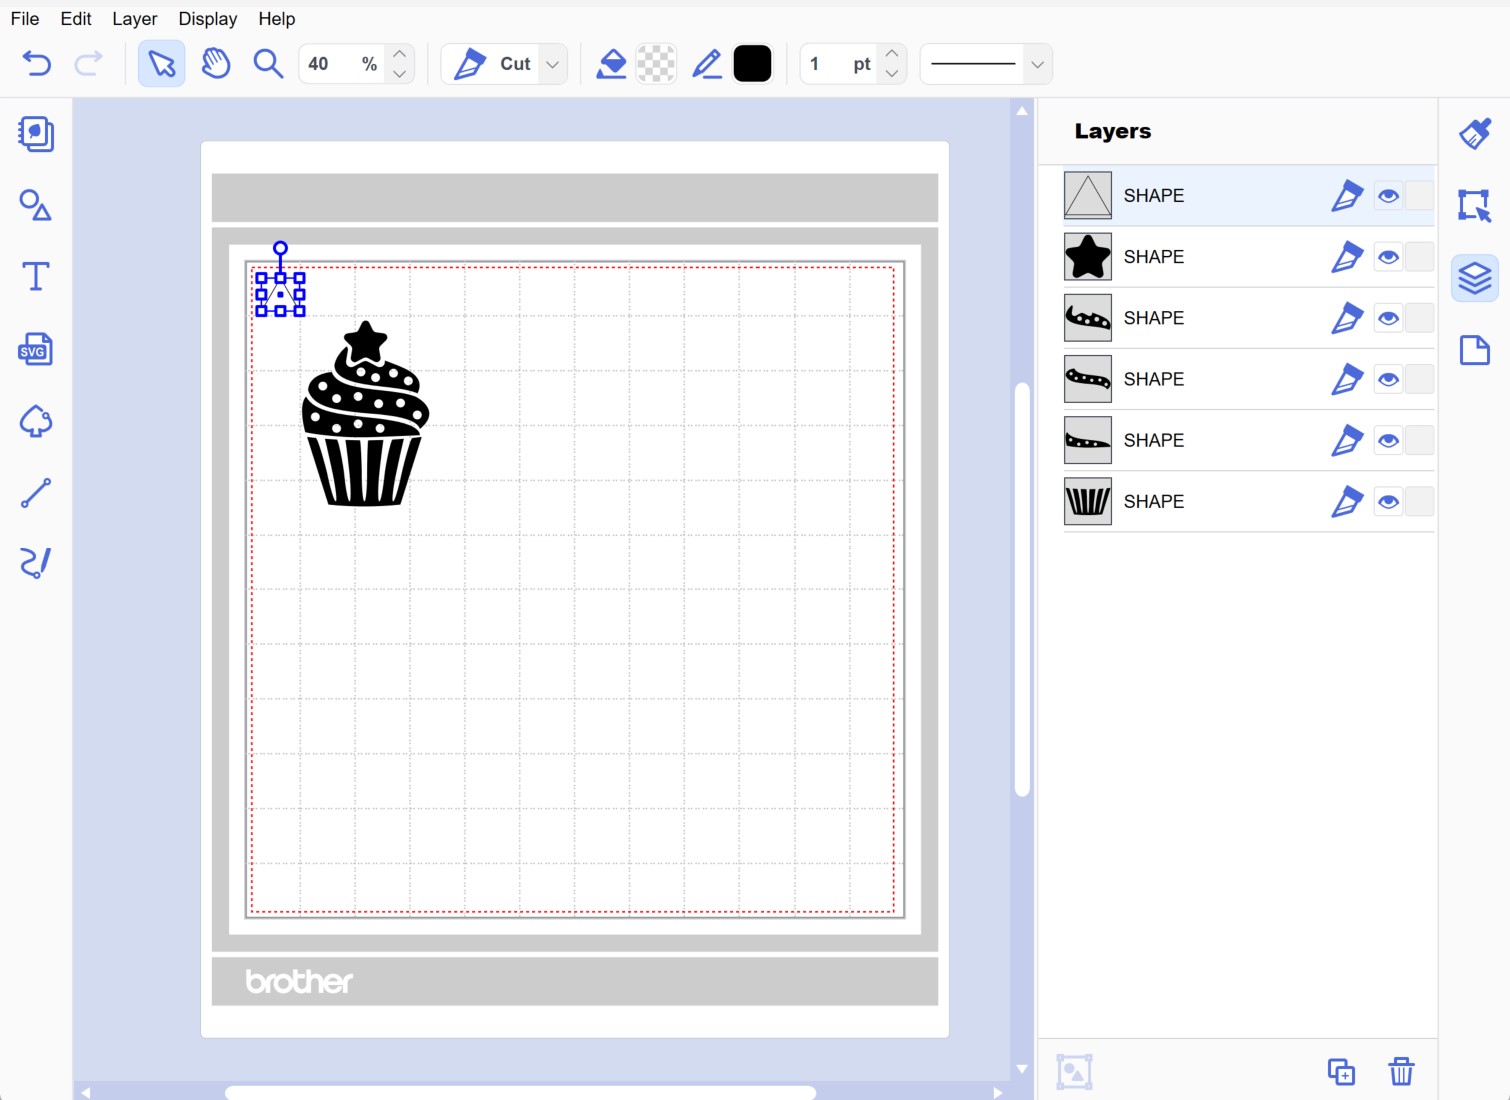
Duplicate the shape by selecting the triangle and either right click and copy and then right click and paste or Ctrl+C and Ctrl+V on your keyboard. We will duplicate 3 times so that we end up with 4 triangles for this particular design. You will find the more you get used to this process the more comfortable you will be using less triangles.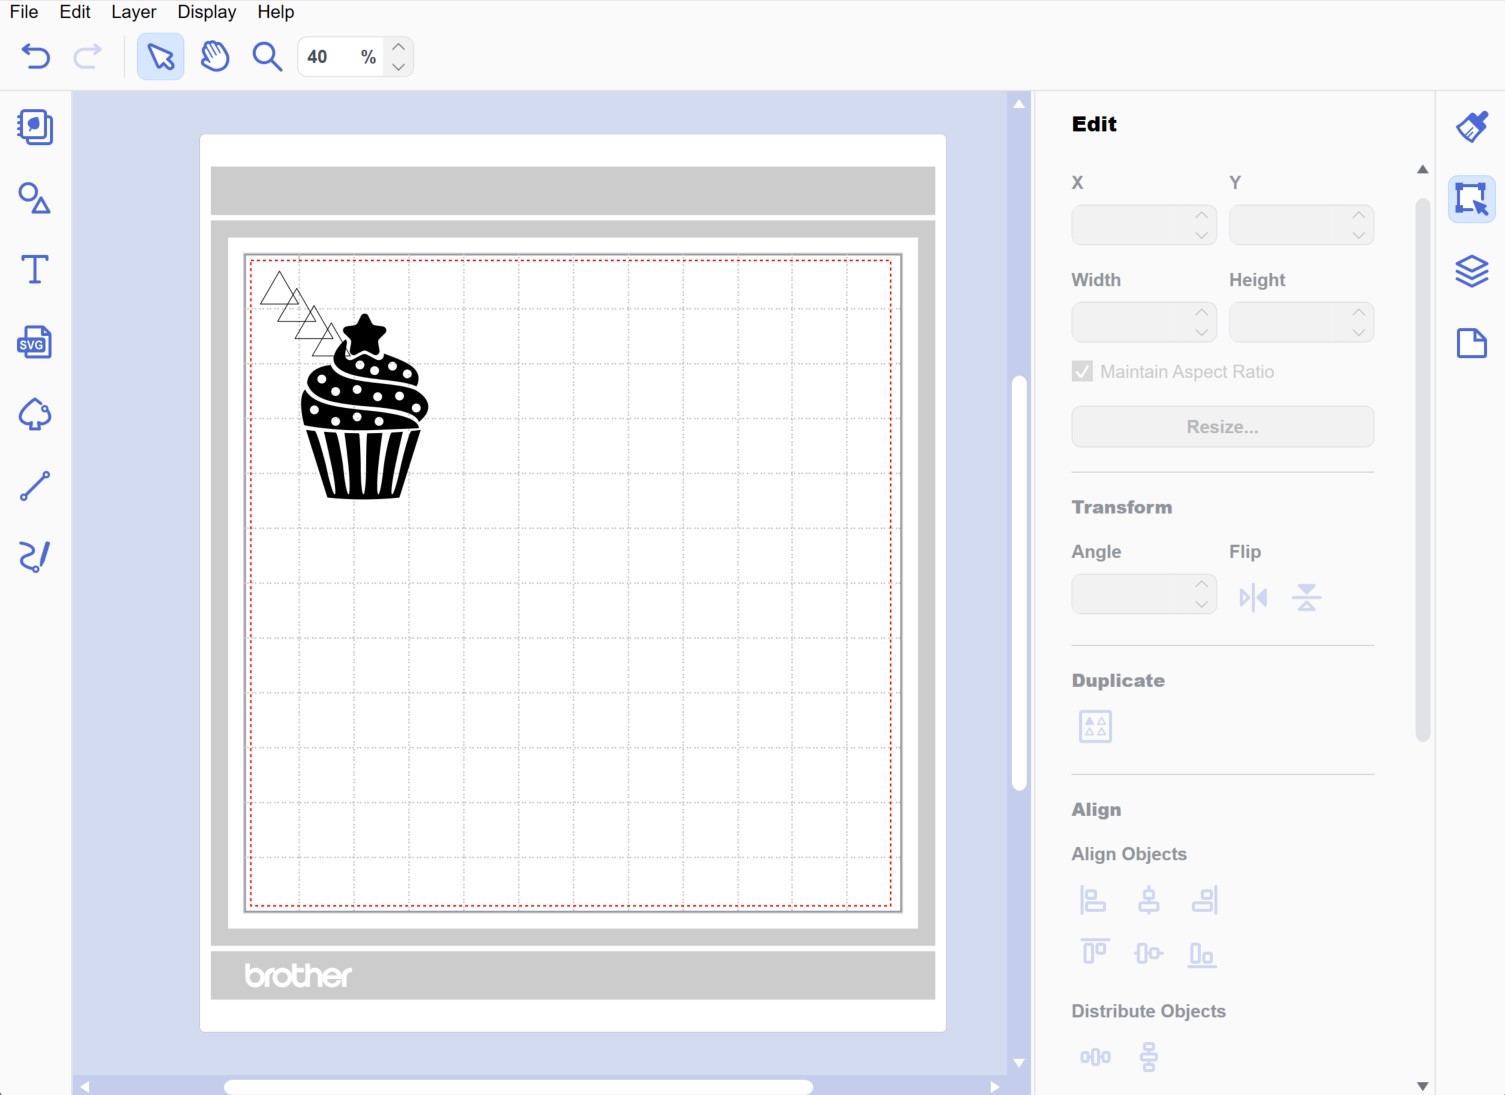
Position the triangles in each corner of the design making sure they sit outside of the design area.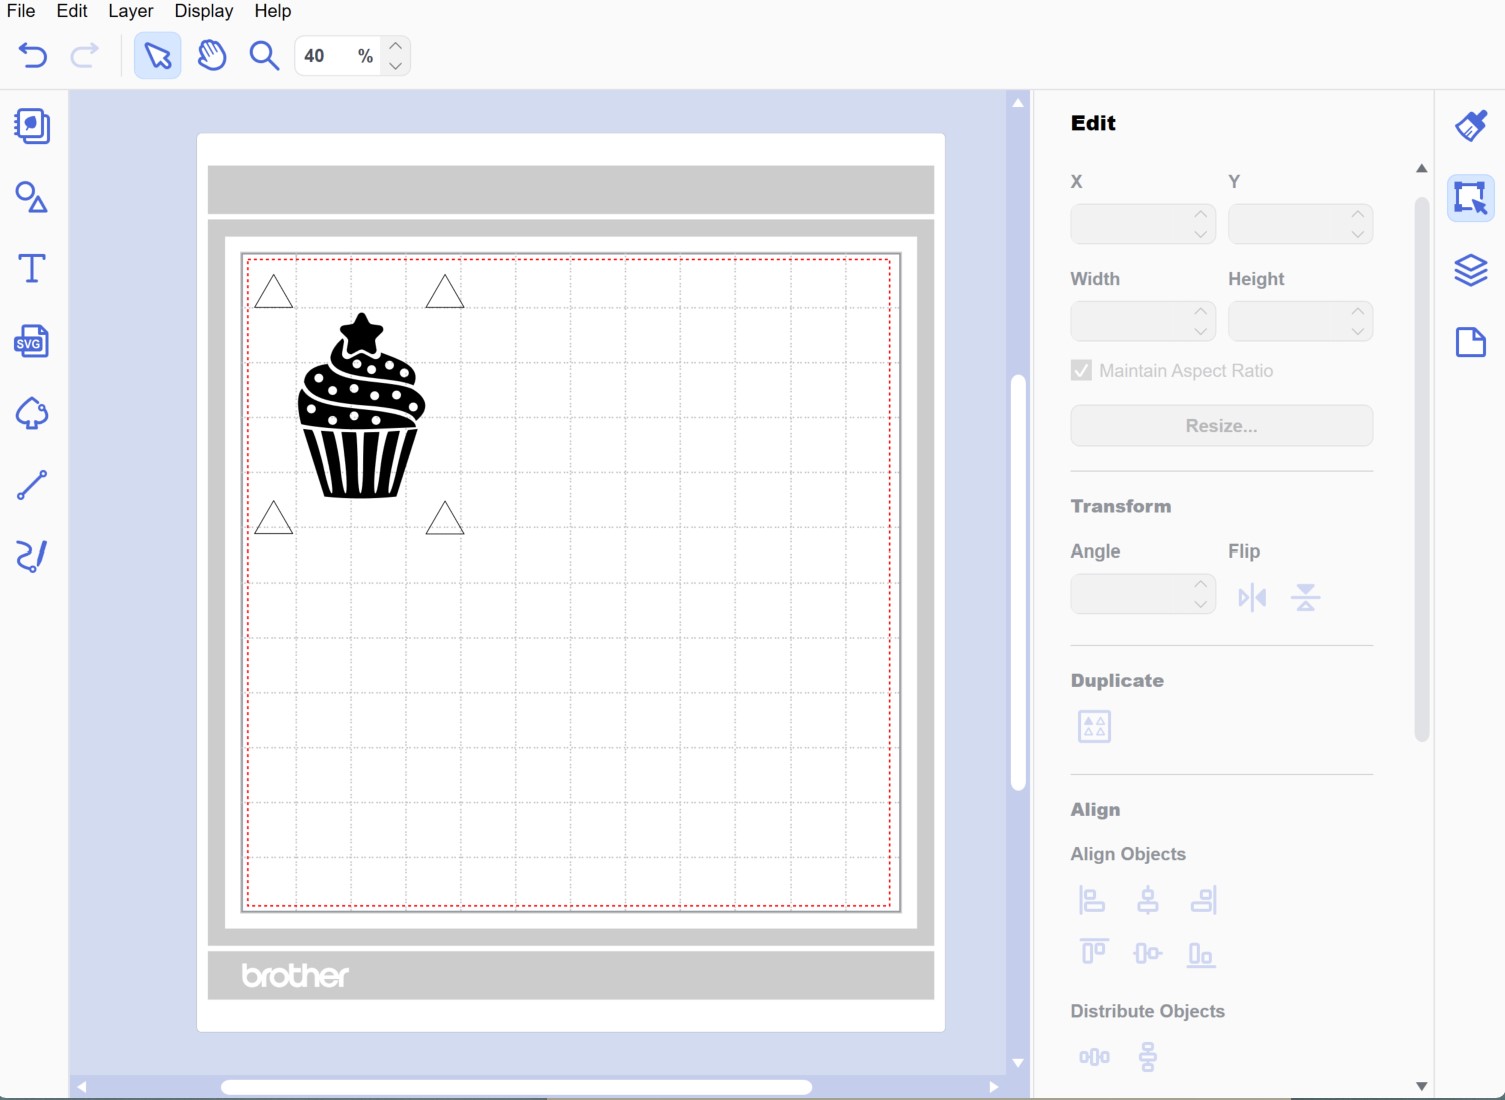
Before splitting our design we are going to assign the colour to each element of our design to match the colour of the vinyl we intend to cut. This will make it easier for us to identify the different layers. Simply click on each shape and select the colour via the paint bucket icon in the top menu.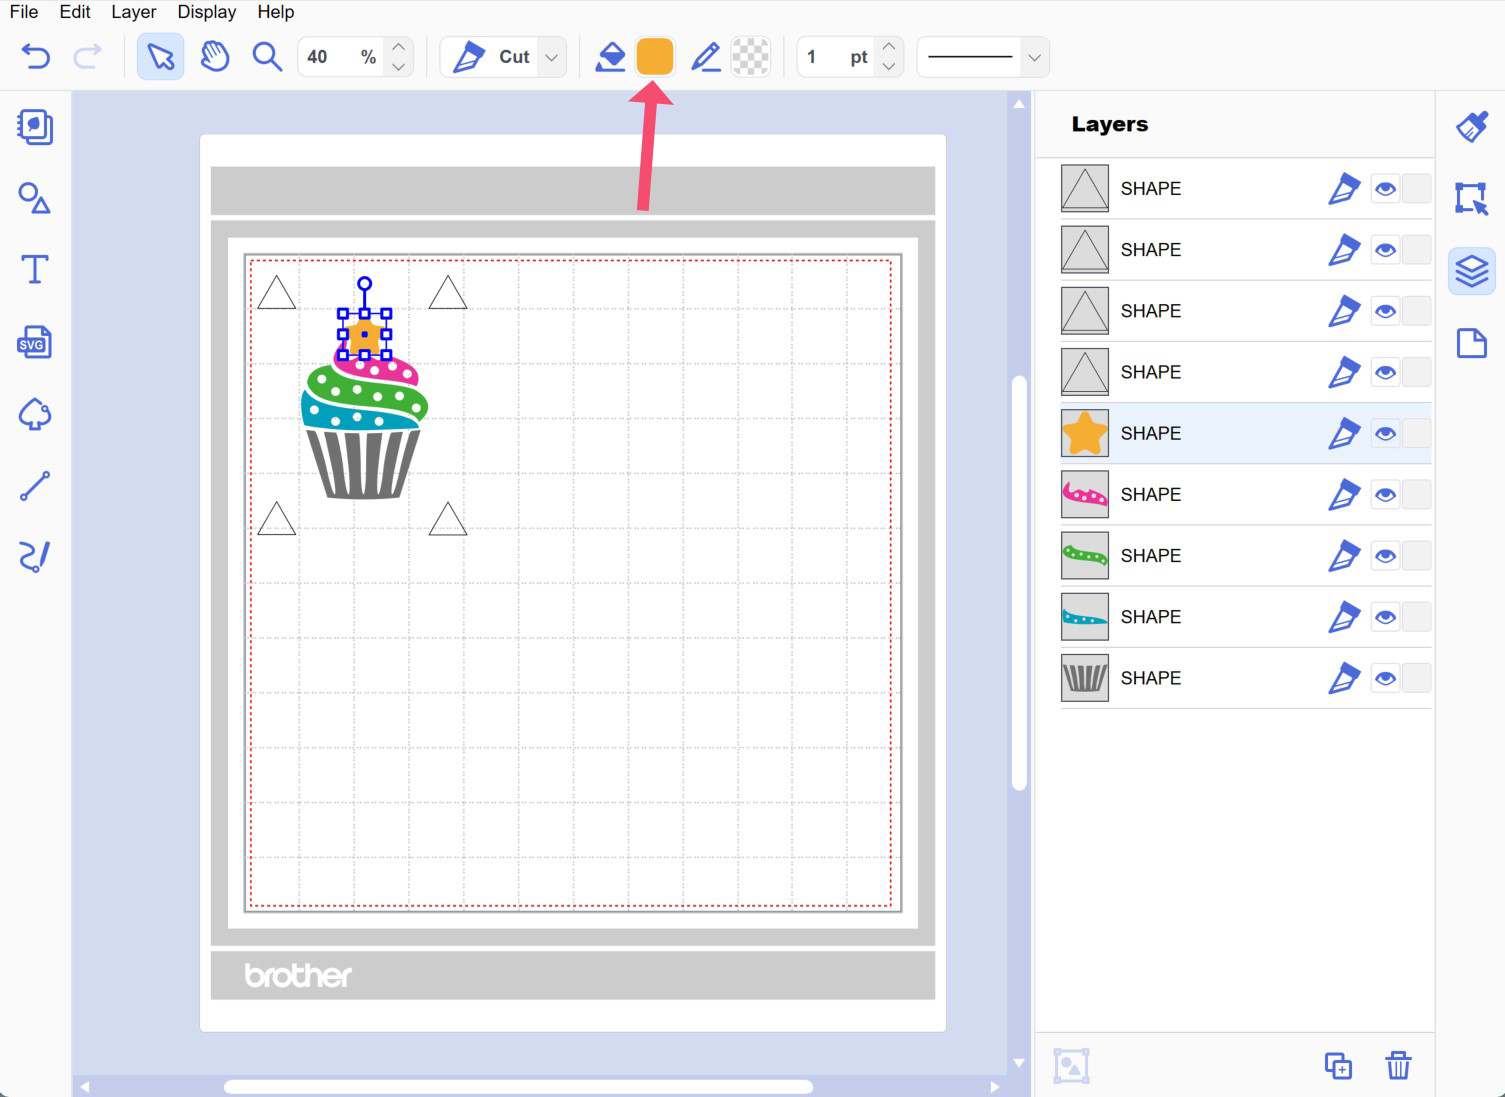
Highlight all layers, right click and group the layers together.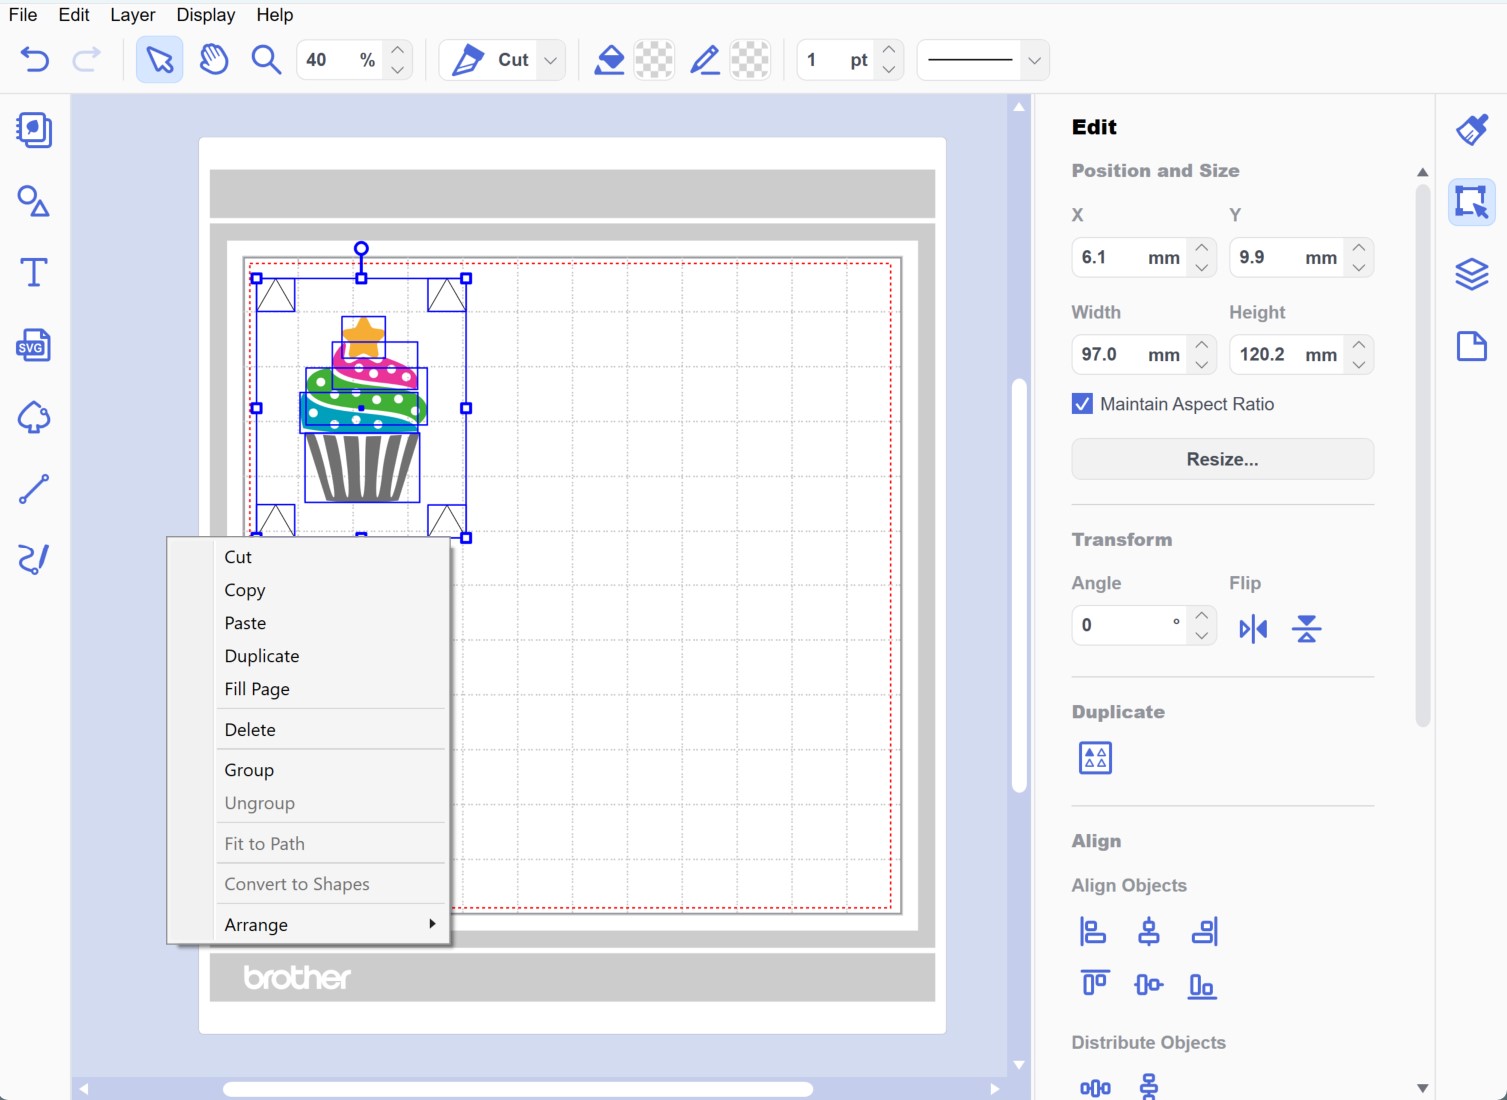
Duplicate the grouped layers 5 times as we will be having 5 different colours. Again you can do this by either right clicking and selecting copy and then right clicking and selecting paste or Ctrl+C and Ctrl+V on your keyboard. 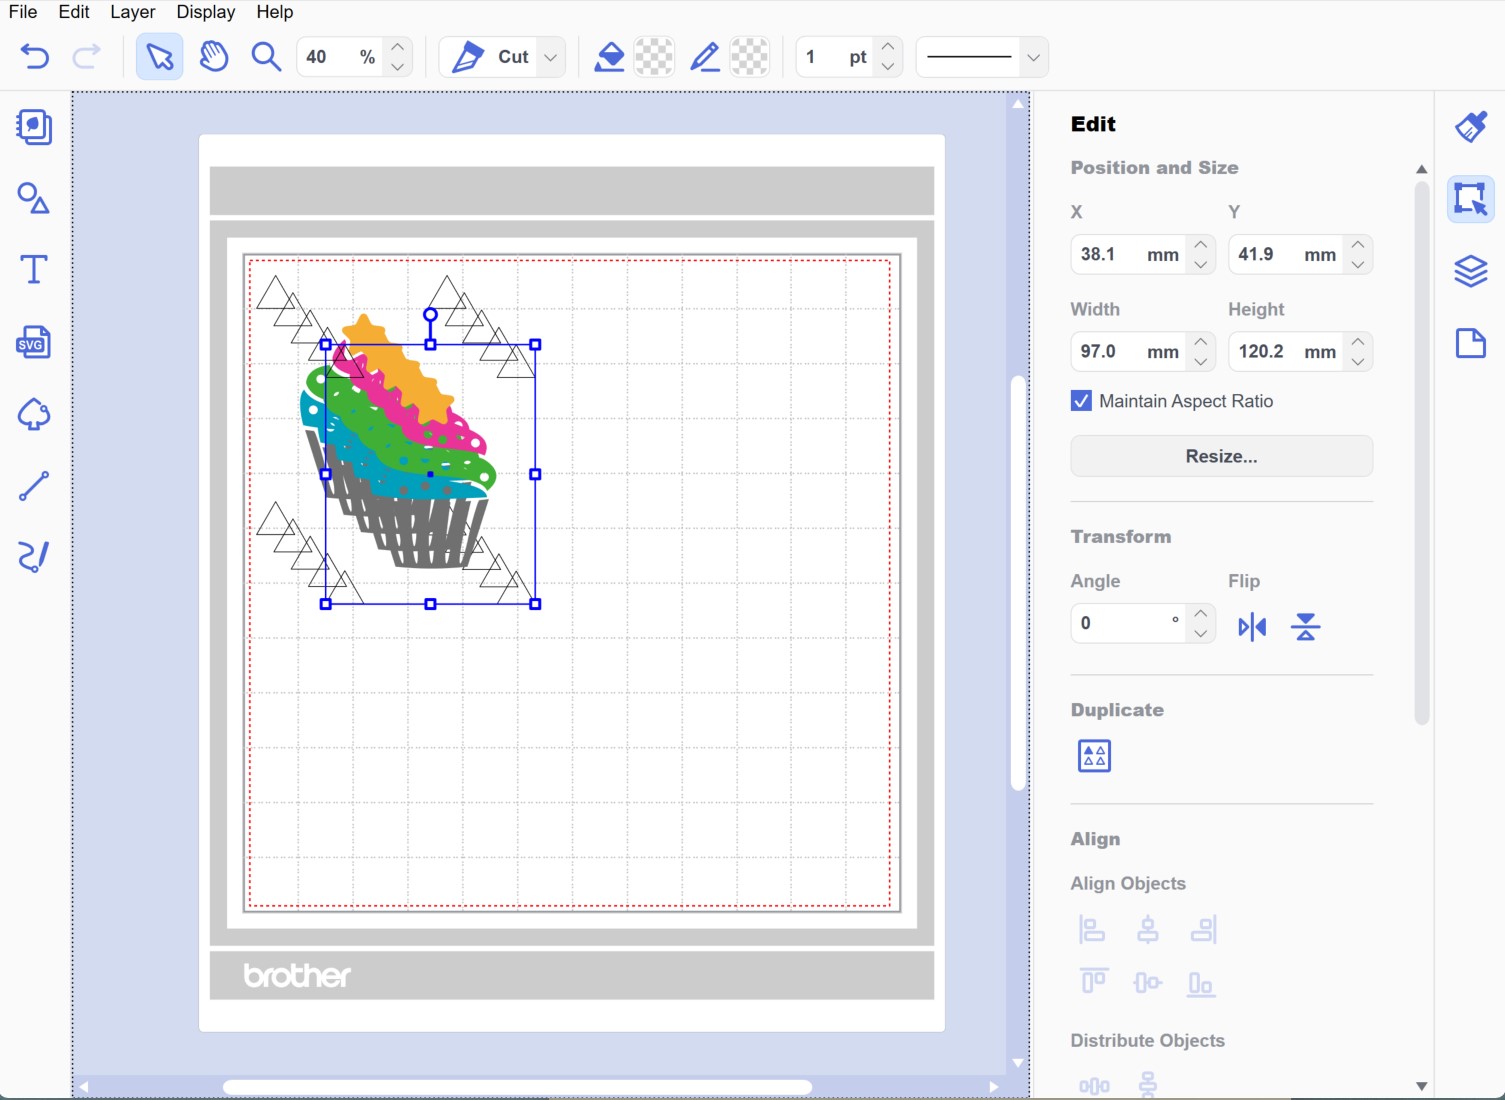
Spread these out across the artboard. The grouped layers should not overlap. 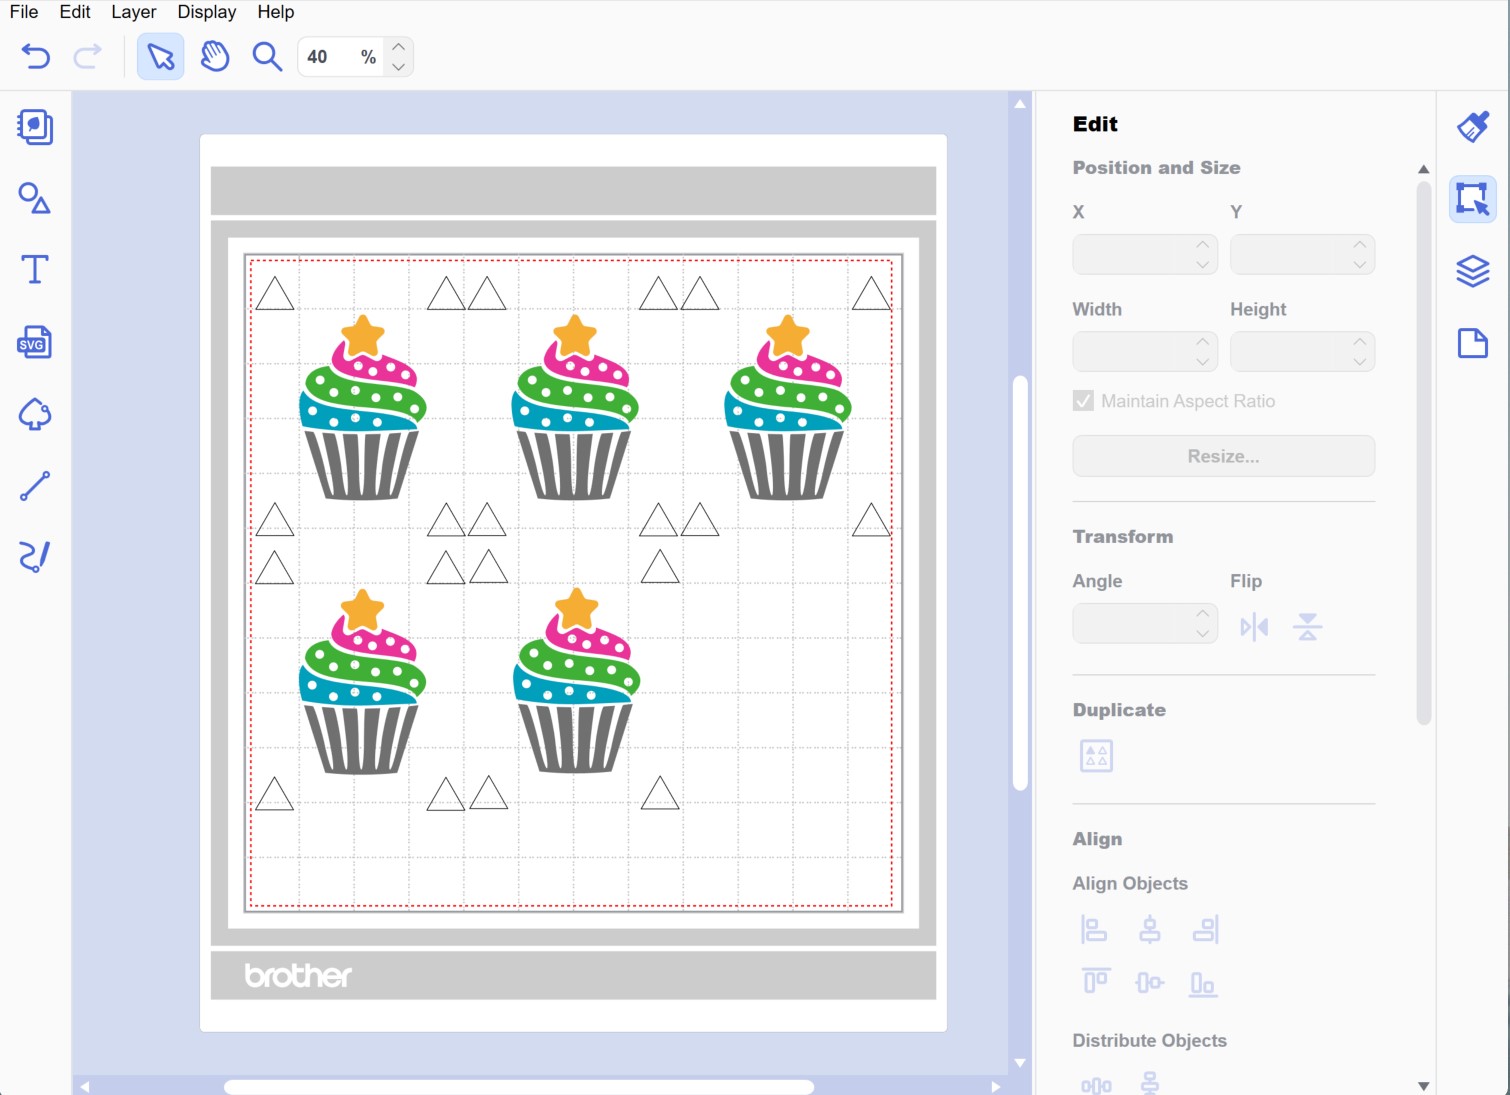
We now want to go through each grouped object and delete the excess element so each grouped object only contains one unique colour. To do this, right click on the first grouped item and click ungroup. 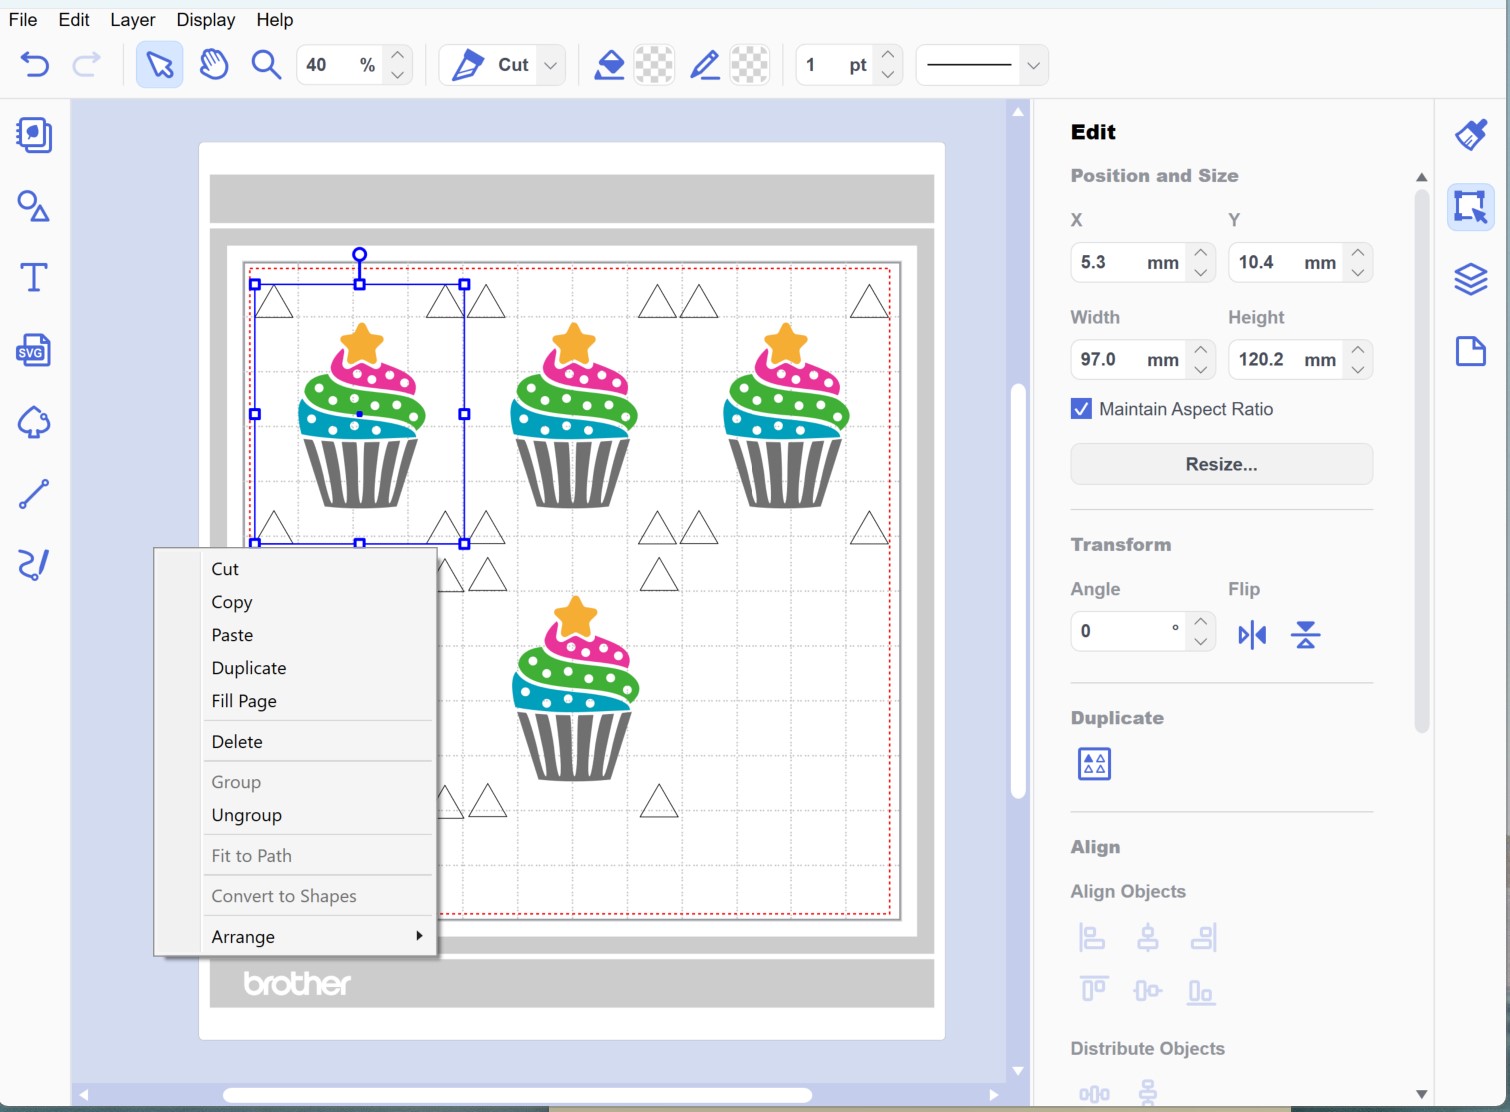
The objects in this group will now be ungrouped. 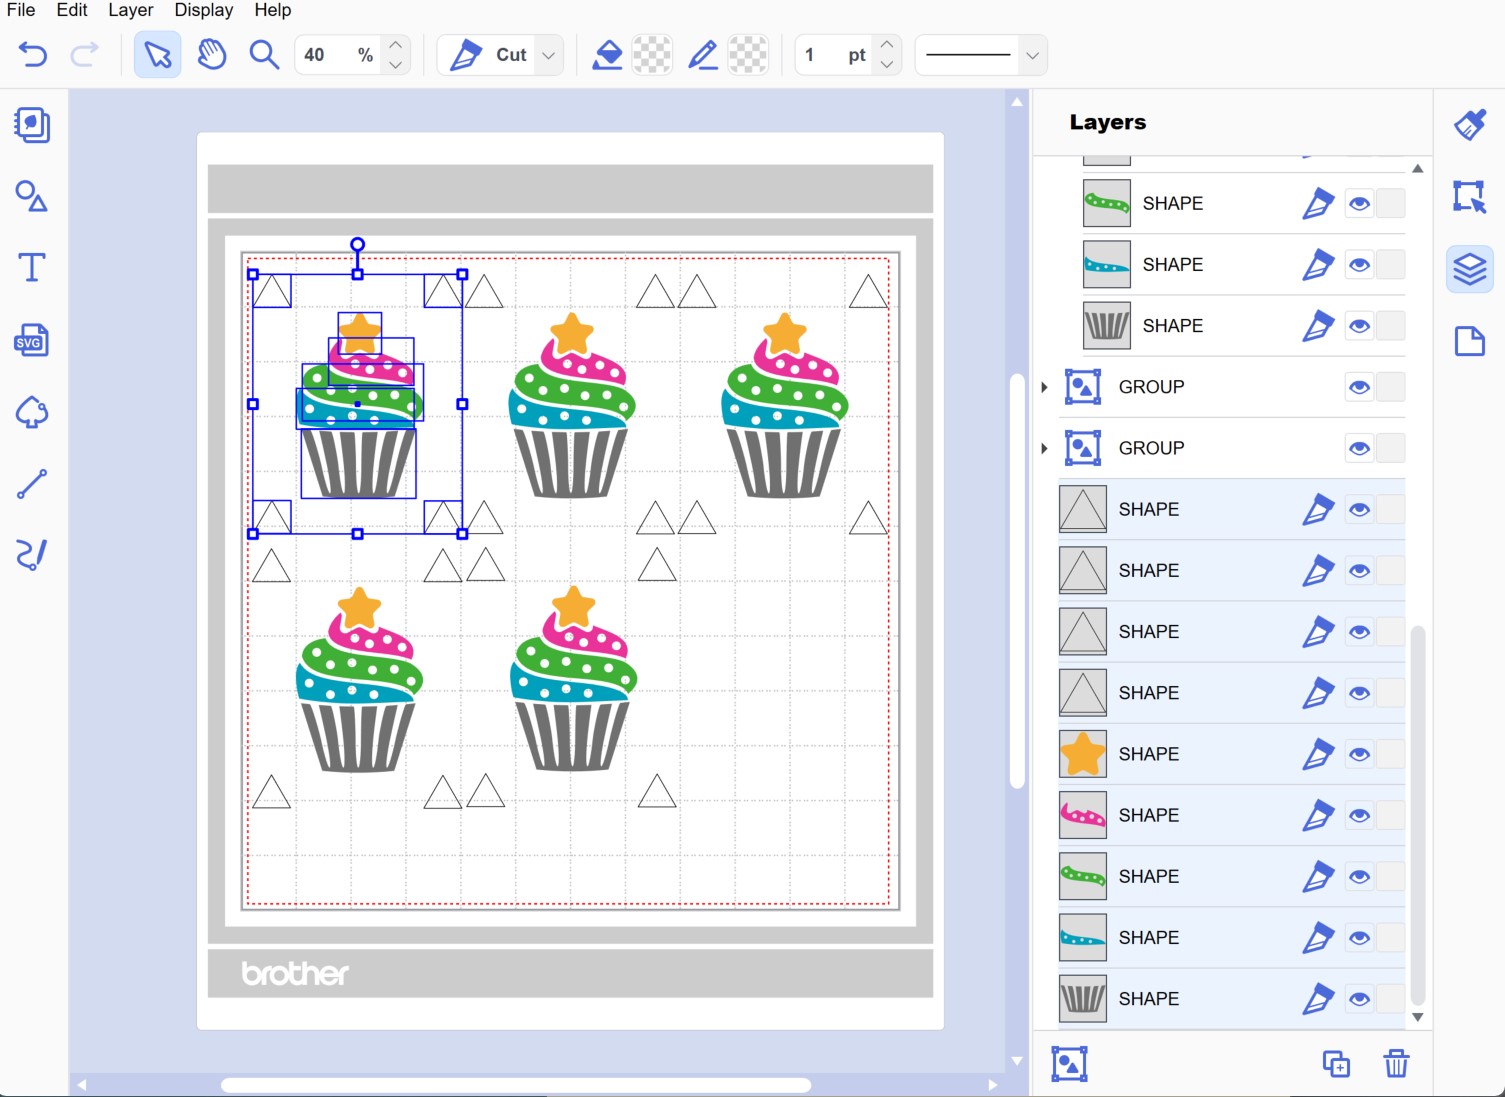
Delete the excess objects so in this case we want to delete the pink, green, blue and grey layers so that only the yellow star remains. 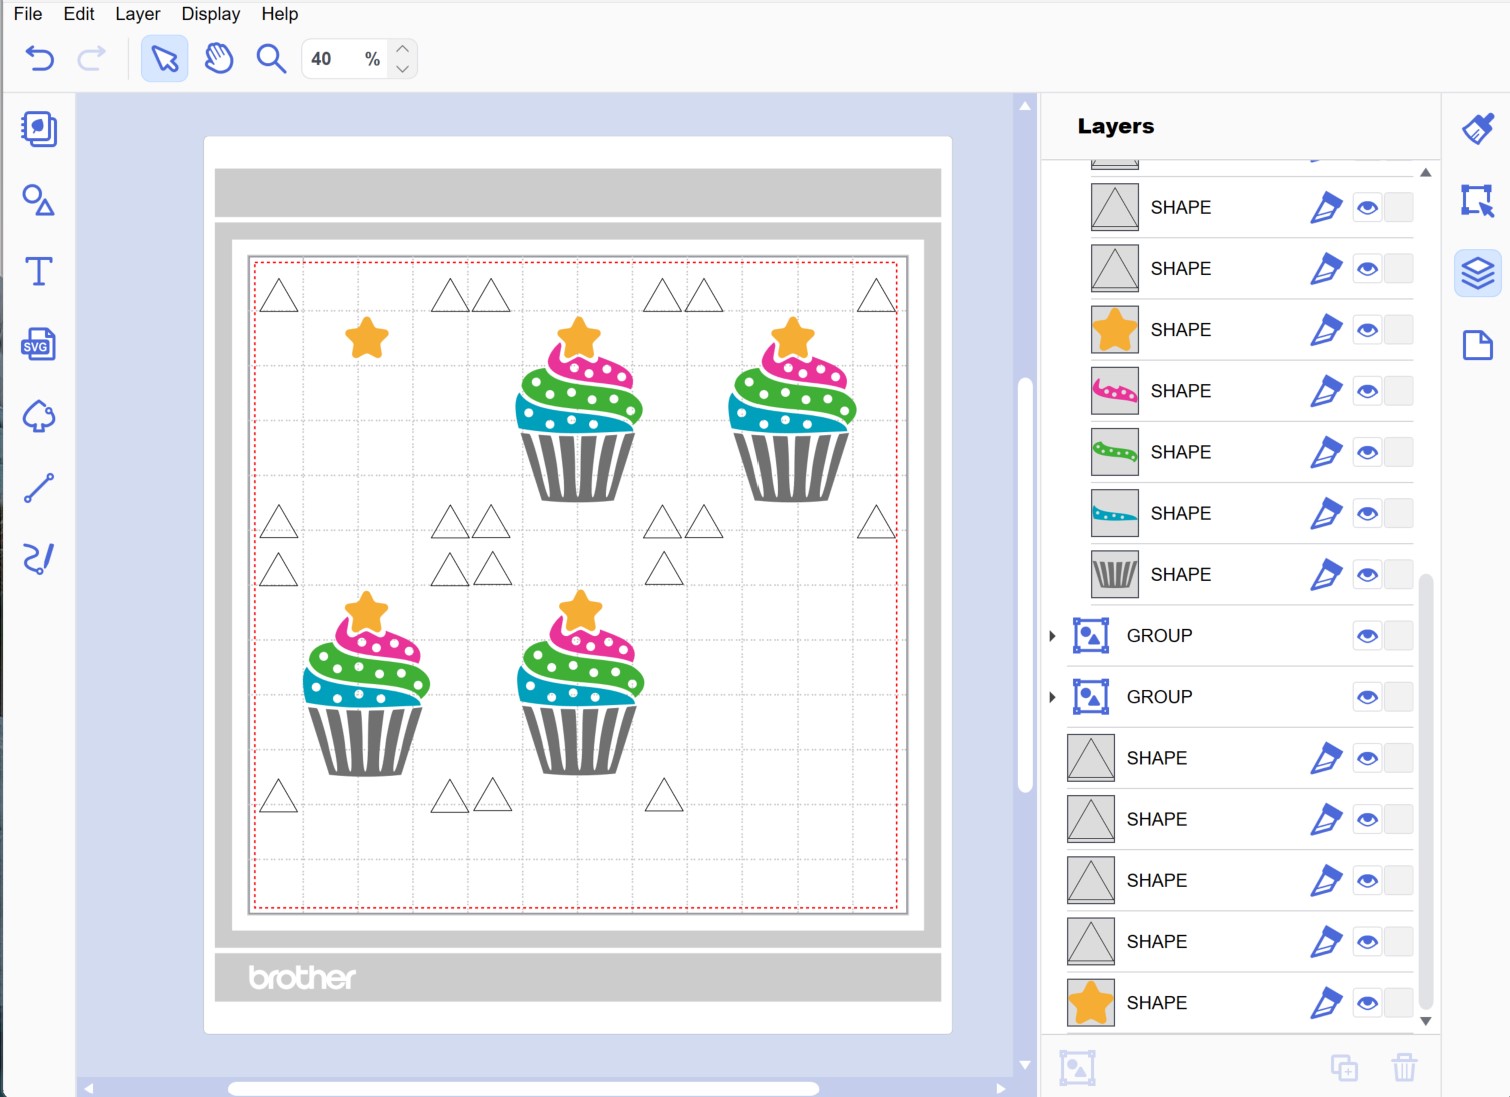
Repeat this for all grouped objects until they all only have the single colour object remaining.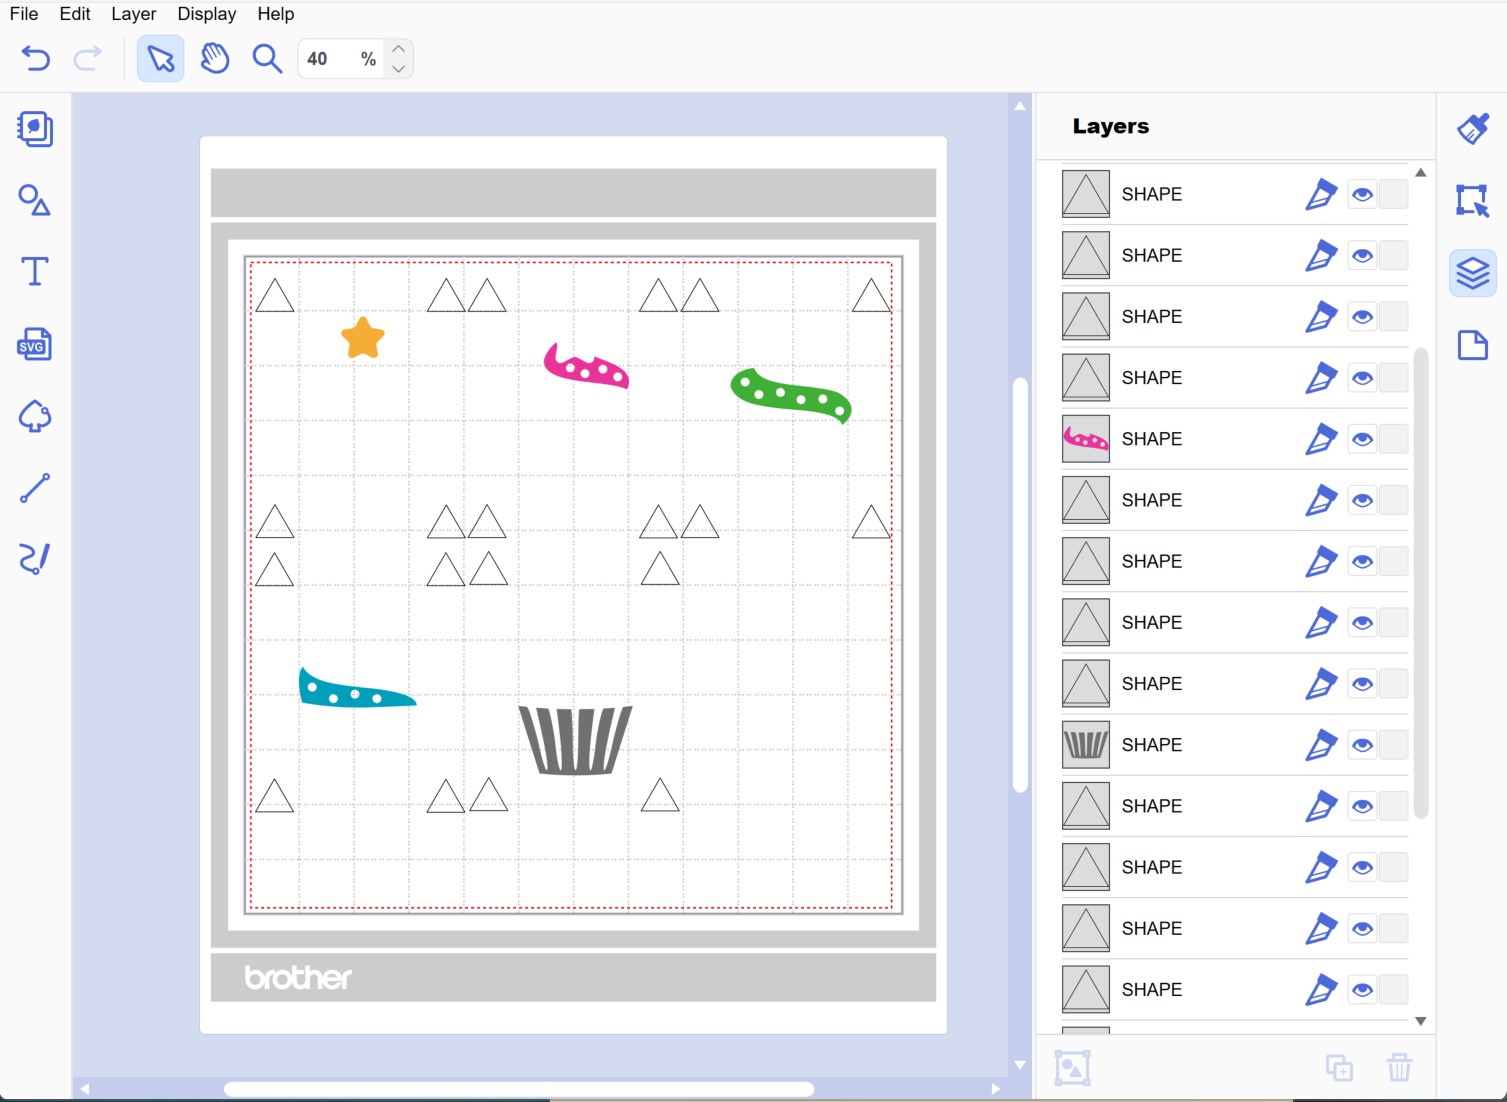
If you wish, you can change the colour of the registration marks to match the colour of the shape and regroup each section. Remember to select all objects, right click and group.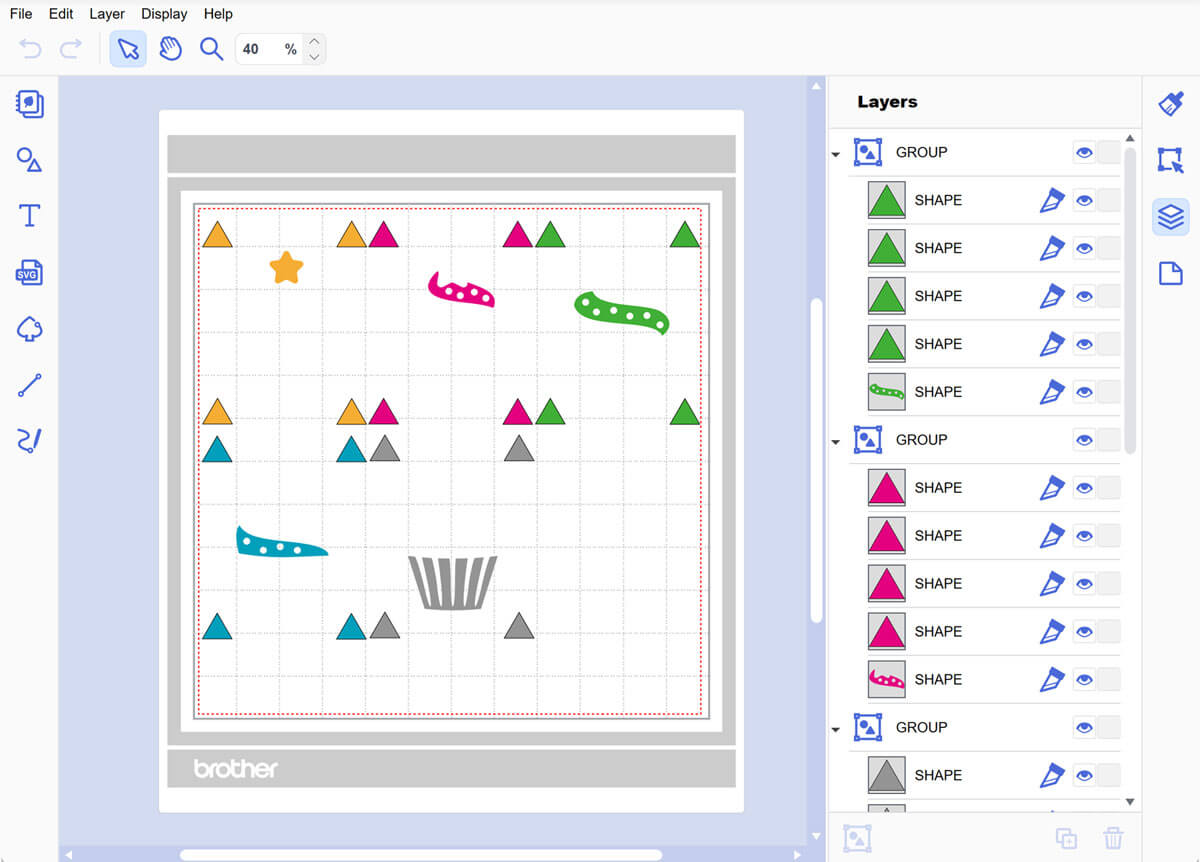
Now we are ready to take the design to the machine for cutting. Save it as an .FCM file and put it on a USB to insert into your machine or send it via Wi-Fi (SDX models).
Place 5 pieces of vinyl in your chosen colours onto your standard machine mat, making sure it is large enough for the required design. Ensure the media is stuck to the mat the correct way up, using a brayer/roller may be helpful.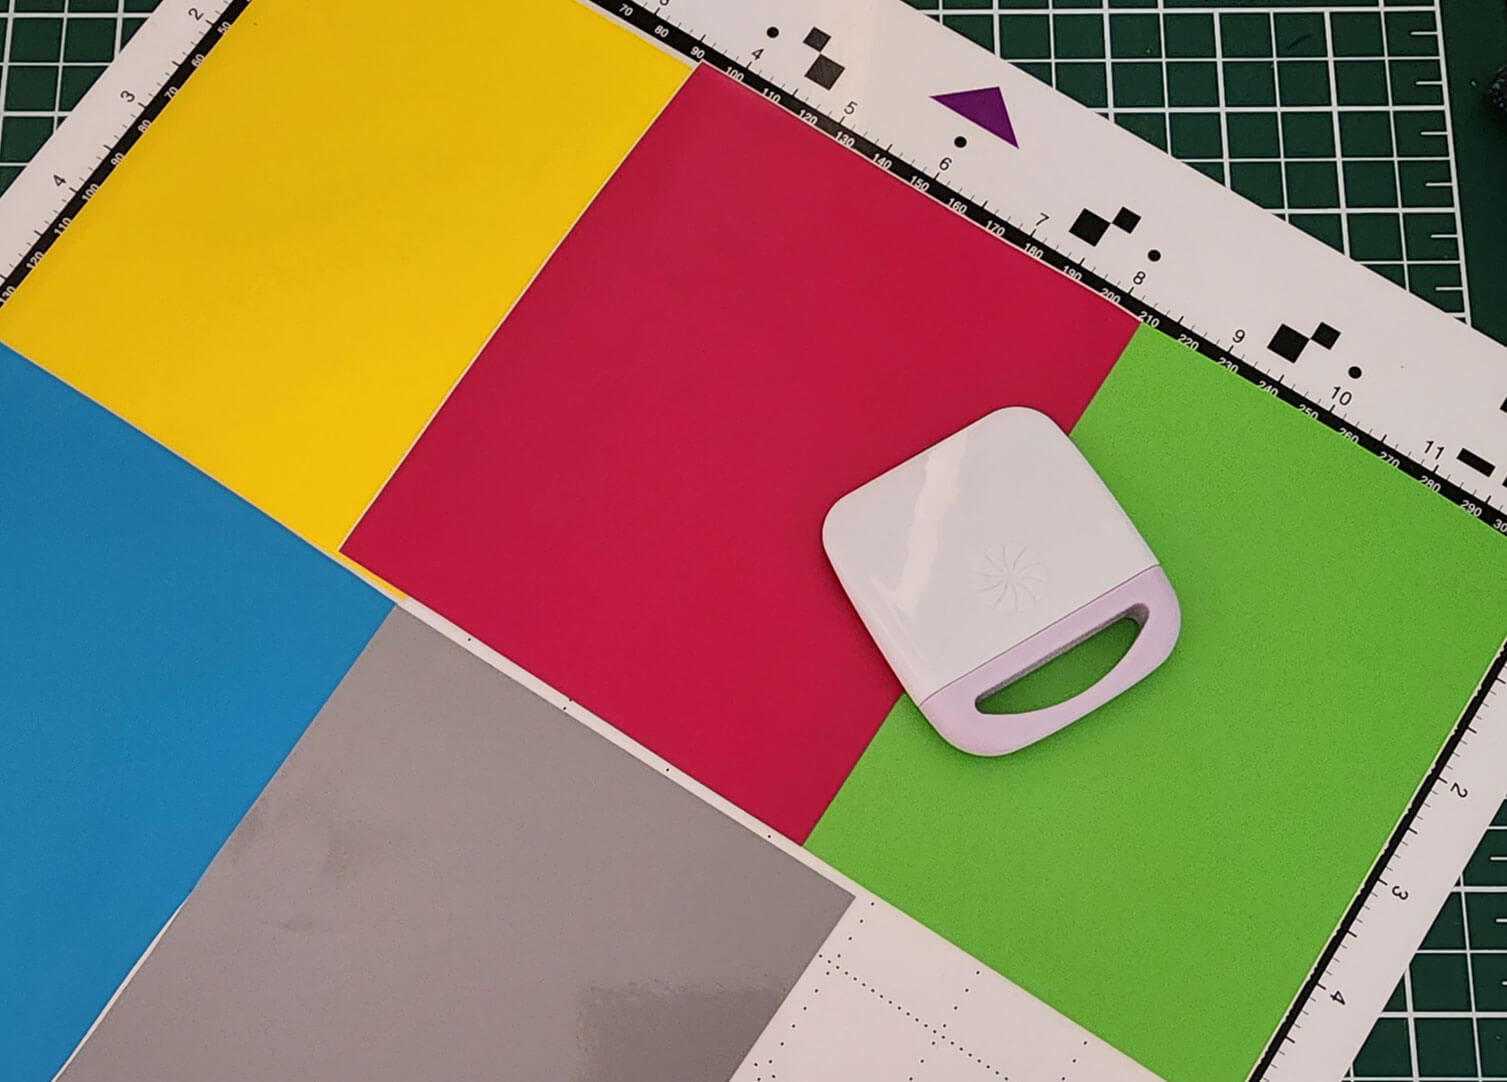
Load the .FCM file you created in CanvasWorkspace. If you have a Brother ScanNCut do a quick scan of your mat to make sure each grouped object is positioned correctly on top of the right coloured vinyl.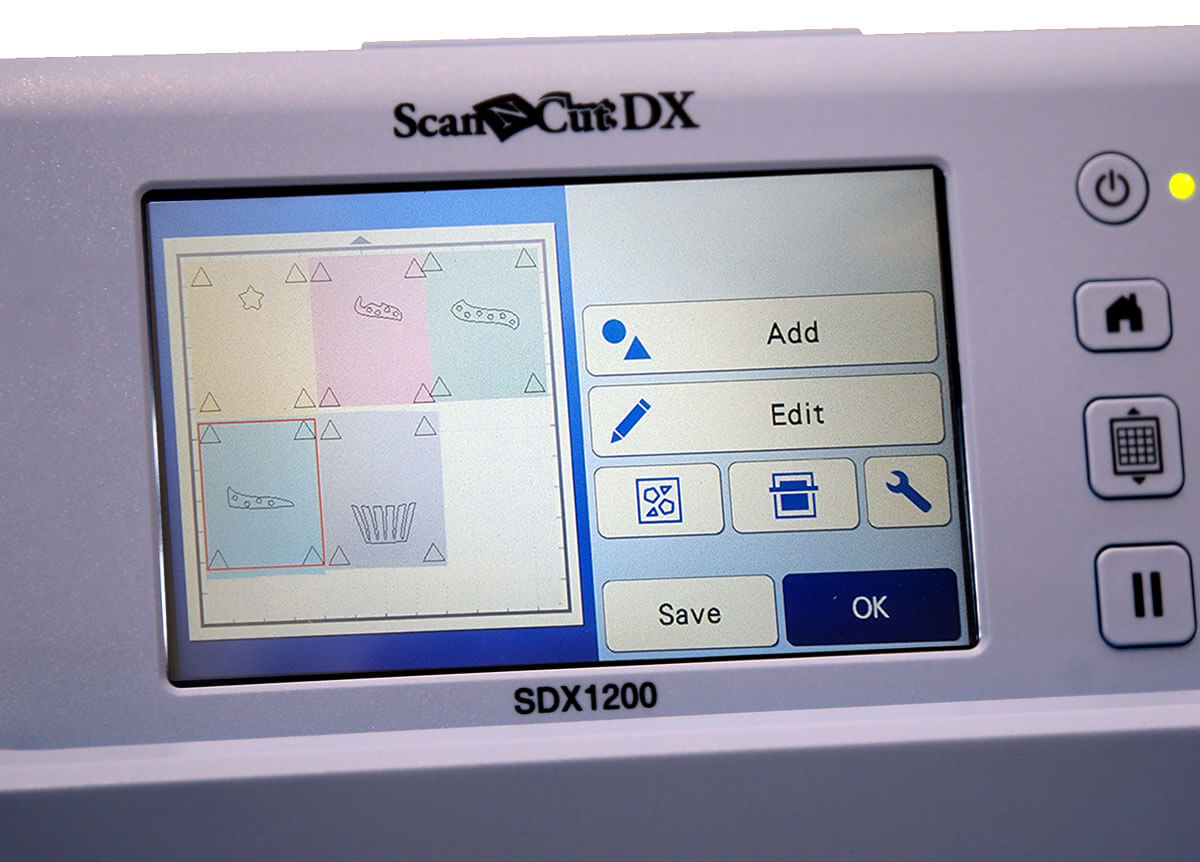
Adjust your machine settings to be suitable for cutting vinyl. For ScanNCut users you will need to enable the half cut option.
Tip: We suggest doing a test cut to ensure you have your settings correct for the medium you are using. Cutting a small hole in the corner of your mat is a lot less upsetting than cutting a large design straight through your mat.
Proceed with cutting the design. Once the cutting is complete, unload the mat from the machine and gently peel the vinyl sheets off.
Starting from one corner of the vinyl and peel back the coloured layer away from the backing sheet. This is also known as weeding. Continue weeding all of the designs until you are left with the object and the 4 registration triangles on each backing sheet. 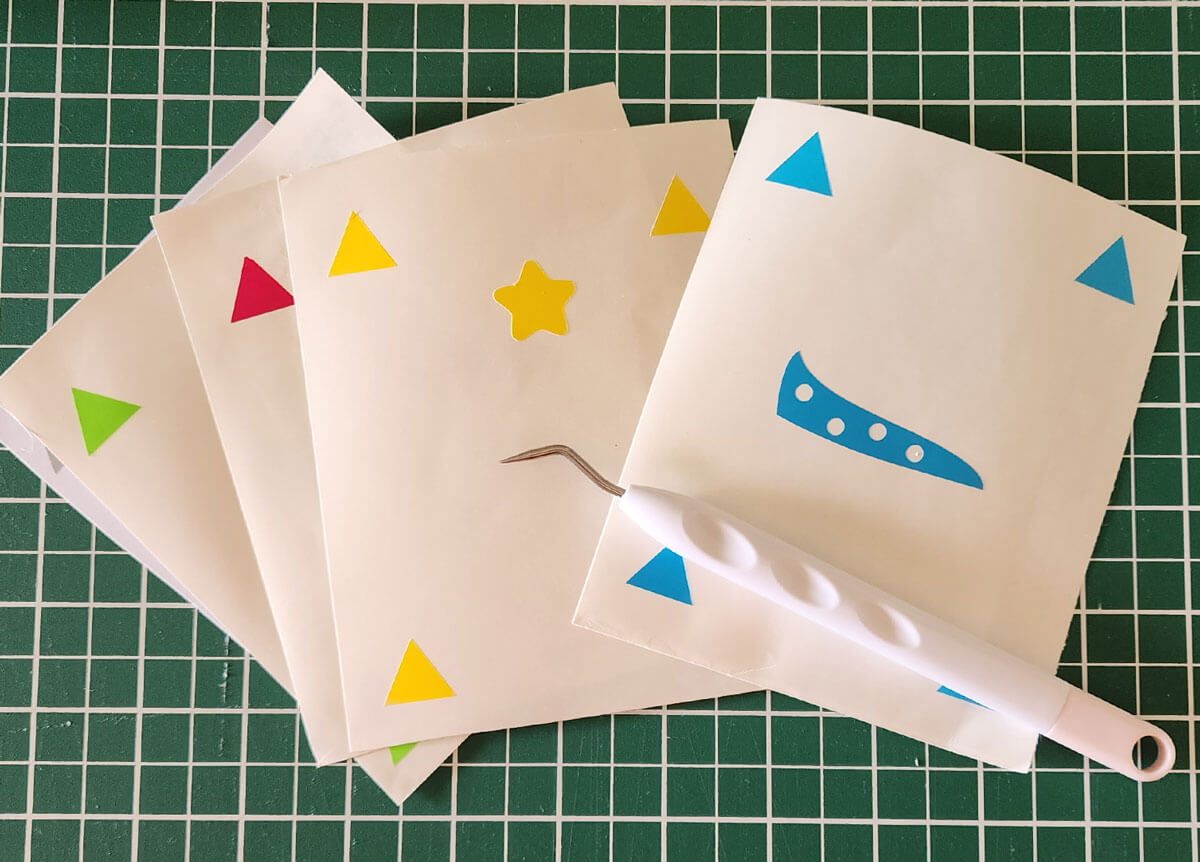
To start we want to set aside the back layer of the design. Note: This particular design doesn't have a back as no layer touches or overlaps so instead we are going to start at the bottom shape and work our way up.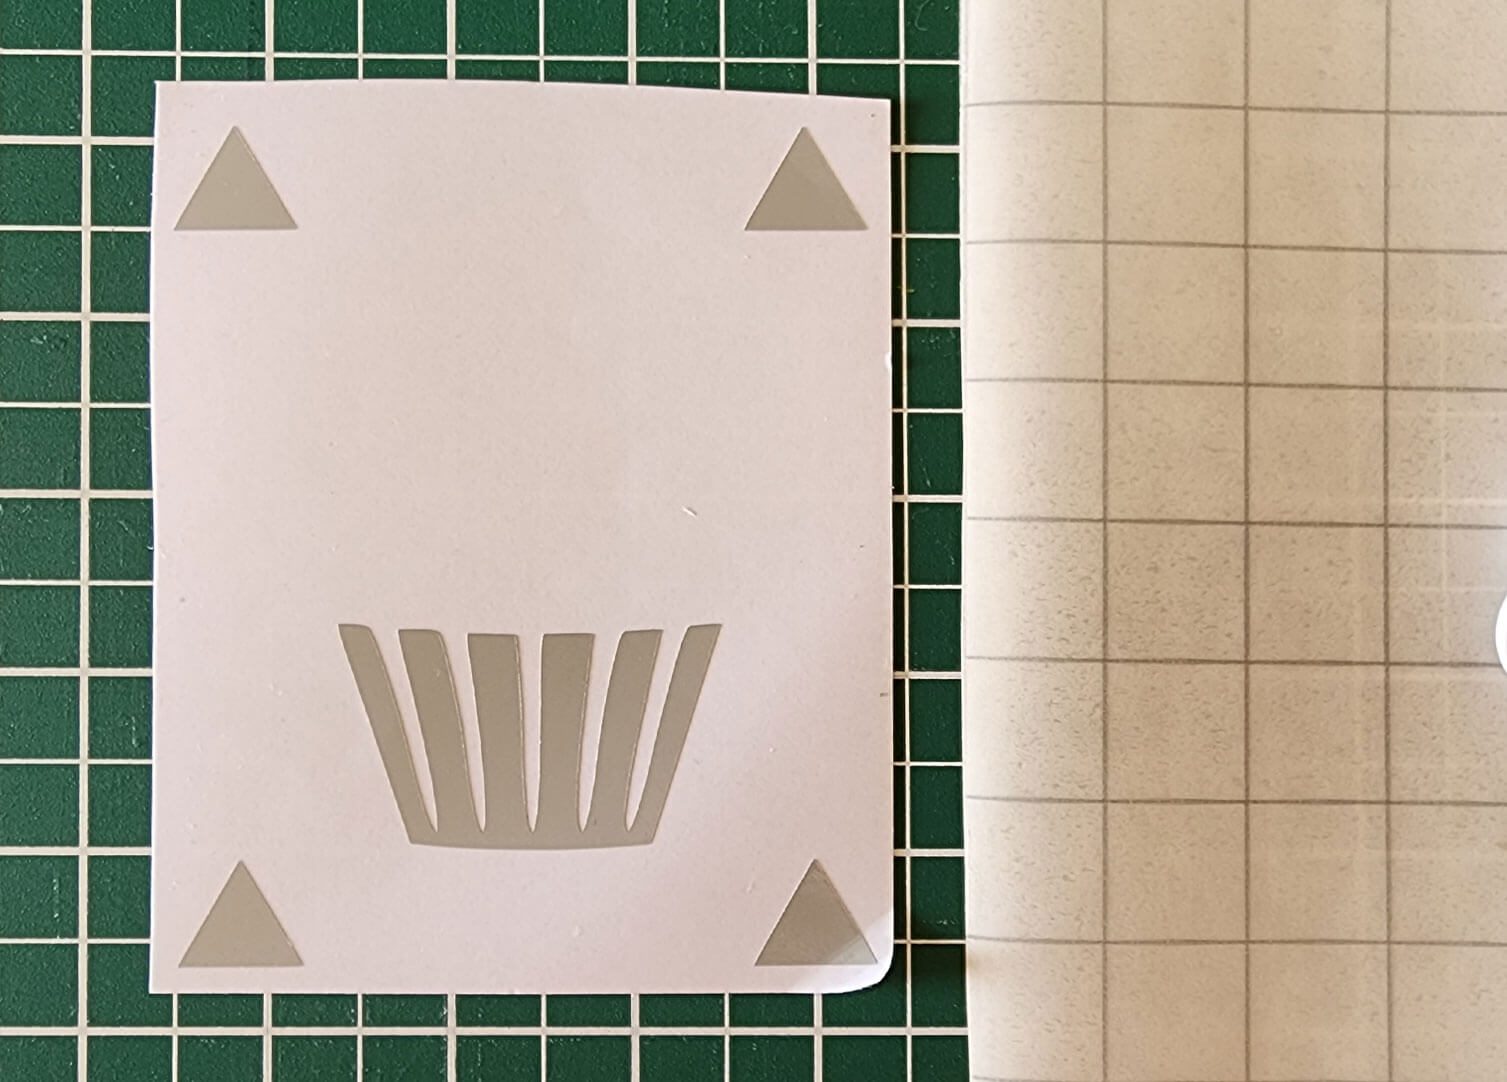
Bring the second shape from the bottom into view and cut a piece of transfer tape large enough to cover your design. Peel off the grid side of the transfer tape and place the transfer tape over the cut-out vinyl ensuring all the vinyl is covered. Gently rub the transfer tape whilst on the vinyl. A scraper can be helpful when doing this. 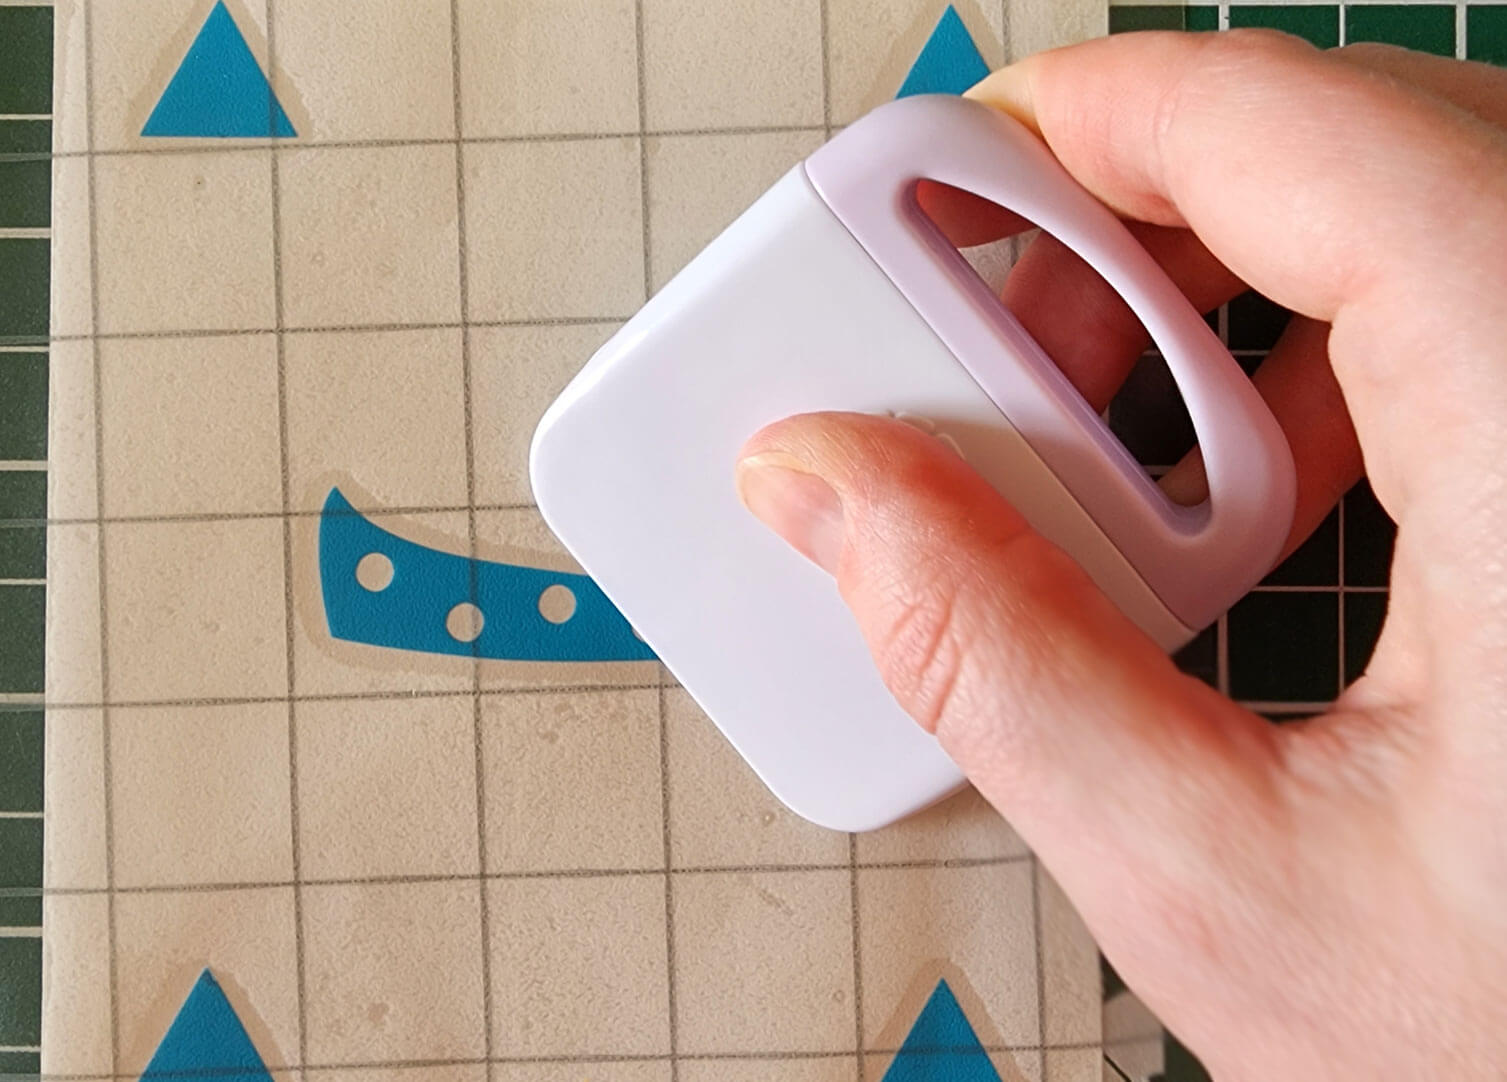
Flip the vinyl over and gently start peeling off the sticker backing. The sticker should lift off with the tape. If not, lay the tape down again and press firmly again. You want your design to stick to the tape so you may need to give it a rub as you go. 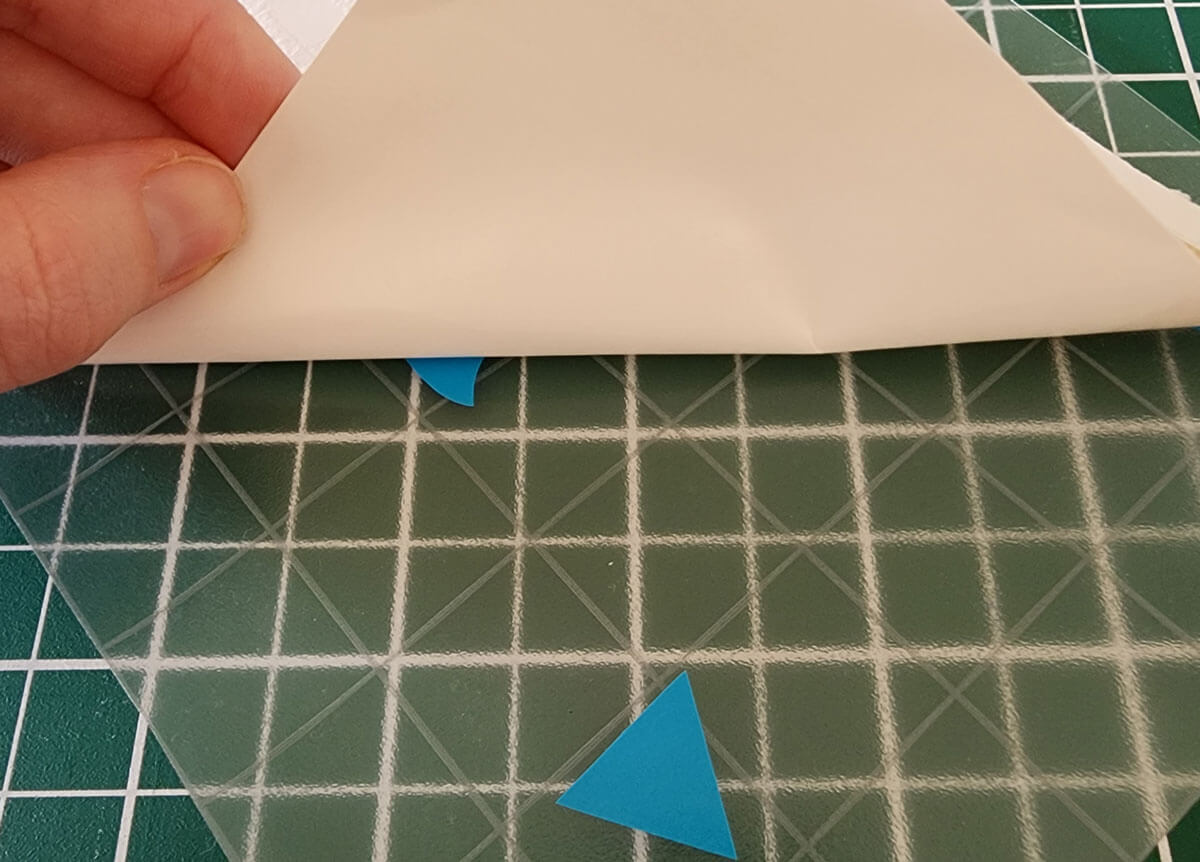
This then exposes the adhesive side of the sticker of the transfer tape. Place the revealed design on top of the bottom layer of vinyl lining up the 2 triangles. In this case we have lined up the bottom 2 triangles but you can line up any 2 triangles. 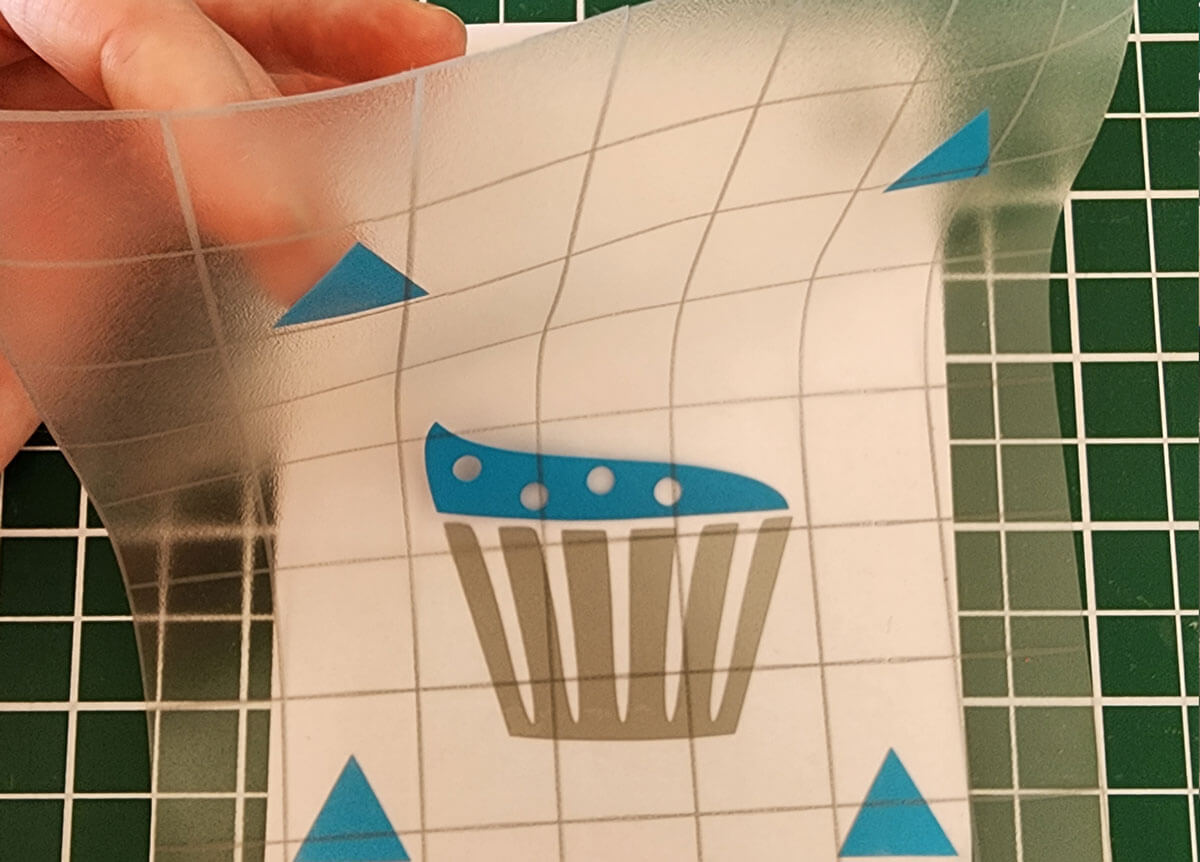
Give the design a rub with the vinyl scraper to help the adhesive of the transfer tape stick. 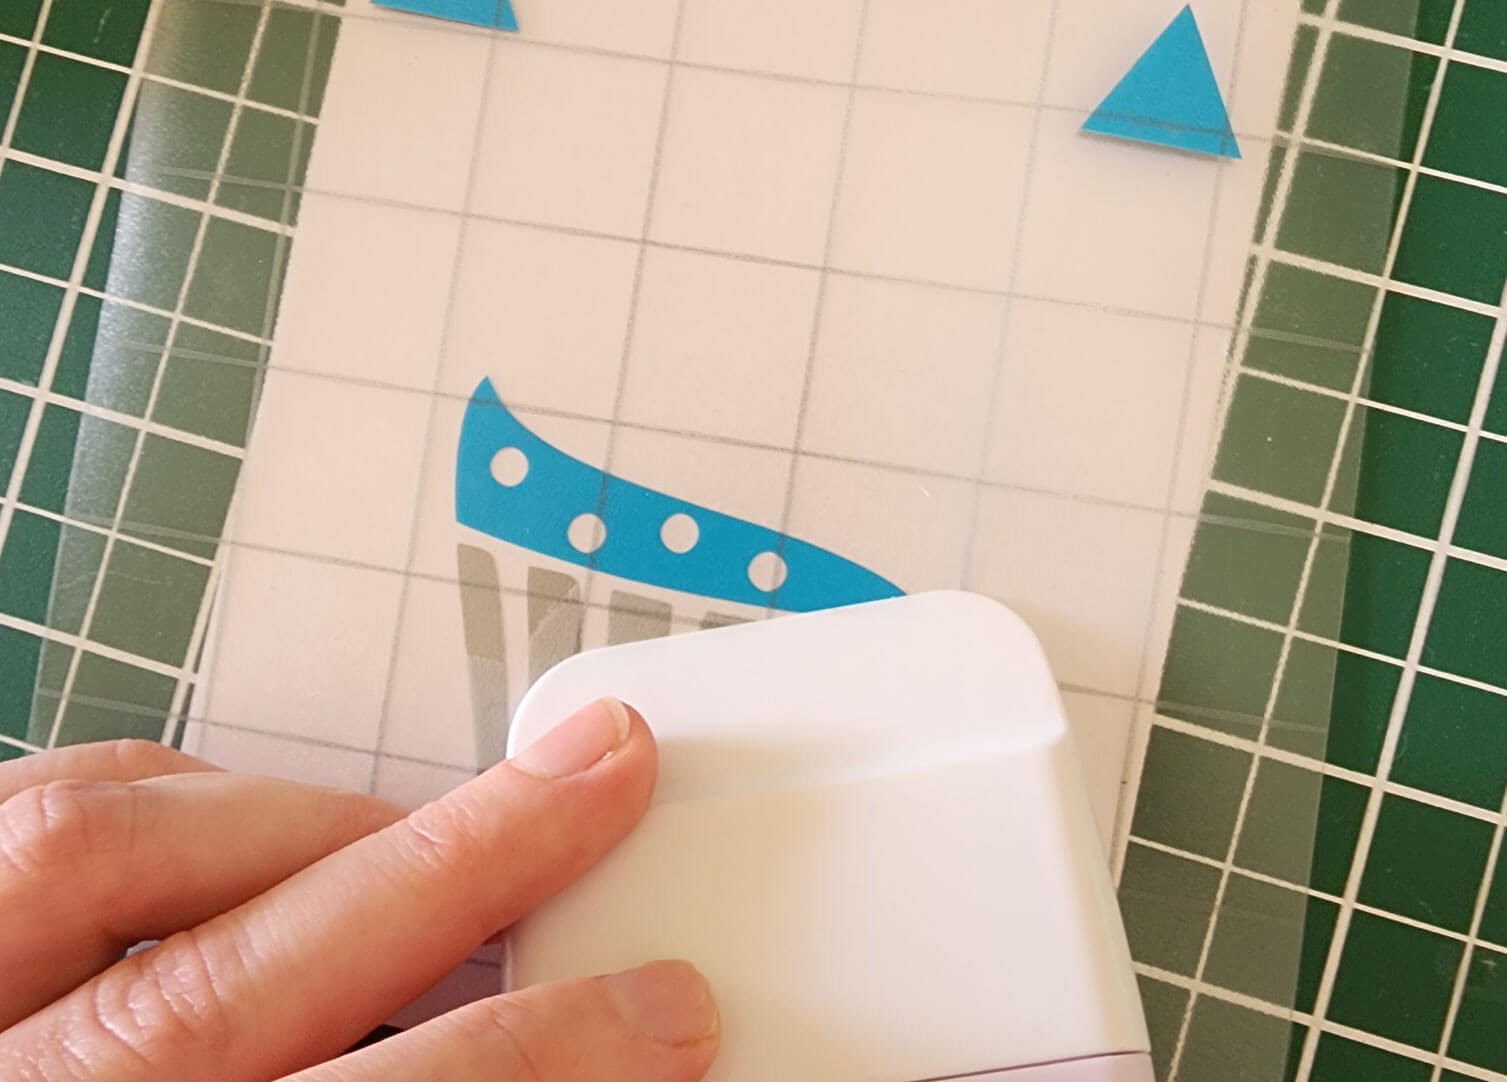
Gently peel back the transfer tape to reveal the 2 layers of vinyl perfectly lined up. 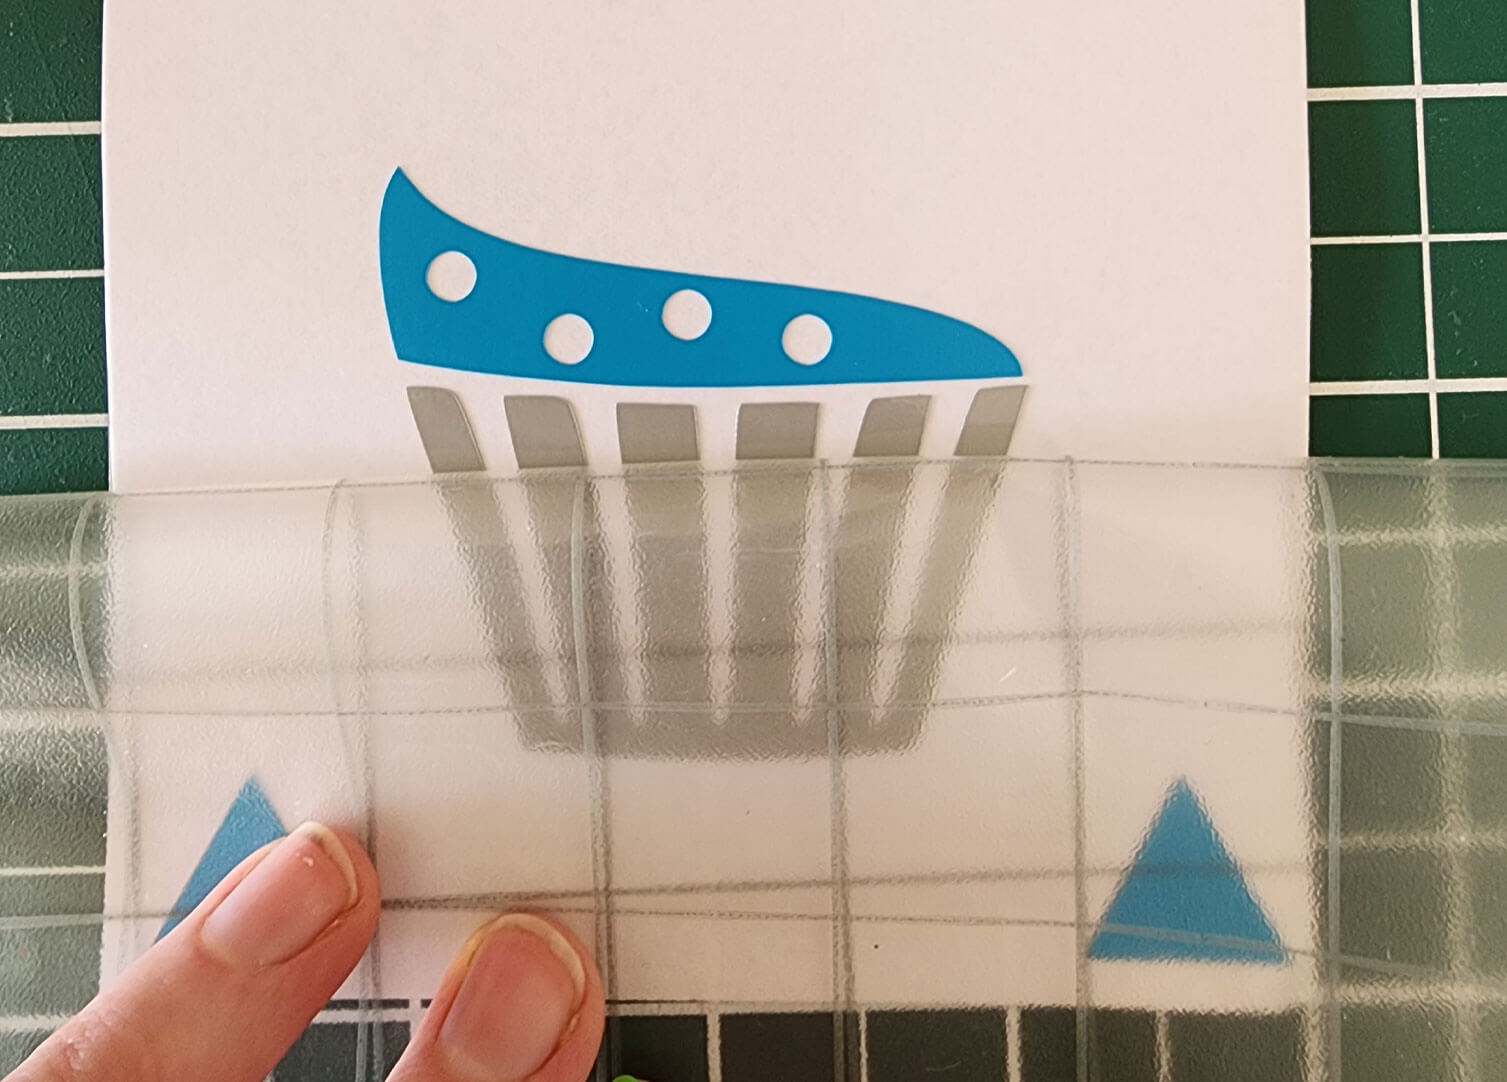
Using the same piece of transfer tape, repeat the same steps with the remaining colours, making sure to order them from back first to the front last until you have your completed design. 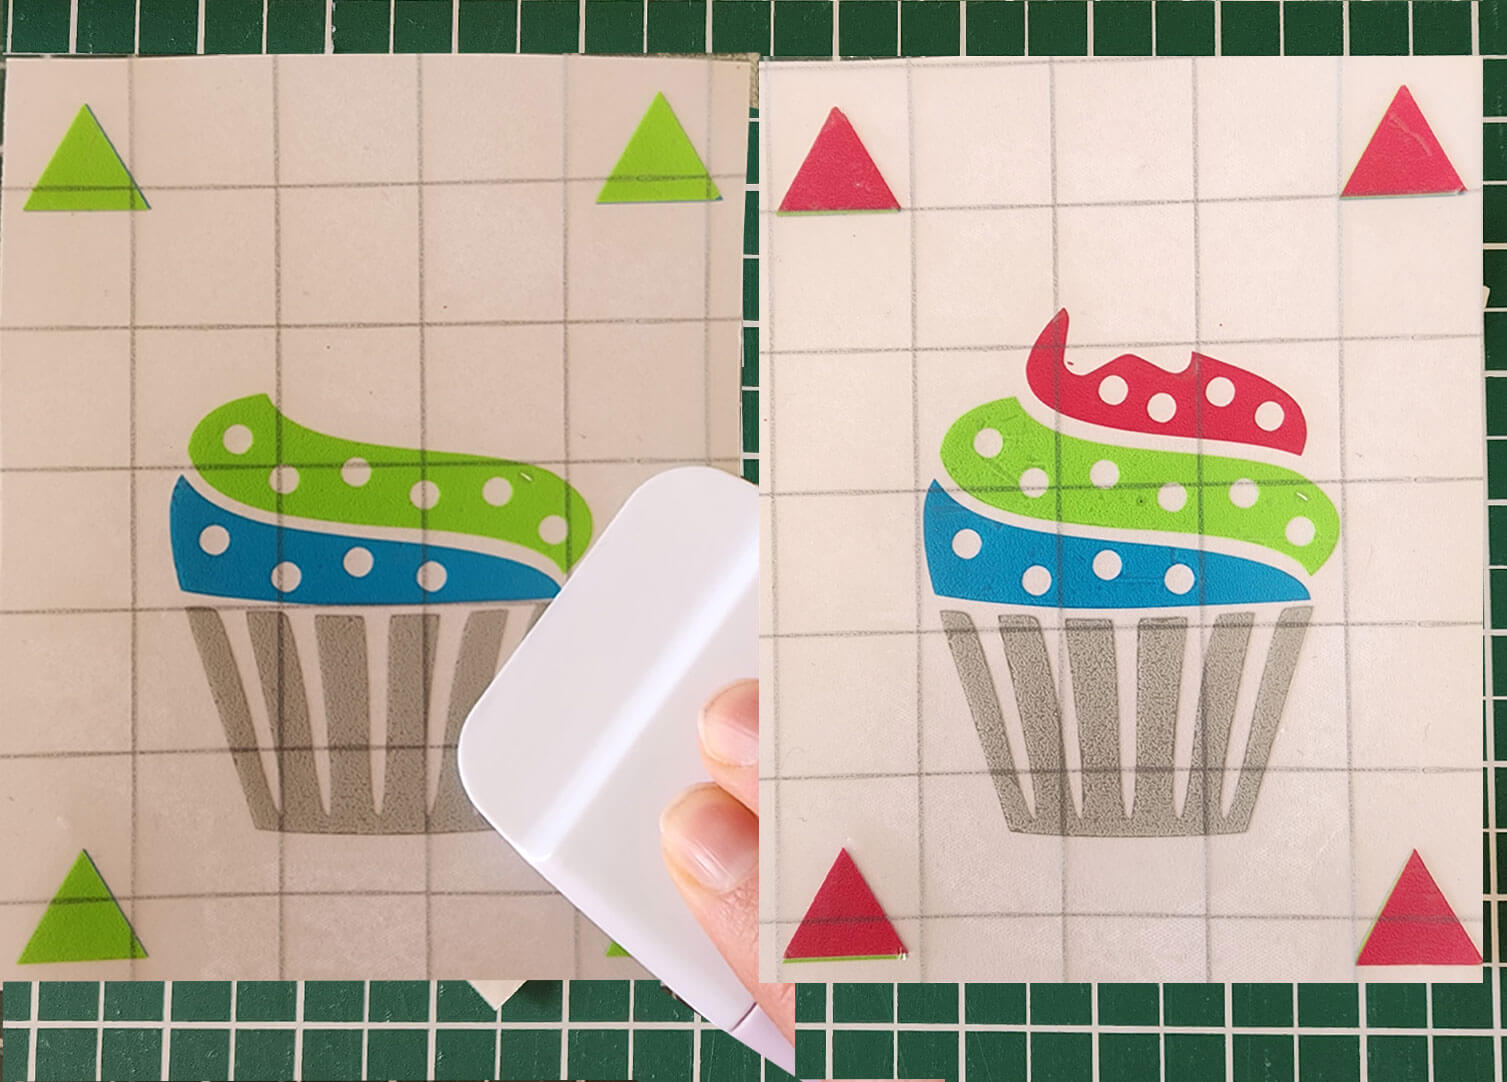
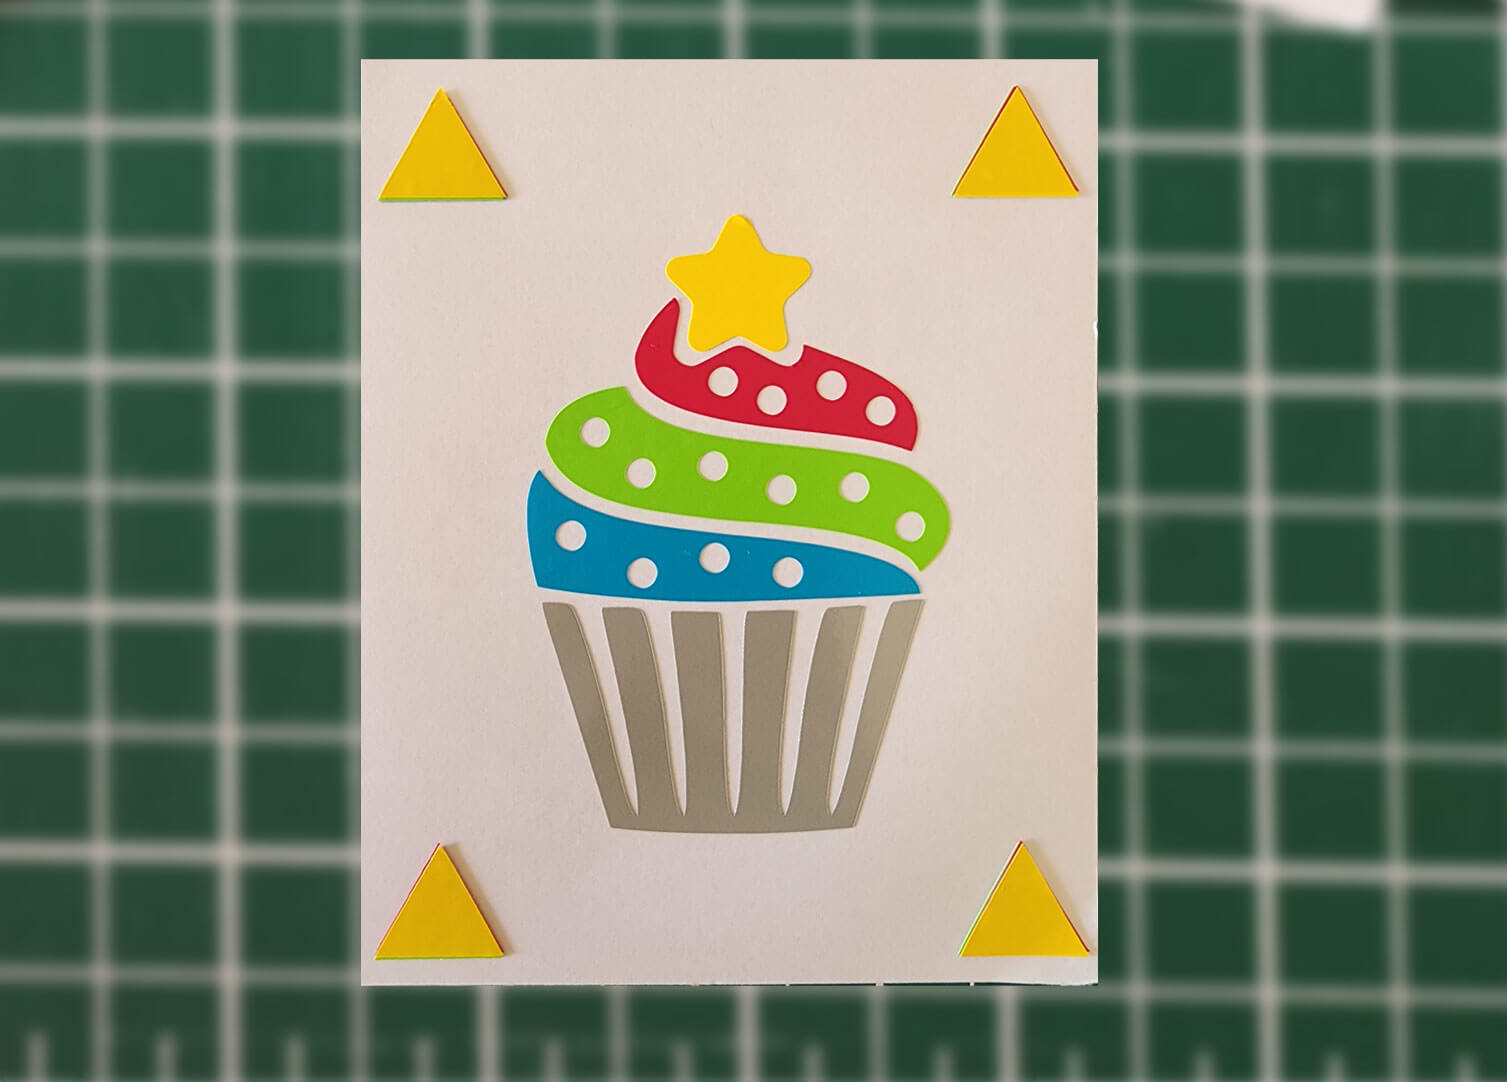
Trim the corners with the registration triangles off so that these are not transferred to your final medium.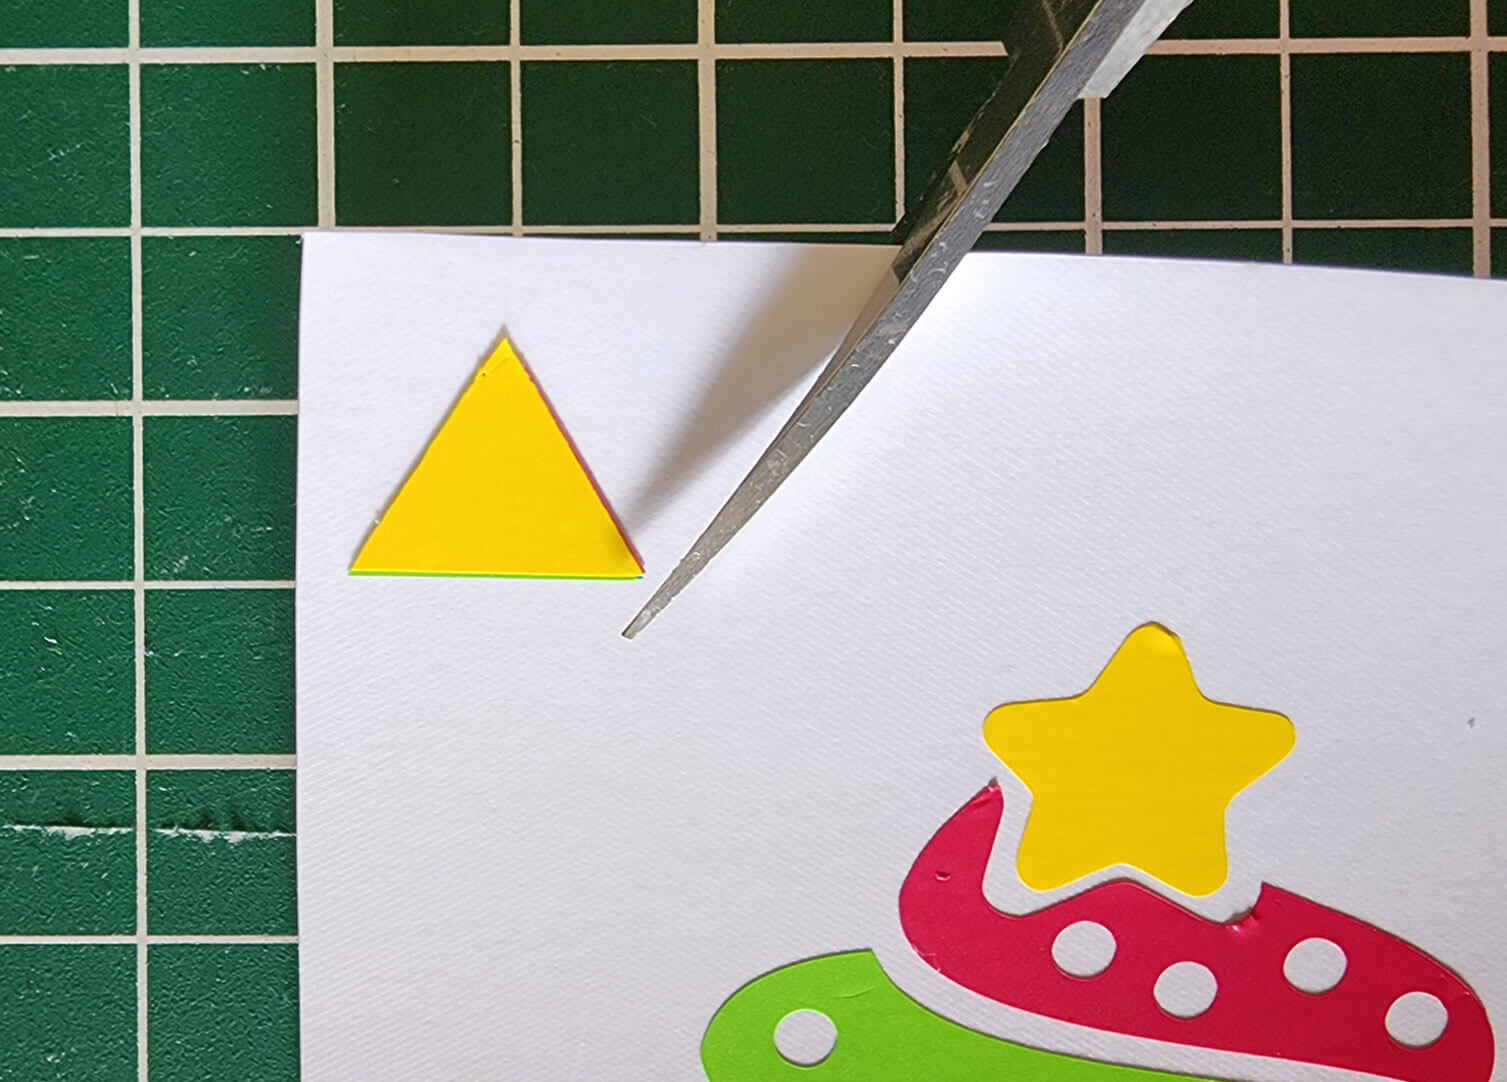
Place the transfer tape over the cut-out vinyl ensuring all the vinyl is covered. Gently rub the transfer paper whilst on the vinyl. Flip over the design and gently start peeling off the sticker backing. The sticker should lift off with the tape. If not, lay the tape down again and press firmly again. You want your design to stick to the tape so you may need to give it a rub as you go.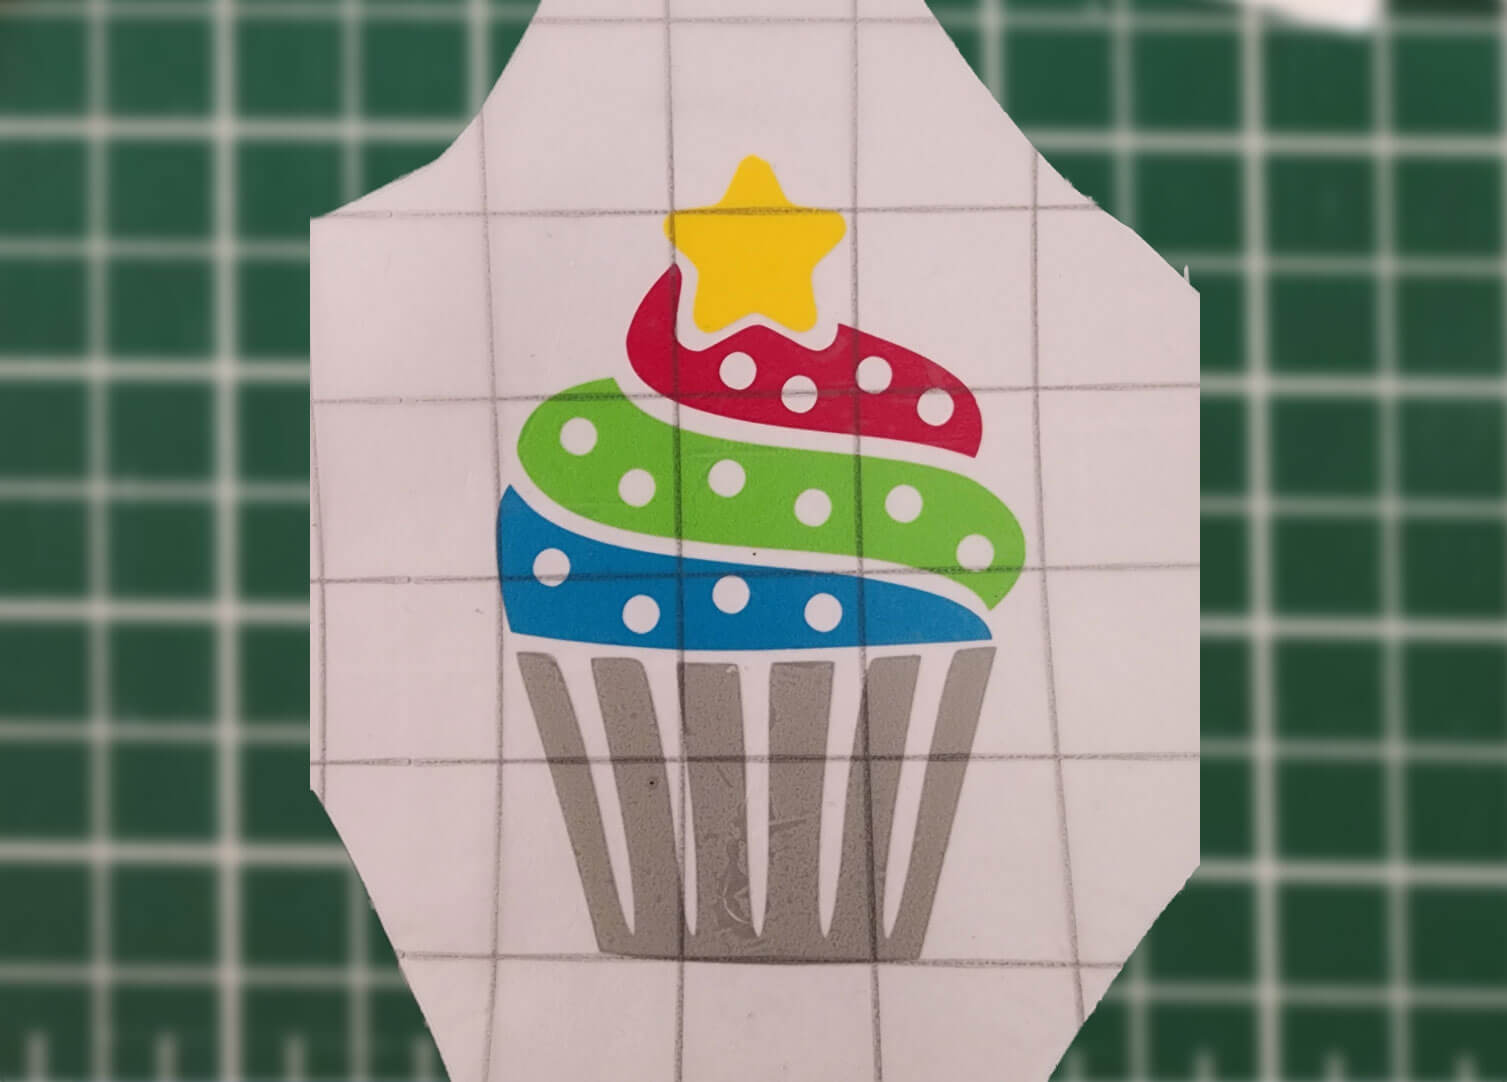
This then exposes the adhesive side of the sticker. Quickly move the sticker to the desired surface and place where desired. Press over the sticker very firmly to force the adhesive to tack. 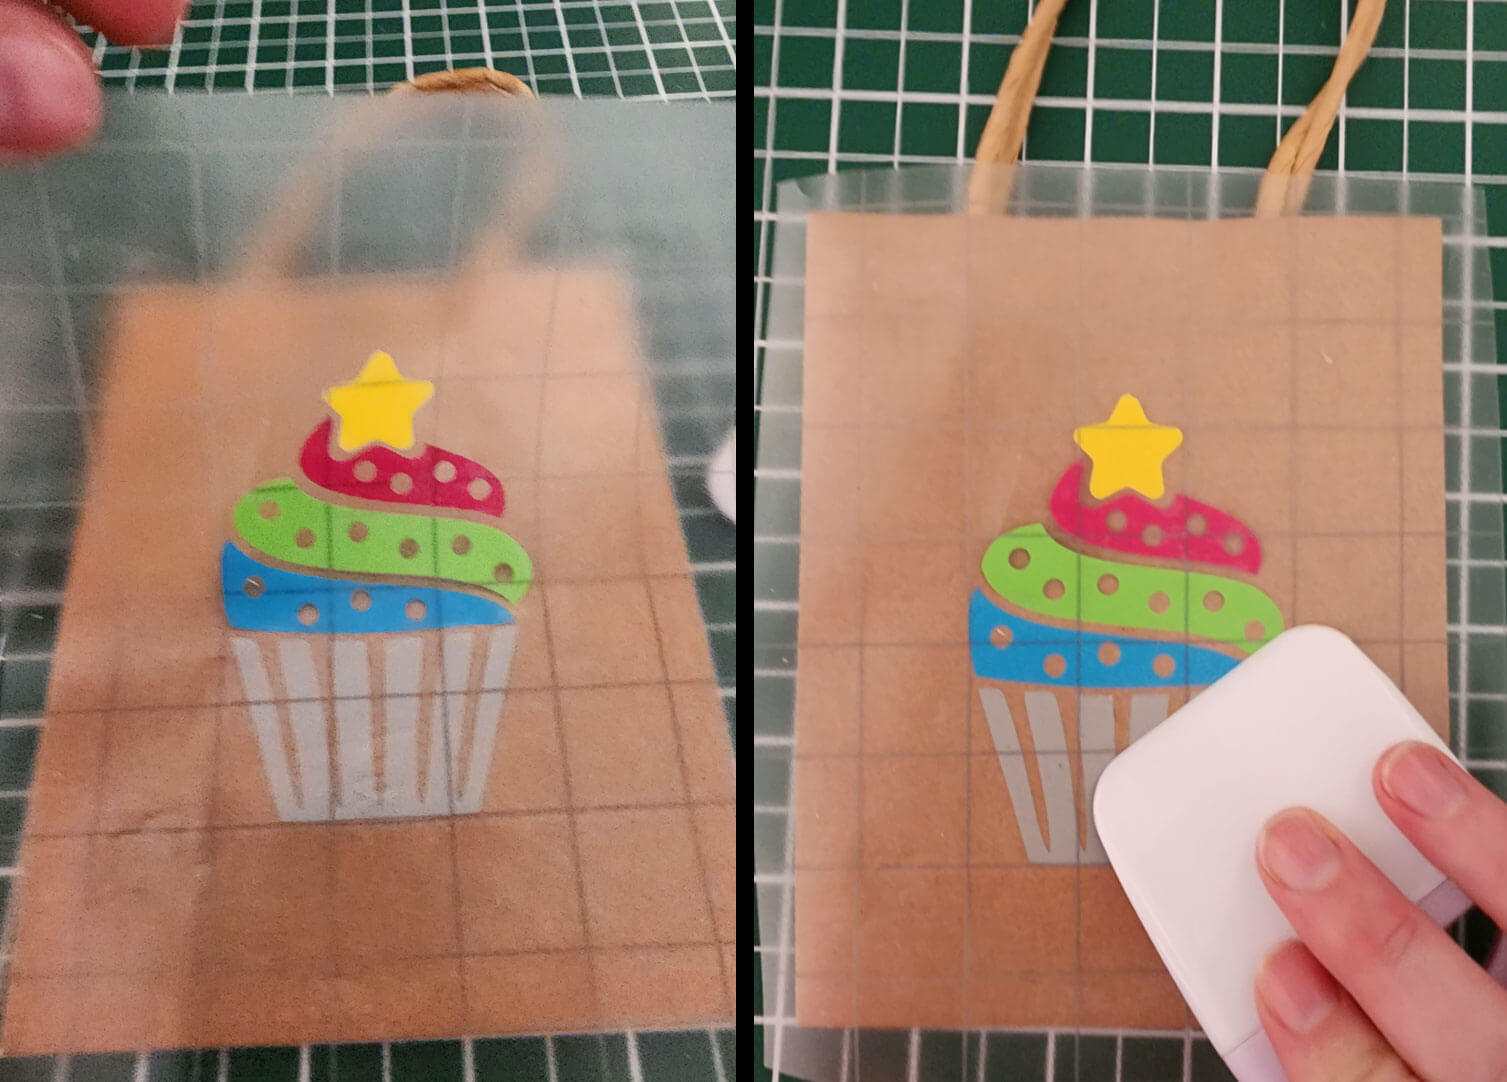
The sticker’s own adhesive is much stronger than the masking tape or transfer paper, so once the sticker is applied the tape can be peeled away to reveal the applied sticker. 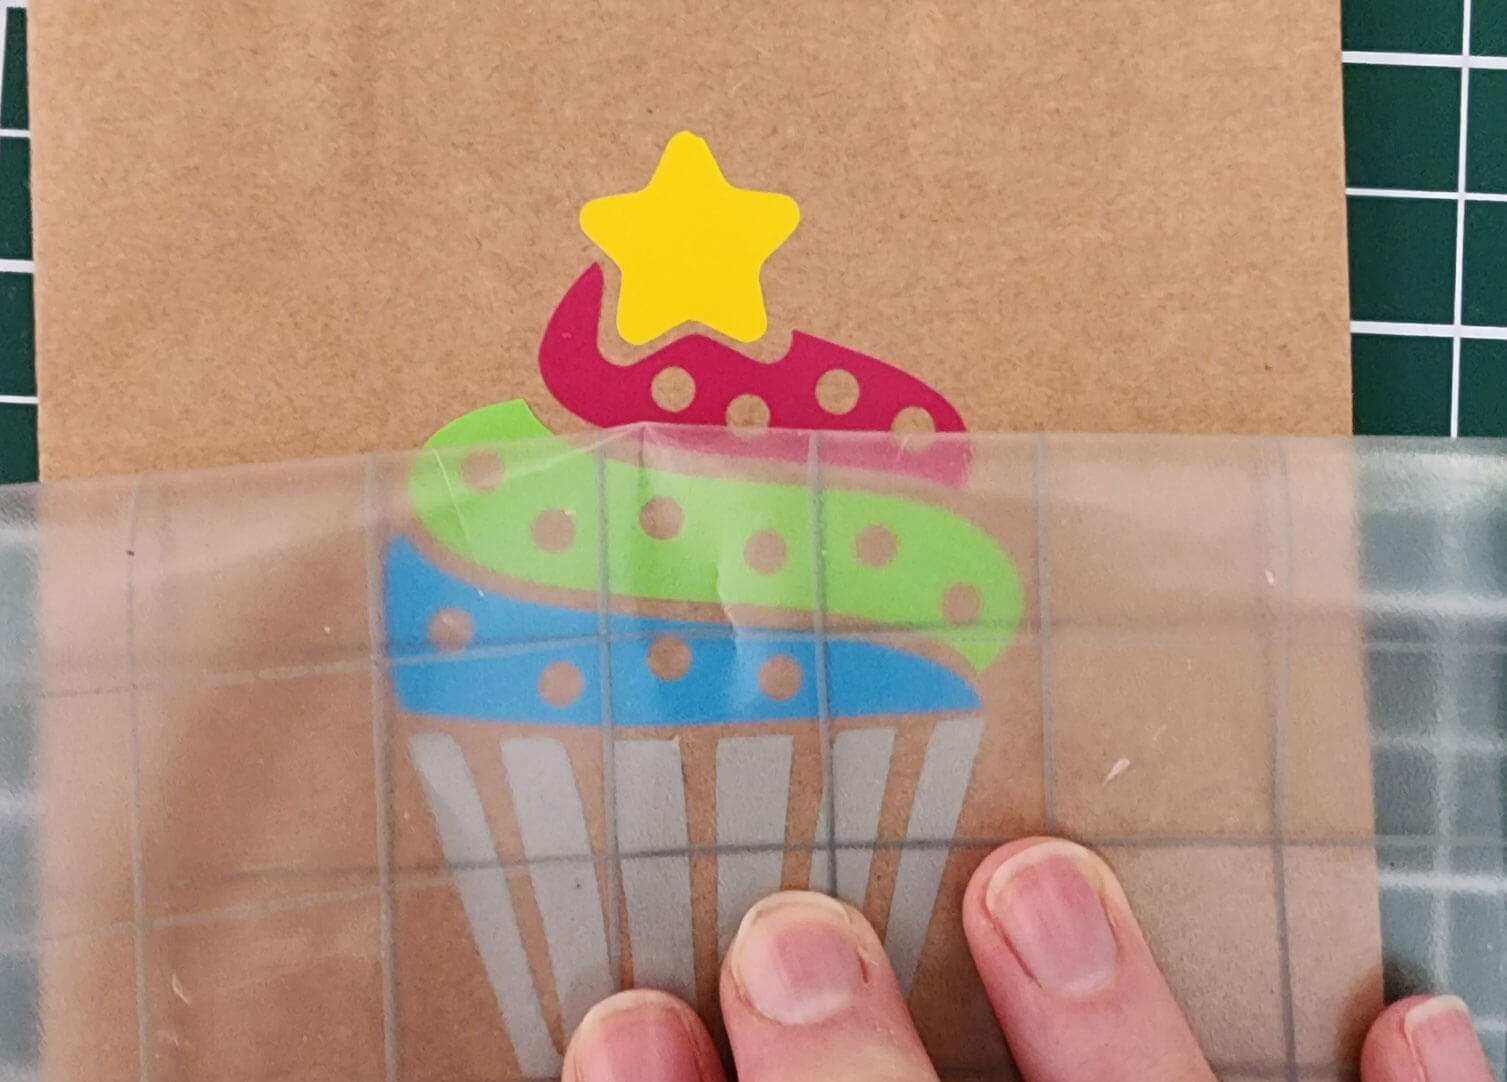
And you're done, you have successfully layered adhesive vinyl.