All Projects


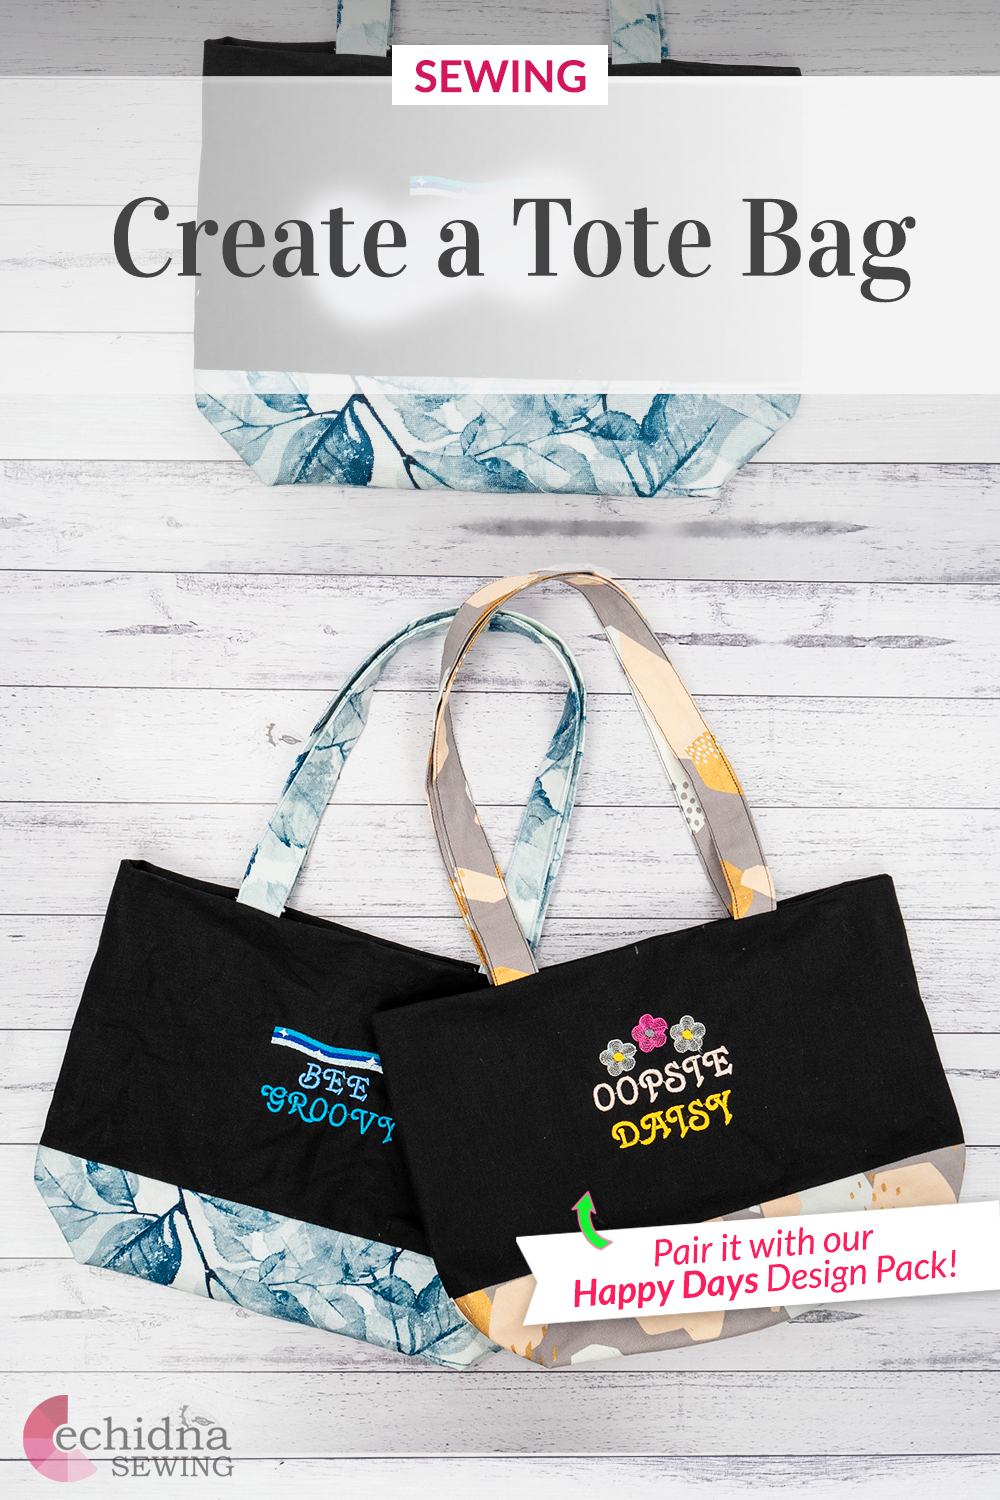
Tote Bag
Date Posted:1 November 2022
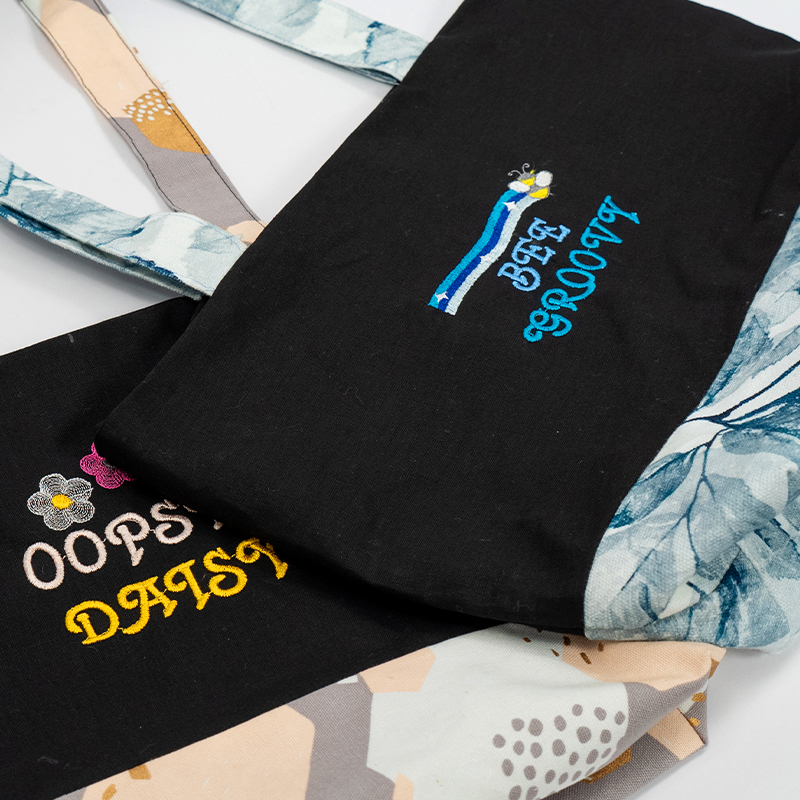
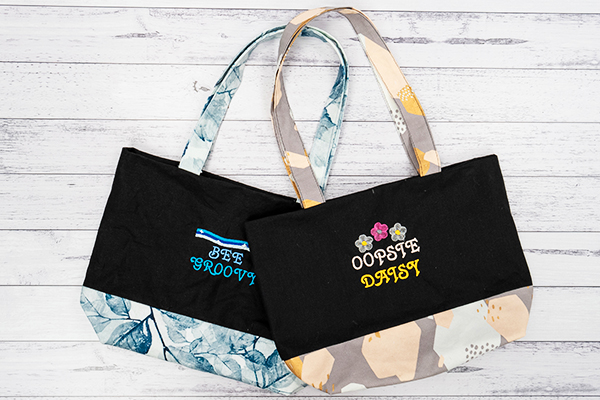
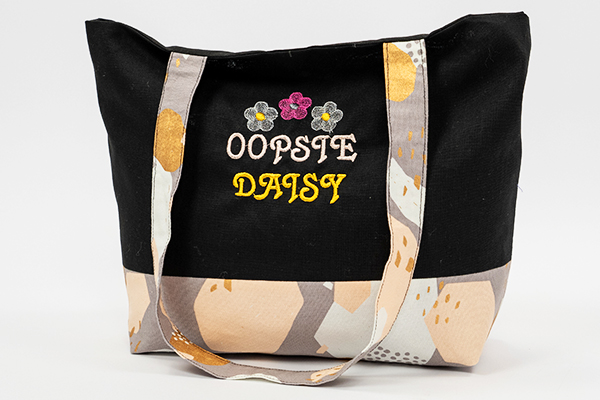
These tote bags are the perfect small size to use every day to carry your lunch, small books, or even as a small gym bag. You can add embroidery for a touch of personalisation and make your creation unique. They are super easy to make and are fantastic gifts for your family and friends. This project is perfect for all levels of sewing, from beginner to advanced, and is suitable for kids as well.
We recommend making this bag out of a medium-weight cotton drill, or lightweight denim. If you have a lightweight fabric you are wanting to use, you can iron on a piece of lightweight interfacing to give it a bit more structure. For sewists wanting to make this a little more complex, you can try making it from corduroy, brocade, or a sequin fabric.
What you'll need:
- Sewing machine
- Fabric 1 - WOF 30" (Main fabric)
- Fabric 2 - WOF 10" (Accent fabric)
- Rasant thread to match your fabric
- Sewing scissors
- Rotary cutter and mat
- Ruler (we recommend our 24" x 6" patchwork ruler)
- Pins and small Echidna clips
- Frixion pen (or chalk)
- Iron and ironing board/wool pressing mat
- Purple thang
- Loop turner
- Optional:
- Embroidery machine
- Embroidery threads
- Cutaway or tearaway stabiliser
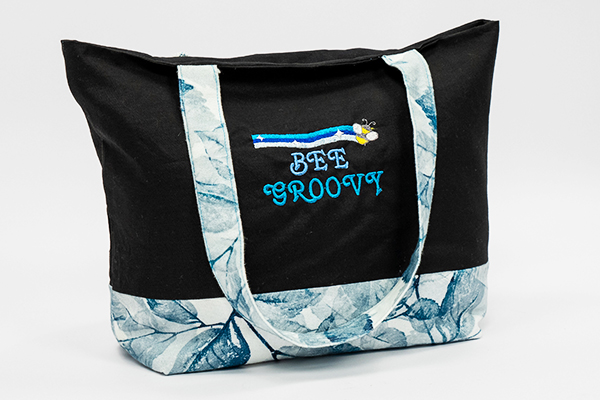
Embroider your tote bag with our FREE embroidery design
You can download one of our fabulous designs from our Happy Days by Echidna Designs collection for FREE! Add some adorable detail to your tote bag with our 'Bee Groovy' design. Download now →
Love these designs? You can purchase the full Happy Days design pack by Echidna Designs with all 10 designs online. Take a look →
Step Overview
The steps below are just an overview of the project instructions and must be used in conjunction with the tutorial video. Print these steps out to have beside you when watching the video as a reminder.
Please note: We are creating this project with embroidery using a 4" x 4" hoop. If you are using a larger hoop, you will need to alter the size of your main body fabric. This is explained in our video above.
- Cut out your fabric pieces: 2 pieces measuring 15” x 8” (main body) and 1 piece measuring 15” x 25.5” (lining) from your main fabric. You will also need 2 pieces measuring 3” x 21”(straps) and 1 piece measuring 15” x 10” (bottom of the bag) from your accent fabric.
- If adding embroidery, do so on one of the main body pieces, making sure it is in the middle.
- Place one of your main body pieces right side up, and place your accent fabric face down, aligning the long edges together, pin or clip to secure.
- Stitch together with a ¼” seam allowance and a straight stitch, then press the seams open.
- Take your other main body piece and align it on the other long end of the accent piece, right sides together. Pin or clip to secure.
- Stitch with a ¼” seam allowance and a straight stitch, then press the seams open.
- Fold piece in half width ways, right sides together, aligning top edge and sides together, pin or clip to secure.
- Stitch sides shut with a ¼” seam allowance and a straight stitch, leaving the top open.
- Box the end seams by separating the fabric layers apart to make a triangle. The side seam should run down the middle of the triangle. Pin to hold.
- Mark a point 3” down on either side of the triangle.
- Using your ruler, connect the two points with a straight line.
- Sew along this line with a straight stitch.
- Repeat steps 9-12 on the other side.
- Trim off the excess fabric.
- Take your lining fabric and fold it in widthways, pin or clip to secure. Mark a 3” gap along the side.
- Stitch the two sides together, with a straight stitch and a ¼” seam allowance. Leaving the top and the 3” gap open.
- Repeat steps 9-13 with your lining fabric. Set aside.
- Fold one of your strap pieces in half lengthways, pin or clip to secure.
- Stitch together down the length with a straight stitch using a ¼” seam allowance.
- Turn right side out with your loop turner (or use a safety pin).
- Press flat with your iron, the seam should be on one side.
- Top stitch both long sides with a 3mm straight stitch as close to the edge as possible.
- Repeat steps 18-22 with your other strap.
- Using your ruler and chalk, on your main body, mark a point 4” from both of the side seams on both sides of the main body, leaving you with four points.
- Align each end of your straps on the INSIDE of this mark. Pin to secure (Make sure your straps are facing the bottom of the bag and not the other way).
- Turn your lining wrong side out and insert your main body inside so that the right sides are touching. Pin or clip to secure.
- Stitch around the entire perimeter of the top, using a straight stitch and a ¼” seam allowance.
- Turn the bag right side out using the opening on the side of the lining.
- Tuck in your turning hole and sew shut.
- Press all the bag seams.
- You're done!
Don’t forget to show us your finished projects on Instagram or Facebook #echidnasewing #madebyme
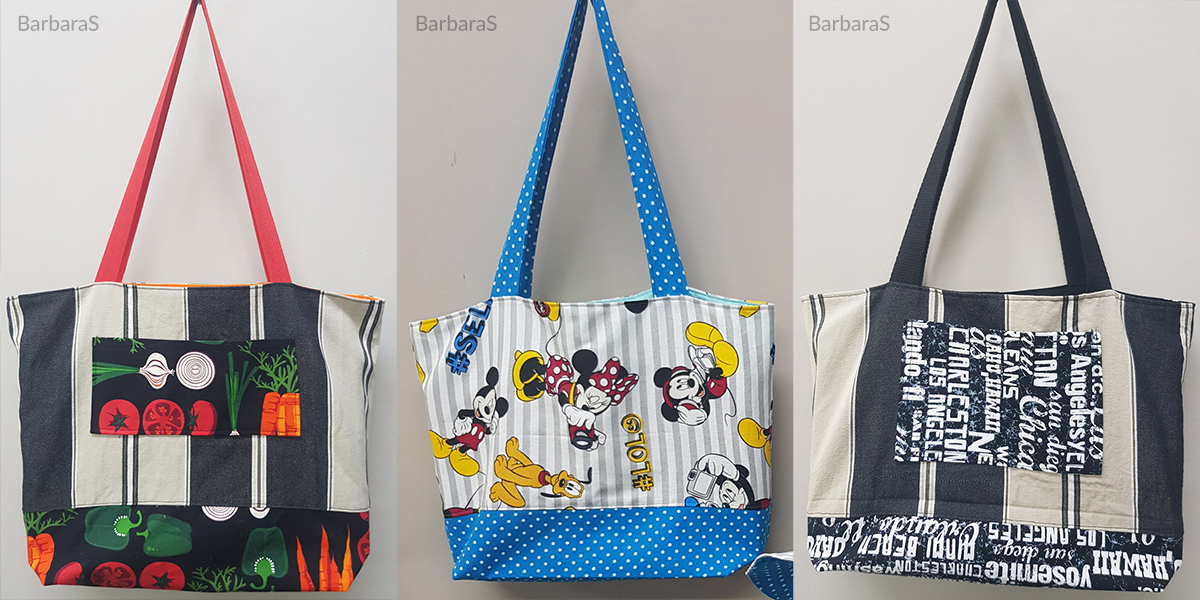
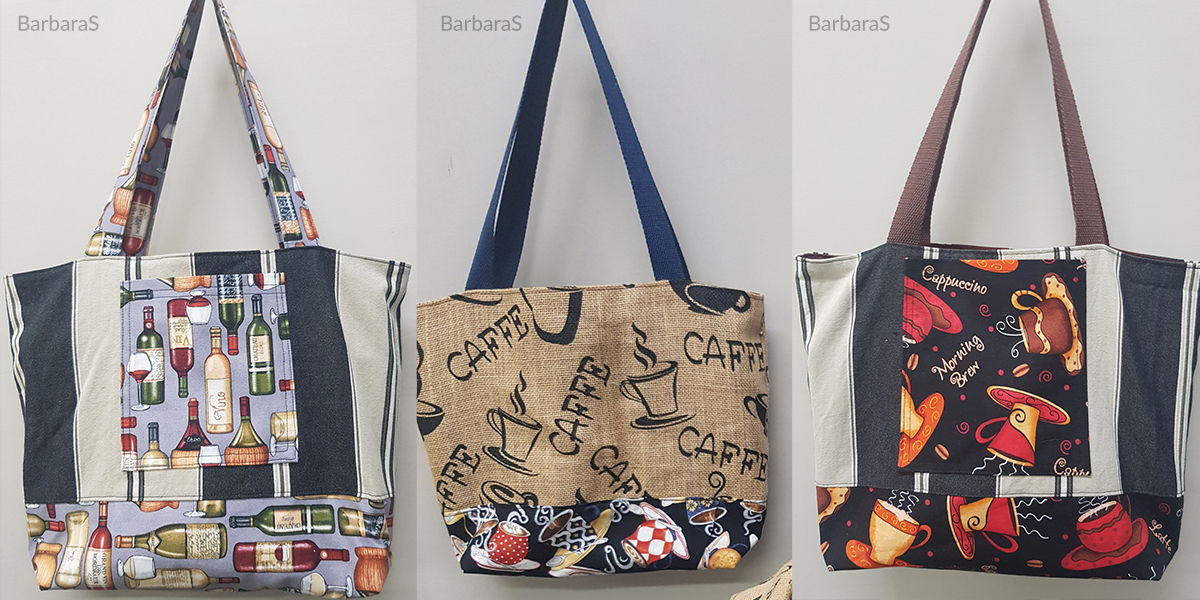
Customer Photos
Free Embroidery Designs
We're excited to offer our free Echidna designs available for download. These free designs are perfect for those at a beginner or an advanced level. Add these designs to your stash and create incredible embroidery!
View all free designs >
Sewing, Quilting and Embroidery Machines
Interested in learning how to sew, quilt or embroider? Take a look at the innovative Brother machines available for purchase at Echidna Sewing. Wherever possible we will beat any deal and you will always receive ongoing service and support!
Find out more >
Learn to Sew or Embroider with Echidna Sewing
Come along to our fun-filled classes to learn more about sewing, embroidery and crafting. Classes cater for all skill levels, whether you're just starting out or already have advanced knowledge.
Find out more >
Echidna project material/ fabric requirements are an indication only and can seem to be generous. This has been intentional. Should you make a cutting or embroidery mistake you will have sufficient fabric to rectify your error.


