All Projects


Fiddle Pillows
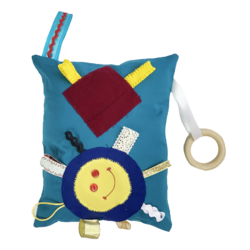
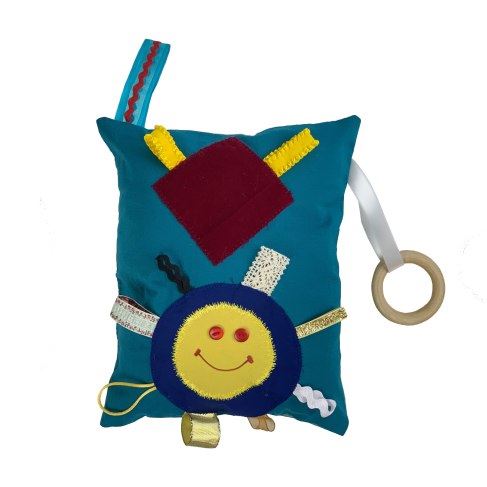
Fiddle pillows are a great project to create for kids or aged care patients who suffer from dementia. A fiddle pillow is designed to engage the senses and keep the hands occupied. It is a great way to assist in managing tension and anxiety, by keeping the user relaxed and distracted.
MATERIALS NEEDED
Please note: If creating this pillow for a charity, a patient with dementia, or someone with autism, we suggest no patterned fabric to be used.
- 1 x Fat quarter of plain cotton fabric - pillow top (20" x 20" square)
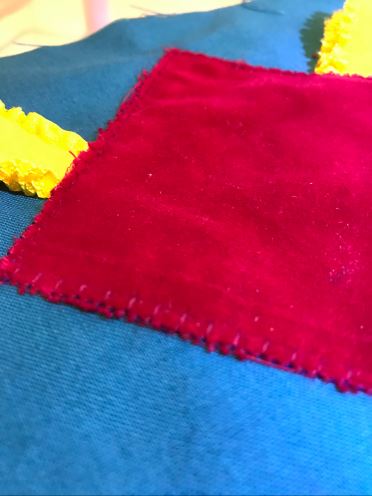
- 1 x Fat quarter of textured fabric - pillow back e.g. Corduroy, velvet, fur fabric, linen, satin
- 1 x 6" square plain fabric (used for large circle)
- 1 x 4" square textured fabric (used for small circle)
- 2 x buttons
- Various ribbons of different textures and styles: Organza, satin, decorative ribbons (We have used 3 x ric rac large and small, cord, decorative or regular elastic)
- Thread for applique and piecing
- Toy stuffing
- 1 x Wooden pole ring (we got ours from the Bunnings curtain department)
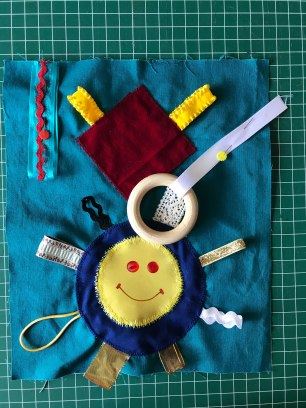
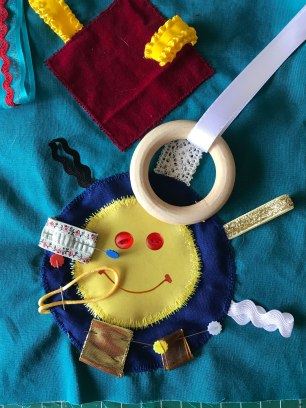
You can download our Placement Plan to follow. This is a guide as to where we have placed the fabric, ribbons, objects on our pillow. Otherwise, feel free to make your own. Download Placement Plan →
CUTTING INSTRUCTIONS
-
- Cut each fat quarter to 10" x 12", set aside.
- Cut out your applique pieces:
- 1 x 5 ½" circle
- 1 x 3" circle
- 1 x 3" by 3" square
(Refer to Placement Plan) - Cut ribbons and ric rac embellishments and set aside (see below):
- For the 5 ½" circle - cut 8 ribbons and ric rac embellishments - (4-5 inches long for each piece).
- For the 3" x 3" square - cut 2 pieces of elastic (1 x 3" and 1 x 6").
- For the outer edge cut 1 x 9" piece for both the organza ribbon and ric rac. Also cut 1 x 10" piece of white satin ribbon for the wooden ring.
STITCHING INSTRUCTIONS
Prepare embellishments for stitching onto cotton fabric.
- Stitch ric rac on top of 9" organza ribbon - set aside.
- Take wooden pole ring and thread it onto the 10" piece of satin ribbon. Pin the ribbon to hold together - set aside.
- Attach elastic to each side of the 3" x 3" square using a matching thread.
Sewing applique shapes onto pillow
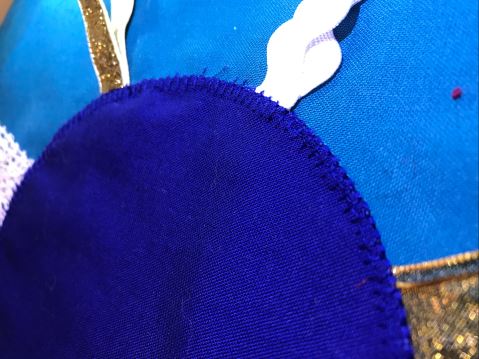
- Place the 5 ½" circle onto the top of the plain cotton fabric near the bottom.
- Select the 8 ribbon & ric rac pieces and fold in half. Slip the raw edge under the blue circle and position the 8 pieces evenly around the circle.
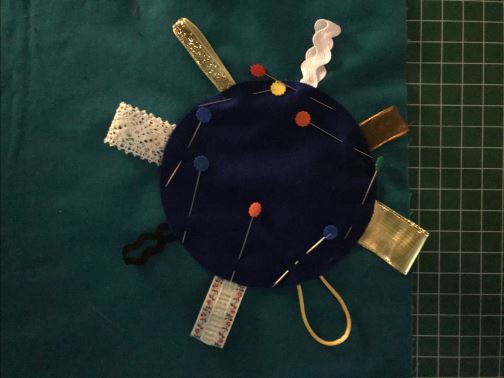
- Select a matching thread to the 5 ½" circle and stay stitch as close to the edge around the outside of the circle to hold the embellishments in place. Choose a decorative stitch - we used a blanket stitch. Sew around the outside of the circle covering the raw edge and stay stitching.
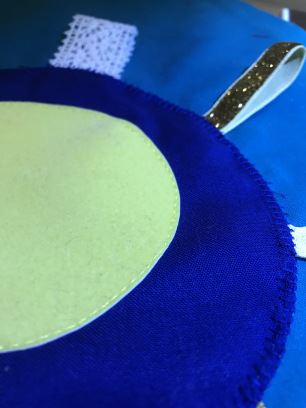
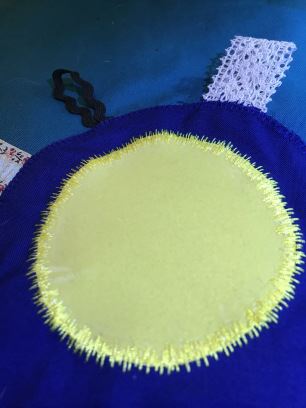
- Change thread to match the 3" circle. Stay stitch circle onto the top of the 5½" circle. Choose a decorative stitch and sew around the outside of the circle covering the raw edge and stay stitching.
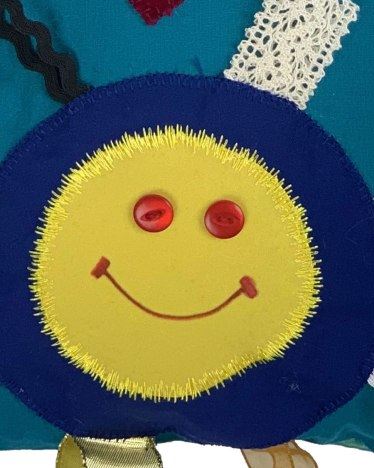
- Attach the buttons onto the top of the 3" circle and draw or stitch a smiley mouth (we have done this using a Pintor Pen).
- Change thread to match the 4" square. Place the square at the top of the cotton fabric. Fold the elastic in half & slip the raw edge of the elastic under the square (refer to Placement Plan). Stay stitch as close to the edge around the outside of the square to hold the elastic in place, then choose a decorative stitch and sew around the outside covering the stay stitching and raw edge.
Sewing embellishments to outer edge of pillow
- Pin the organza ribbon 1" in from the top left hand corner of the pillow. Using a ¼" seam, sew the organza ribbon onto the edge of the pillow.
- Pin the satin ribbon with the wooden pole ring 2" down from the right hand corner of the pillow. Using a ¼" seam, sew the satin ribbon onto the edge of the pillow.
SEWING THE FIDDLE PILLOW TOGETHER
- Fold and pin the ribbons into the middle of the pillow to ensure they don't get caught in the seams.
- With the right side of the pillow facing up, lay the backing fabric on top.
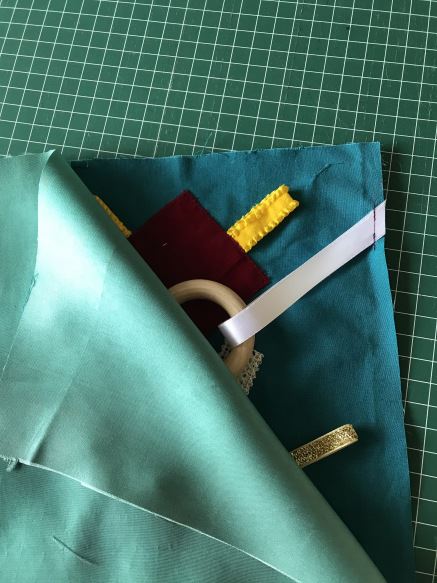
- Pin in place, and using the edge of your foot as a guide, stitch around the outside of the pillow leaving a 2" gap for turning inside out and stuffing.
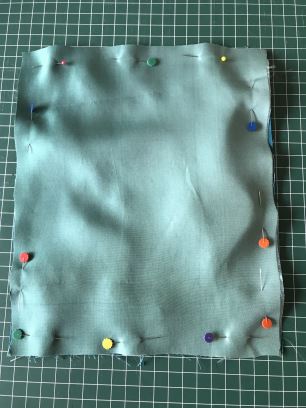
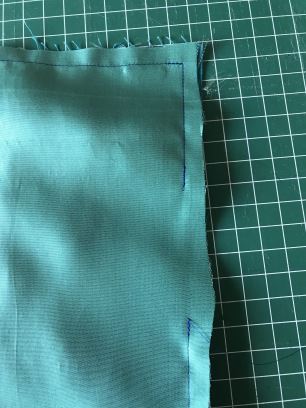
- Remove the pins and clip the corners.
- Turn in the right way, remove the pins that were holding the ribbons onto the pillow.
- Stuff the pillow with toy stuffing and slip stitch the gap closed.
DONATE SOME TO A CHARITY
These fiddle pillows can also be donated to charity. If you want to contribute to a great cause, the charities listed below accept our handmade fiddle pillows to distribute. Just send your creations in to the mailing address provided.
Are you a charity that would accept this item? Contact us to have your details added here.
QLD
Dementia Australia
View locations throughout Queensland →
OzCare
66 River Terrace
Kangaroo Point QLD 4169
Australia
NSW
Dementia Australia
View locations throughout New South Wales →
VIC
Dementia Australia
View locations throughout
Victoria →
ACT
Dementia Australia
View locations throughout the Australian Capital Territory →
SA
Dementia Australia
View locations throughout South Australia →
NT
Dementia Australia
View locations throughout the Northern Territory →
TAS
Dementia Australia
View locations throughout
Tasmania →
WA
Dementia Australia
View locations throughout Western Australia →

Free Embroidery Designs
We're excited to offer our free Echidna designs available for download. These free designs are perfect for those at a beginner or an advanced level. Add these designs to your stash and create incredible embroidery!
View all free designs >
Sewing, Quilting and Embroidery Machines
Interested in learning how to sew, quilt or embroider? Take a look at the innovative Brother machines available for purchase at Echidna Sewing. Wherever possible we will beat any deal and you will always receive ongoing service and support!
Find out more >
Learn to Sew or Embroider with Echidna Sewing
Come along to our fun-filled classes to learn more about sewing, embroidery and crafting. Classes cater for all skill levels, whether you're just starting out or already have advanced knowledge.
Find out more >
Echidna project material/ fabric requirements are an indication only and can seem to be generous. This has been intentional. Should you make a cutting or embroidery mistake you will have sufficient fabric to rectify your error.


