All Projects
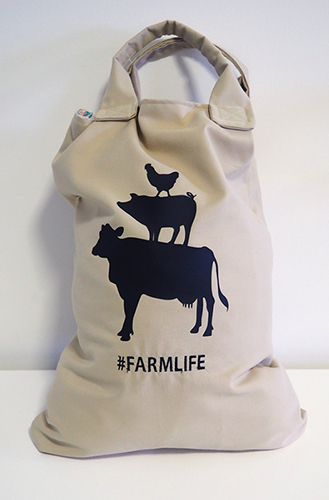
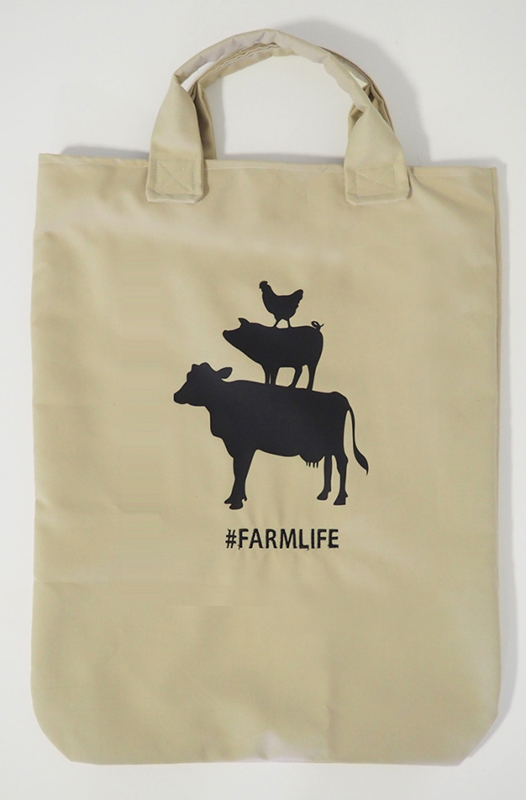


Drawstring Tote Bag
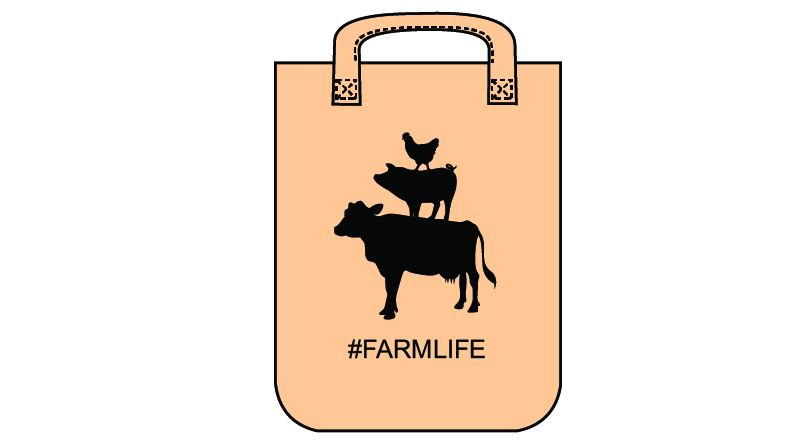
Create a tote bag with a drawstring and handles, and add an embroidery or ScanNCut design of your choice! This bag is perfect for a variety of uses, like carrying essential, personal or toiletry items, or even your groceries!
This project is great for all levels of sewing, from beginner to advanced. Create it for yourself, or a friend, or donate it to charity. Find out what charities accept these tote bags →
Requirements
General tools:
- Sewing machine
- 1 metre cord
- Scissors
- 1 metre bag fabric
- 1 metre lining fabric
- Iron-on interfacing
- Pins
- Matching thread
Fabric:
- Bag & lining: Cut 2 pieces measuring 50cm (w) x 40cm (h)
- Lining pocket: Cut 2 pieces measuring 28cm (w) x 30cm (h)
- Lining internal drawstring holder: Cut 1 piece measuring 78cm (w) x 5cm (h)
- Bag strap & iron-on interfacing: Cut 4 fabric pieces and 2 lining fabric pieces measuring 40cm (w) x 60cm (h)
Tools needed to add optional embellishment:
- Embroidery machine with 4" x 4" hoop or larger
- Brother ScanNCut machine
- Flex iron-on transfer
- Your chosen embroidery or ScanNCut design (we used a design for Aussie Helpers charity)
Instructions
Bag & Lining
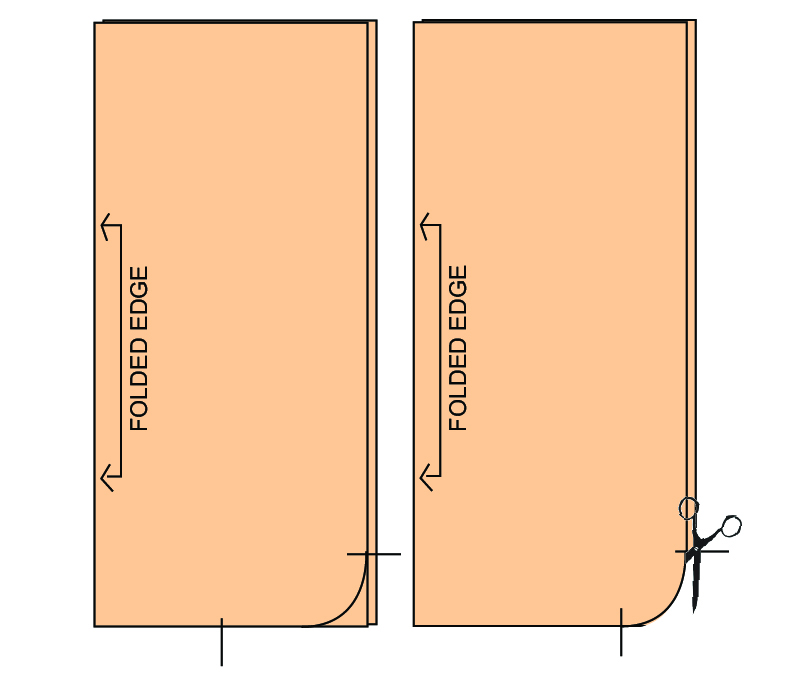
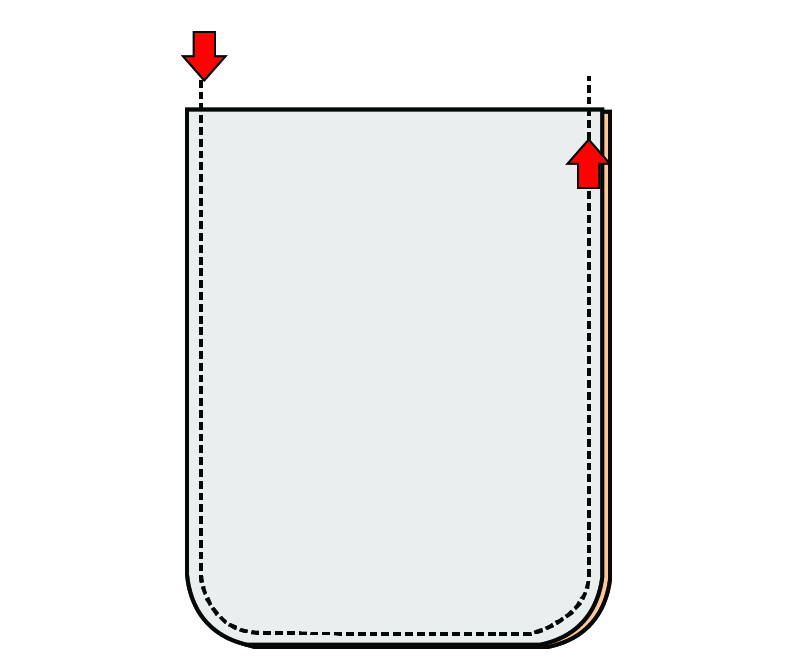
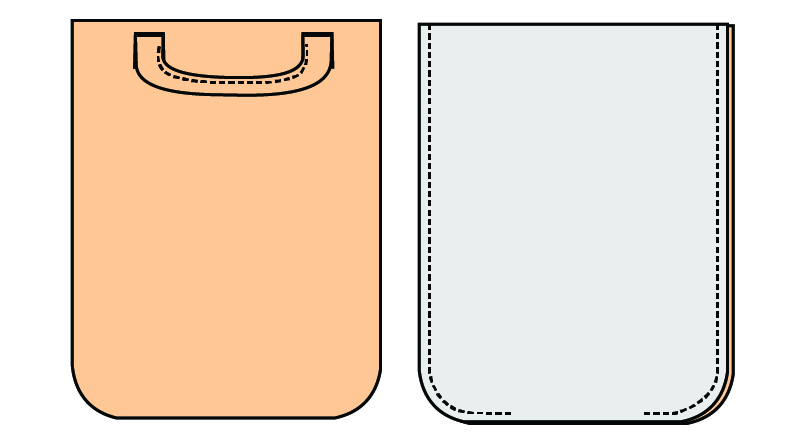
- Fold the bag in half (width wise) and measure 6cm in and up from the bottom cornered edge. Draw a curved line connecting these two marks. Cut along this curved line, which will give your bag and lining a cornered bottom.
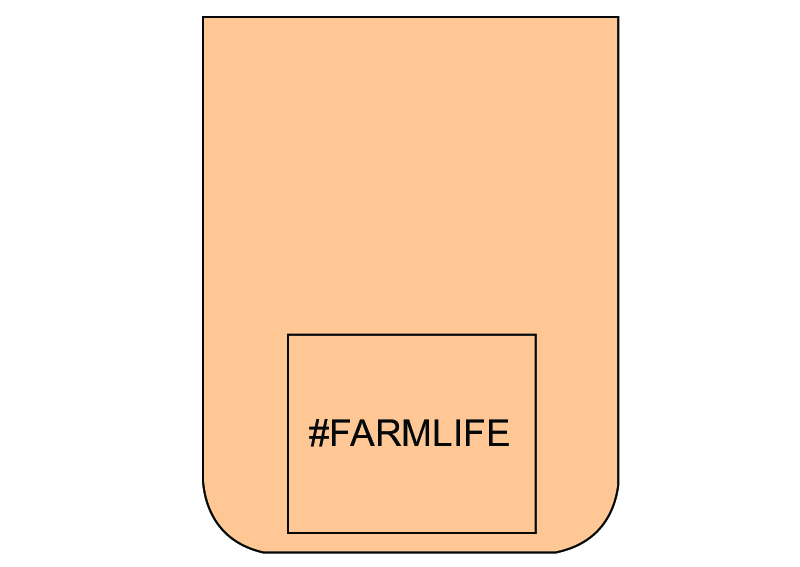
- OPTIONAL: Embroider the front of your bag placing some cut away stabiliser underneath your fabric.
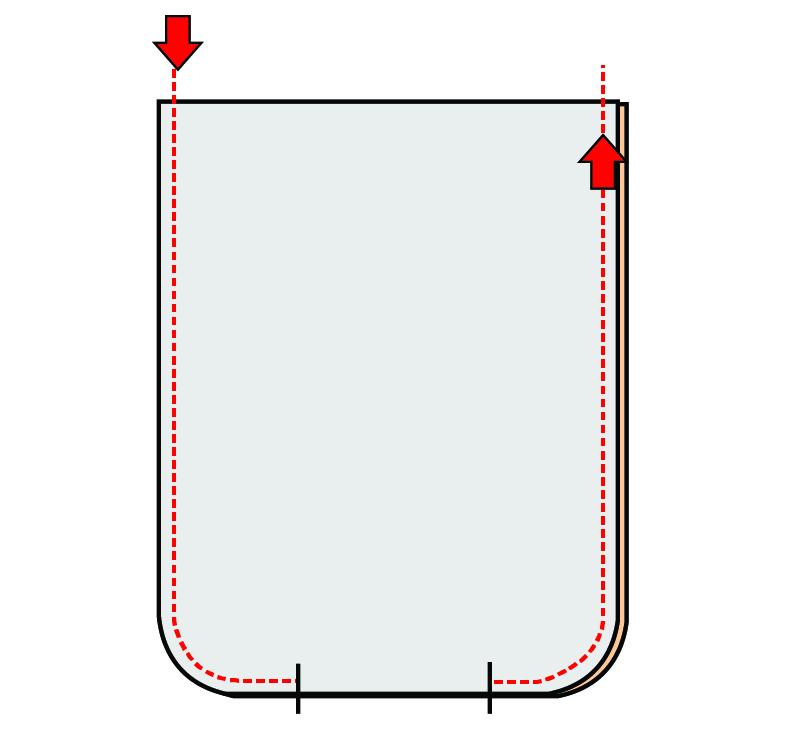
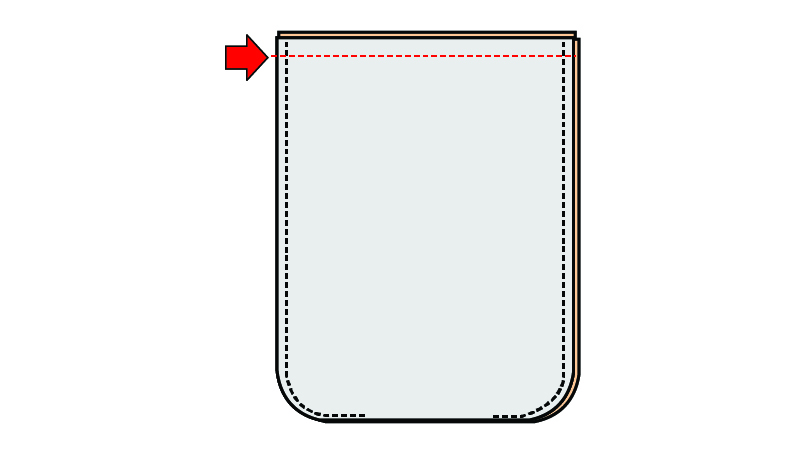
- Place the right sides of the bag fabric together and stitch a line 1/4 inch from the top left of your bag, down around the bottom corners, finishing at the top left of your bag. Cut the corners of your bag, making sure not to cut through the stitch line.
Lining Pocket
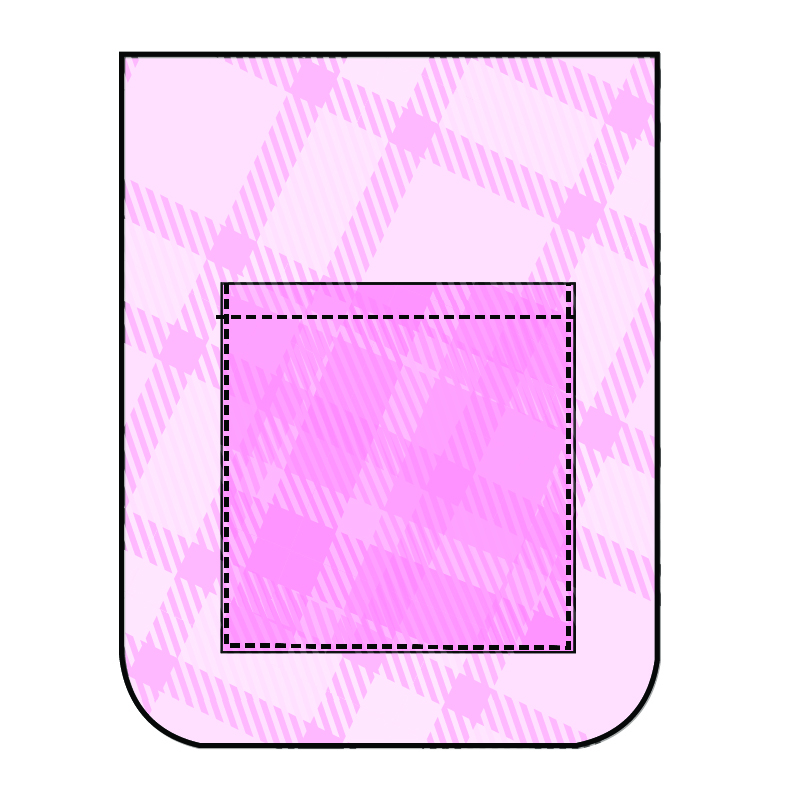
- Fold the right side of your lining pocket down 2cm from the top and then fold it down under again, so that no raw edges are showing. Now stitch a line across this to secure it down.
- Place this pocket 10cm from the bottom of the bag lining. Fold the outside edges in 1/4” and pin this down. Stitch as close as you can to the edge of your pocket from the top left, around the bottom back up to the top right. Repeat this for the second pocket on the other side of the bag lining.
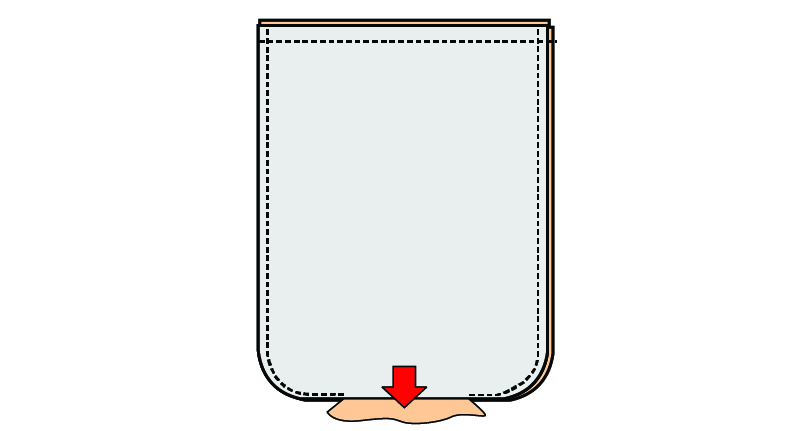
- Place the right sides of the bag lining together and stitch a line 1/4 inch from the top left of your bag down to the bottom. Here we will leave a 10cm gap and then continue to sew up to the top right corner. Cut the corners of your bag, making sure not to cut through the stitch line.
- Fold the lining inside out and iron down flat making sure to push out the corners.
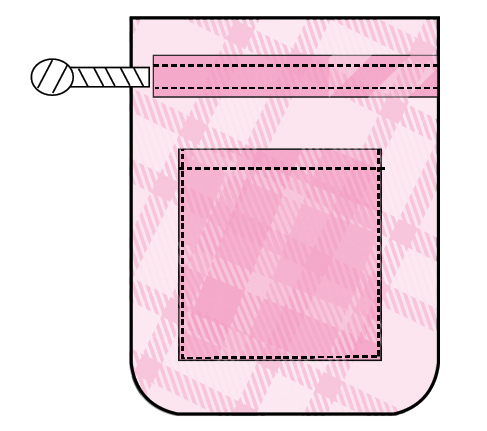
Drawstring Lining
- Fold the top and bottom edges of the drawstring lining under 1cm. Stitch this down.

- Now fold the left and right in about 2cm and stitch this down.

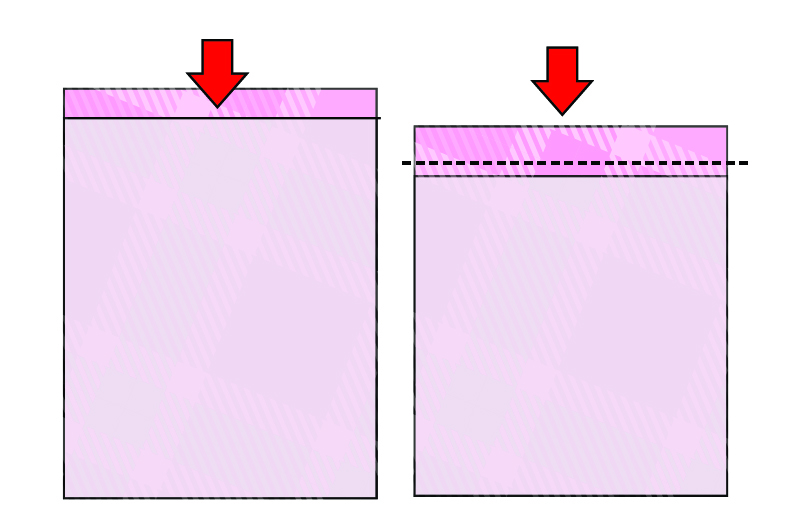
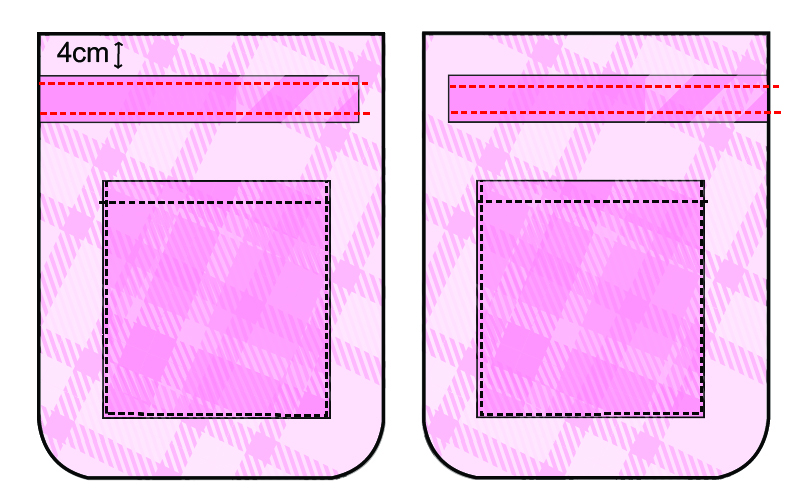
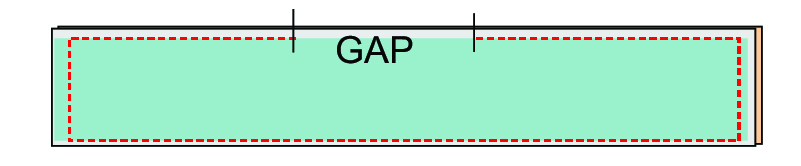
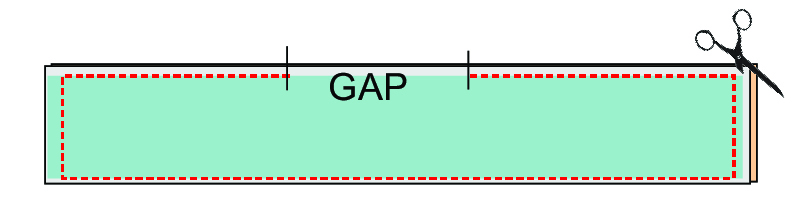
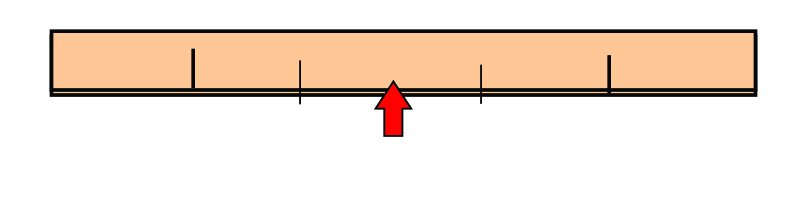
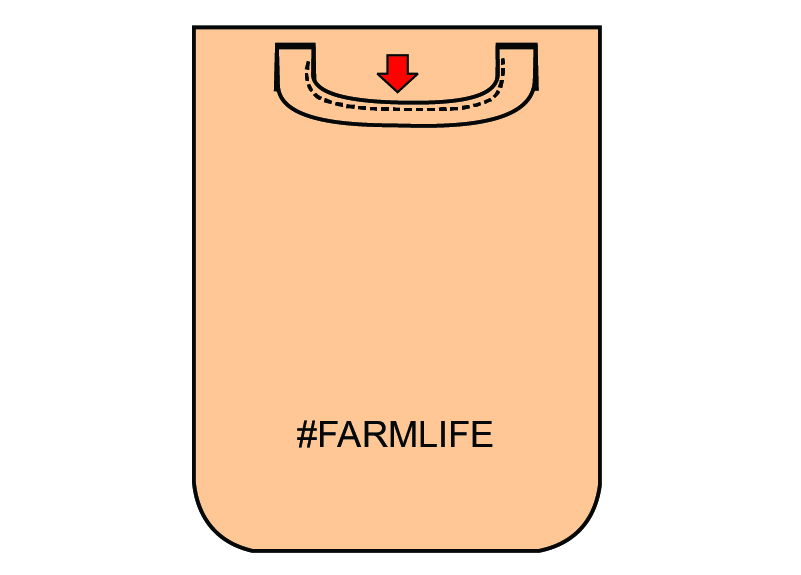
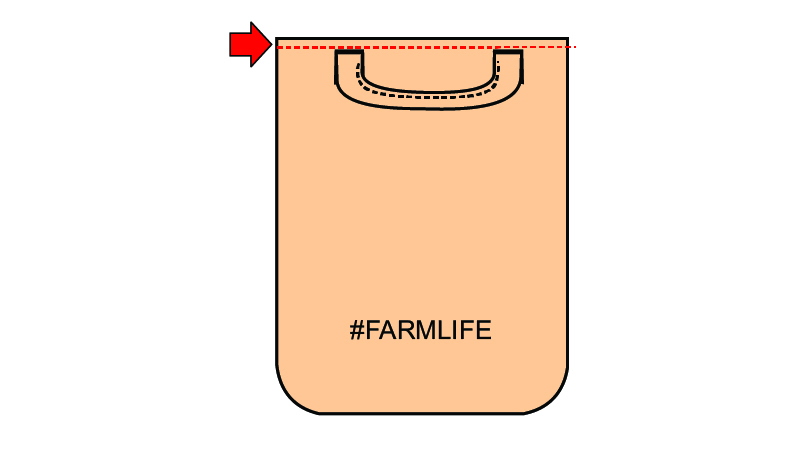
- Now place your drawstring fabric on the top of your bag, with the right side showing. Make sure to leave a 4cm gap from the top of your bag, as shown left.Pin this down and now stitch all along the top and bottom only
Note: This fabric is not intended to meet the edge of the bag and will leave a gap at both edges. This is to ensure that you can fit your drawstring cord inside.
Bag Strap
- Get two pieces of your bag strap fabric and iron on some iron-on interfacing to the wrong sides of this fabric.
- Now place the wrong sides of your bag strap fabric together and stitch a line all around your strap, leaving a 5cm gap at the top.
- Cut the corners of your fabric, making sure not to cut through the stitch line.
- Now turn the strap inside out and iron it flat.
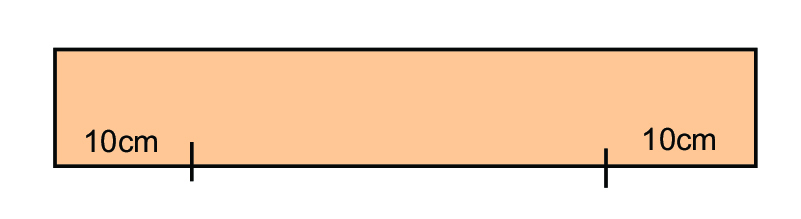
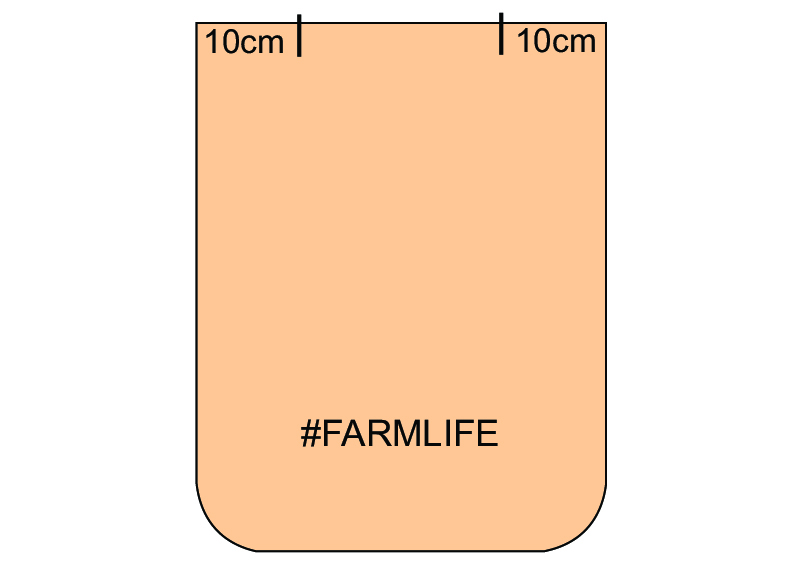
- Measure in 10cm from both sides of the strap. Mark a line.
- Fold the strap in half length ways, making sure to push the inside of the fabric so that the unsewn gap sits nicely.
- Now stitch a line as close to the edge as you can, inside this 10cm marking.

- Repeat for the second strap

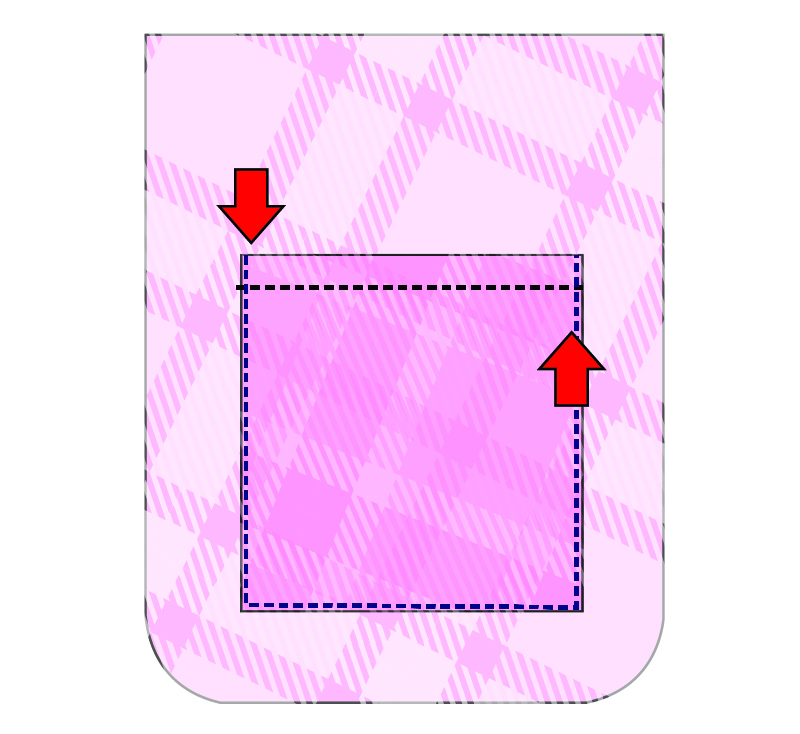
- Measure 10cm in from left and right of your fabric front and back. Mark a line.
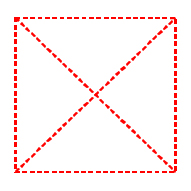
- Now place your strap edges onto the bag so that the strap edges sit in line with this 10cm marking. You are going to stitch your bag straps on using a rectangle with cross stitch line, shown below.
Just make sure that you stitch your straps down at least 2cm down from the bag top. Repeat for the second strap.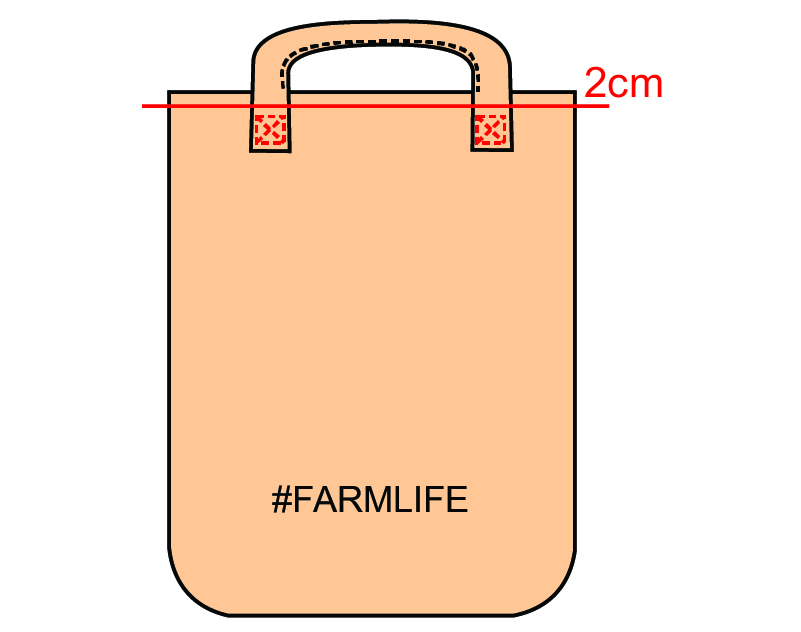
- Fold your straps down and pin these in place to your bag.
- Turn your bag lining inside out. Now place your bag inside your bag lining. You’ll notice that the right sides of the bag and lining are facing.

- Stitch 1/4” around the top inside of your bag so it stitches completely closed. Making sure not to stitch over your bag straps that are sitting inside. Pull the bag through the gap in the lining bottom.
- Keeping the straps pinned in place. Iron and push out the bag edges so that it sits nicely. Iron down the top of your bag. Now you can stitch another line around the top of your bag so that it’s nice and secure.
Add ScanNCut embellishment (OPTIONAL)
Before finishing your bag with the drawstring cord, here you can cut out your ScanNCut design and iron it onto your bag.
Finishing steps
- To finish off the bag, place a safety pin at the end of your cord and guide the cord through the drawstring opening on the inside of your bag.
- You have now completed your drawstring tote bag.
DONATE SOME TO A CHARITY
These bandanas can also be donated to charity. If you want to contribute to a great cause, the charities listed below accept handmade bandanas. Just send your creations in to the mailing address provided.
Are you a charity that would accept this item? Contact us to have your details added here.
Queensland
Aussie Helpers
Address:
18 Wills Street
Charleville QLD 4470
Add an embellishment
Download 'Farm Life' embroidery design →
Download ScanNCut farm animal design →
Free Embroidery Designs
We're excited to offer our free Echidna designs available for download. These free designs are perfect for those at a beginner or an advanced level. Add these designs to your stash and create incredible embroidery!
View all free designs >
Sewing, Quilting and Embroidery Machines
Interested in learning how to sew, quilt or embroider? Take a look at the innovative Brother machines available for purchase at Echidna Sewing. Wherever possible we will beat any deal and you will always receive ongoing service and support!
Find out more >
Learn to Sew or Embroider with Echidna Sewing
Come along to our fun-filled classes to learn more about sewing, embroidery and crafting. Classes cater for all skill levels, whether you're just starting out or already have advanced knowledge.
Find out more >
Echidna project material/ fabric requirements are an indication only and can seem to be generous. This has been intentional. Should you make a cutting or embroidery mistake you will have sufficient fabric to rectify your error.


