All Projects
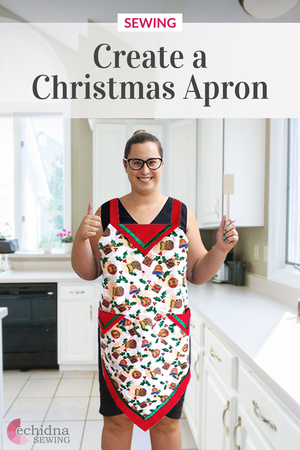


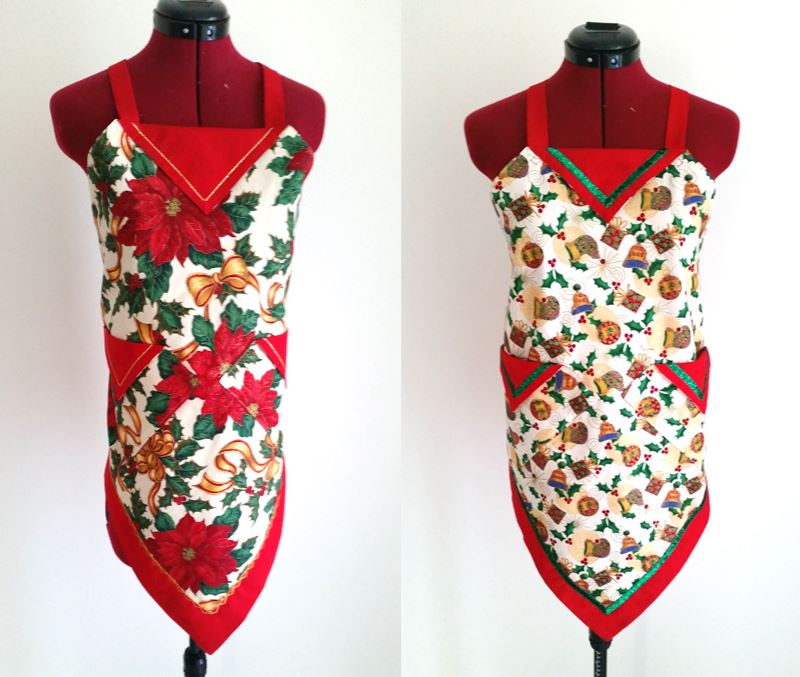
Christmas apron
Author: Rhonda Chandler Date Posted:17 November 2021
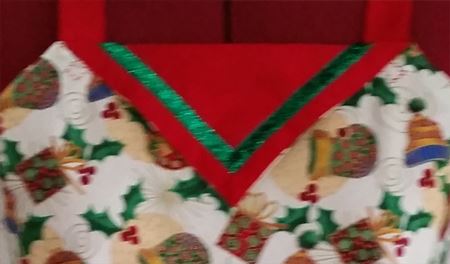
The lovely Christmas Apron is quick, easy to make and takes under an hour to complete. Embellish it with embroidery, or trim it with some pretty ribbon to make it that extra something special this Christmas.
WHAT YOU NEED:
- Fabric – Main Print or Plain – 60cm
- Contrast Plain – Homespun or Emma Louise – 65cm
- Normal Sewing Thread to match fabric
- 1.5 – 2.0mm Buttons x 2
- 1/4” Steam-A-Seam Light
- Adjustable Blind Hemming Foot (Brother F017N)
- Optional Ribbon or lace trim
- Contrast Embroidery Thread (Optional)
- Spray Starch
- Patchwork Ruler, Cutter & Mat
Cutting Out
- From Main Fabric , cut 1 x 60cm (23 ½”) Wide Square for Main Apron Piece and 2 Pocket pieces 20cm (8”) Square;
- From Contrast Fabric, cut the following pieces:
- Apron Lining - 1 x 65cm (25 ½”) Square
- 3 Straps - Across shortest 65cm width of fabric,
- Cut 3 x 6 ½cm (2 ½”) Wide Strips
- 2 Pocket Linings – Cut 2 x 20cm (8”) squares

Method
1. Thread your sewing machine with normal sewing thread. Select a Straight Stitch in centre needle position; length of 2.5 and your standard sewing foot (Brother J foot).
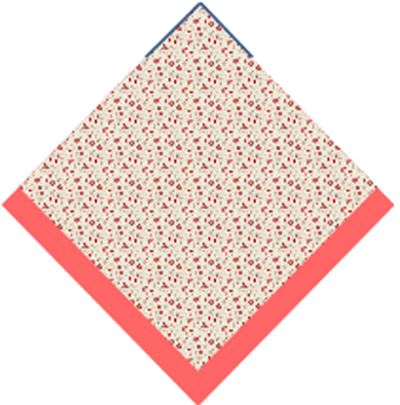
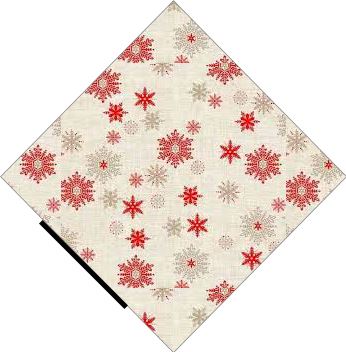
2. Place right sides of both main fabric and apron lining squares together aligning 2 sides – the bottom edge and the right hand corner. Pin fabrics together.

3. Using edge of your foot as a guide, first sew along pinned right side edge, stop approximately 3cm from corner and gradually reduce length of stitch until you reach the end of the fabric. Start stitching bottom edge with small stitch and gradually increase stitch length until you reach 2.5. Continue to sew seam to end of fabric edge i.e. apron lining fabric.
Note: By stitching the corner using this method, the small stitches will ensure that the corner is secured after you trim it back. Also, starting and finishing on the lining fabric, will give a guide line to press over later.
4. Trim corner back to stitching. Turn to right side. Press seam. How? - To make sure that you don't get any unwanted pleats hidden in seam, separate the 2 fabrics and place over your ironing board so that you can press seam towards lining fabric. Place both fabrics back together on top of the ironing board and then press seam so that fabric sits evenly on edge. Press under remaining edges of lining fabric using stitching as your guide to how much to fold over.
5. Turn apron to lining side. Press Steam-A-Seam to raw edges of remaining 2 sides. Using edge of Steam-A-Seam as you guide, press under these 2 edges.
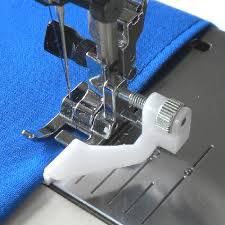
6. At your machine. Change length of Straight Stitch to 3.0. Attach Adjustable Blind Hemming Foot. This foot has an adjustable guide (as the name suggests) which allows you to move the plastic guide so that you can use this as a guide to align the edge of the fabric to give you a PERFECT straight stitch EVERY TIME.With Main Fabric side up, and aligning guide on edge of fabric, topstitch along 2 previously sewn sides.
7. Pin and tack down remaining raw edges. How? - Change back to your standard foot (Brother Foot J) on your machine; Straight Stitch 4.0. Move needle over on your machine by adjusting width to 7.0. Place edge of foot aligning Main Fabric raw edge and sew in place.
8. Back at your iron, the next step is to press over Lining Fabric over onto the Main Apron Fabric. This edge is already pressed under using the width of the Steam-A-Seam. From this folded edge, measure up another 5cm (2”). Press in place.
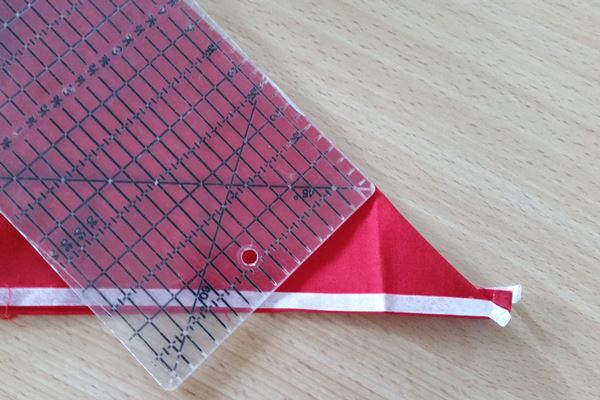
9. Stitching Mitre – At the point of the Apron, the overlapped edges need to be sewn with a mitred seam i.e. stitched at a 45°. If you have a patchwork ruler, the 45° is marked on the ruler. Unfold pressed Lining edges back out and fold them the opposite way - with right sides together. You will easily see both pressed creases. Pin along creases. Align 45° marking on ruler to pressed creases and corner of ruler to point where creases join. Draw a line from point to fabric edge. Pin along this line.
10. Select Straight Stitch – Centre Position – Length 2.0. Sew down drawn line, securing seam at beginning and end. Trim seam back to approximately 6mm (¼”) seam. Open seam and turn to right side.
11. Remove paper from Steam-A-Seam. Position folded edge in place and press well. This folded edge can either be sewn down with a straight stitch or cover seam with a ribbon or even add a decorative stitch – it is up to you.
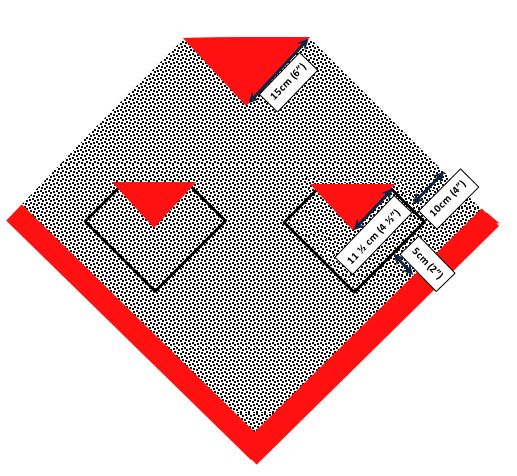
12. On the top point of the Apron, measure down 15cm (6”) and mark. Fold over top edge on these marks. If you have embellished the bottom edge of your apron, on lining side of top edge, draw another line 1cm (½”) in from edge between markings. Duplicate the embellishment which you have stitched on the bottom of the apron.
Pockets
1. Pin 1 x Main Fabric 20cm (8”) Square to Lining Square. Repeat for the other pocket. With normal thread on your machine, sew squares together using a straight stitch and centre needle position, stitch around all sides of square using edge of foot as a guide on the edge of the fabrics, leaving an opening on one of the sides for turning through. Trim corners back to stitching. Turn to right side. Press seam of opening to inside and also the rest of the pocket.
2. Pockets are positioned onto the apron “on point” i.e. as a diamond shape. Place the pocket down with Main Fabric side up also with the opening on the left hand bottom side. From top point, mark down 11 ½cm (4 ½”) . Fold top edge at this mark. This forms the opening for the pockets.
3. Sew the same embellishment on top of the pockets as you have stitched for the top of the apron.
4. Position pockets onto apron front, 5cm (2”) up from bottom border edge and 10cm (4”) in from side. Pin in place. Using a Straight Stitch, Length 3.0, sew pockets in place.
Straps
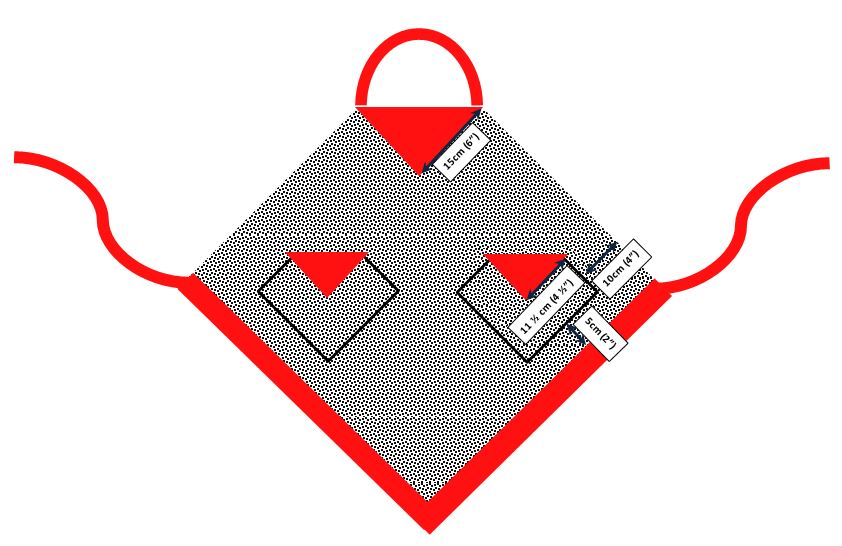
1. With right sides together, fold straps in half widthways. Sew across 1 end and down long side using a 6mm (¼”) seam. Trim corner back to stitching. Turn to right side. Press.

2. Attach 2 of the straps to side points of apron for ties. The remaining is for the top neck tie. Turn under raw edge of strap. Align end of tie 2½cm (1”) down from top and edge of tie to edge of folded piece. Stitch in place.
I am sure that you will enjoy making this as much as I had creating it. Happy Sewing!
Rhonda
Free Embroidery Designs
We're excited to offer our free Echidna designs available for download. These free designs are perfect for those at a beginner or an advanced level. Add these designs to your stash and create incredible embroidery!
View all free designs >
Sewing, Quilting and Embroidery Machines
Interested in learning how to sew, quilt or embroider? Take a look at the innovative Brother machines available for purchase at Echidna Sewing. Wherever possible we will beat any deal and you will always receive ongoing service and support!
Find out more >
Learn to Sew or Embroider with Echidna Sewing
Come along to our fun-filled classes to learn more about sewing, embroidery and crafting. Classes cater for all skill levels, whether you're just starting out or already have advanced knowledge.
Find out more >
Echidna project material/ fabric requirements are an indication only and can seem to be generous. This has been intentional. Should you make a cutting or embroidery mistake you will have sufficient fabric to rectify your error.
Comments (1)
Fantastic apron and a lovely gift.
By: CHRISTINE HOGENDIJK on 6 May 2020Thank you, Rhonda, for sharing this with Echidna followers, it is greatly appreciated. I’m off now to have a go at this one.


