All Projects
Santa's Snack Plate with Adhesive Vinyl
Author: Nicole H
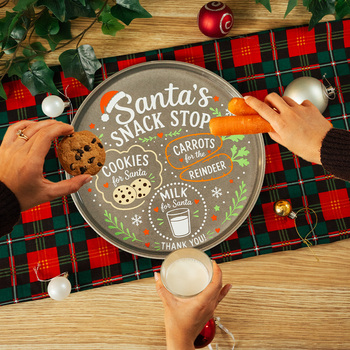
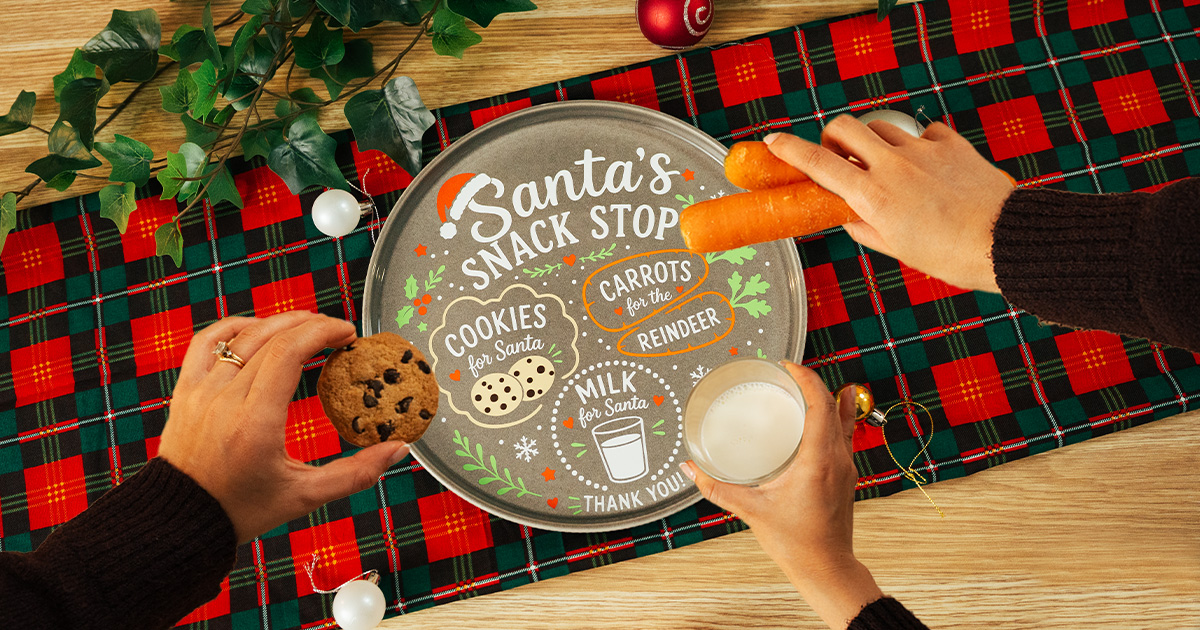
Create a special Christmas Eve snack plate for Santa and his reindeer using adhesive vinyl and your cutting machine. This festive project uses multiple colours of adhesive vinyl to transform a simple ceramic plate into a fun keepsake that can be brought out year after year.
With dedicated spots for Santa's cookies and milk, plus carrots for the reindeer, it's a fun way to add a handmade touch to your family's Christmas Eve traditions.
About The Design
We've included the complete Santa's Snack Stop SVG FREE with this project.
The design features dedicated areas for:
- Cookies for Santa
- Carrots for the Reindeer
- Milk for Santa
We've created ours using six colours of adhesive vinyl, but you can easily customise the design using your own colour combination or cut the entire design from a single colour for a simpler finish.
Our design uses:
- White
- Red
- Green
- Orange
- Cream
- Chocolate
What You'll Need
- Brother ScanNCut (or other cutting machine)
- Ceramic Plate
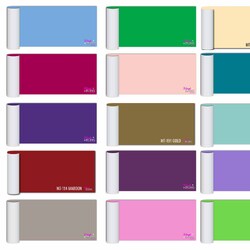
- Permanent Adhesive Vinyl – White
- Permanent Adhesive Vinyl – Red
- Permanent Adhesive Vinyl – Green
- Permanent Adhesive Vinyl – Orange
- Permanent Adhesive Vinyl – Cream
- Permanent Adhesive Vinyl – Chocolate
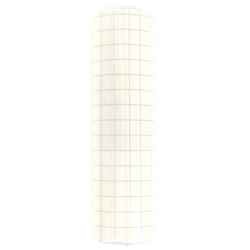
- Transfer Tape
- Standard Tack Cutting Mat
- Vinyl Auto Blade (DX) or Standard Blade
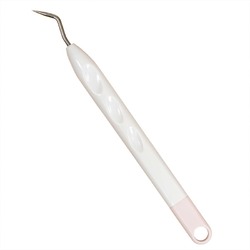
- Vinyl Weeding Tool
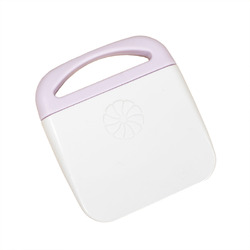
- Scraper Tool
- Isopropyl Alcohol
- Microfibre Cloth
- Ruler or Tape Measure
- Design Files (Download Here →)
- Free Design Files Download now →
Shop Online:
Before You Begin
This project uses permanent adhesive vinyl, which provides a longer-lasting bond to ceramic than removable vinyl.
Unlike Heat Transfer Vinyl (HTV), adhesive vinyl is not mirrored before cutting.
For the best adhesion, make sure your ceramic plate and adhesive vinyl are at room temperature before application. If the plate has been stored in a cold area, allow it to warm naturally before cleaning and applying the vinyl. Applying adhesive vinyl to a very cold surface can reduce the initial tack and make it more difficult for the vinyl to bond properly.
Before applying your design, thoroughly clean the ceramic plate using isopropyl alcohol and a lint-free cloth to remove fingerprints, dust and oils. This will help the adhesive vinyl bond properly.
Please Note: Adhesive vinyl is not considered food safe and this project is for decorative purposes. Hand wash only and avoid soaking the plate.
If you're new to layering adhesive vinyl, there are several ways to layer multi-colour adhesive vinyl. In this project, we'll show you how to line up the layers by eye using gridded Transfer Tape and the vinyl backing sheets.
If you would prefer a method that provides more precise alignment, check out our adhesive vinyl layering guides before you begin. The Registration Marks method requires the registration marks to be added to your design in CanvasWorkspace before cutting.
- How to Layer Adhesive Vinyl Using Registration Marks →
- How to Use Baking Paper to Layer Adhesive Vinyl Designs →
Detailed Instructions
- Download the Santa's Snack Stop SVG included with this project.
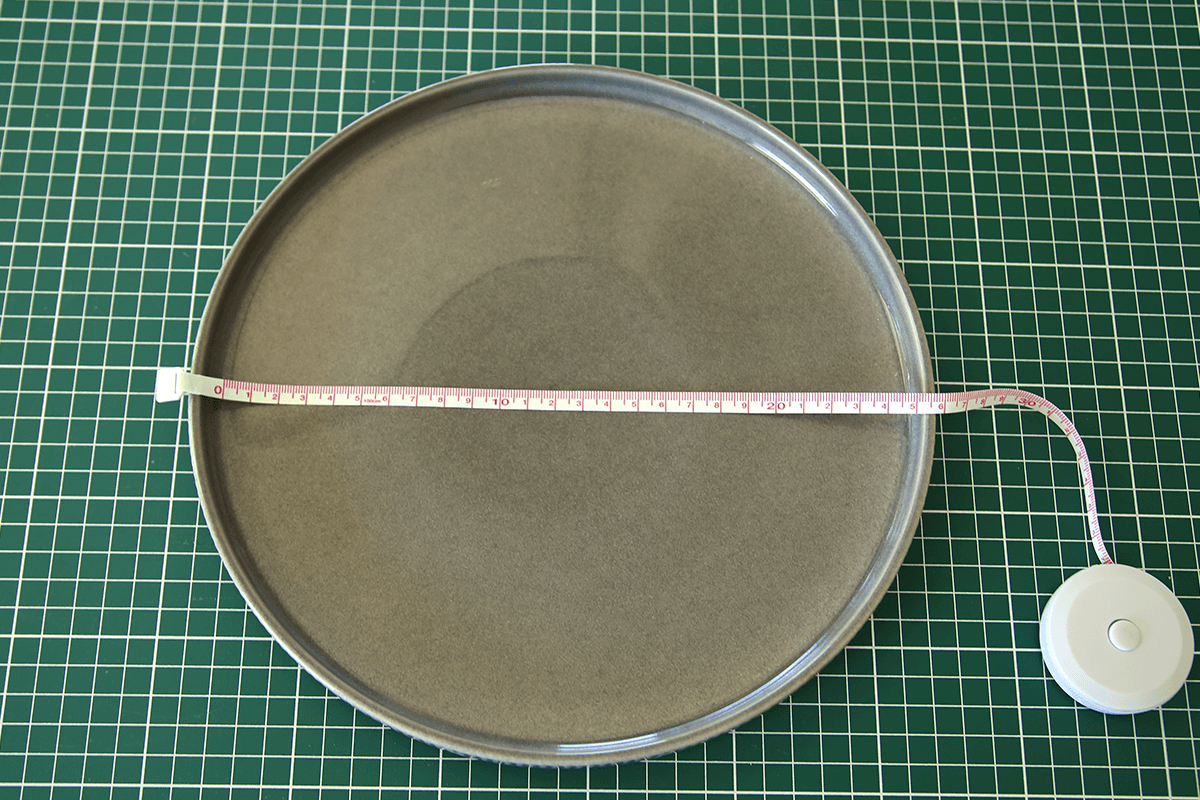
- Before jumping into the design, measure the usable area of your plate to work out how large you would like the finished design to be. Remember to leave some space around the outside of the design rather than extending it right to the edge of the plate.
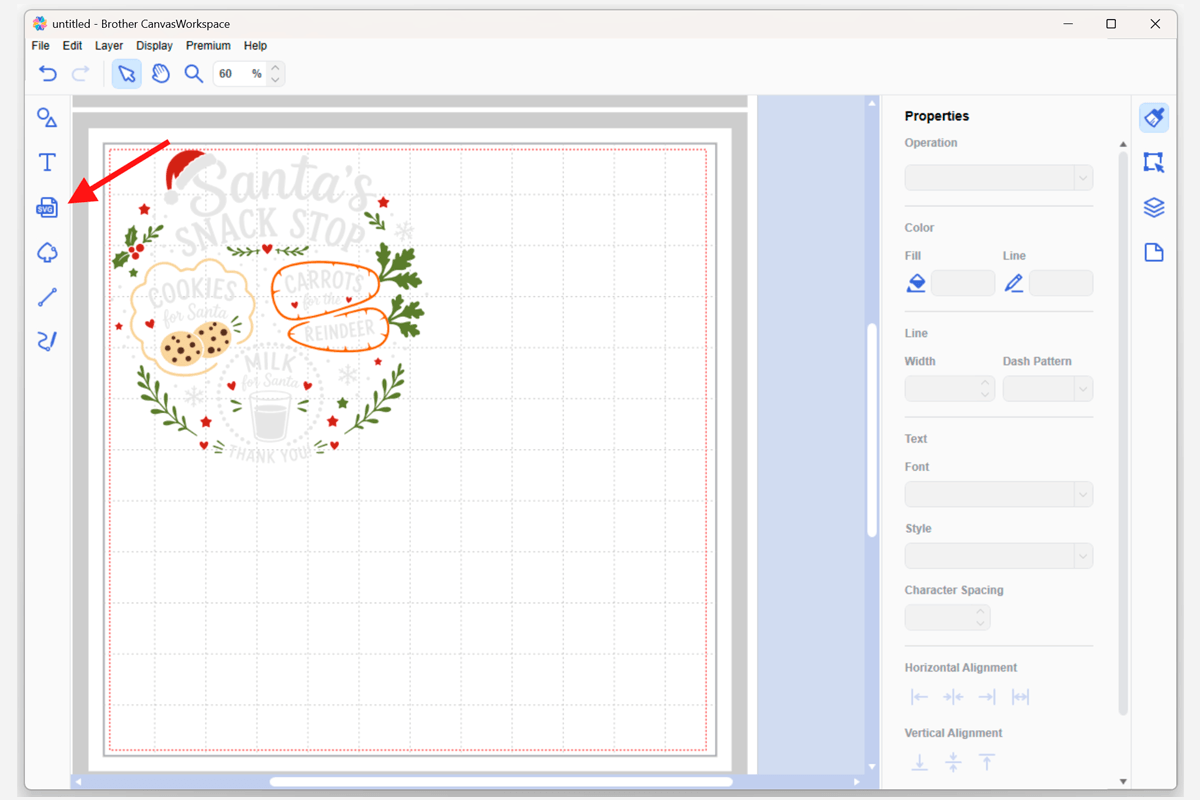
- Open the supplied SVG in the desktop version of CanvasWorkspace.
- Select all elements in the design by clicking in one corner of the workspace and dragging your mouse diagonally across the entire design.
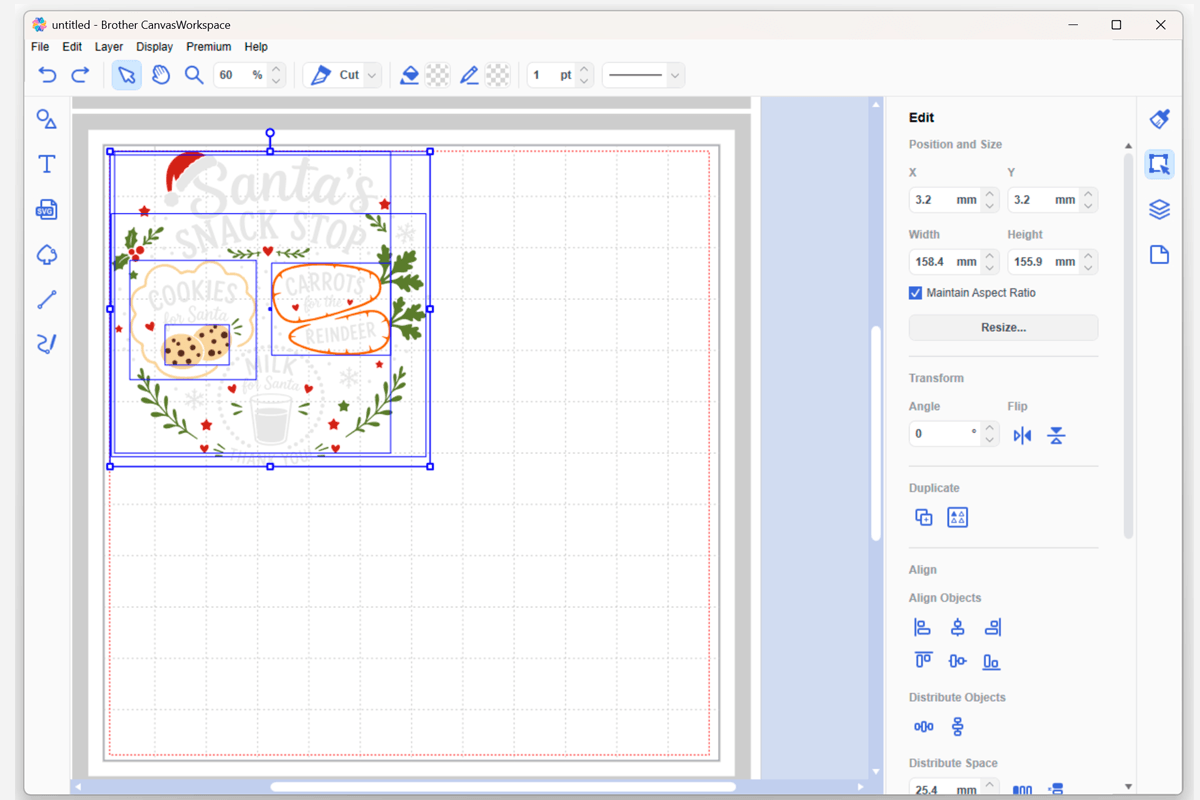
- With all elements still selected, use the Edit panel on the right to resize the complete design to suit your plate measurements. Make sure Maintain Aspect Ratio is selected so the entire design is resized proportionally and the alignment between the different colours remains unchanged.
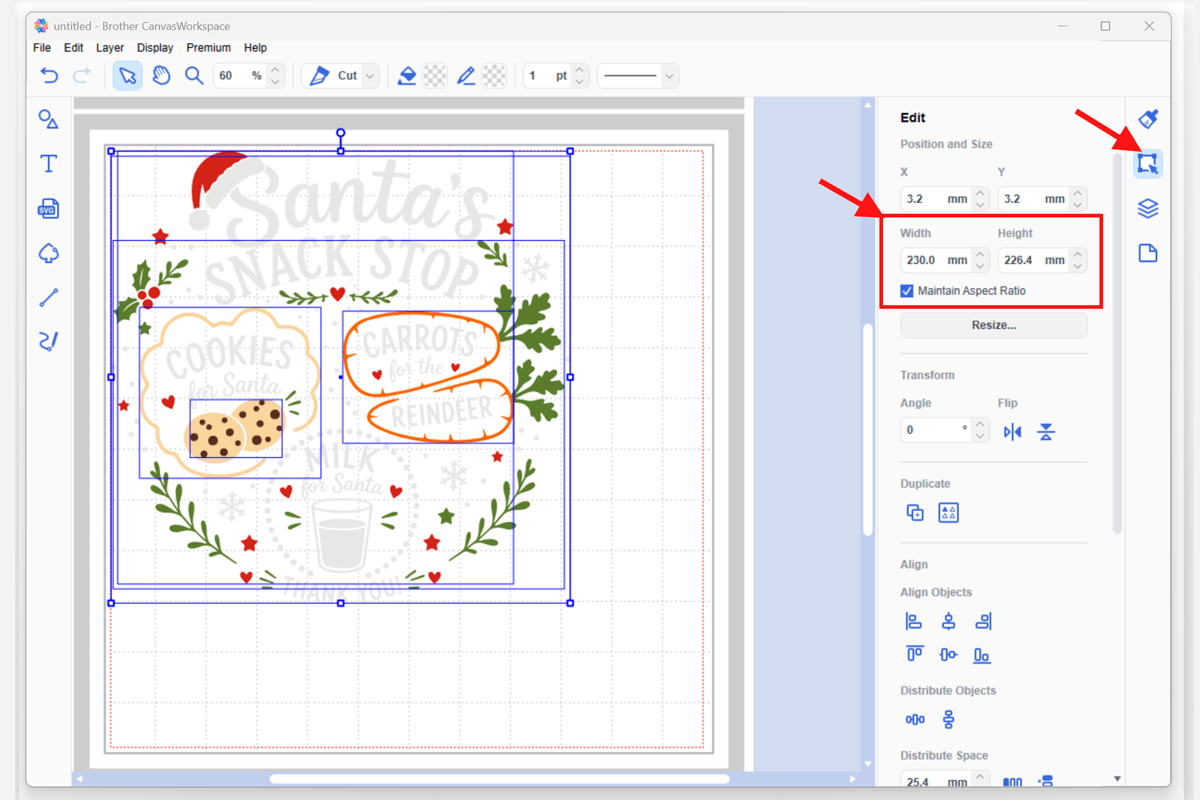
Tip: It is important to resize the complete design at this stage. Avoid resizing individual colours later, as they may no longer align correctly when the design is layered. - Once you're happy with the size, select File > Export/Transfer FCM File.
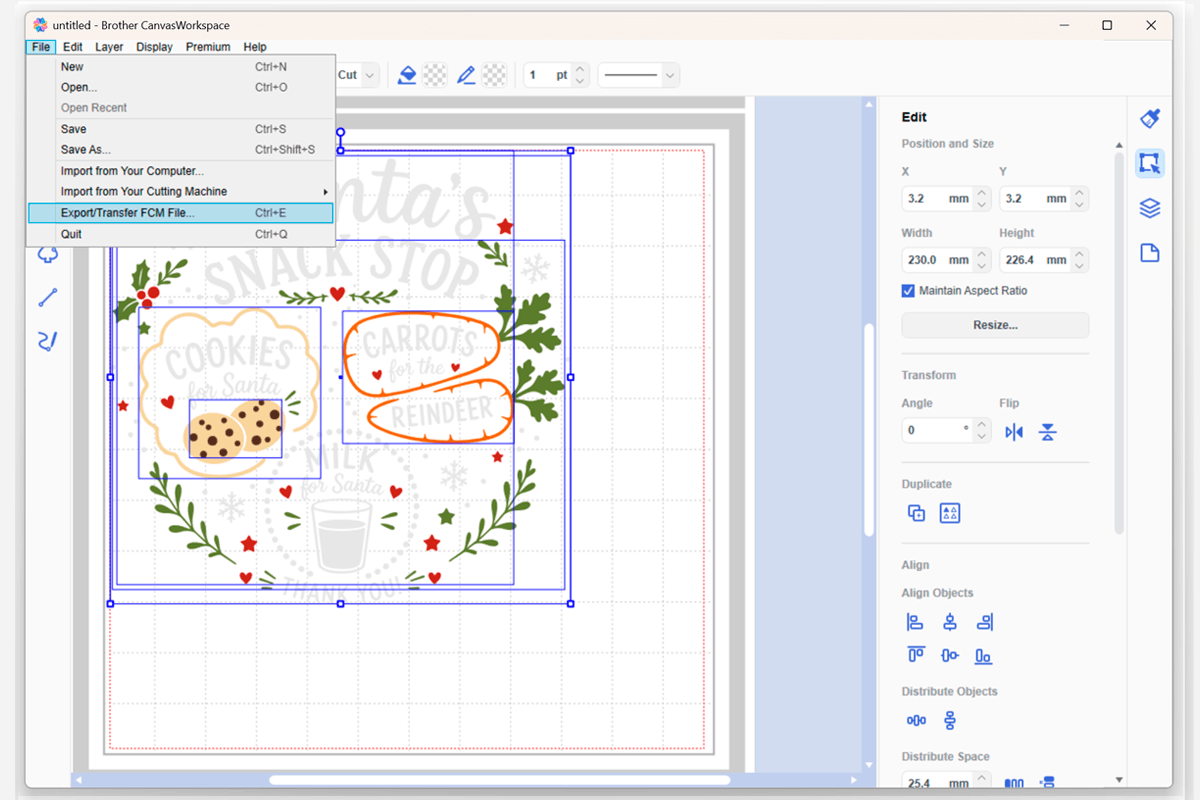
- Choose your preferred method to transfer the design to your ScanNCut. We recommend transferring it via the internet if your ScanNCut is connected to Wi-Fi, or exporting it as an FCM file and saving it to a USB drive to insert into your ScanNCut.
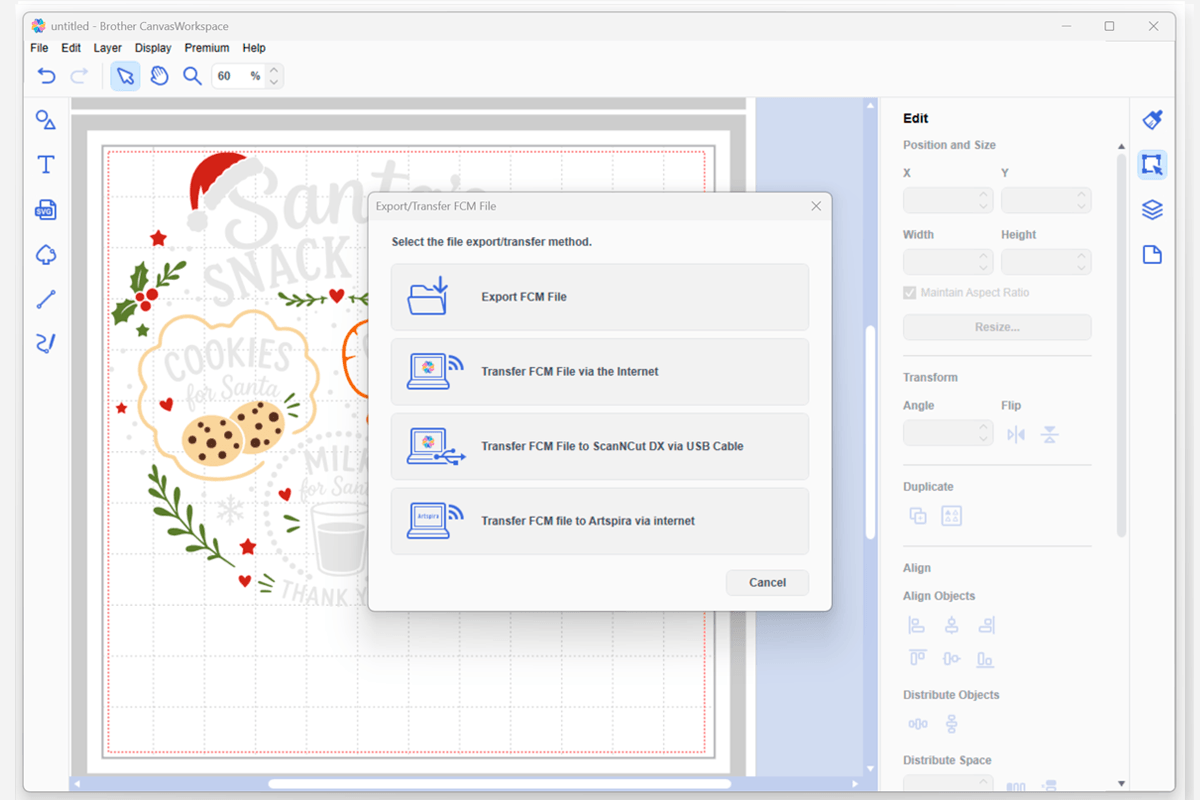
- Load the complete resized design onto your ScanNCut. Before making any changes to the design, save it into the machine's memory. This will become your master design that you can reload for each vinyl colour.
Important: Do not resize any individual elements on the ScanNCut once saved to the memory. All six colours need to remain at the same size as the complete design you resized in CanvasWorkspace so they align correctly when layered. - As this is quite a large design, we won't be able to fit all six colours of vinyl onto the cutting mat at the same time. Instead, we'll cut the design in stages, reloading our saved master design for each group of colours.
- Place your first pieces of adhesive vinyl onto the machine mat. You can add more than one colour at a time if they fit comfortably on the mat, making sure each piece is large enough for the elements that will be cut from that colour. Ensure the vinyl is stuck to the mat the correct way up; using a brayer/roller may be helpful. Masking tape can help secure it if your mat is starting to lose its tack.
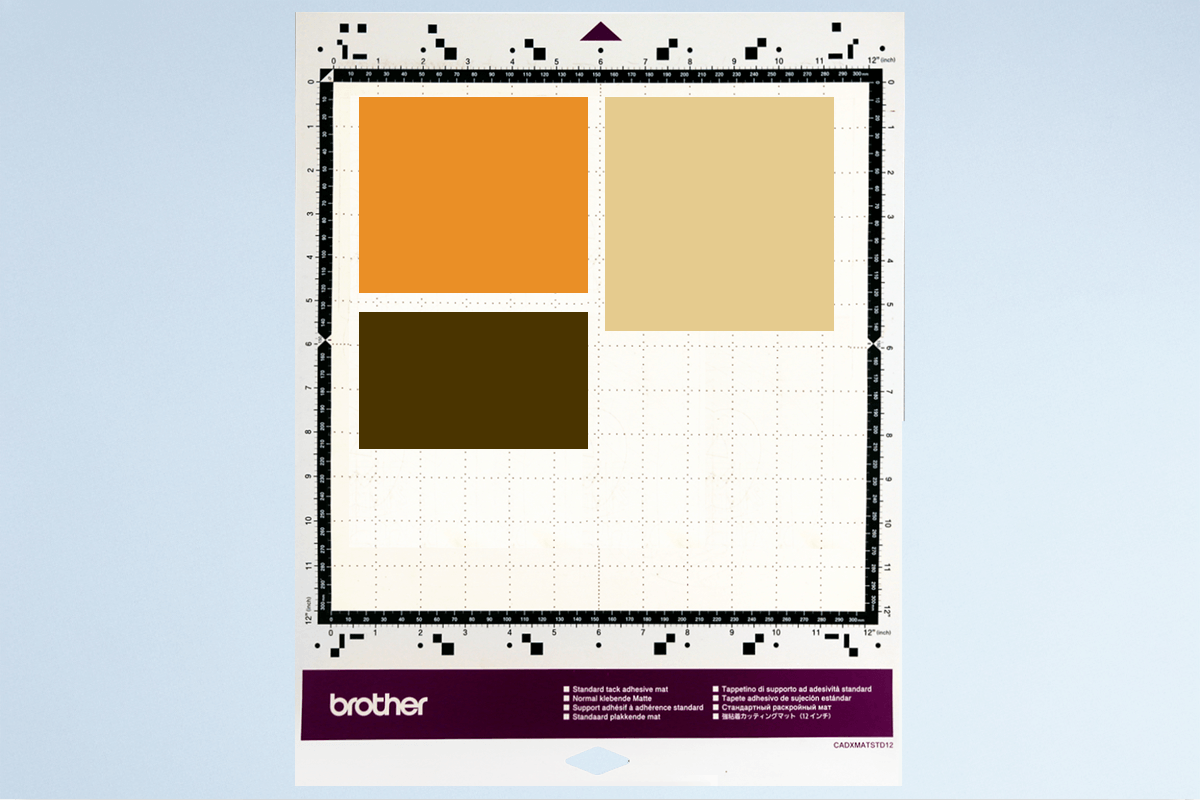
- Load the mat into your machine, holding it level as it feeds in.
- Scan the mat so you can see the position of each piece of vinyl on the ScanNCut screen.
- Position the relevant design elements over their corresponding vinyl colours. Delete any elements that you are not cutting during this pass, leaving only the elements that correspond with the vinyl currently on your mat.
Important: Move the elements as needed to position them over the vinyl, but do not resize them. You'll reload the original saved master design for the next group of colours. - Adjust your machine settings to be suitable for cutting vinyl. For ScanNCut DX users, you will need to enable the Half Cut option.
Tip: We suggest doing a test cut to ensure you have your settings correct for the medium you are using. Cutting a small hole in the corner of your mat is a lot less upsetting than cutting a large design straight through your mat. - Proceed with cutting the design.
- Once cutting is complete, unload the mat and gently peel the vinyl sheets off the mat.
- Place your next colour or colours of adhesive vinyl onto the mat and load it back into the machine.
- Reload the complete master design you previously saved to the ScanNCut's machine memory. Scan the mat, position the relevant elements over their corresponding vinyl colours and delete all of the elements you are not cutting during this pass.
- Proceed with cutting, then repeat this process by reloading the saved master design each time until all six colours have been cut.
- Starting from one corner of each piece of vinyl, peel the coloured layer away from the backing (also known as weeding). Using a weeding tool may be helpful to get you started.
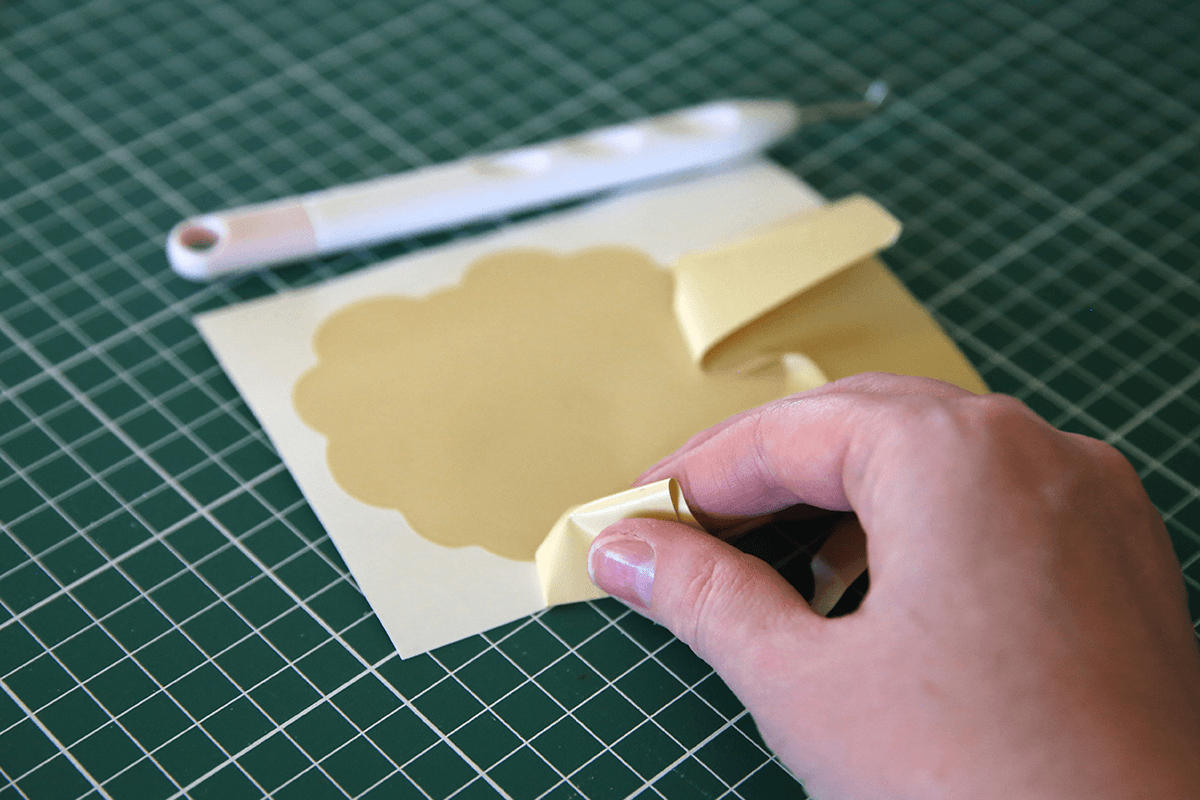
- Repeat for the remaining 5 colours.
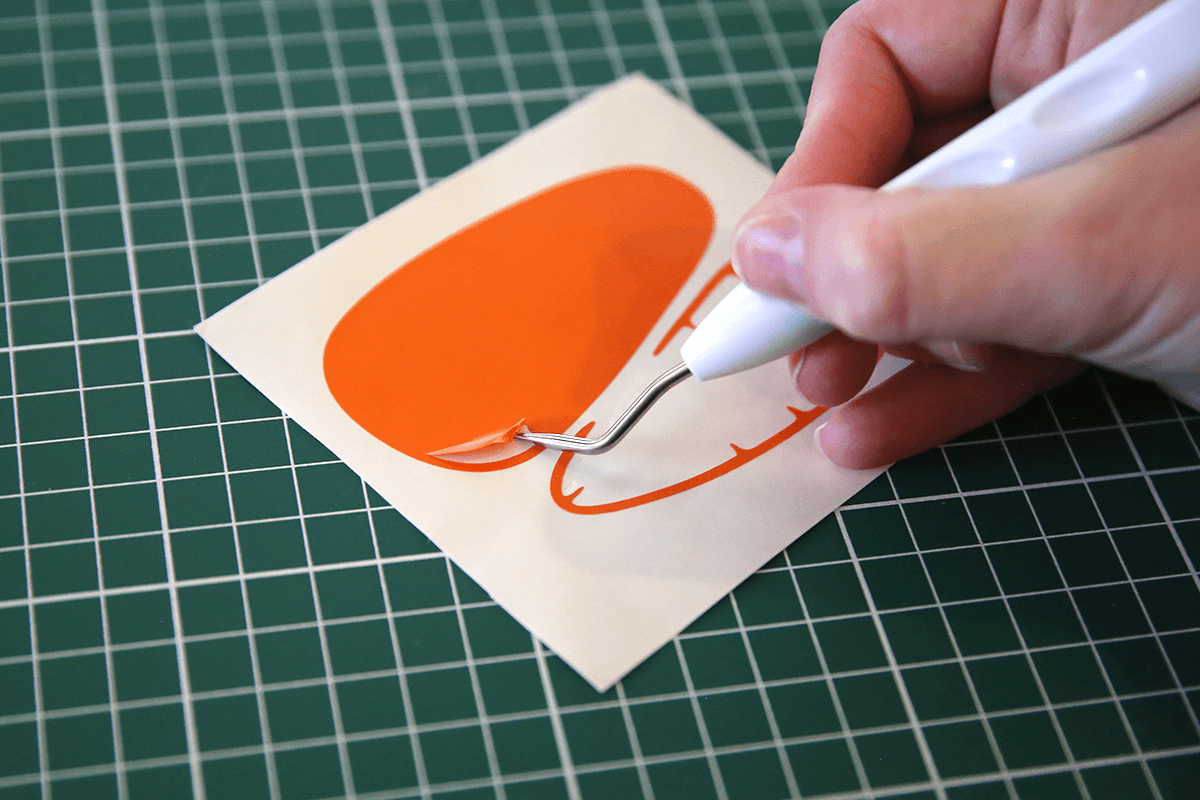
- Use a Vinyl Weeding Tool to remove the more intricate pieces if needed. Take your time around the smaller lettering, snowflakes, stars and other fine details.
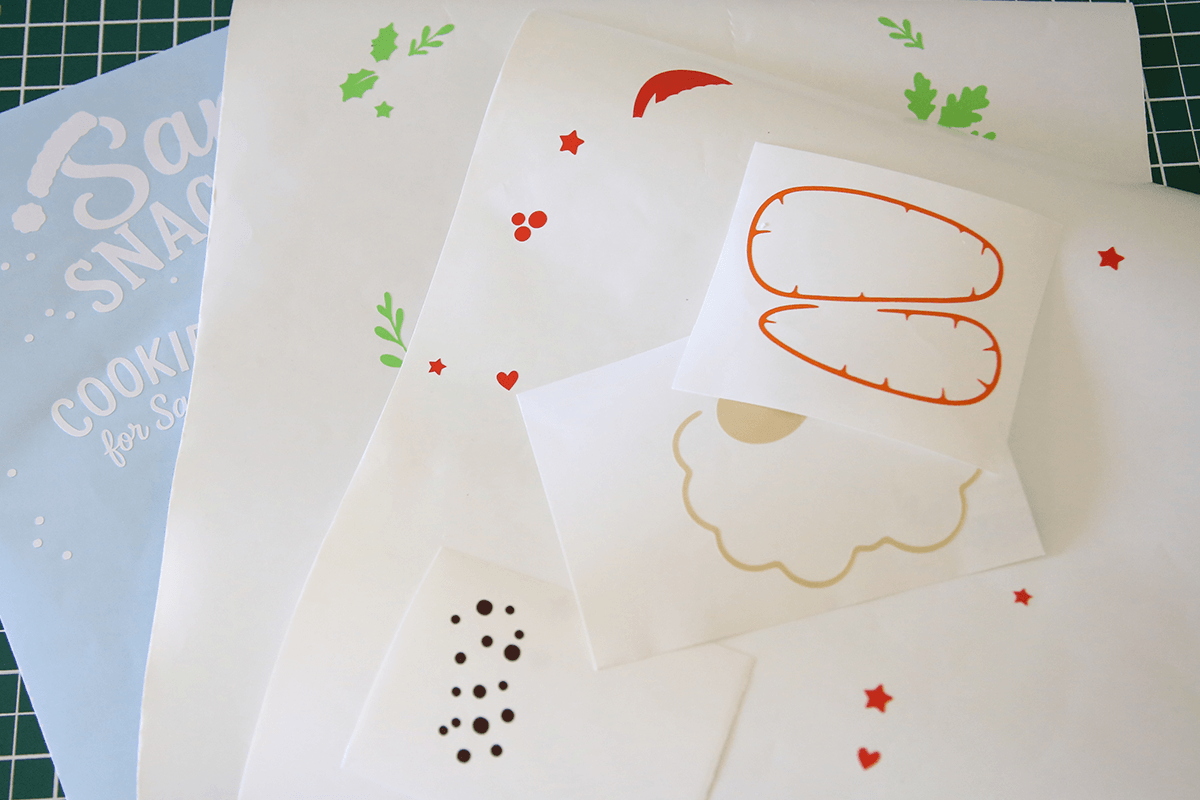
- You should now have each colour of the design weeded and remaining on its individual backing sheet.
- Before assembling the complete design, check for any smaller vinyl elements that need to sit directly on top of another colour. For example, the chocolate chips need to be layered onto the cream cookie pieces. Apply these smaller details to their corresponding vinyl pieces first, making sure they are correctly positioned.
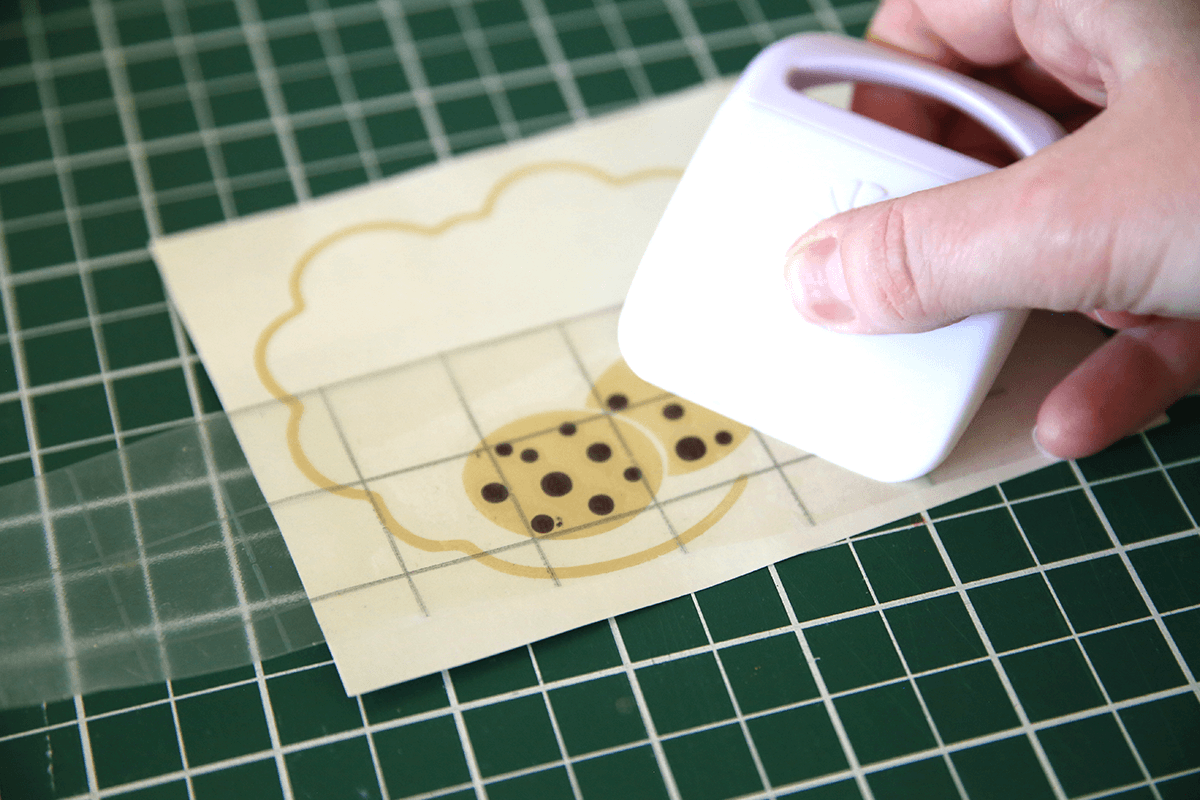
- Starting with the largest section of your design, cut a piece of gridded Transfer Tape large enough to cover the entire weeded design.
- Line the gridded Transfer Tape up with the bottom of the design.
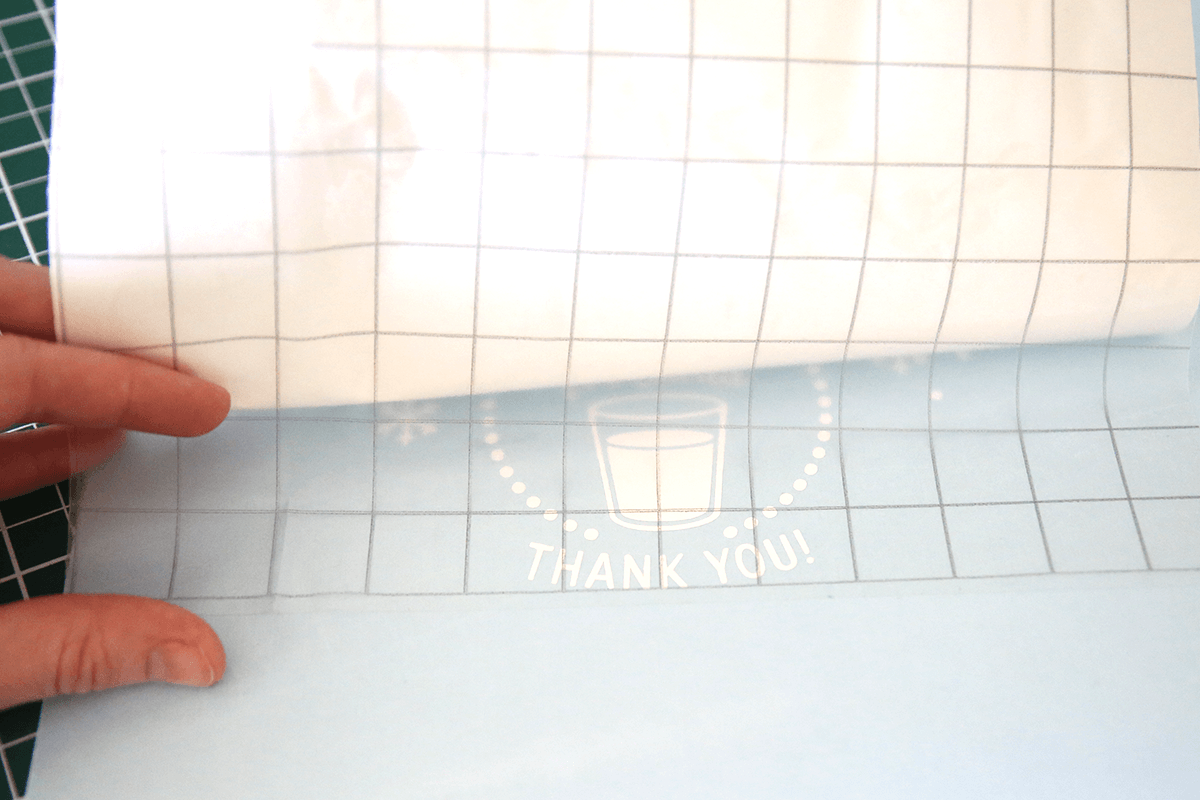
- Slowly apply the Transfer Tape over the design, using a scraper as you go to help prevent bubbles and press the vinyl firmly onto the Transfer Tape.
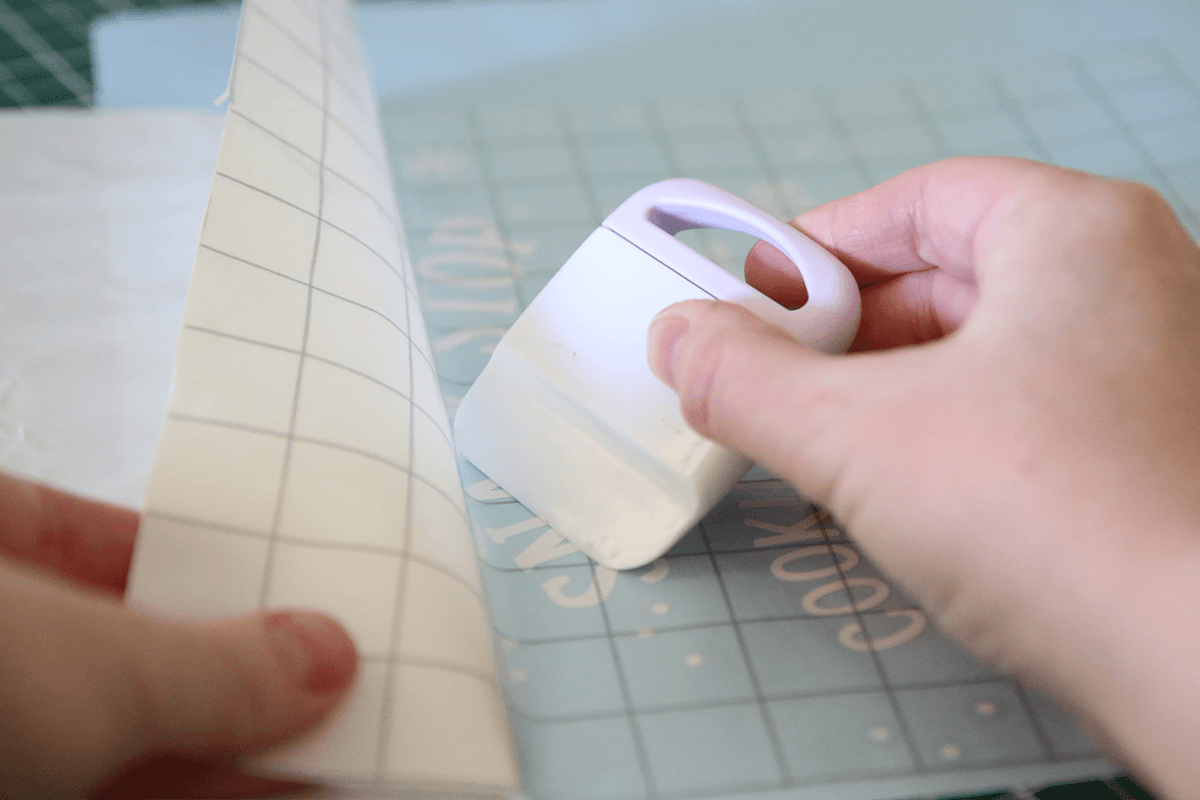
- Continue until the gridded Transfer Tape completely covers the weeded vinyl design.
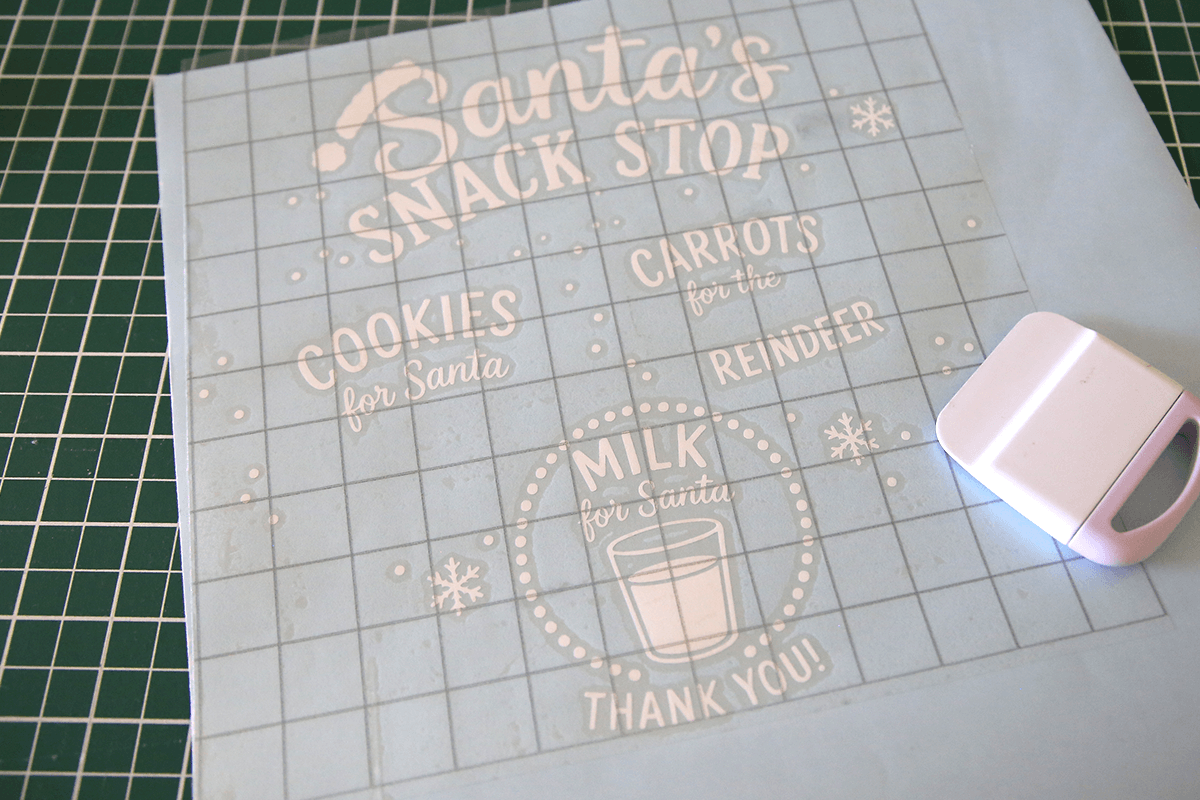
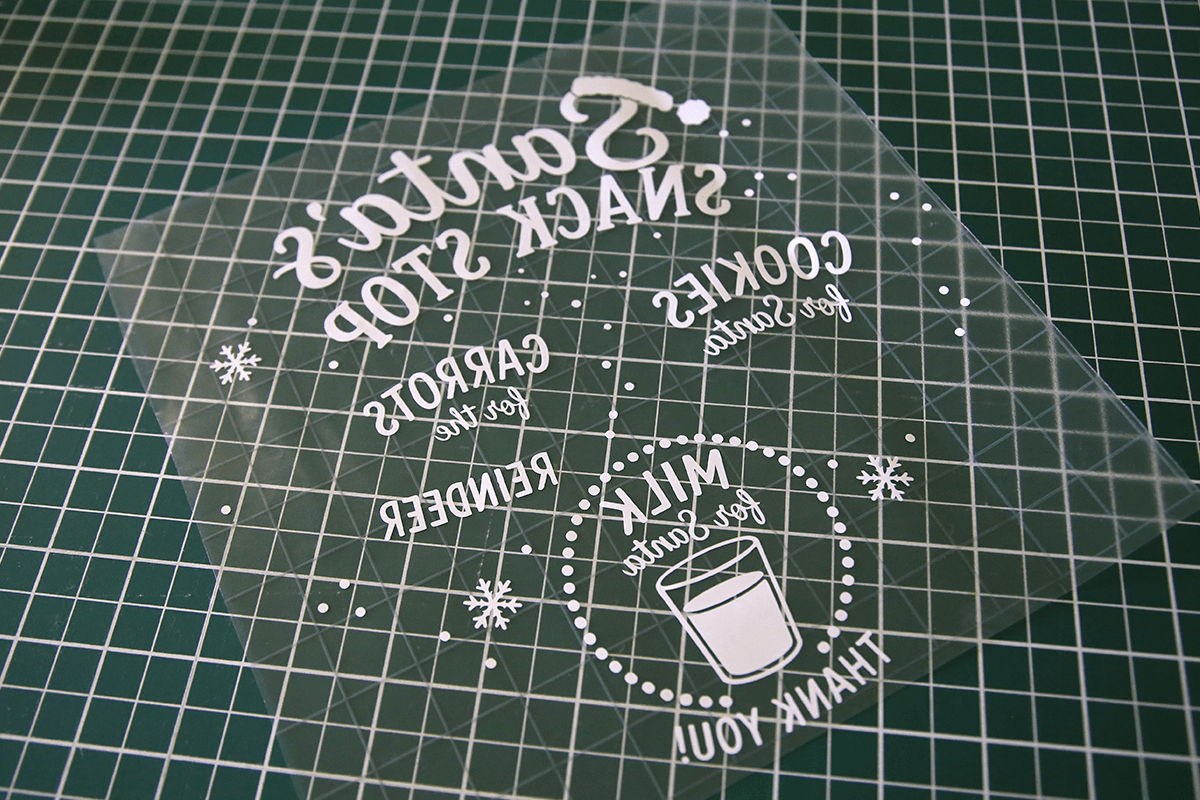
- Flip the vinyl over and slowly peel away the backing sheet. The vinyl should remain adhered to the Transfer Tape.
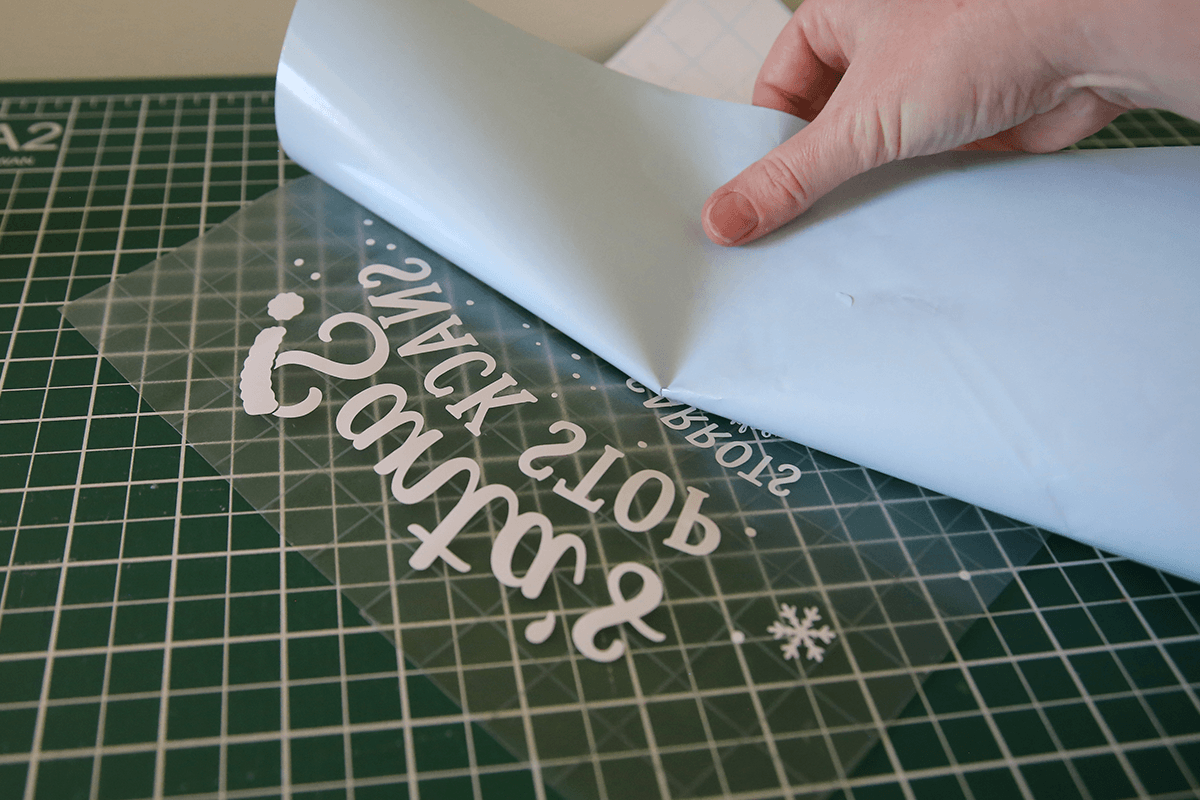
- Your first colour should now be completely transferred onto the Transfer Tape.
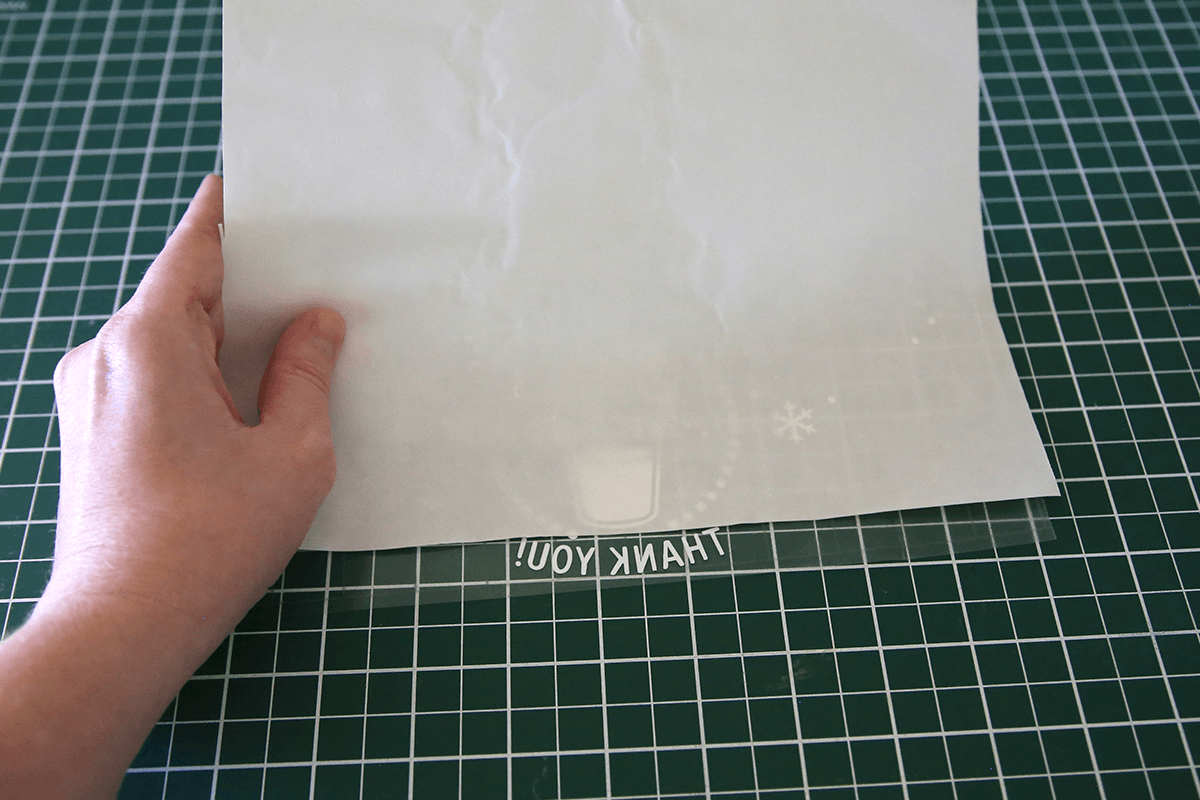
- Place the backing sheet you just removed back ontop of the Transfer Tape, covering approximately 90% of the design and leaving only a small section of the adhesive side of the Transfer Tape exposed. This allows you to position the next colour without the rest of the Transfer Tape accidentally sticking to it.
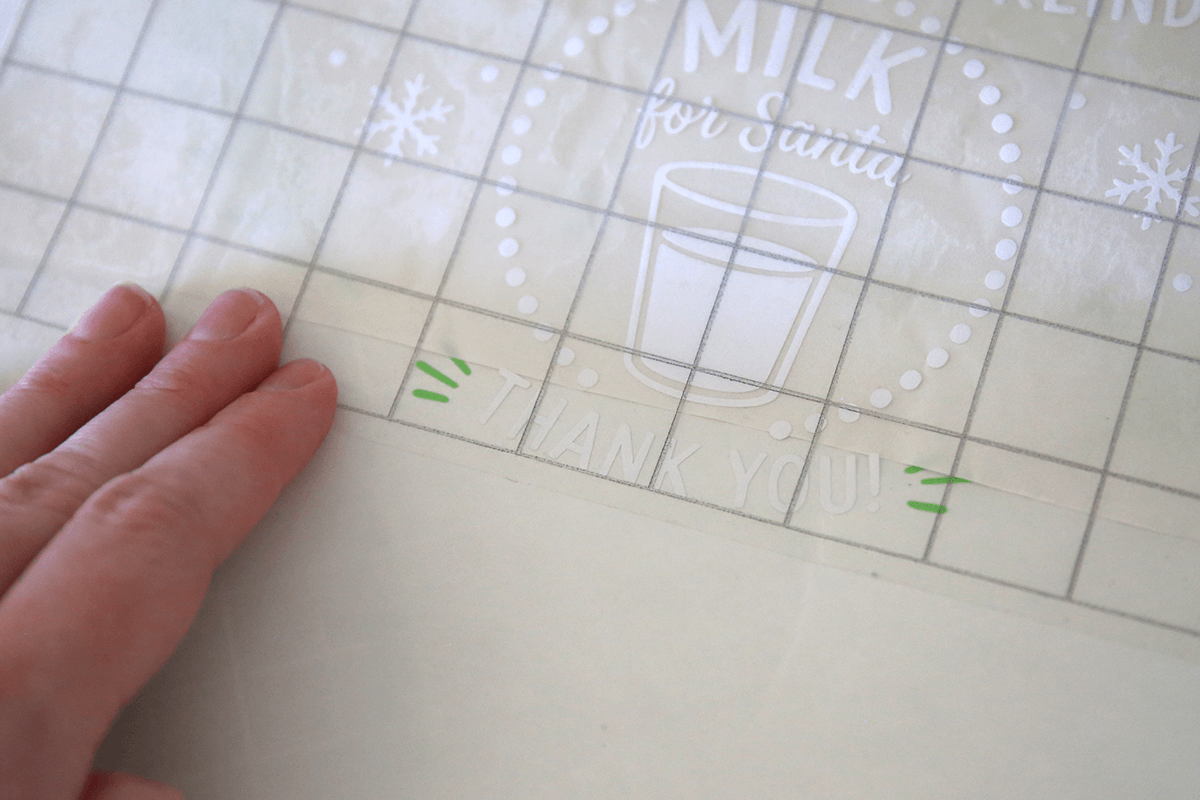
- Position your next weeded vinyl colour underneath the Transfer Tape. Use the exposed section to carefully line up the two parts of the design by eye. The grid on the Transfer Tape can also help you keep the design straight. Once you're happy with the alignment, press the exposed section of Transfer Tape onto the second vinyl colour to hold the positioning in place.
- Slowly slide or peel the additional protective backing sheet away while pressing the Transfer Tape down over the second colour.
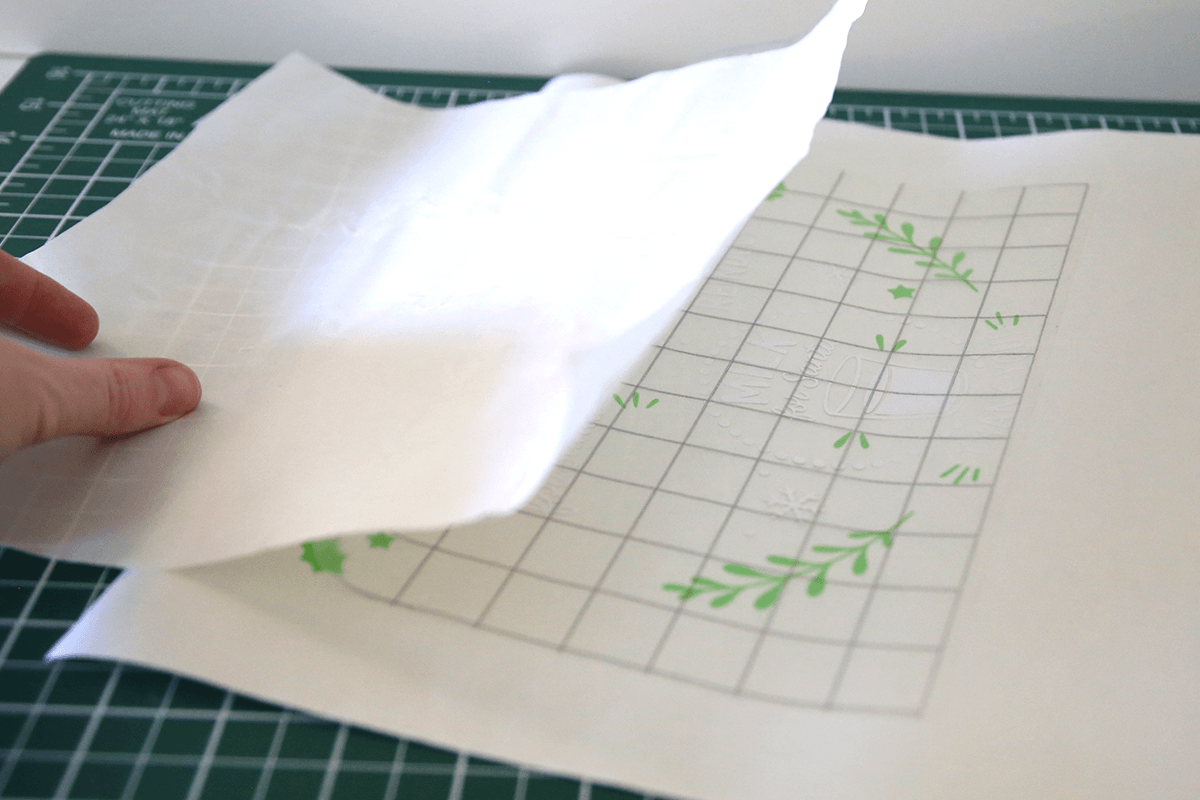
- Flip the design over and slowly peel away the backing sheet from the second vinyl colour. Both colours should now remain together on the Transfer Tape.
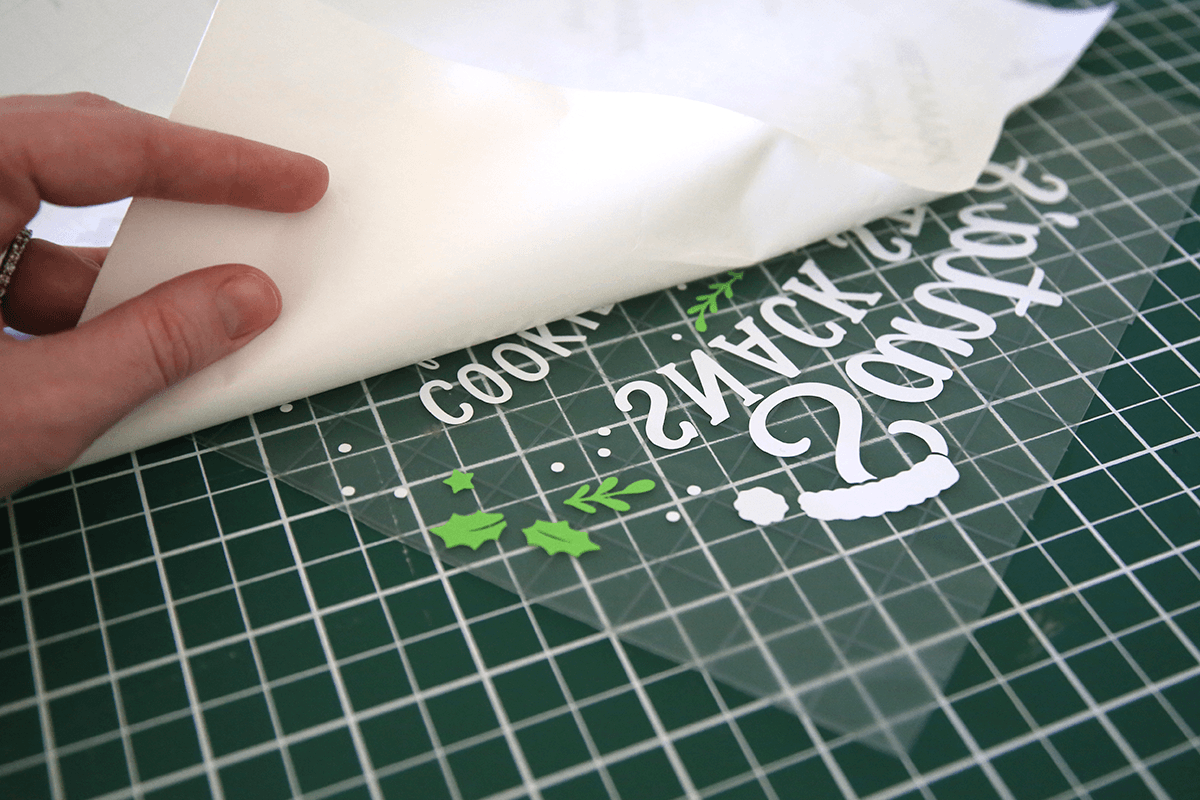
- You should now have two colours correctly positioned together on the Transfer Tape.
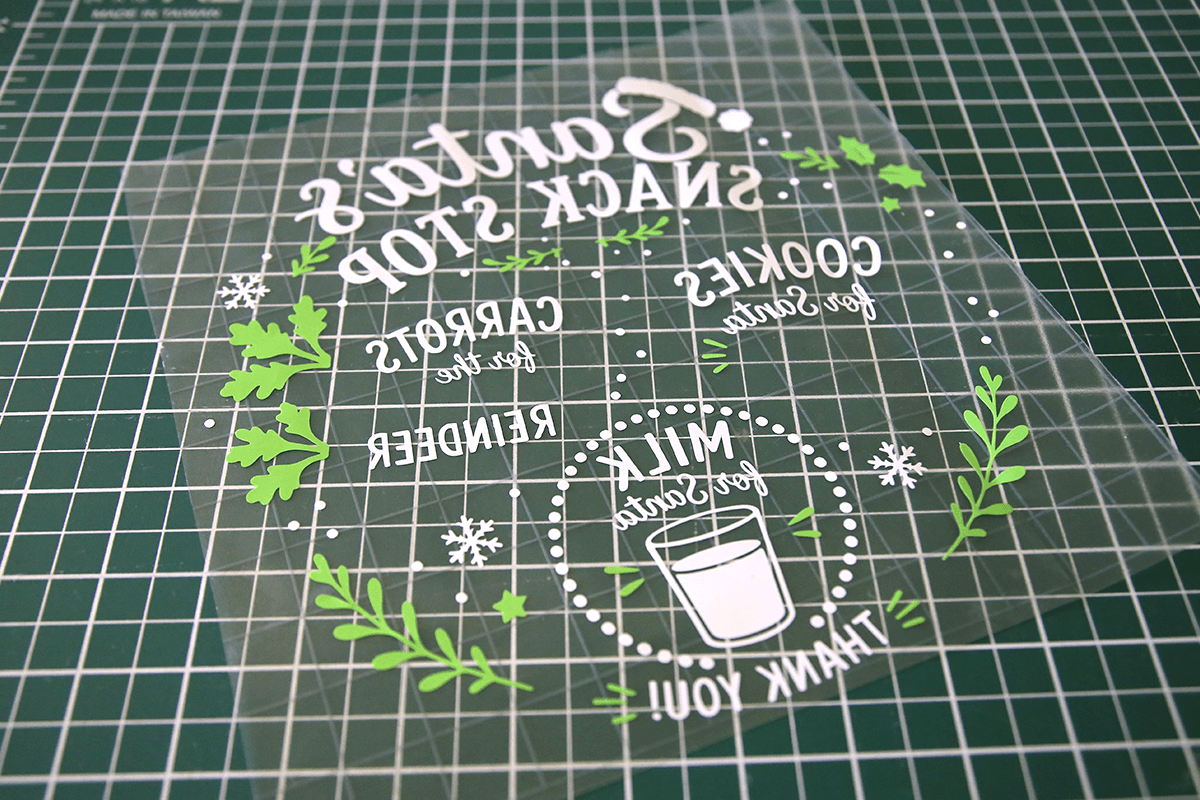
- Repeat this process with each of the remaining four colours, lining up and adding one colour at a time until the complete six-colour design is assembled on the Transfer Tape.
Tip: Take your time when lining up each layer. Only exposing a small section of the Transfer Tape at first allows you to check the positioning before committing the entire layer. - Once all six colours have been assembled, your complete design should be held together on the Transfer Tape, ready to apply to the plate.
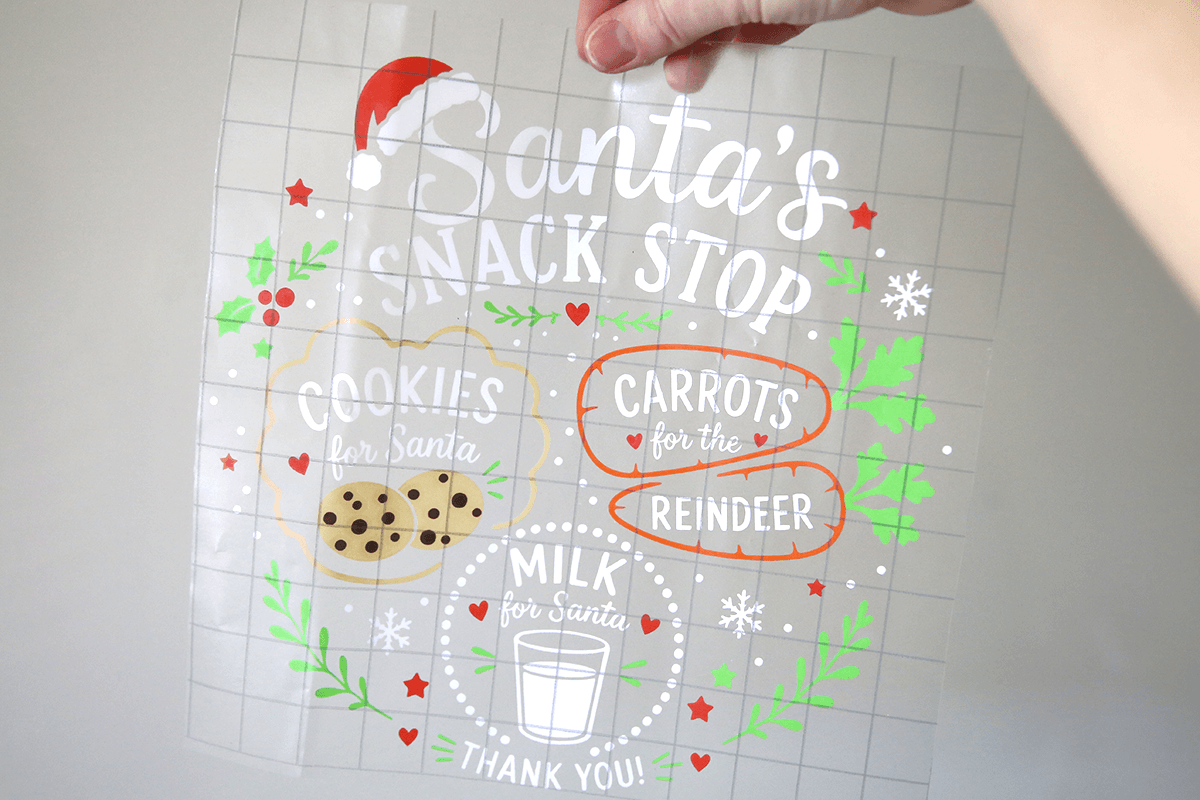
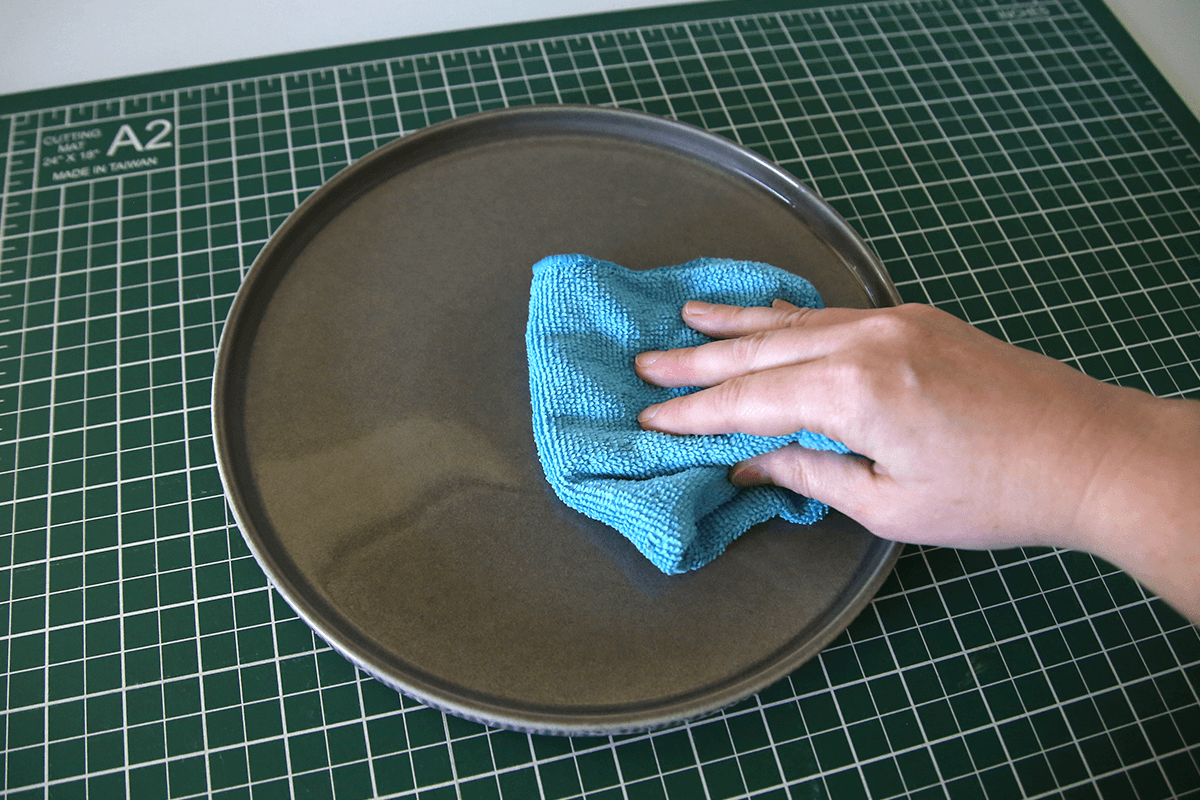
- Make sure the ceramic plate is at room temperature, then thoroughly clean it using isopropyl alcohol and a lint-free cloth to remove fingerprints, dust and oils. Allow the surface to dry completely before applying the design.
- (Optional) If you're having trouble lining up the design, use a ruler and whiteboard marker to add temporary markings to the plate to help centre the design. These can easily be wiped away once you are finished.
- Carefully position the design over the plate. Once you're happy with the placement, gently press down the centre of the design first to hold it in position.
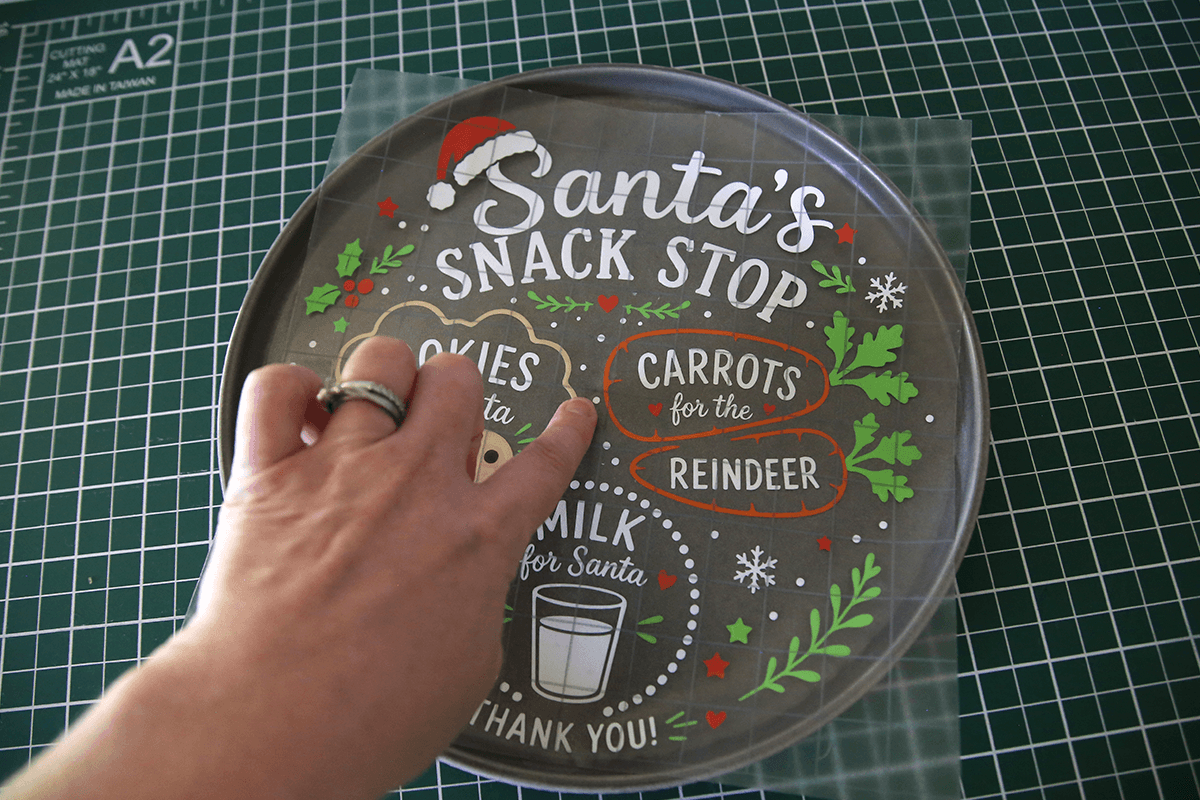
- Using your scraper tool, gradually work from the centre of the design outwards, pressing the vinyl onto the plate as you go. As the plate is slightly curved, working outwards rather than applying the entire design at once will help the vinyl conform to the surface and reduce the chance of bubbles or wrinkles.
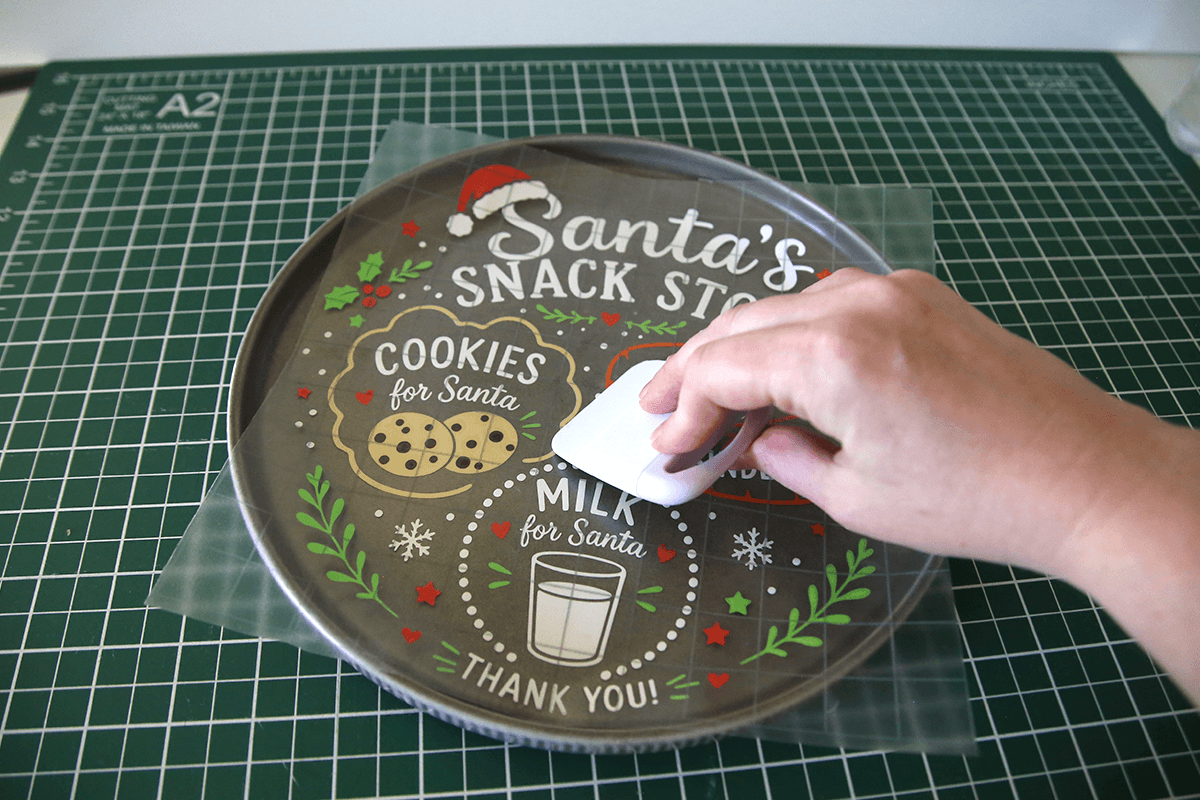
- Continue working outwards in small sections until the entire design has been firmly applied to the plate. Pay particular attention to the smaller lettering and detailed elements to ensure they have adhered securely.
- Slowly peel the Transfer Tape away from the plate to reveal the finished design. Peel it back on itself rather than pulling it directly upwards. If any part of the vinyl begins to lift, lay the Transfer Tape back down and use your scraper to press the vinyl firmly onto the plate before continuing.
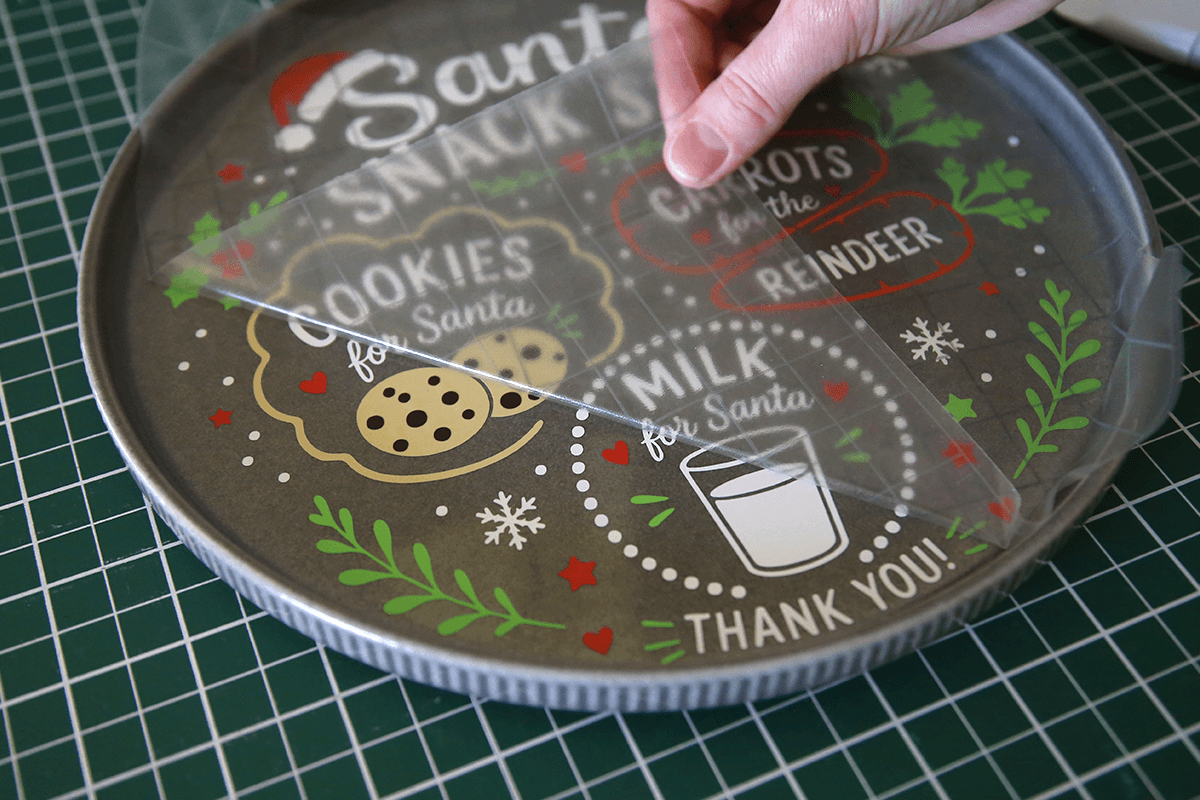
- Inspect the finished design and press down any edges or small details that may need a little extra help adhering.
Note: Do not varnish over vinyl. As varnish dries, it shrinks and can cause vinyl to lift or curl.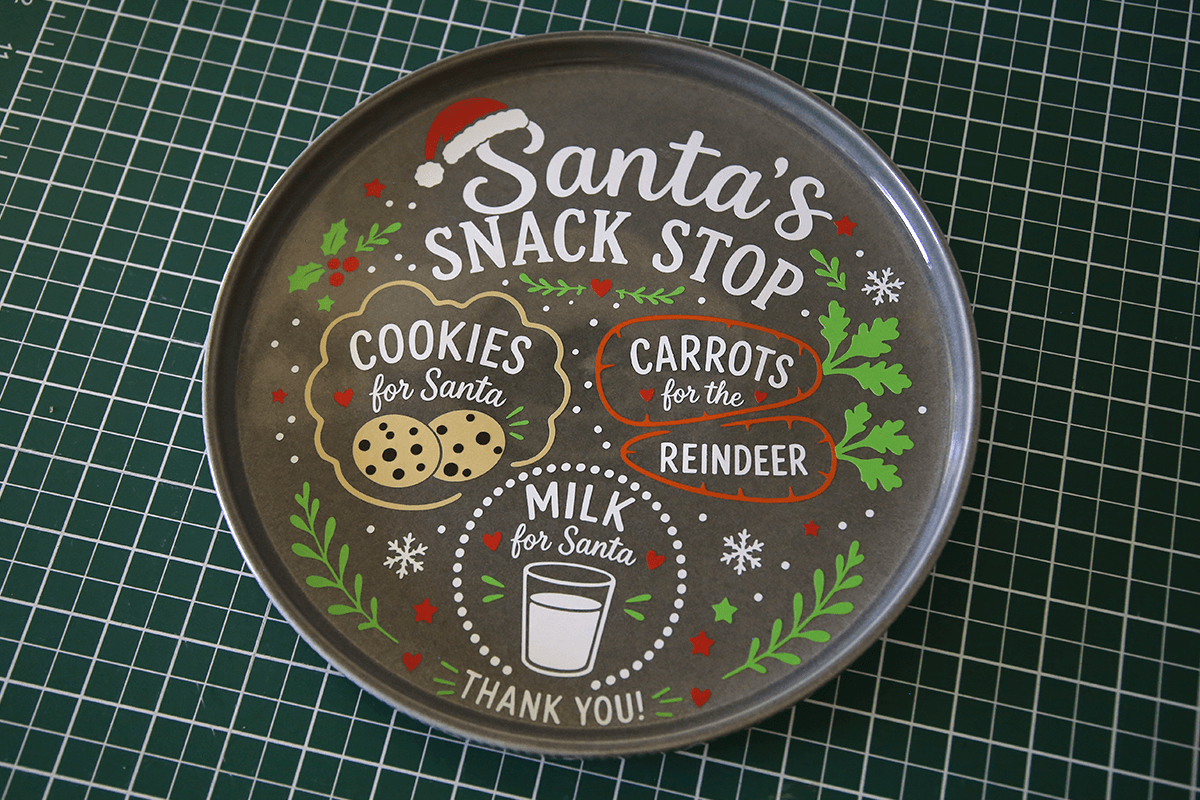
- Your Santa's Snack Plate is now ready for Christmas Eve! Add cookies for Santa, carrots for the reindeer and a glass of milk to create a festive family tradition you can bring out each Christmas.
Free Embroidery Designs
We're excited to offer our free Echidna designs available for download. These free designs are perfect for those at a beginner or an advanced level. Add these designs to your stash and create incredible embroidery!
View all free designs >
Sewing, Quilting and Embroidery Machines
Interested in learning how to sew, quilt or embroider? Take a look at the innovative Brother machines available for purchase at Echidna Sewing. Wherever possible we will beat any deal and you will always receive ongoing service and support!
Find out more >
Learn to Sew or Embroider with Echidna Sewing
Come along to our fun-filled classes to learn more about sewing, embroidery and crafting. Classes cater for all skill levels, whether you're just starting out or already have advanced knowledge.
Find out more >
Echidna project material/ fabric requirements are an indication only and can seem to be generous. This has been intentional. Should you make a cutting or embroidery mistake you will have sufficient fabric to rectify your error.