All Projects
HTV Personalised Jewellery Box
Author: Nicole H
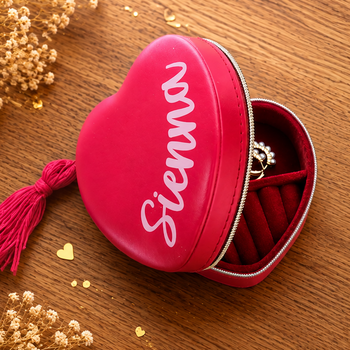
Create a beautiful personalised jewellery box using heat transfer vinyl (HTV) and your Brother ScanNCut. This elegant project is perfect for creating a thoughtful gift for birthdays, weddings, bridesmaids, Mother's Day, Valentine's Day, or simply treating yourself.
In this tutorial, you'll learn how to use the Fit to Path feature in CanvasWorkspace to curve text around the shape of your project, creating a professional-looking personalised design. Once you've mastered this technique, you can apply it to countless other projects including signs, plaques, ornaments, keyrings and more.
We'll then guide you through cutting and applying the HTV to a heart-shaped PU leather jewellery box for a beautiful finished result.
Although we've created this project using a Brother ScanNCut, the same techniques can be adapted for most electronic cutting machines.
What you will need:
- Brother ScanNCut
- Artspira/CanvasWorkspace Login
- PU Jewellery Box
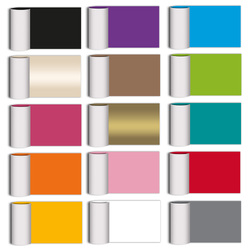
- Heat Transfer Vinyl (HTV) in your preferred colour
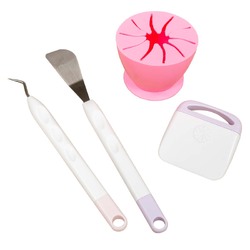
- Weeding Tools
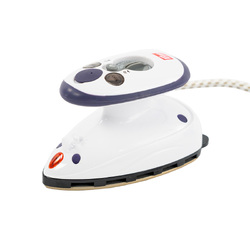
- Mini Iron
- Wool Pressing Mat
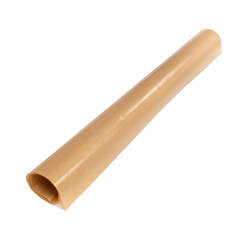
- Protective Heat-Resistant Sheet (to protect the vinyl)
- Heat Resistant Tape (optional)
Shop Online:
Detailed instructions:
Choosing Your Jewellery Box:
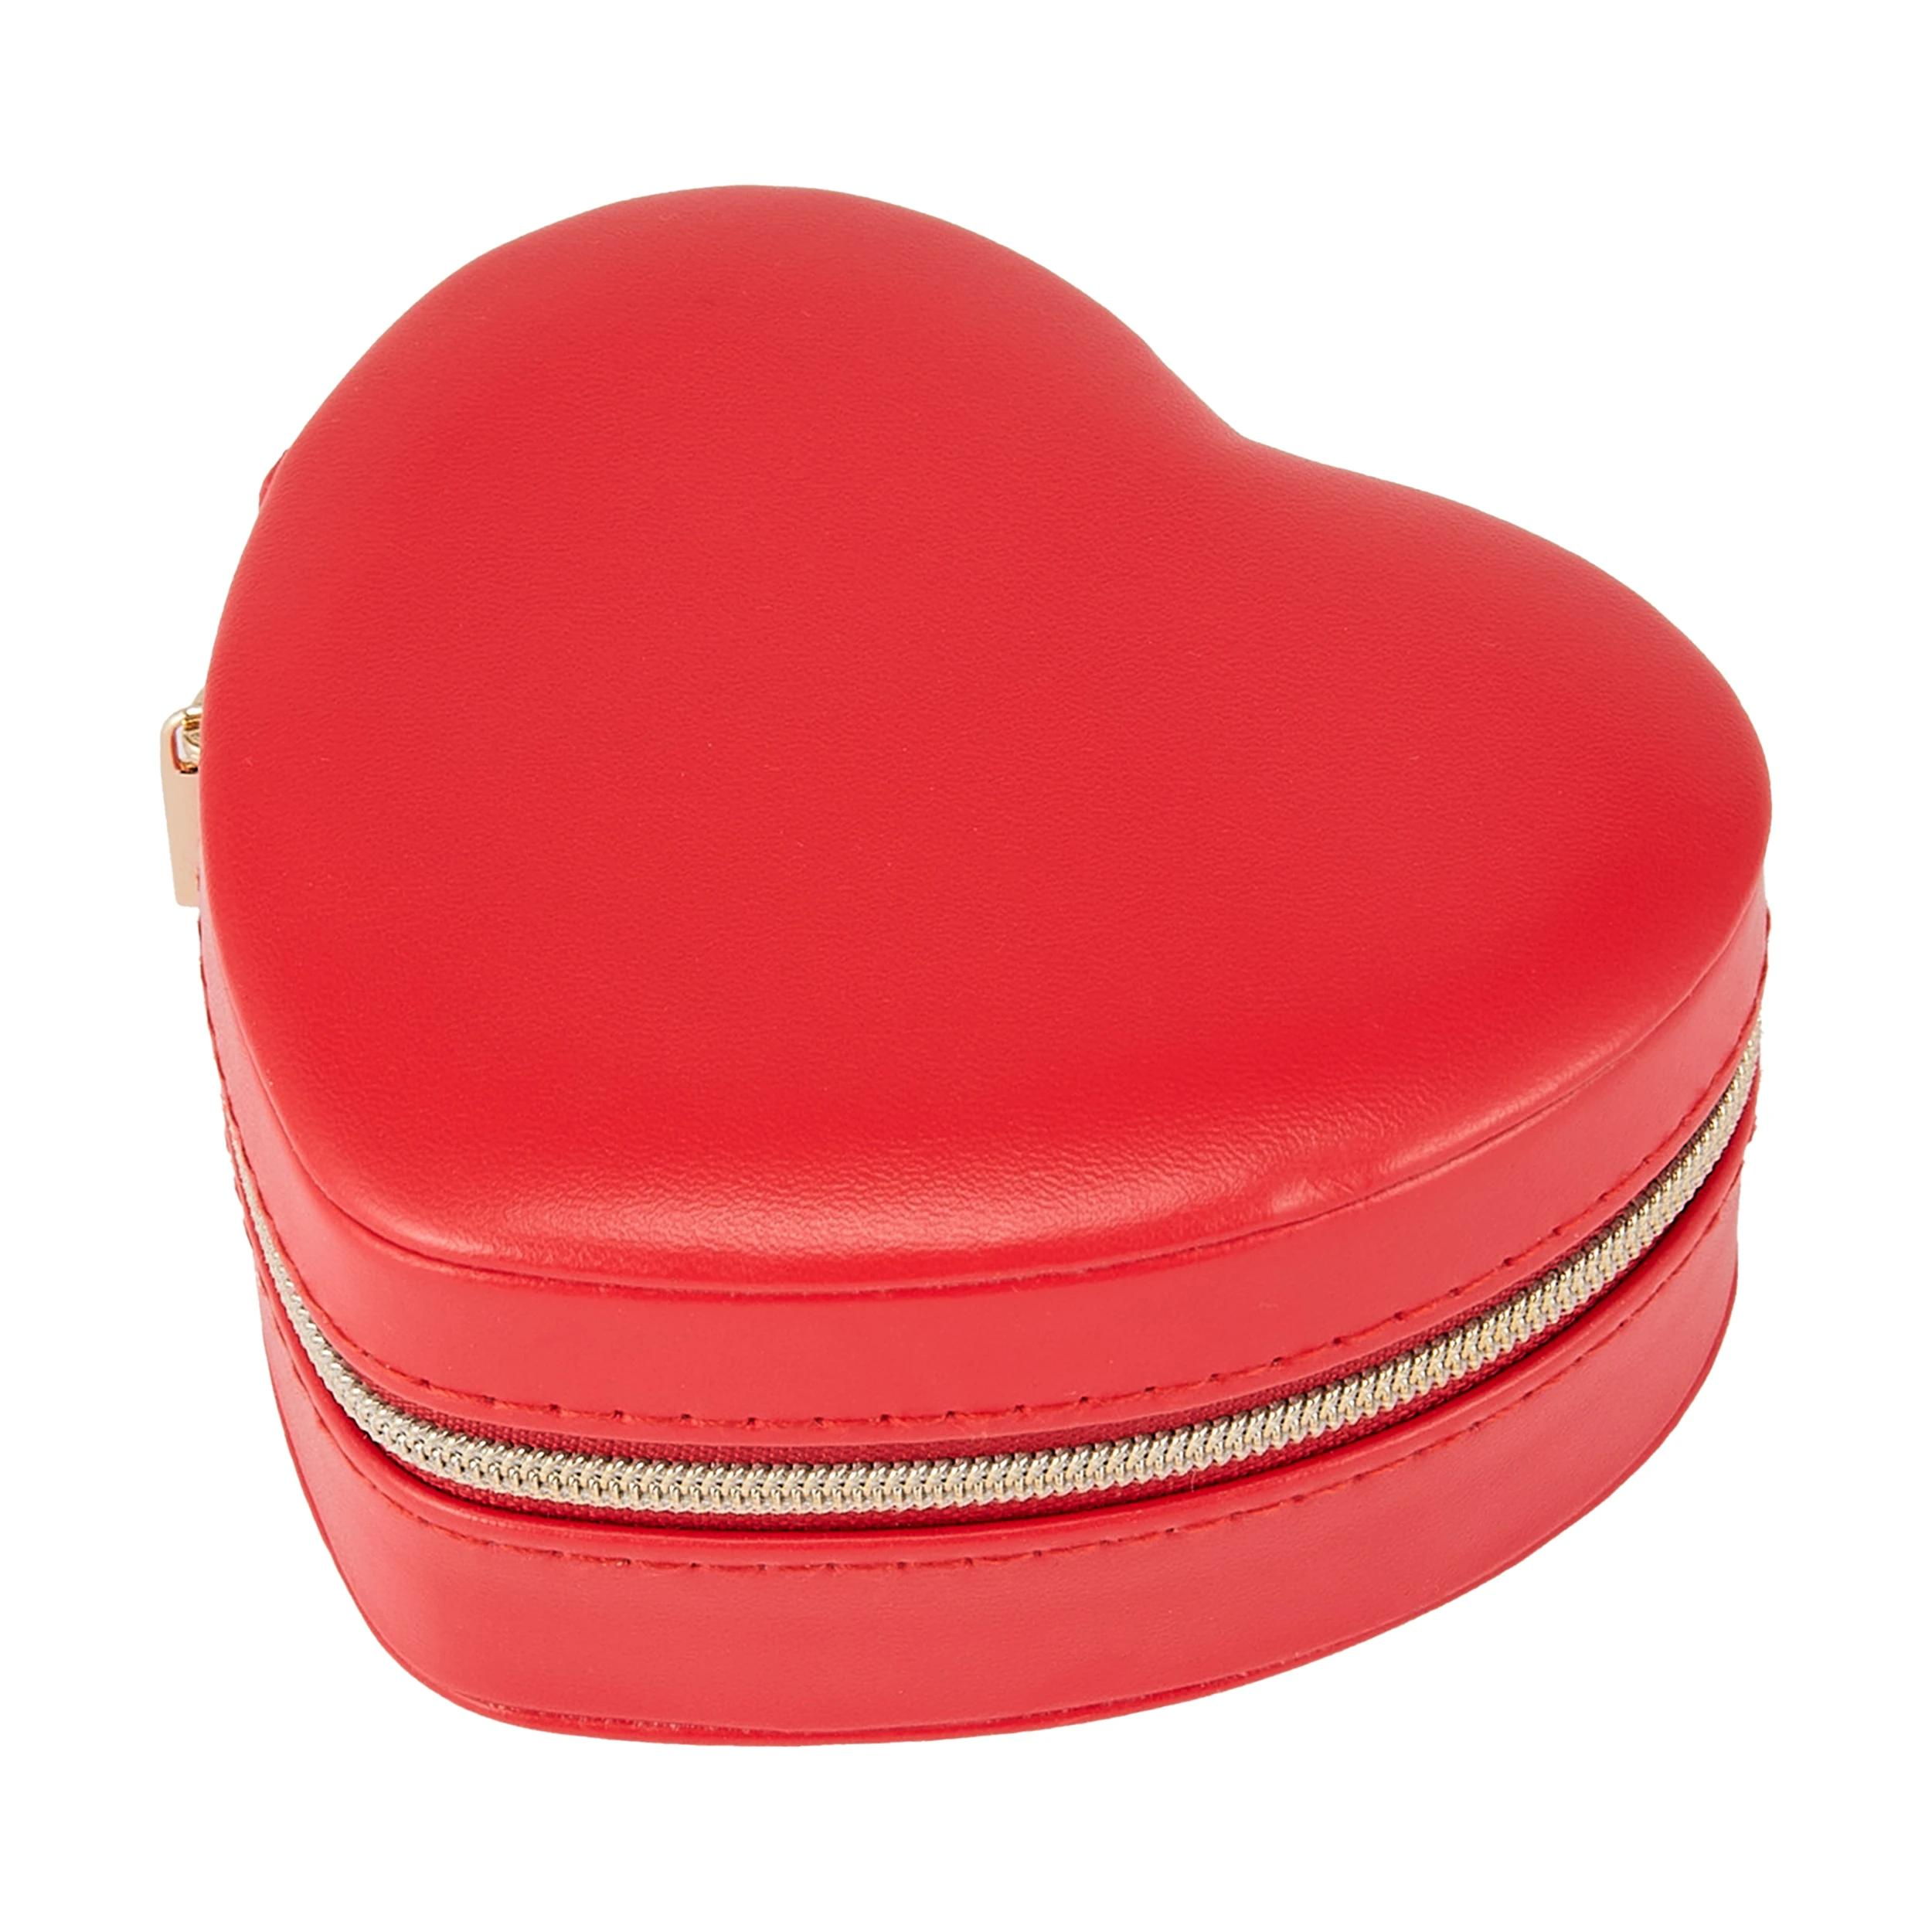
For this project we've used a heart-shaped PU leather jewellery box purchased from a department store. It features a secure zip closure and multiple compartments, making it ideal for storing rings, earrings, necklaces and other small accessories.
When choosing your own jewellery box, look for one with:
- A smooth PU leather or faux leather surface.
- A reasonably flat area large enough for your design.
- A firm structure that can support light pressure during heat application.
Because PU leather is heat-sensitive, we'll use a mini iron on a lower heat setting to apply the HTV safely without damaging the surface.
Download the Font:
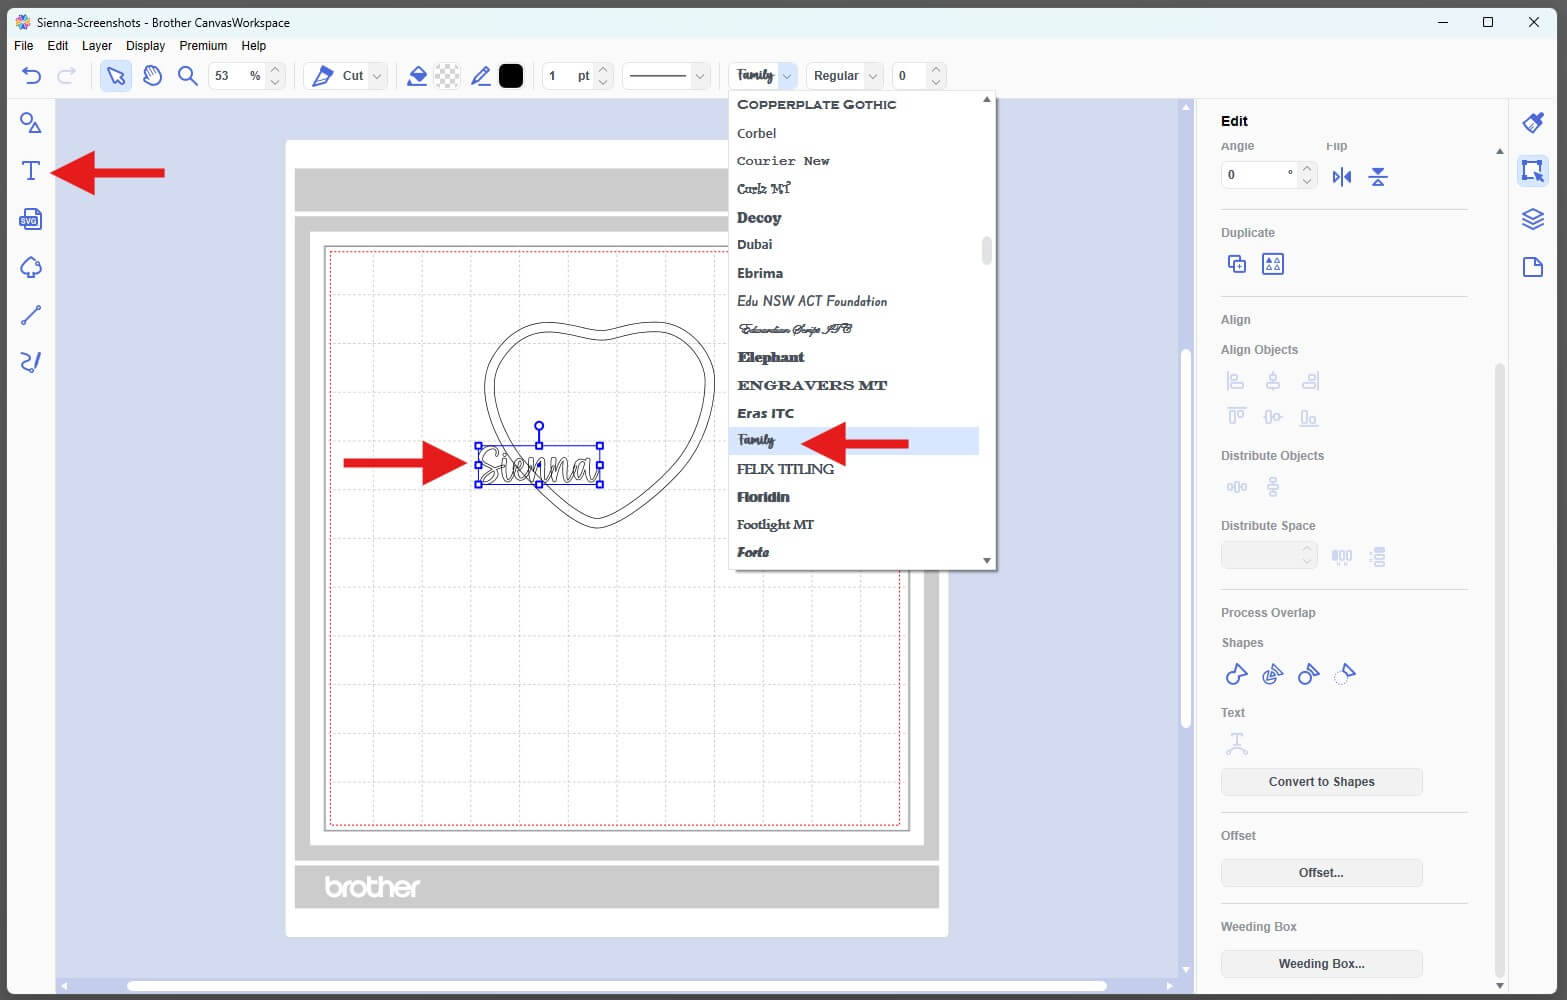
Our project has been created using the free "Family" font from CreativeFabrica. Download and install the font before opening CanvasWorkspace.
Be sure to use the desktop version of CanvasWorkspace, as this allows you to access fonts installed on your computer.
Measure Jewellery Box:
Before creating the design, measure the widest and tallest points of your jewellery box. We'll use these measurements later to accurately size the finished design.
Because our heart-shaped jewellery box isn't a perfect geometric shape, we'll also use a photograph to create an accurate curved path for the text.
Take a photo of the jewellery box from directly above and save it to your computer. If your jewellery box is a simple symmetrical shape, you may be able to create it using measurements alone without needing a photograph.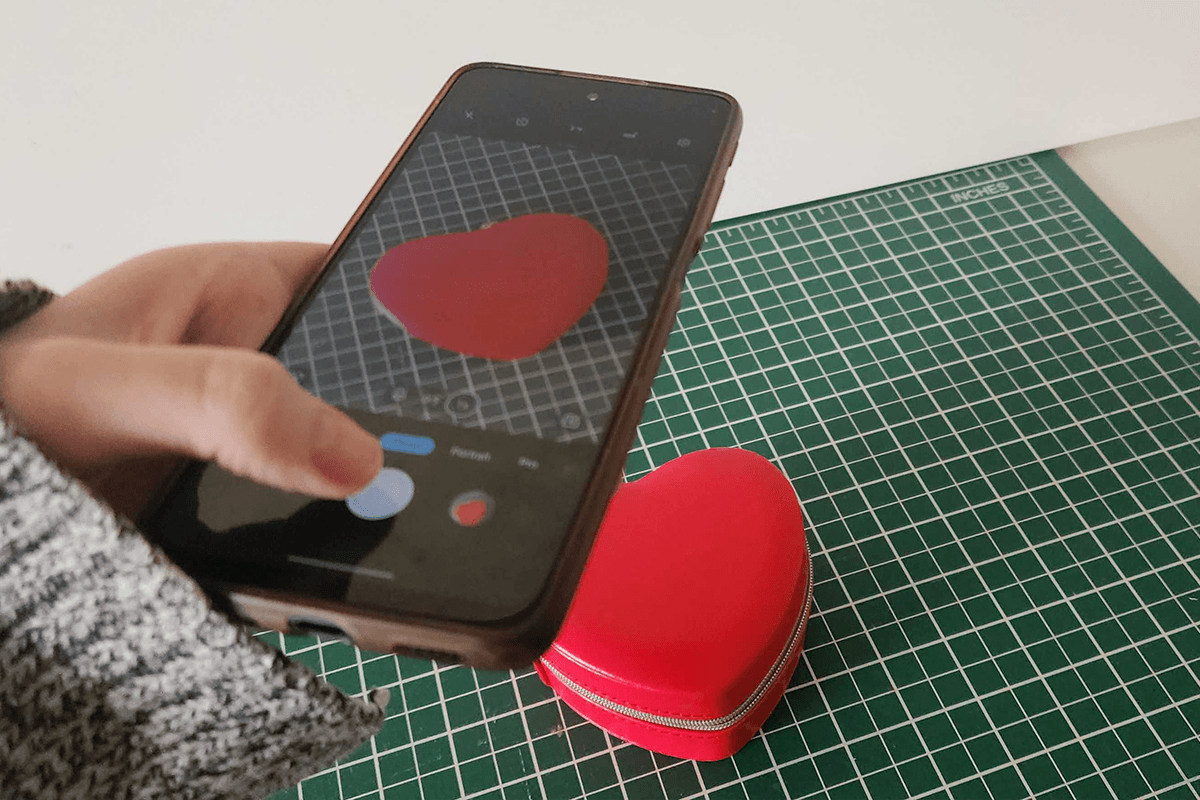
Create your design in CanvasWorkspace:
- Open the desktop version of CanvasWorkspace and log in to your account.
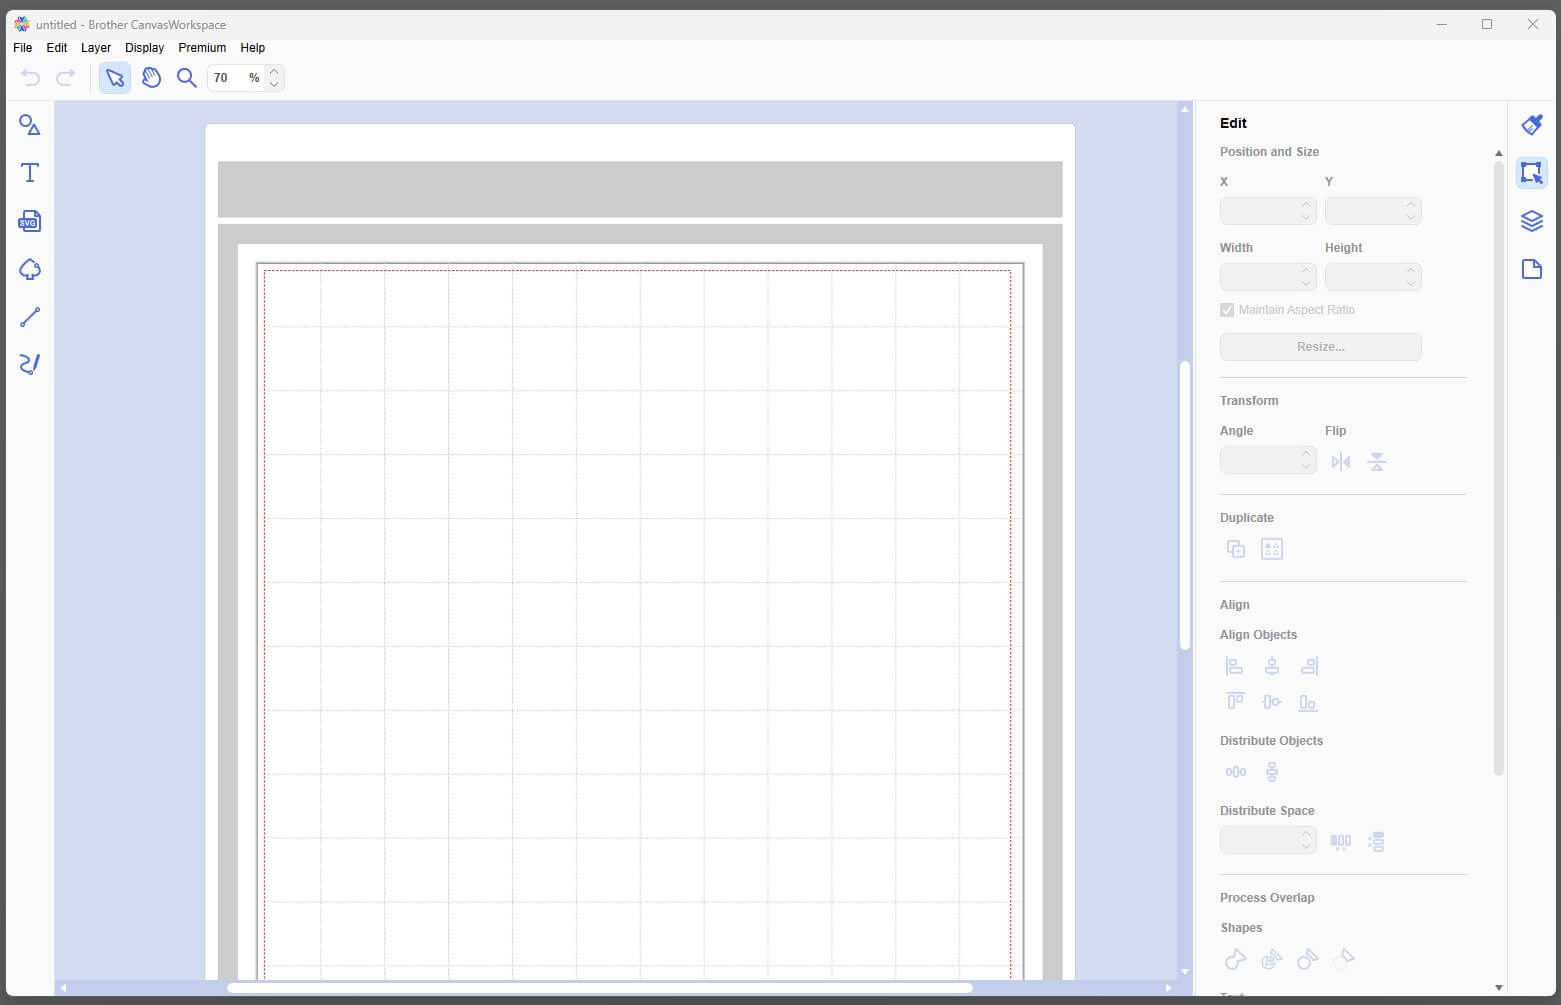
- Import the photo you have taken by selecting File > Import from Your Computer, then locate the photo on your computer.
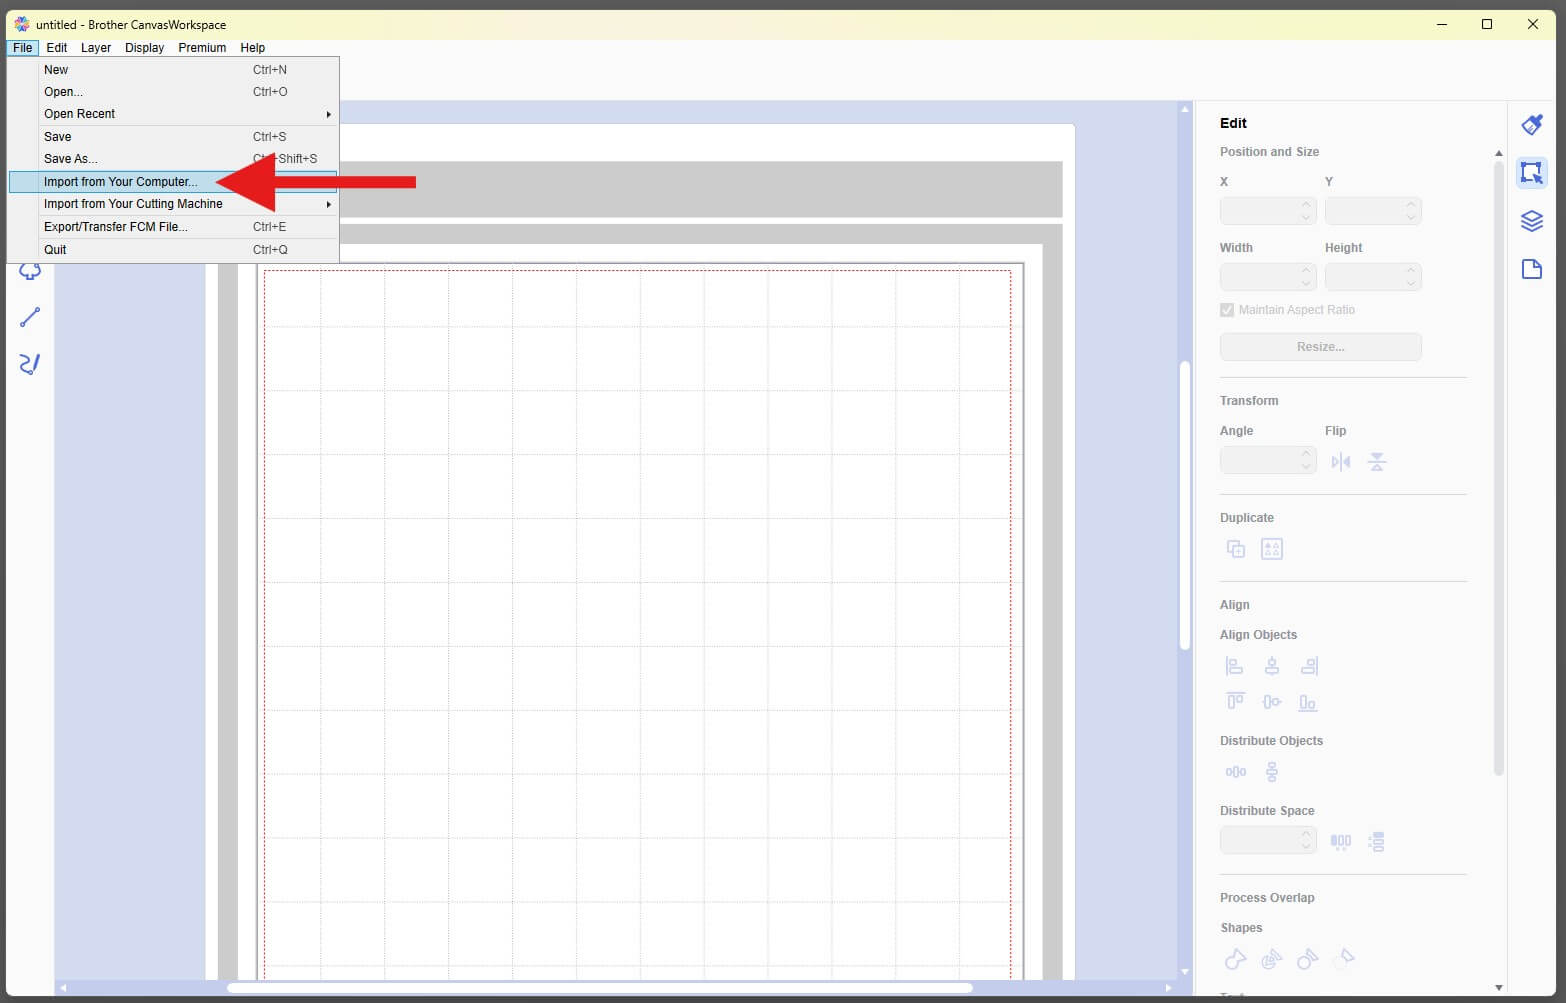
- Resize the photo so it fits comfortably on the CanvasWorkspace mat.
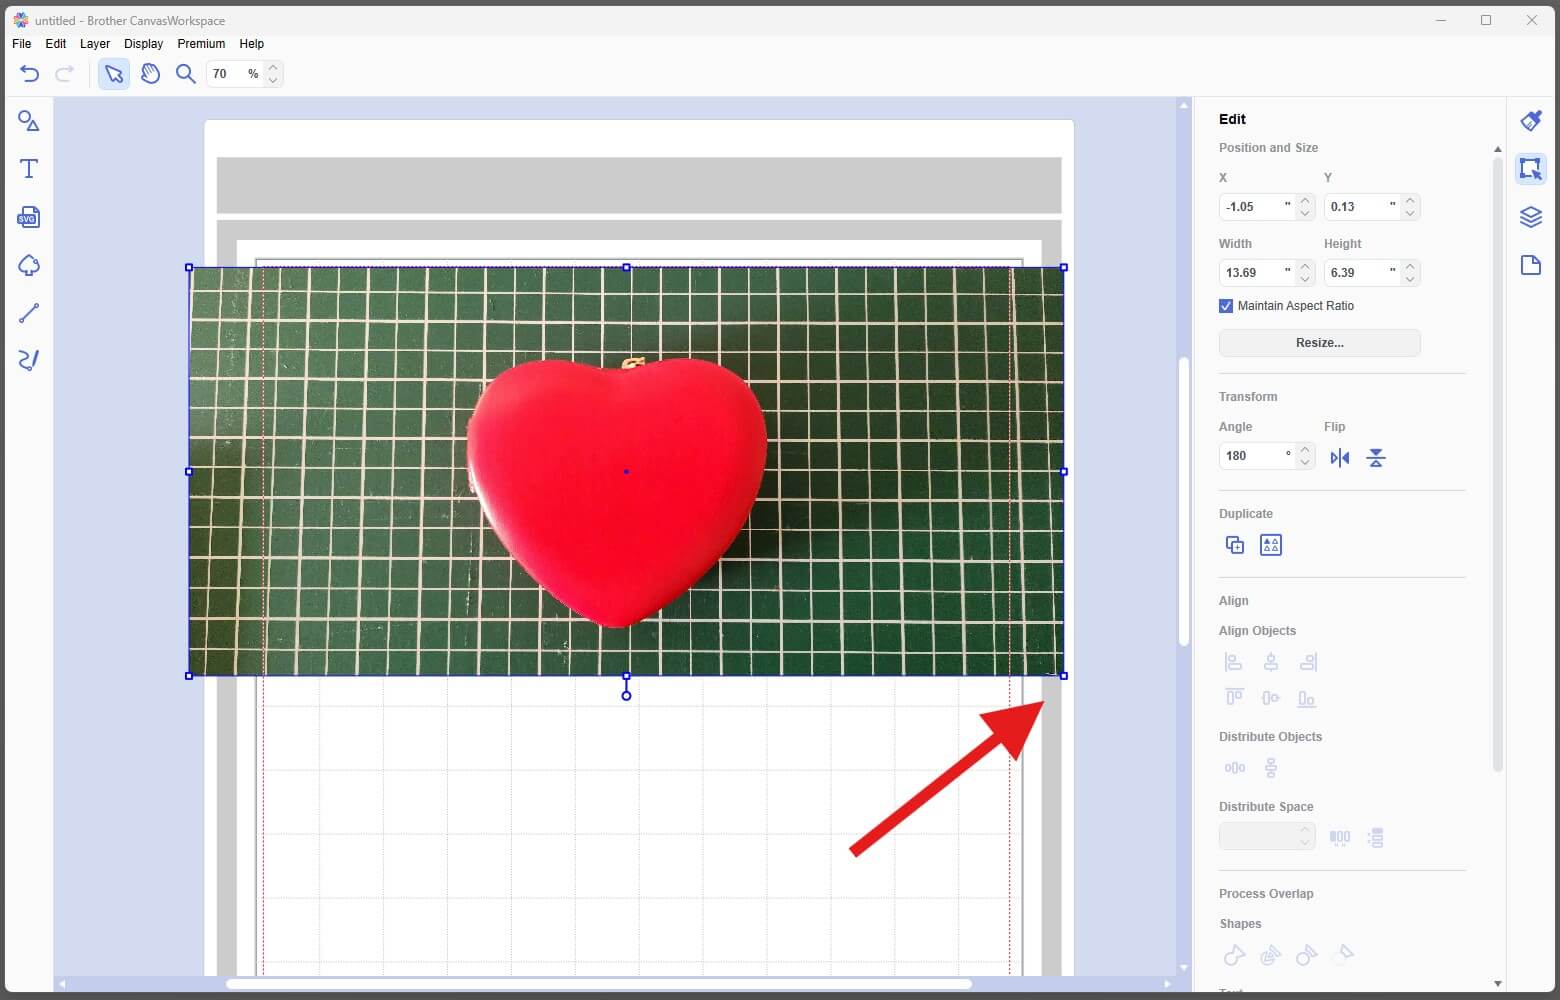
- Insert a shape that resembles the shape of your jewellery box. We have used the heart shape.
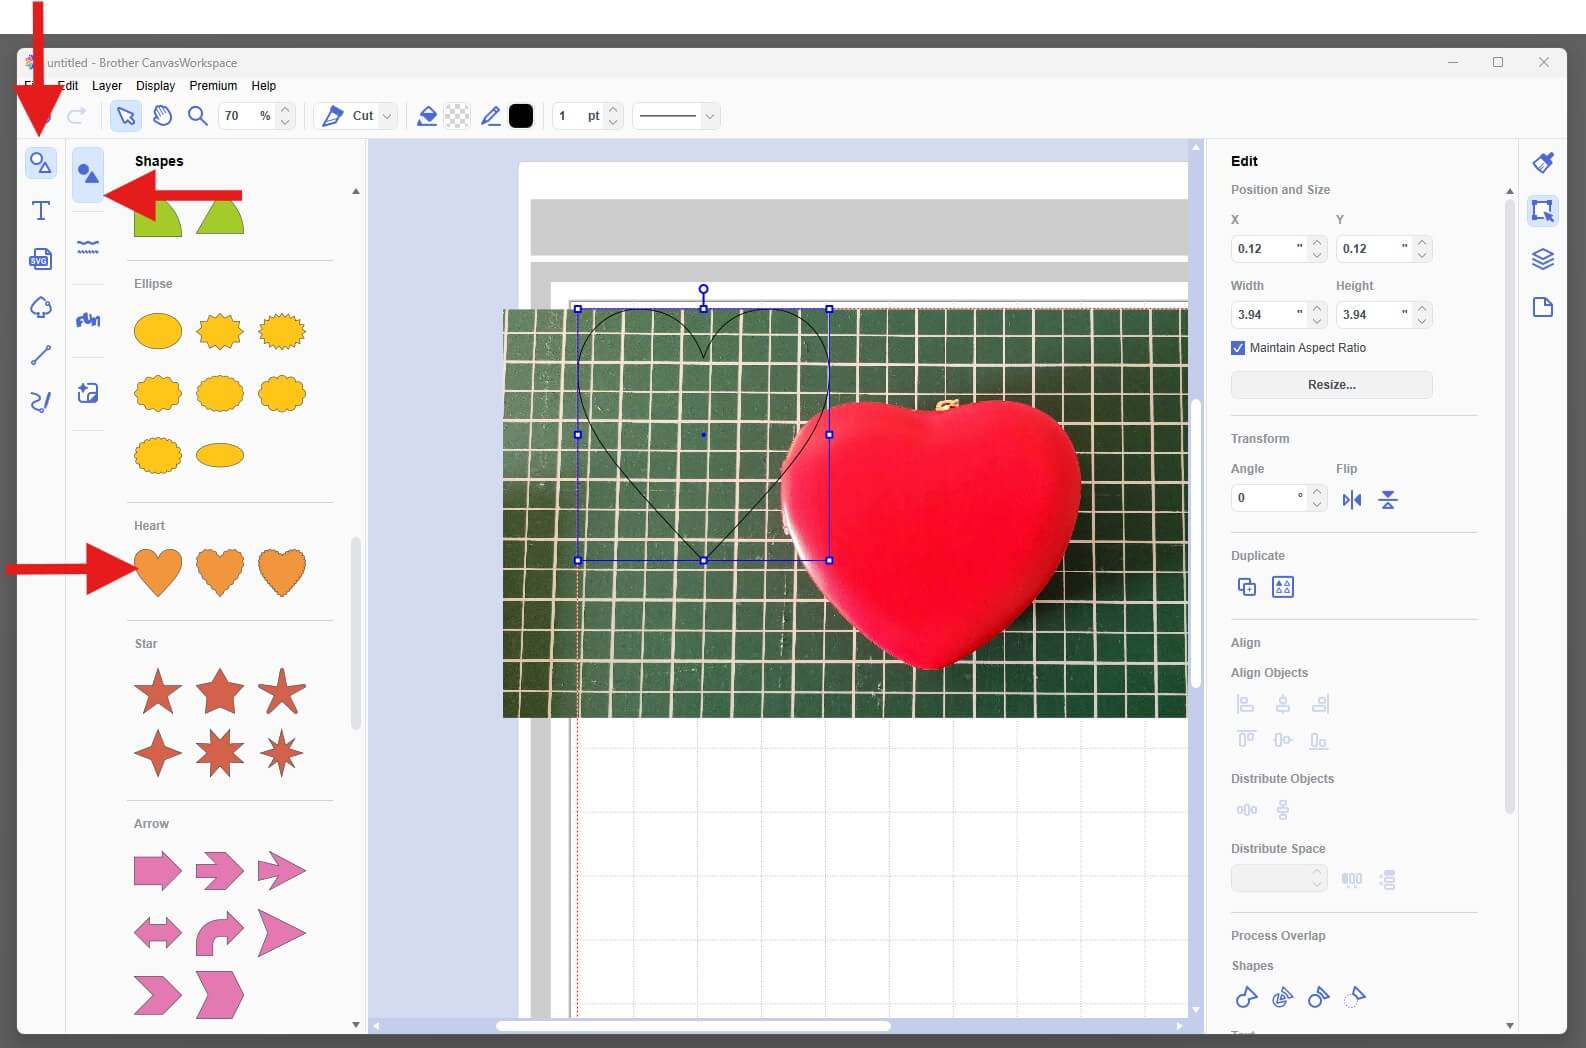
- Move the shape over the item in your photo.
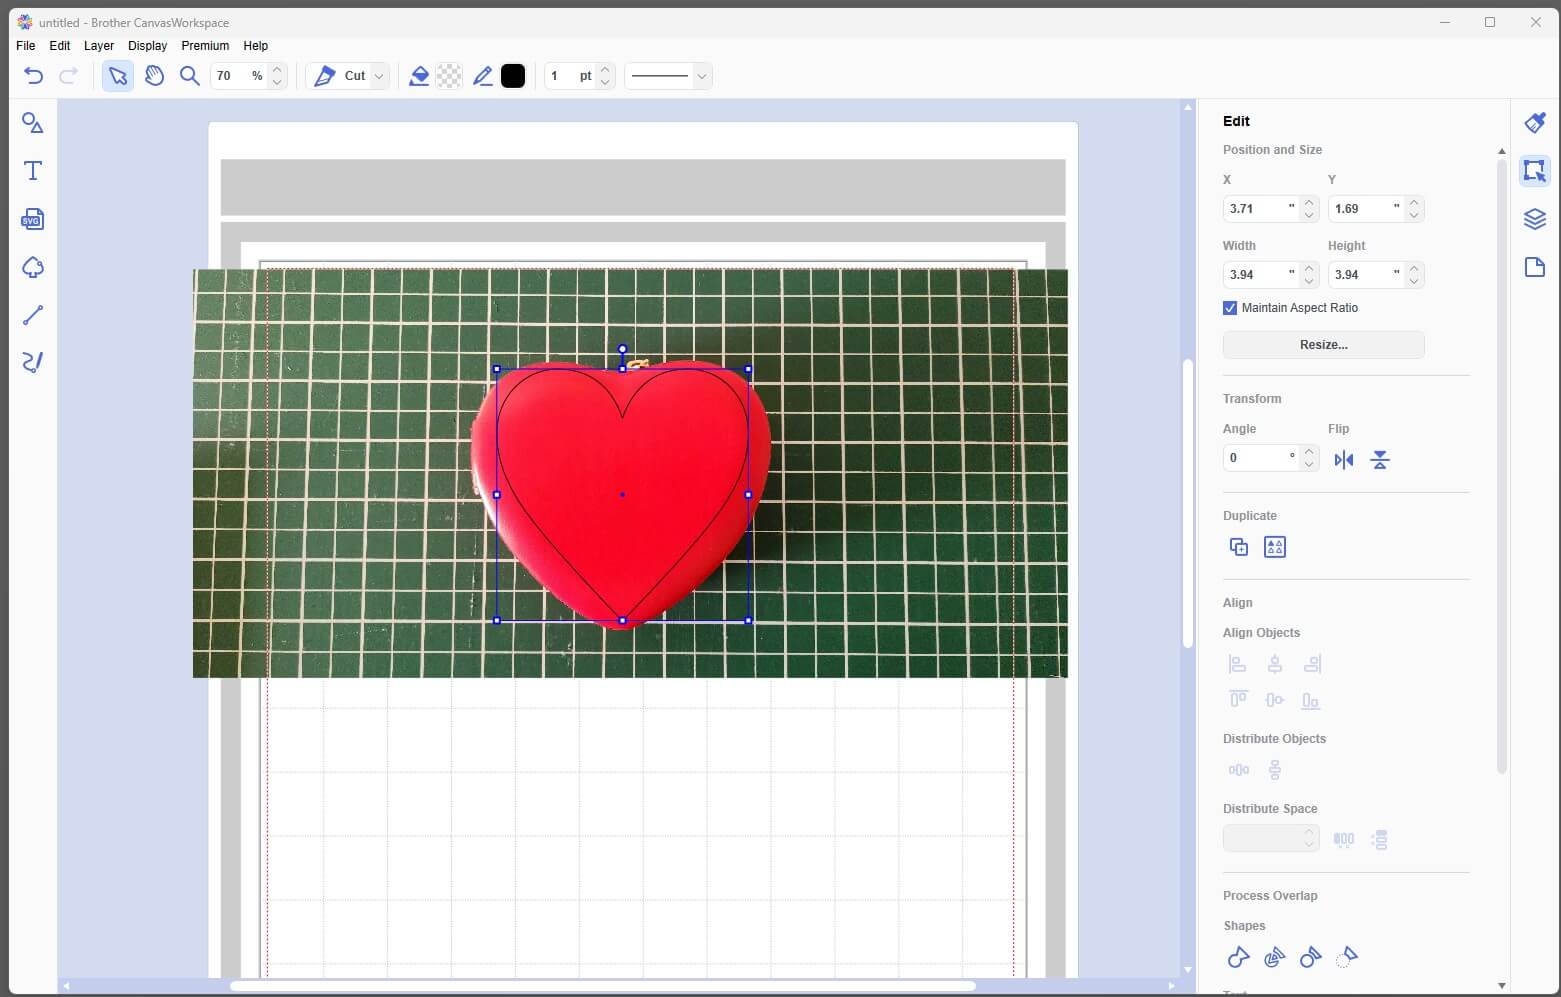
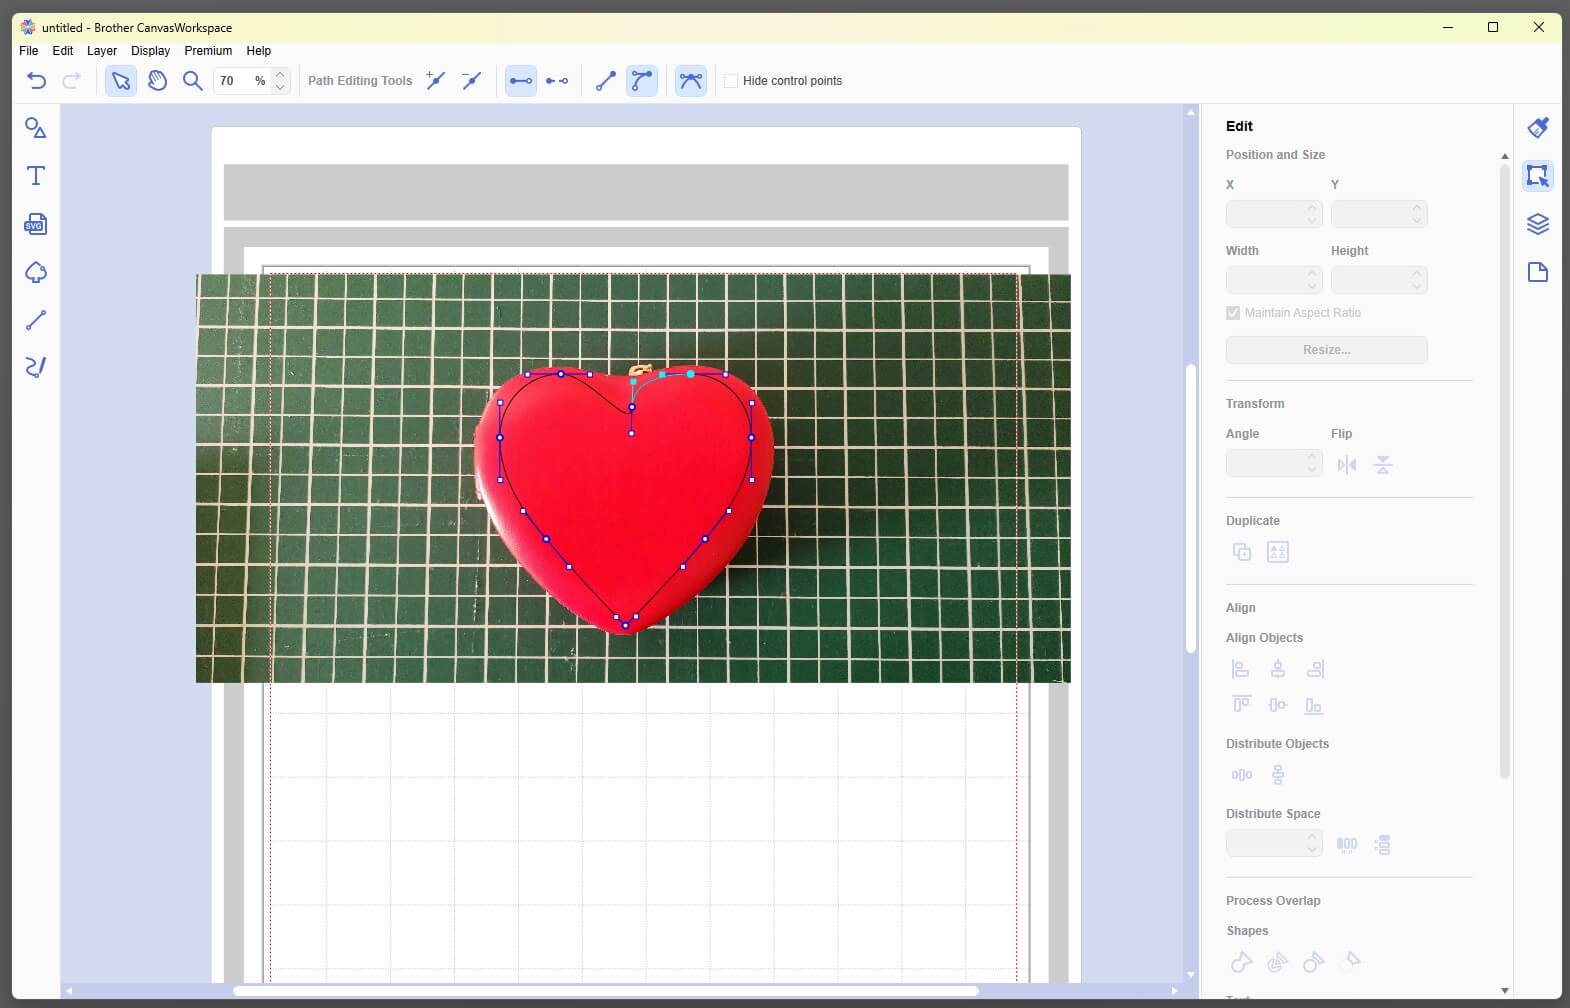
- Double-click the heart shape to display the editable nodes. Drag the nodes and handles until the shape closely matches the outline of your jewellery box. Click and move these to reshape to match your item. Use the arms to play with the angles as needed.
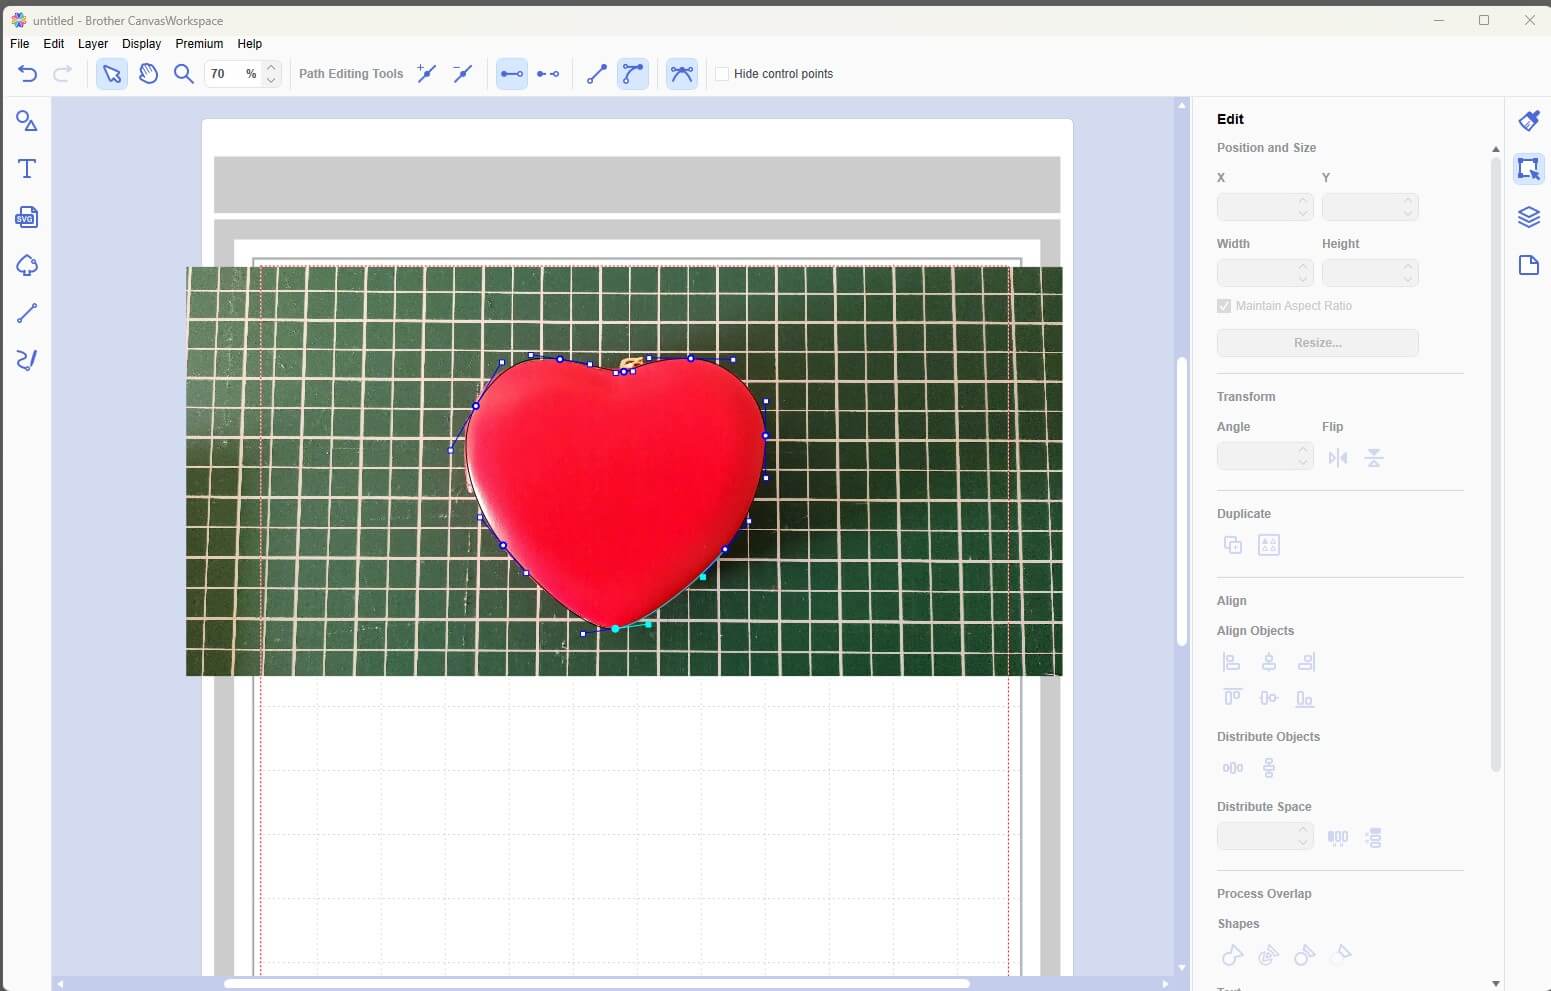
- Hide the layer with the photo.
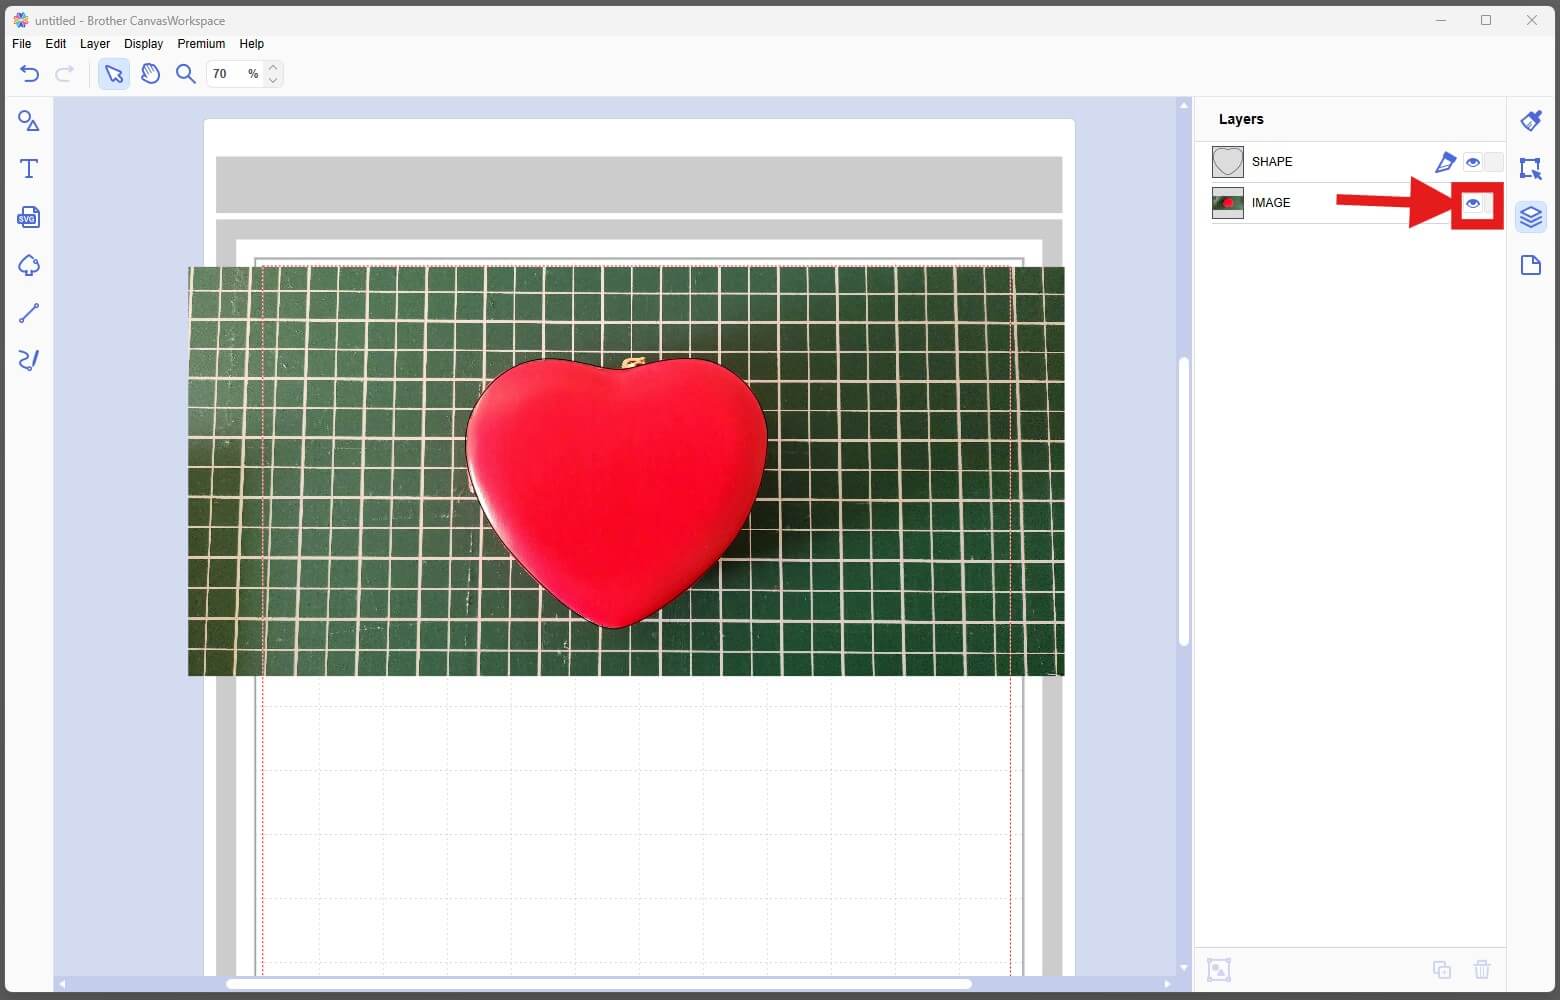
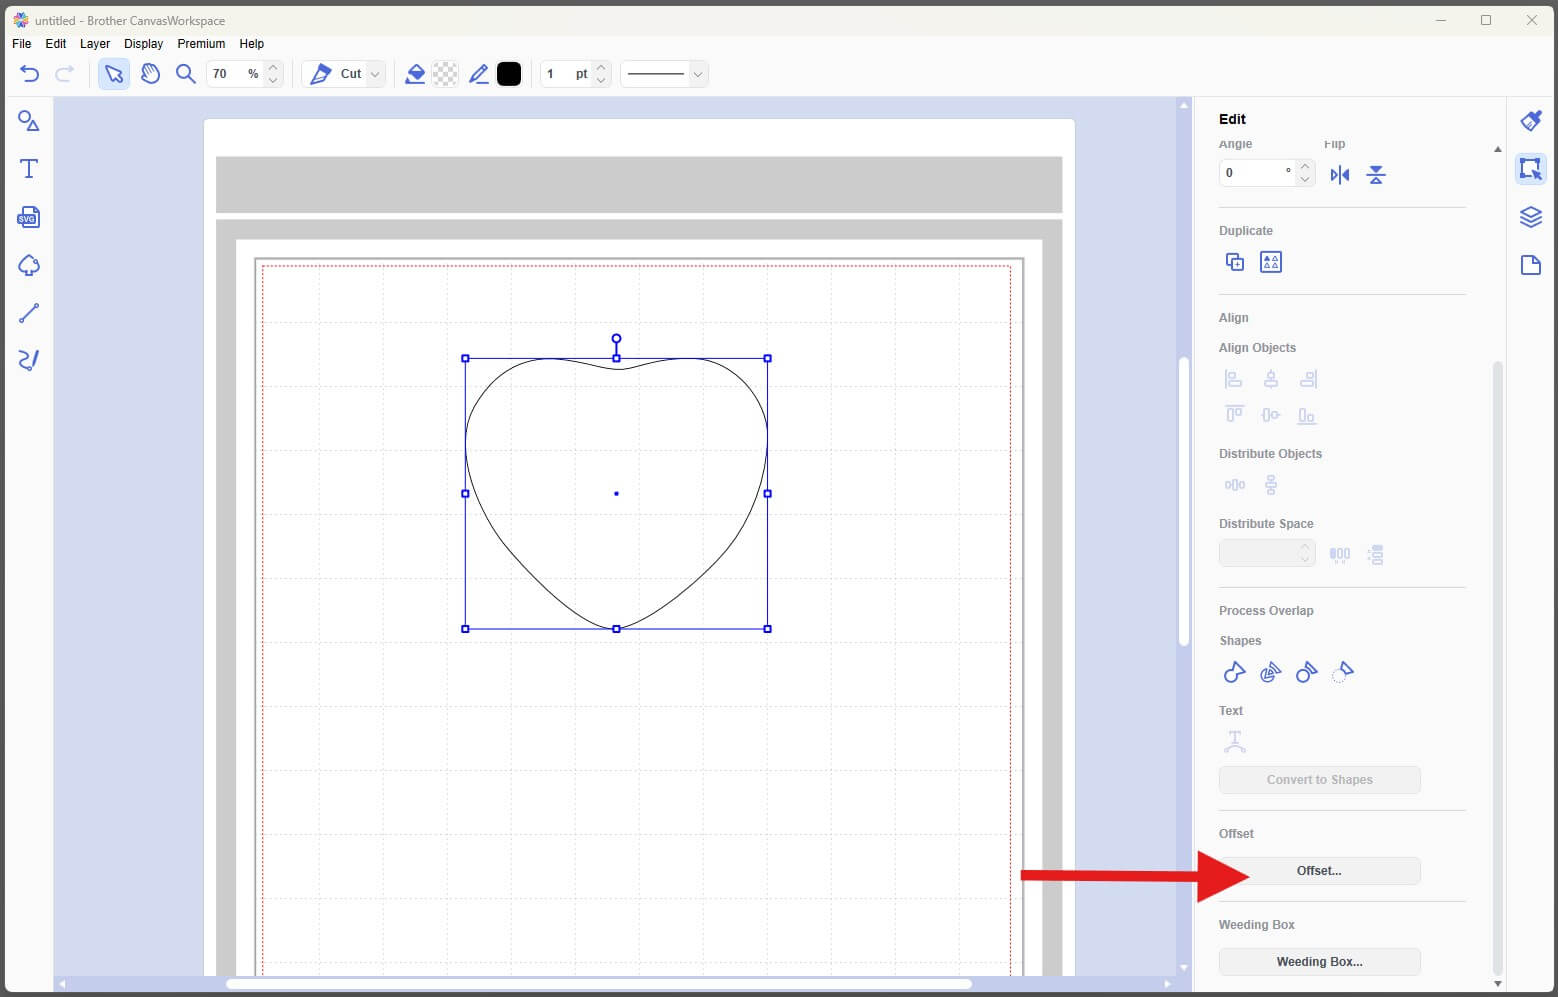
- Click on the shape and click the Offset button under Edit toolbar.
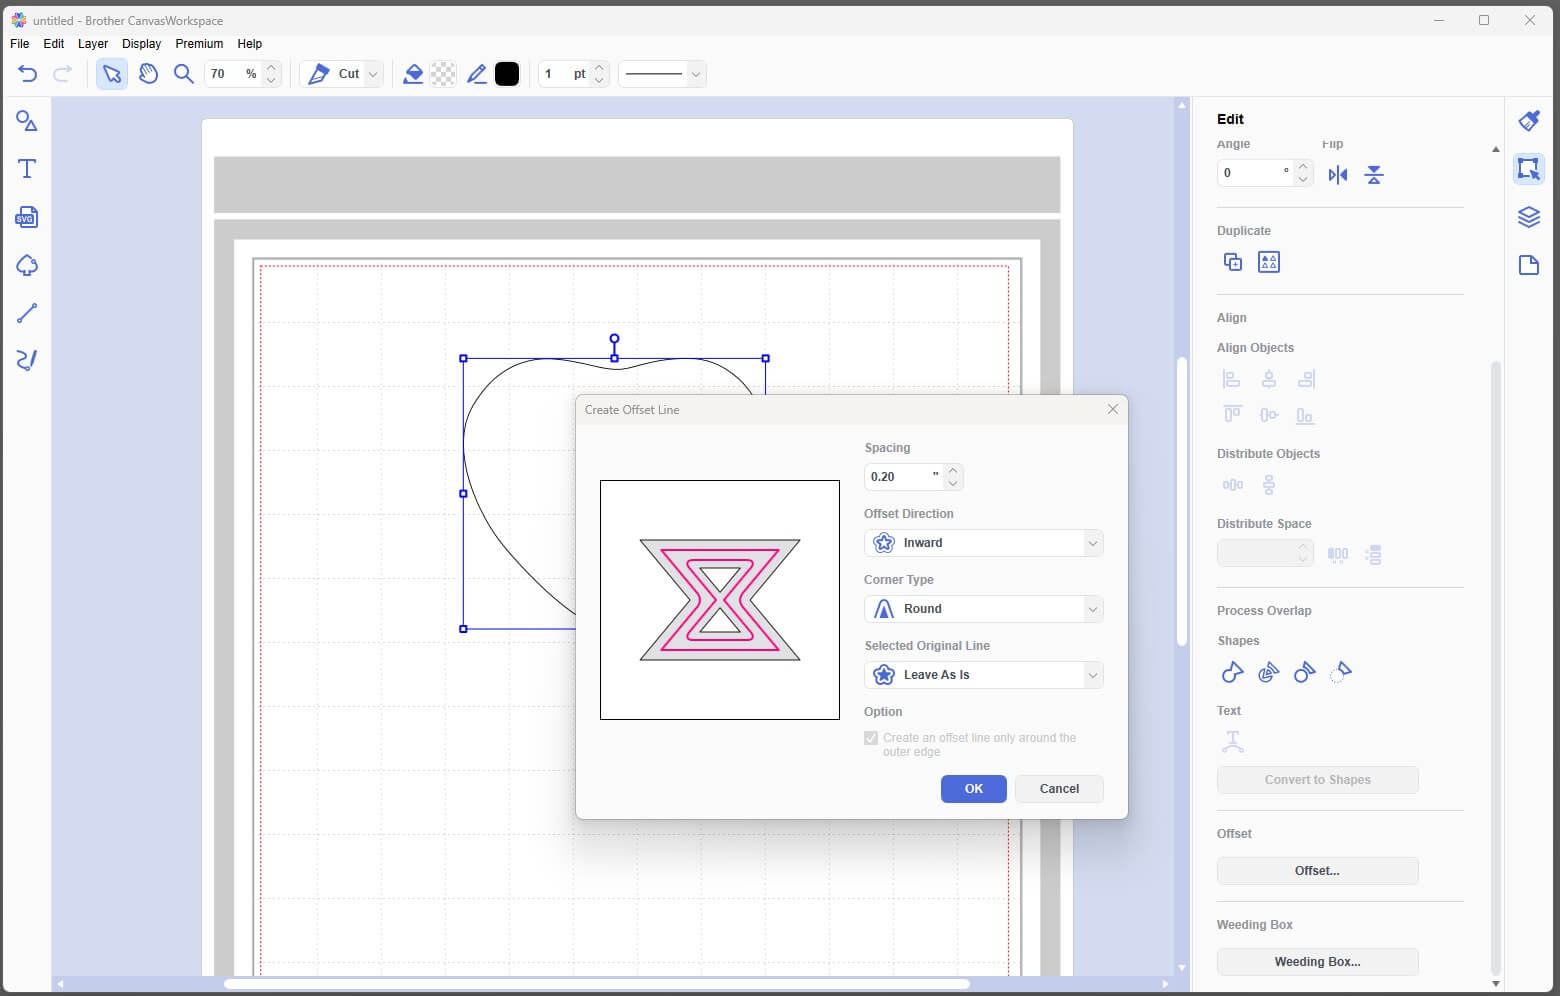
- On the Offset screen set the
- Spacing: 10mm (0.20")
- Offset Direction: Inward
- Corner Type: Round
- Selected Original Line: Leave As Is
- Click OK
- Add a text box and write the name and change font too "Family".
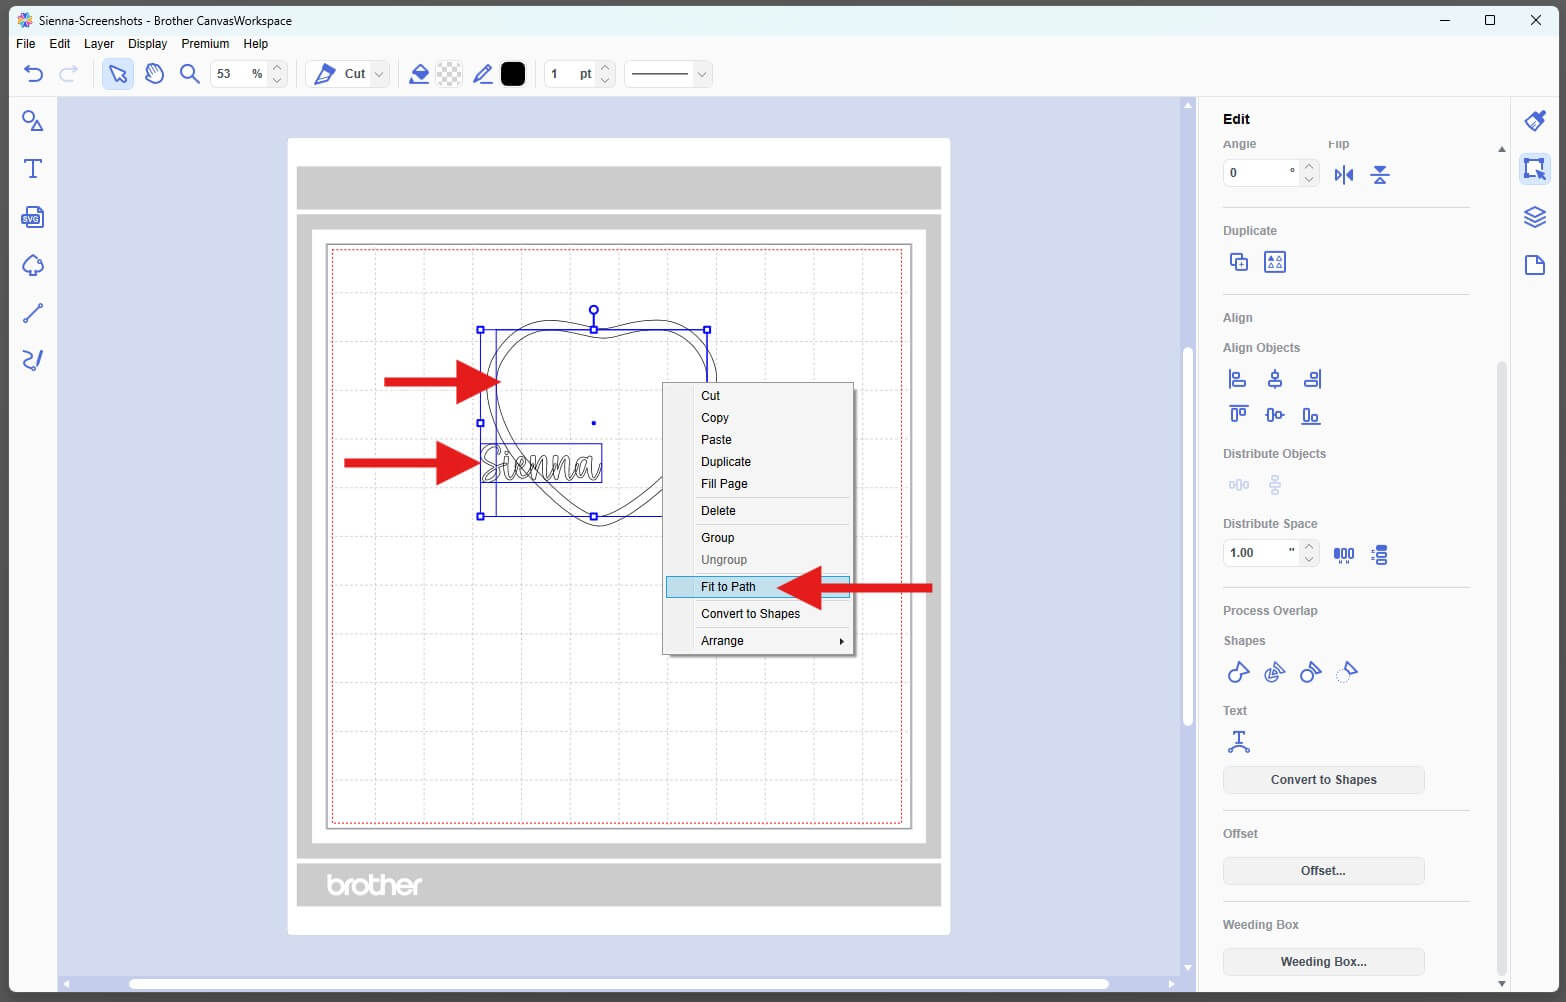
- Select inner shape and text box and right click fit to path.
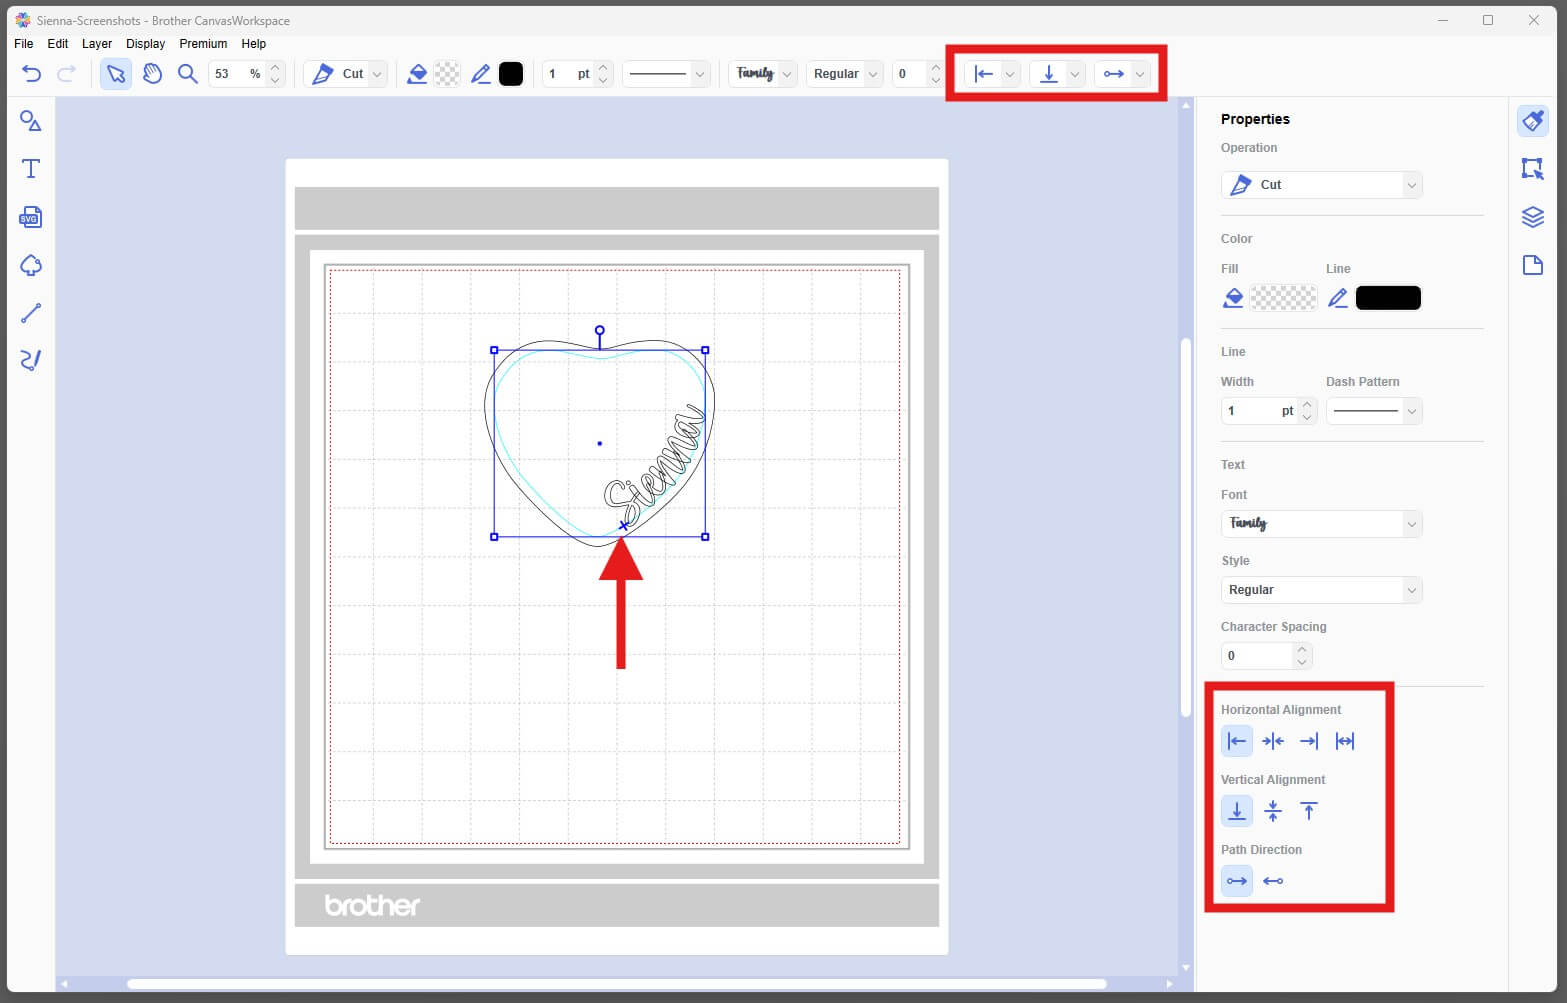
- Once the text has been fitted to the path, use the small + handle to reposition it around the heart. Experiment with the alignment and path direction tools until you're happy with the placement. Use the alignment and path direction tools to move where you would like the text to appear.
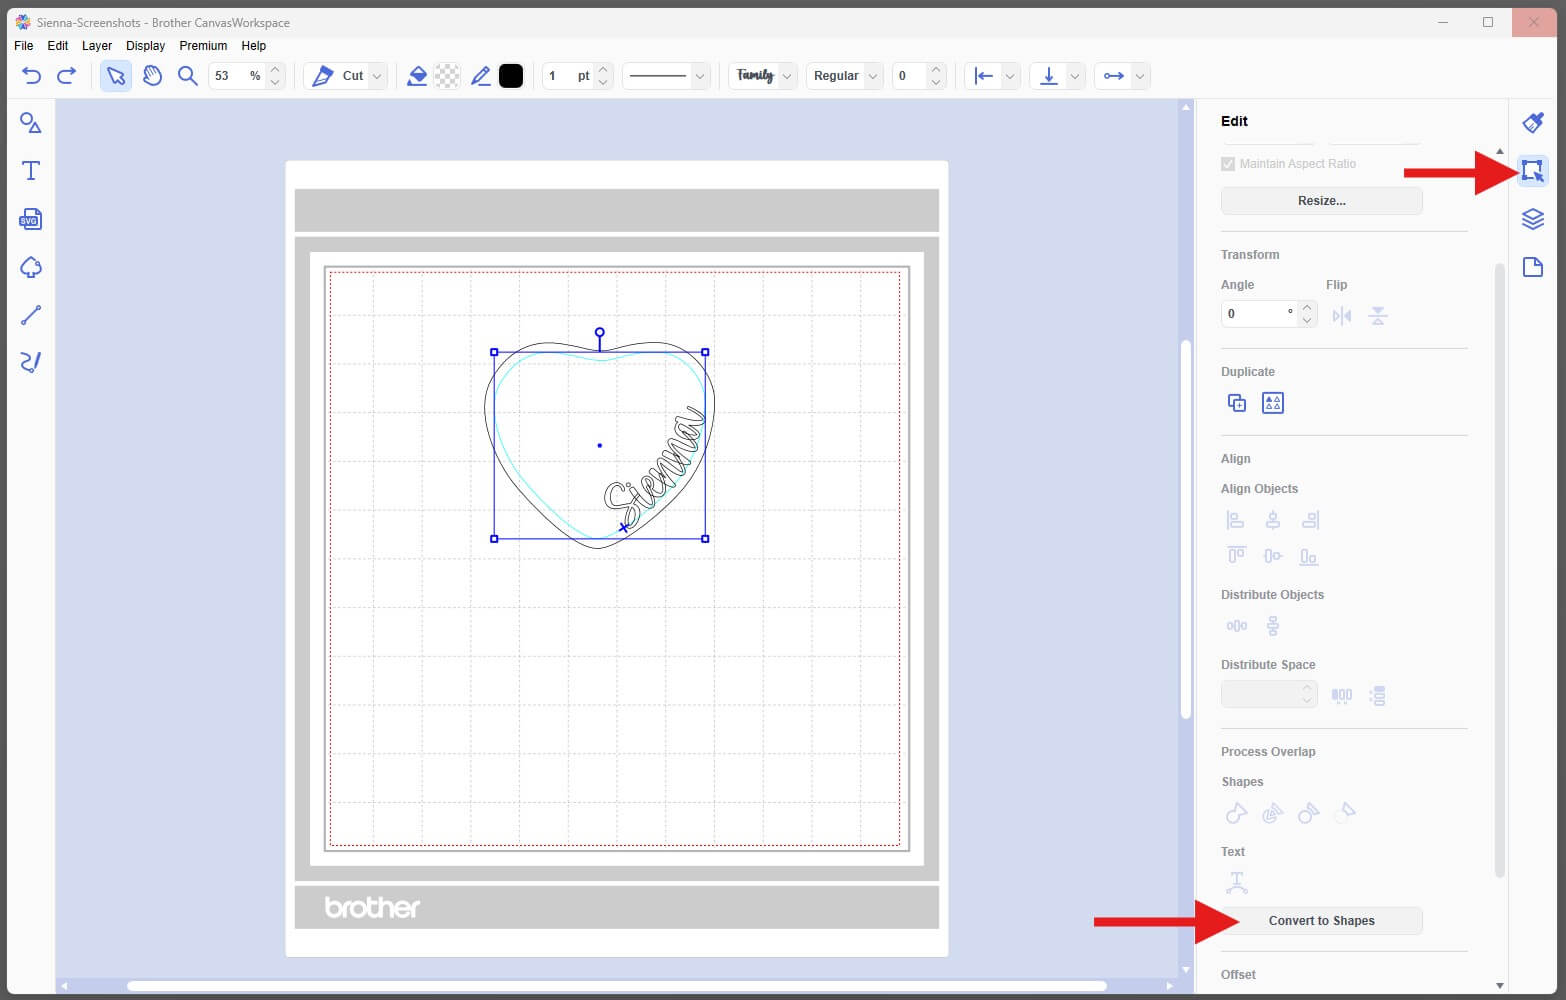
- Once you're happy with the layout, convert the text to shapes. This locks the text in position and prepares it for welding. This is located under the Edit toolbar. Click on the Convert to Shapes button.
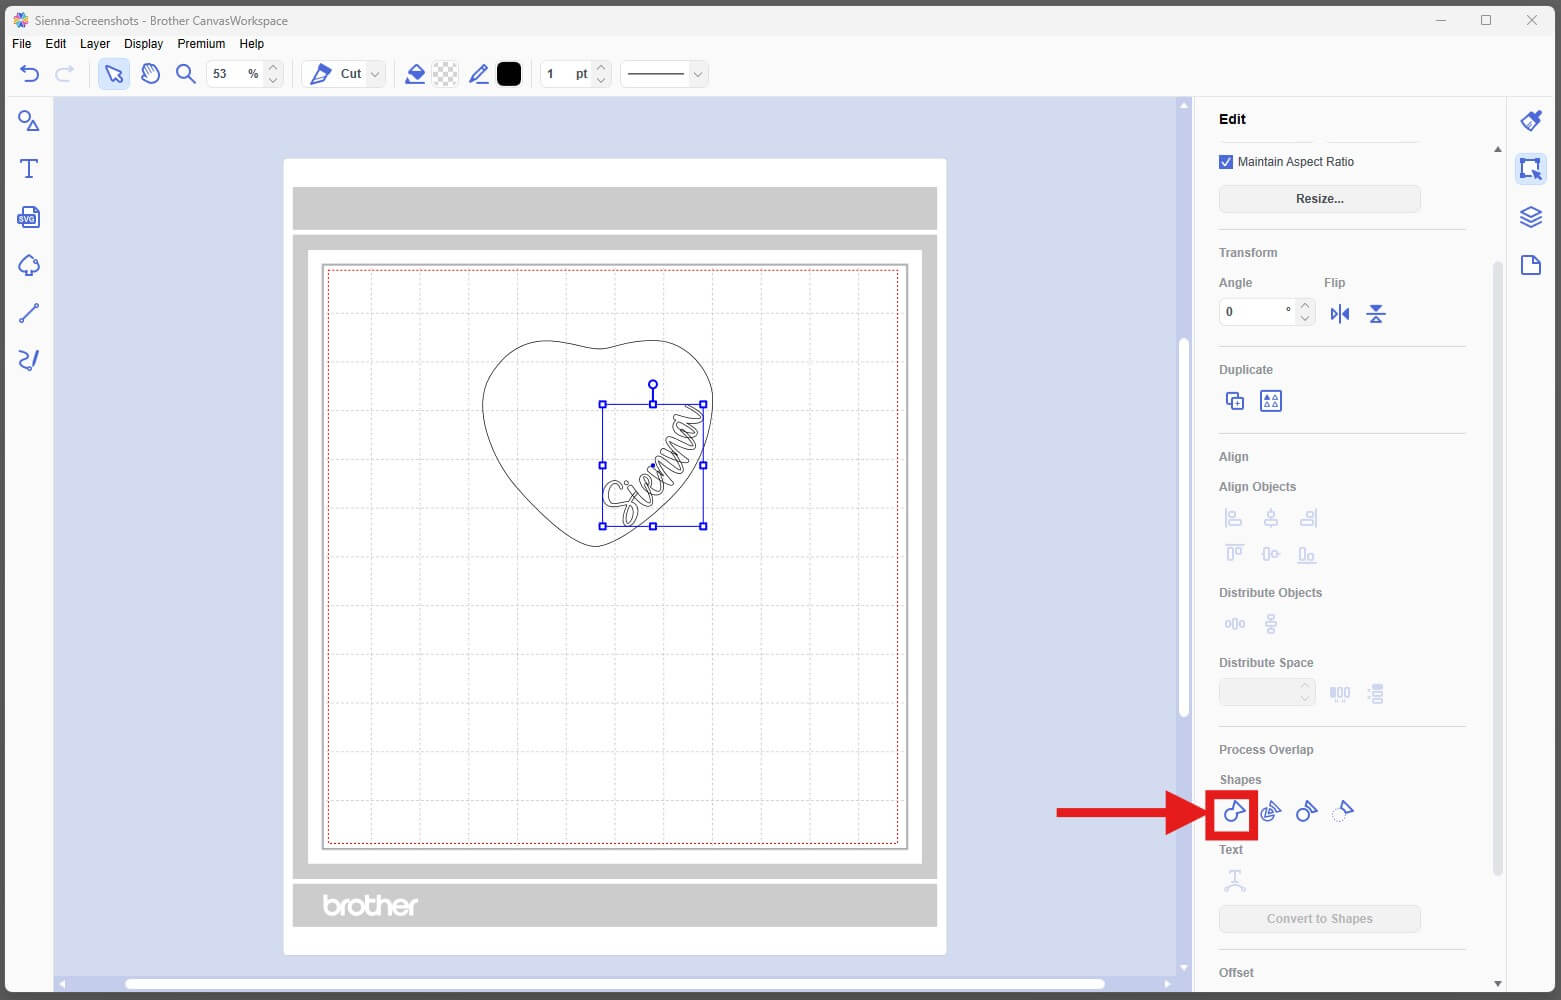
- Weld the letters together so they become a single cut object. This prevents overlapping letters from cutting individually. This is located under the Edit toolbar. Click on the Weld icon under Process Overlap.
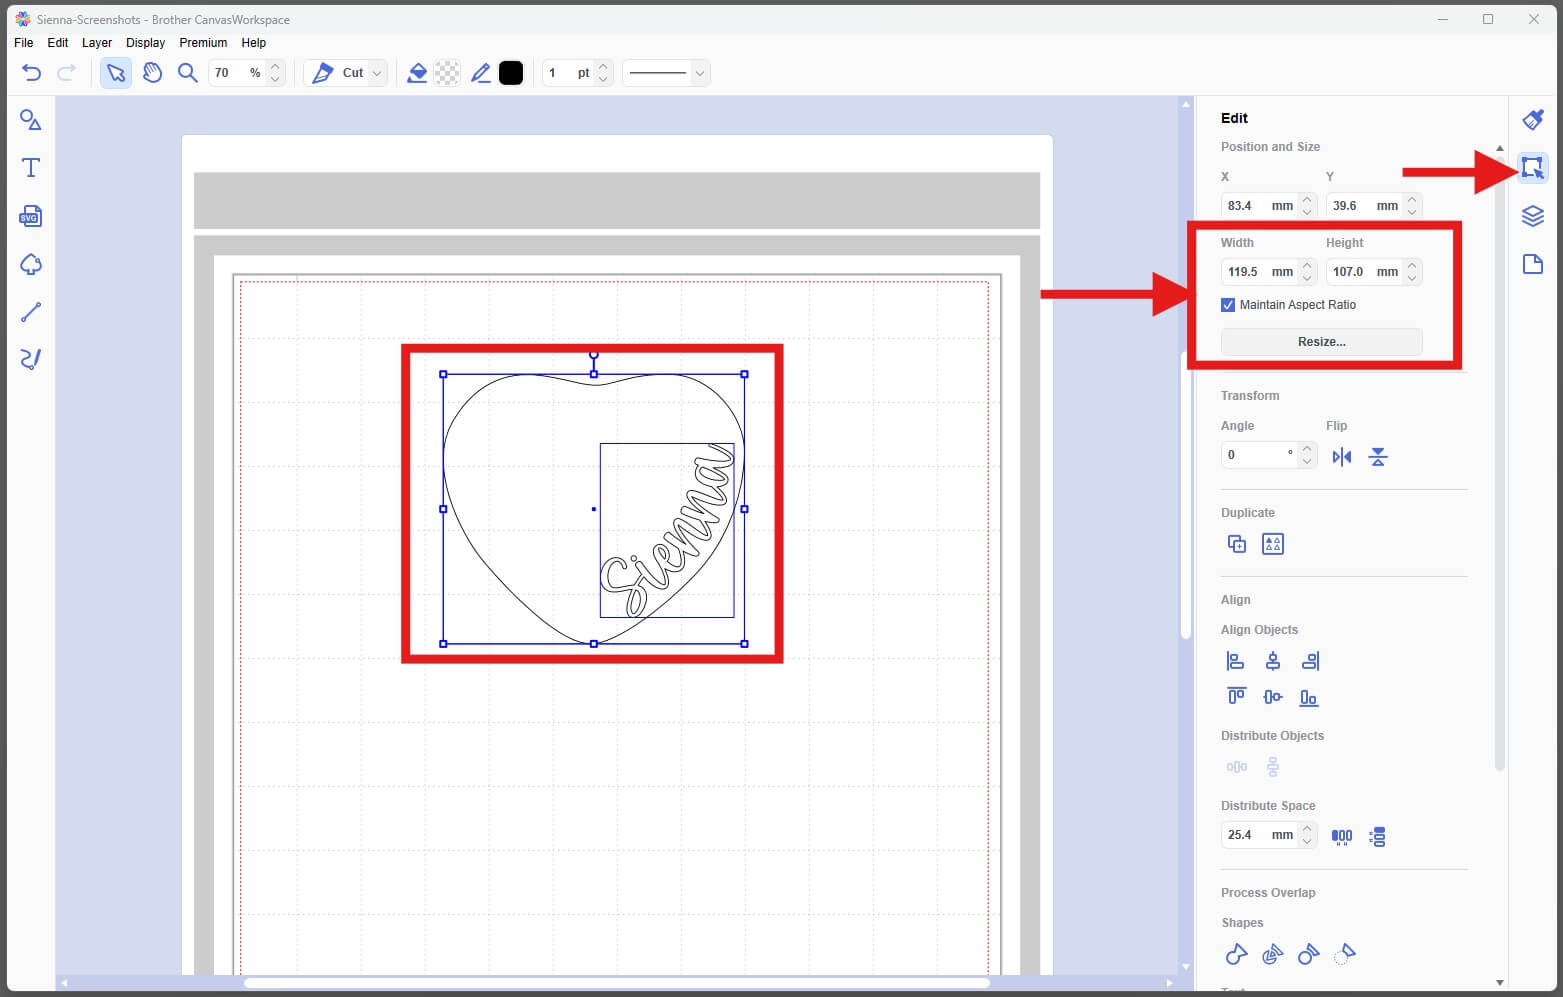
- Select both the heart and the text, then resize them to match the measurements taken from your jewellery box within the Edit toolbar. If necessary, untick Maintain Aspect Ratio so you can adjust the width and height independently.
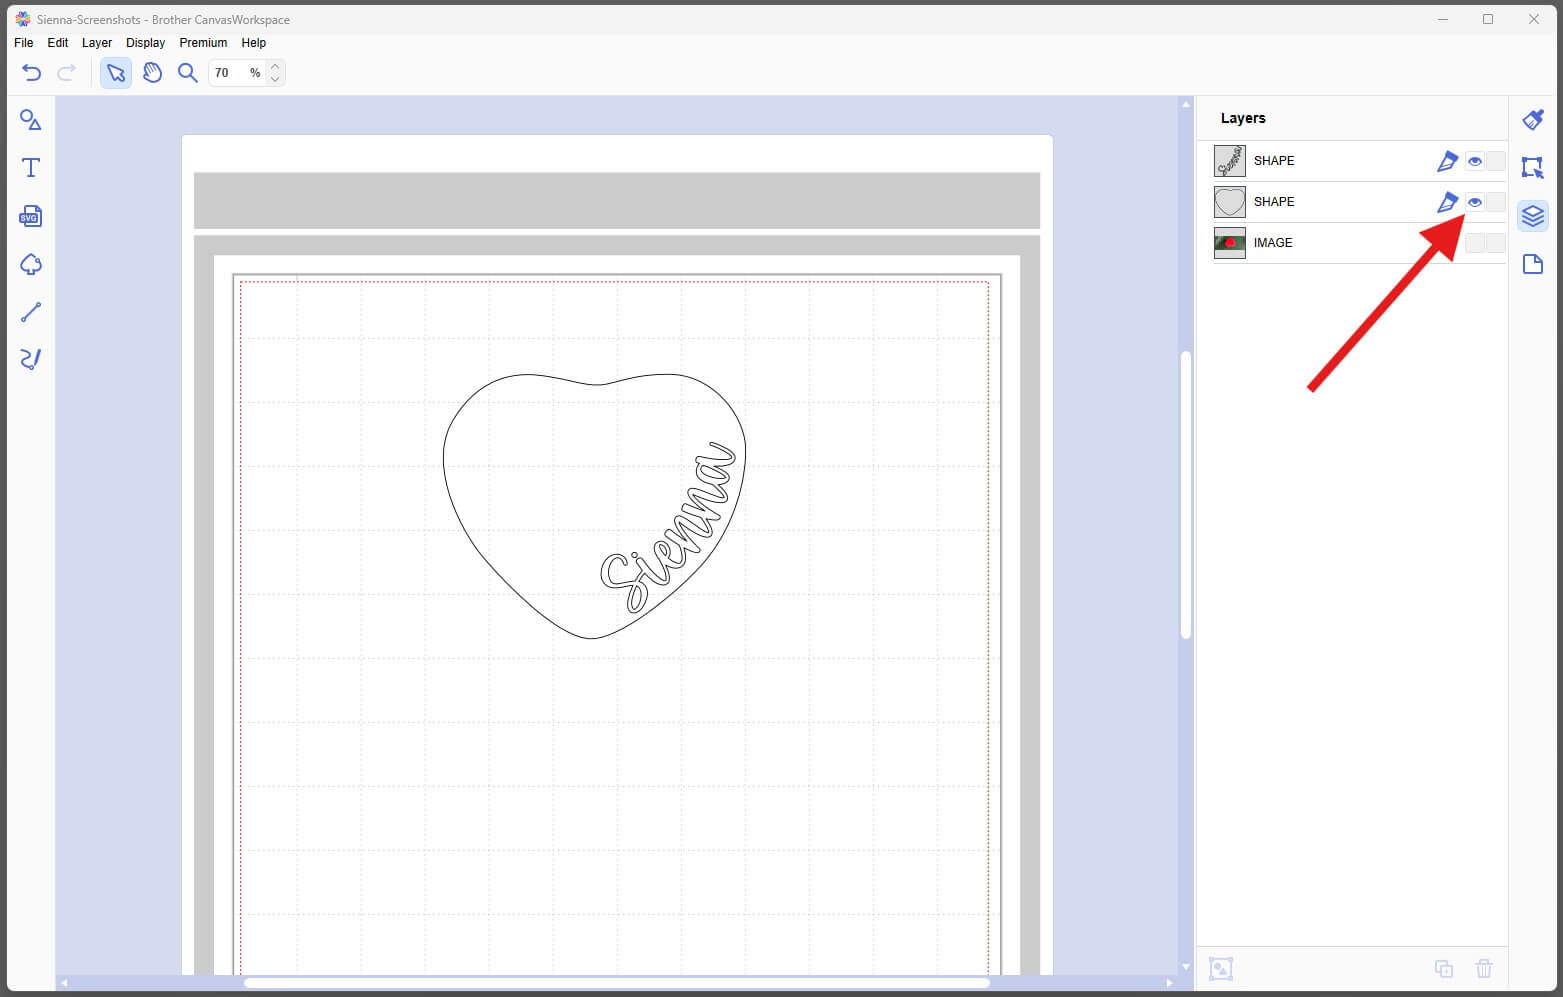
- Once resized, hide the heart layer so only the personalised name remains.
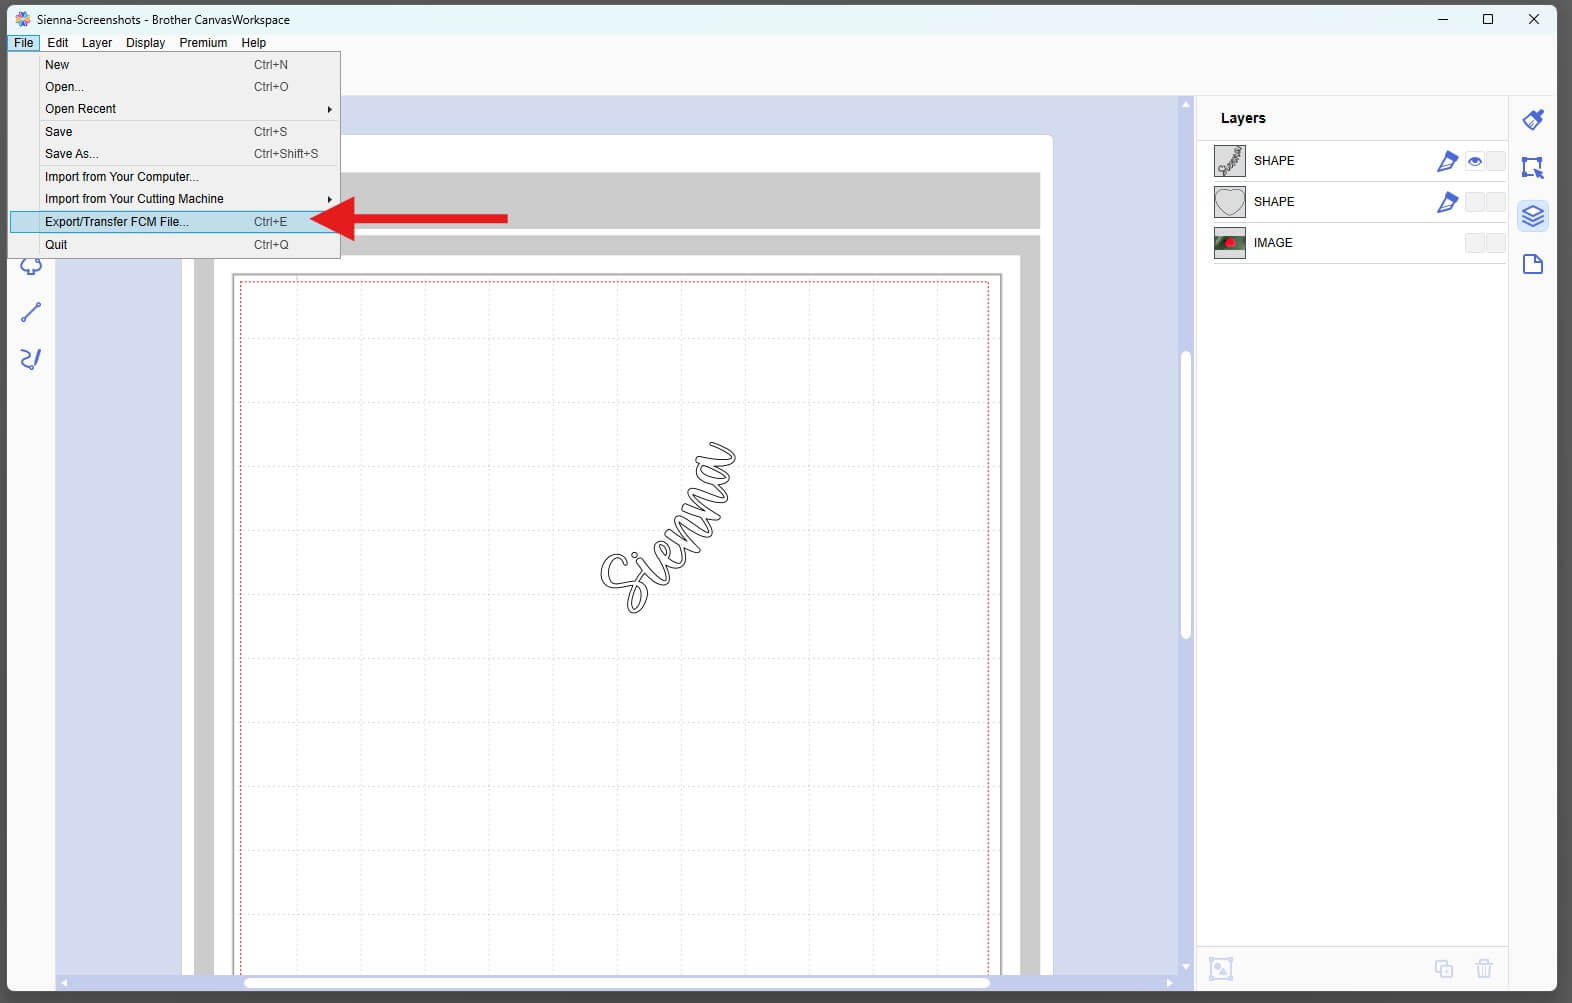
- Now we simply need to export the design. To do this select File > Export/Transfer FCM File from the top menu.
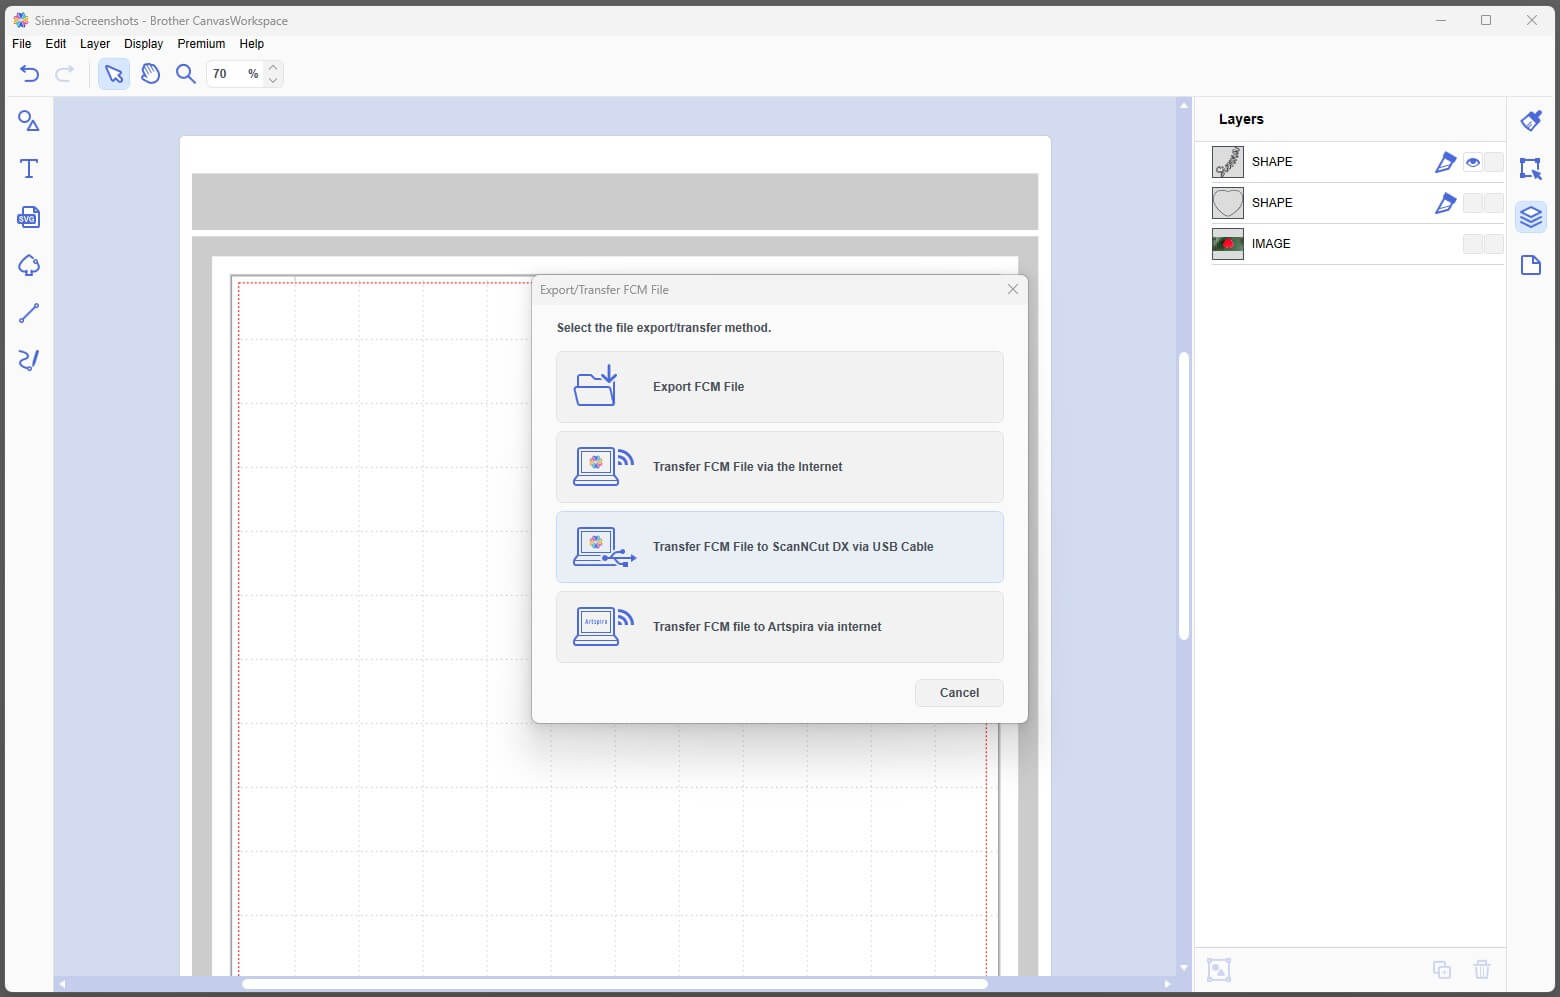
- Choose to send the file to your ScanNCut using one of the methods or save the file to your computer. We will be sending the FCM File via the Internet.
Cut Your Design:
- Place your HTV sheet in the top left-hand corner of the cutting mat, shiny carrier sheetside down. A brayer can help secure it firmly. Masking tape can help tape it down if your mat is starting to lose its tack.
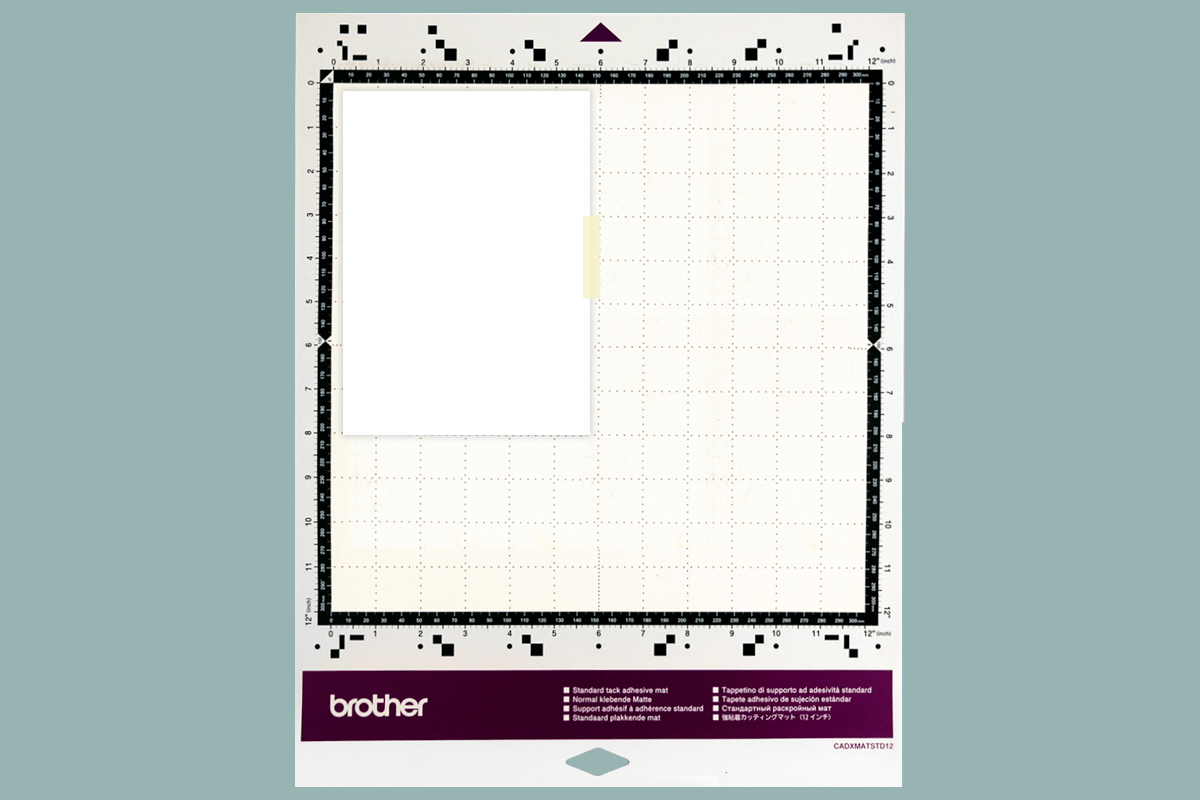
- Load the mat into your machine, holding it level as it feeds in.
- Load the design from CanvasWorkspace via Wi-Fi by selecting the Wireless option (3). Alternatively, if you have saved the design to a USB drive, select USB (2) on your machine’s screen.
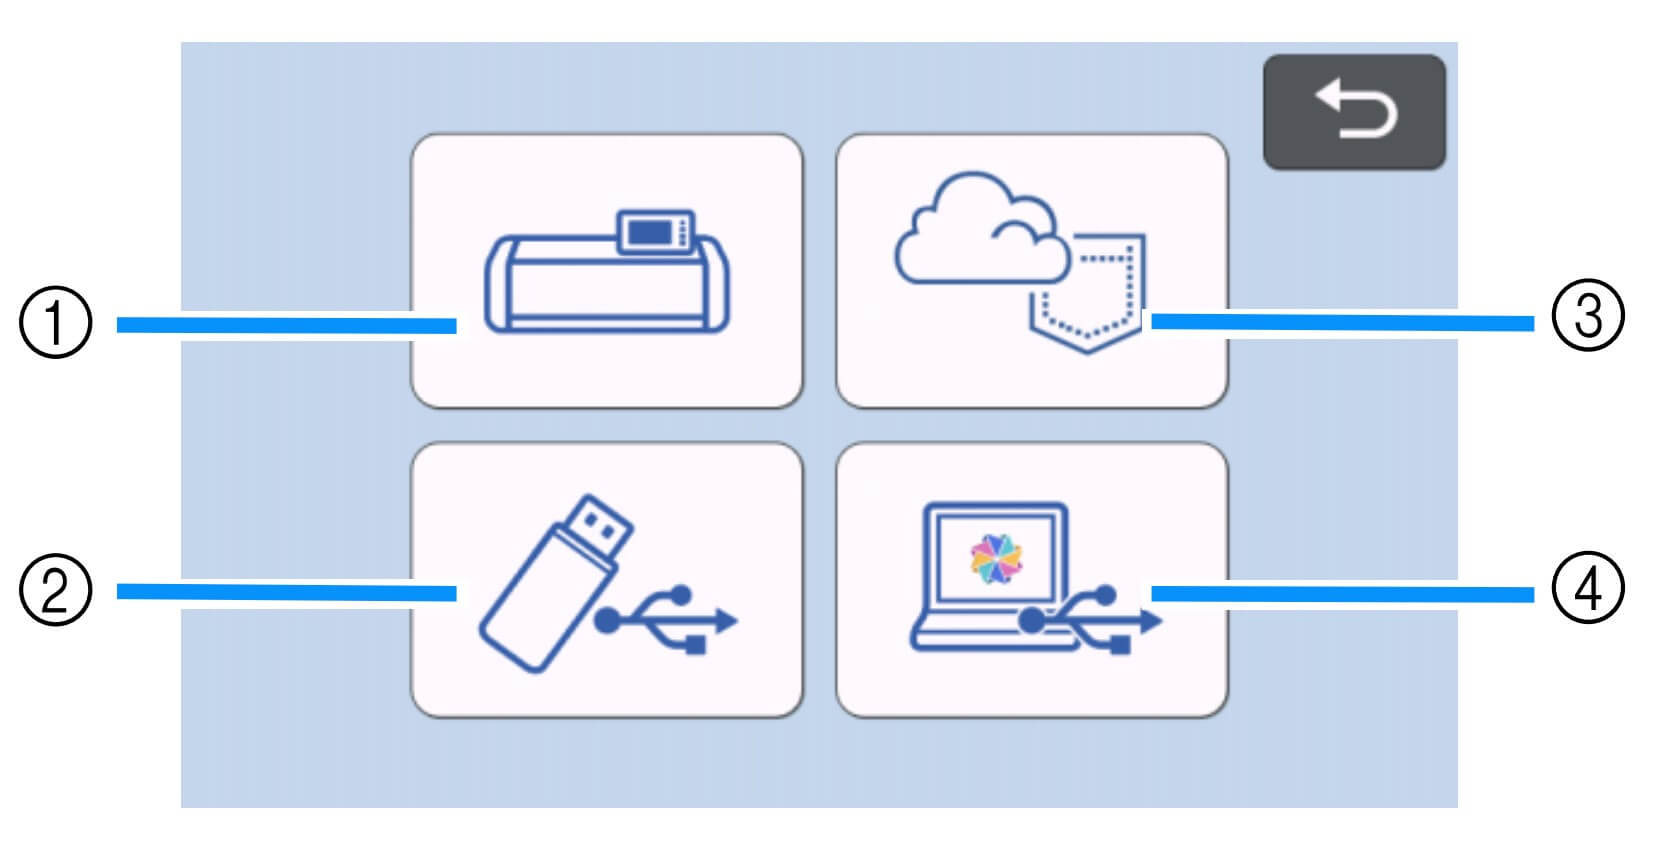
- Select your design and mirror it before cutting (important for HTV).
- Scan the mat to check placement of the design on the HTV and adjust if needed.
- Run a test cut to check your settings.
SDX Settings: Use the Half Cut function for HTV, which cuts the vinyl layer but leaves the clear carrier intact. Adjust Cut Pressure if needed depending on HTV thickness. - Send the design to cut.
- Once finished, unload the mat and peel away the HTV sheet.
- Weed away the unwanted vinyl. Use a weeding tool for small details.
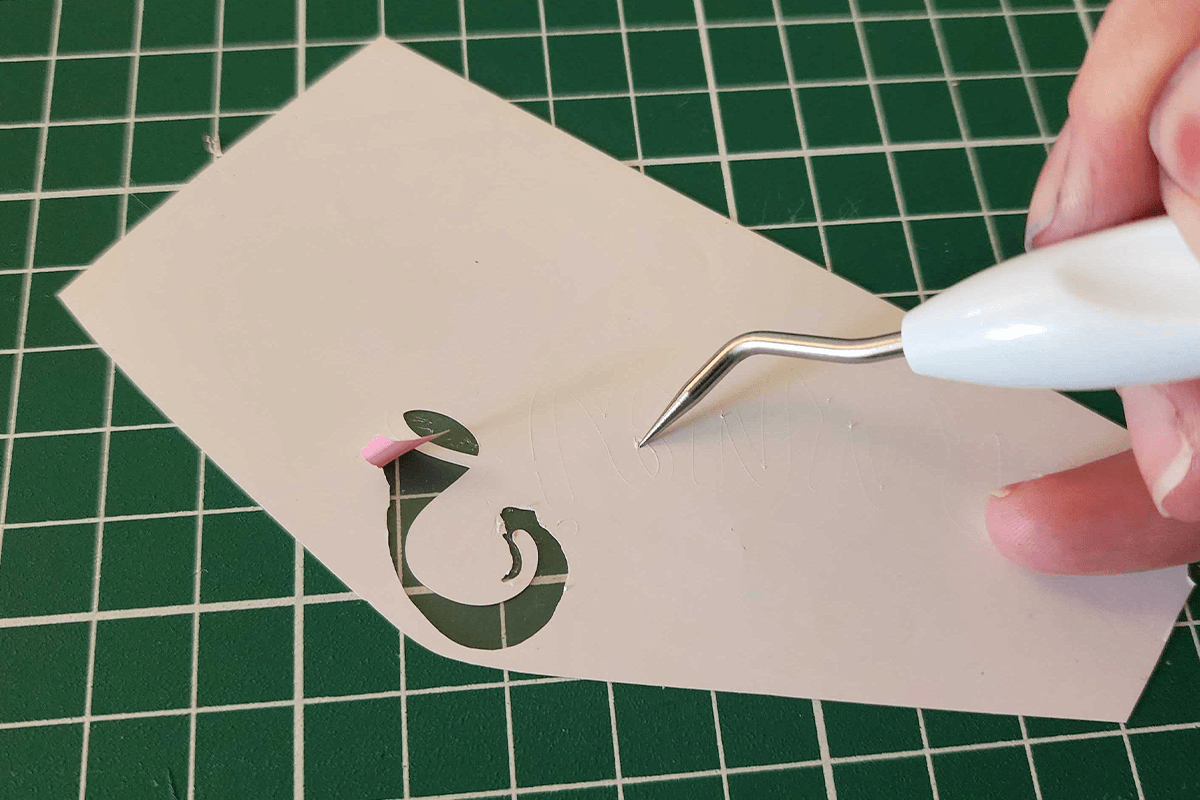
- You should be left with your design on the clear carrier sheet, ready to apply.
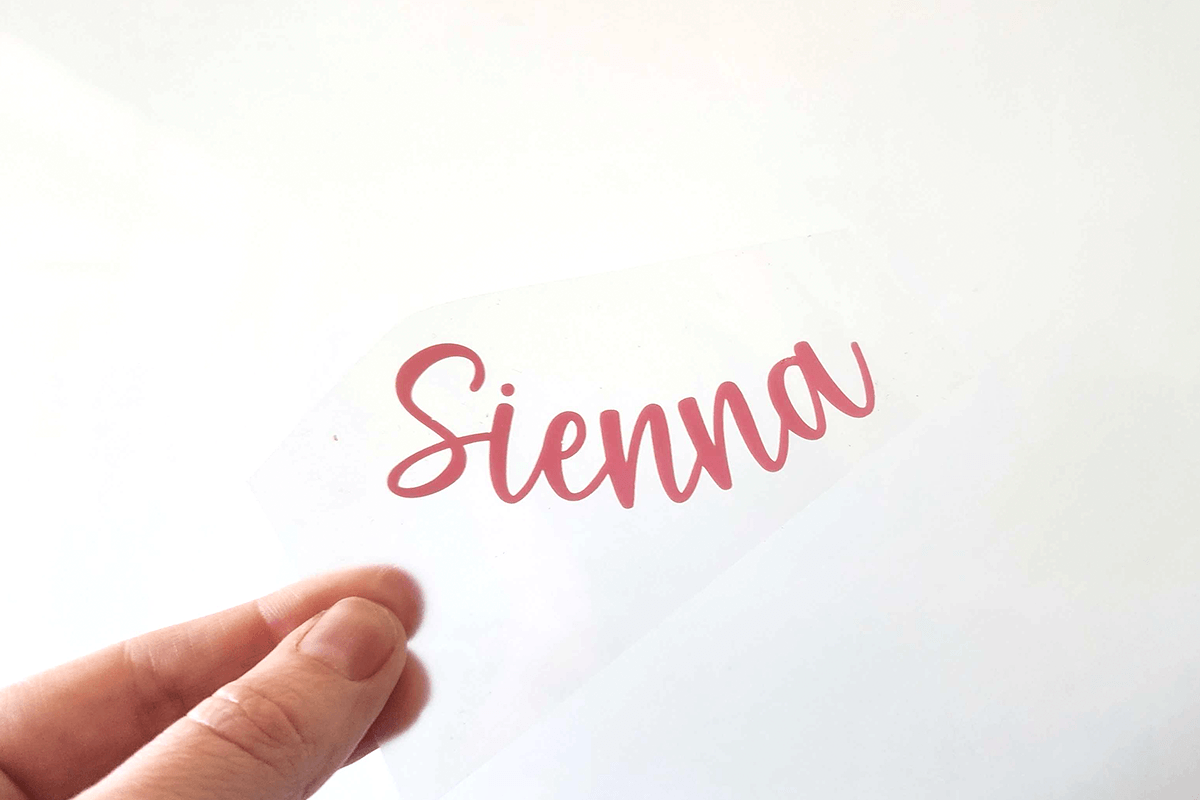
- Turn on your mini iron and allow it to preheat. Because this jewellery box is made from PU leather, it's important to use a lower heat setting to avoid damaging the surface.
Tip: Before applying your final design, test a small piece of HTV on the underside of the jewellery box. Always protect the surface with a Protective Heat-Resistant Sheet before applying heat.
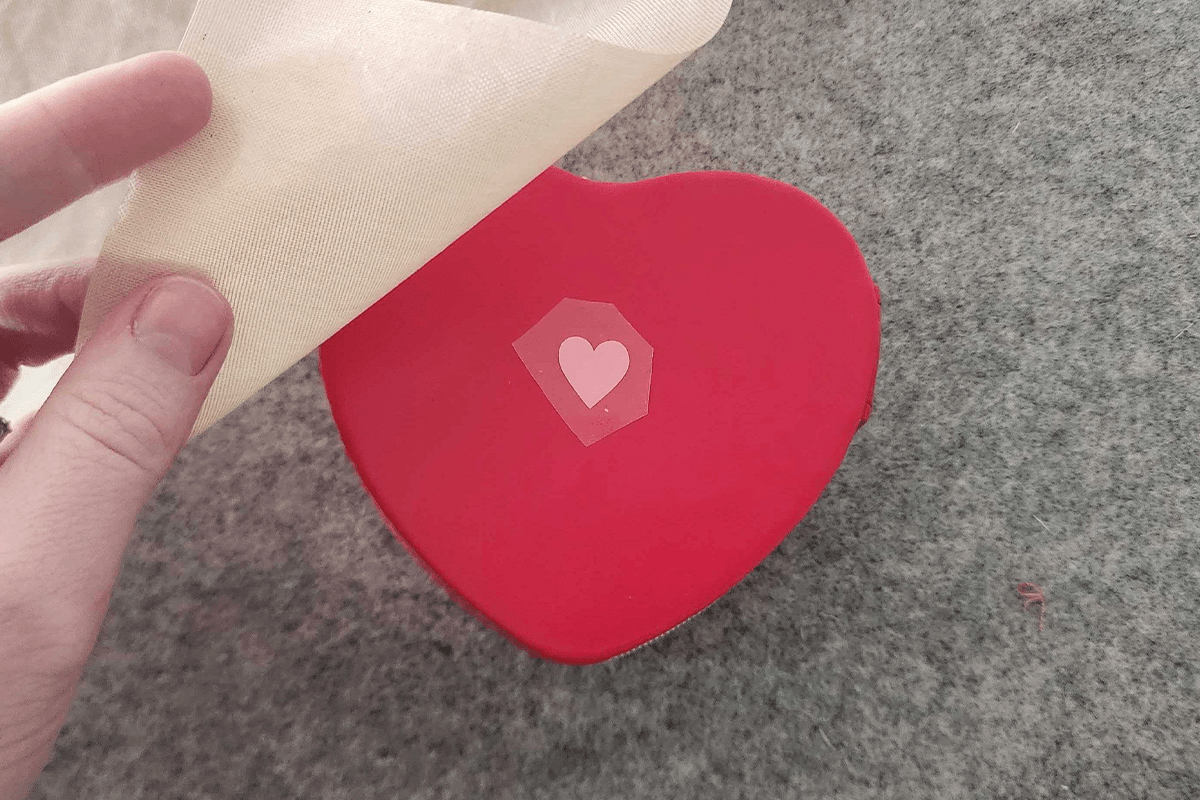
We set our mini iron to approximately half heat and pressed for around three seconds at a time. Your settings may vary depending on the HTV brand you're using, so always refer to the manufacturer's recommendations. - Now you are ready to add the name to the front of the jewellery box. Place the HTV where you would like it to sit on the jewellery box and use Heat Resistant tape if needed to hold it in place.
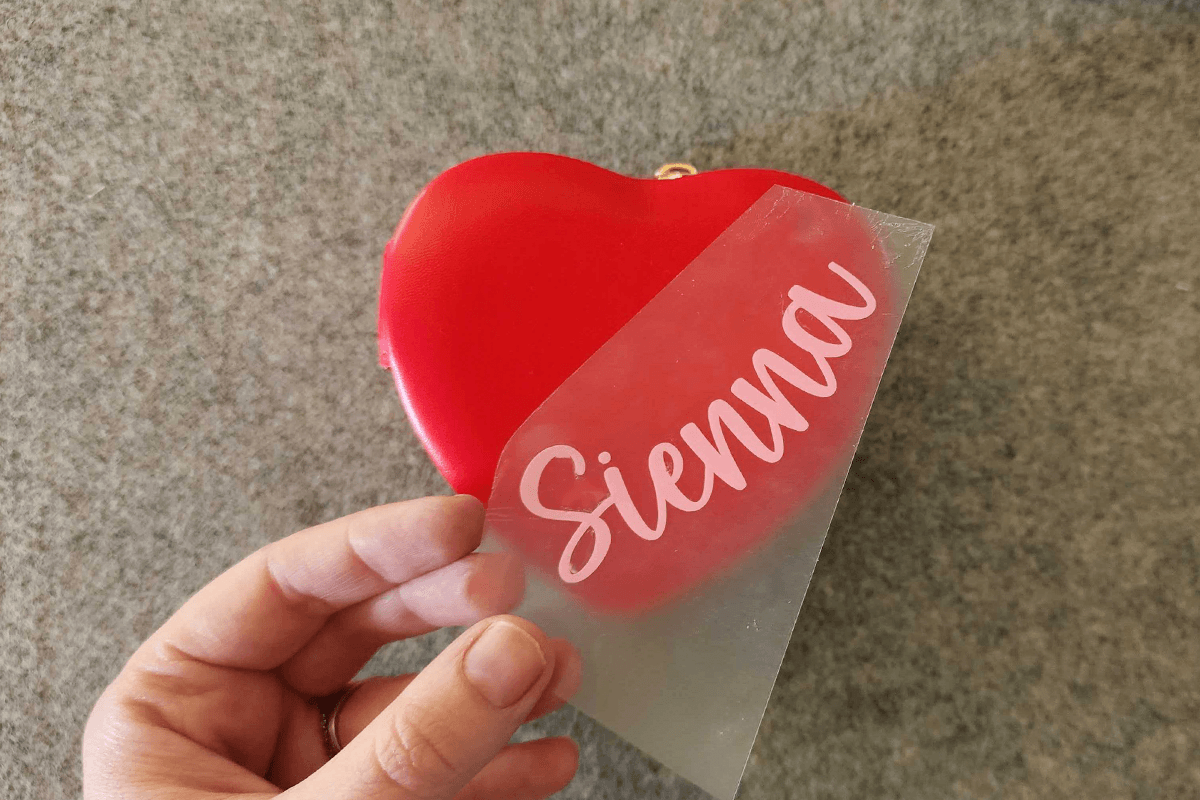
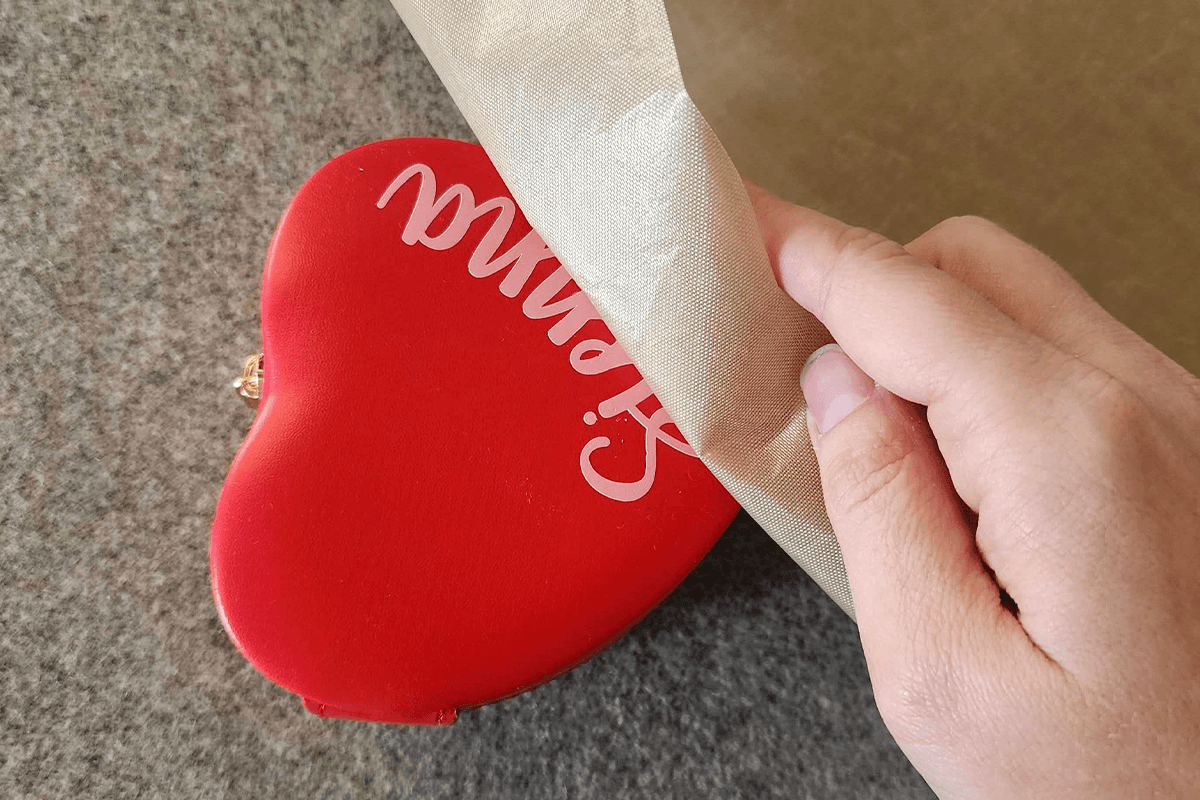
- Cover the HTV and jewellery box with a Protective Heat-Resistant Sheet before pressing. This protects the PU leather from direct heat and helps prevent damage to the surface.
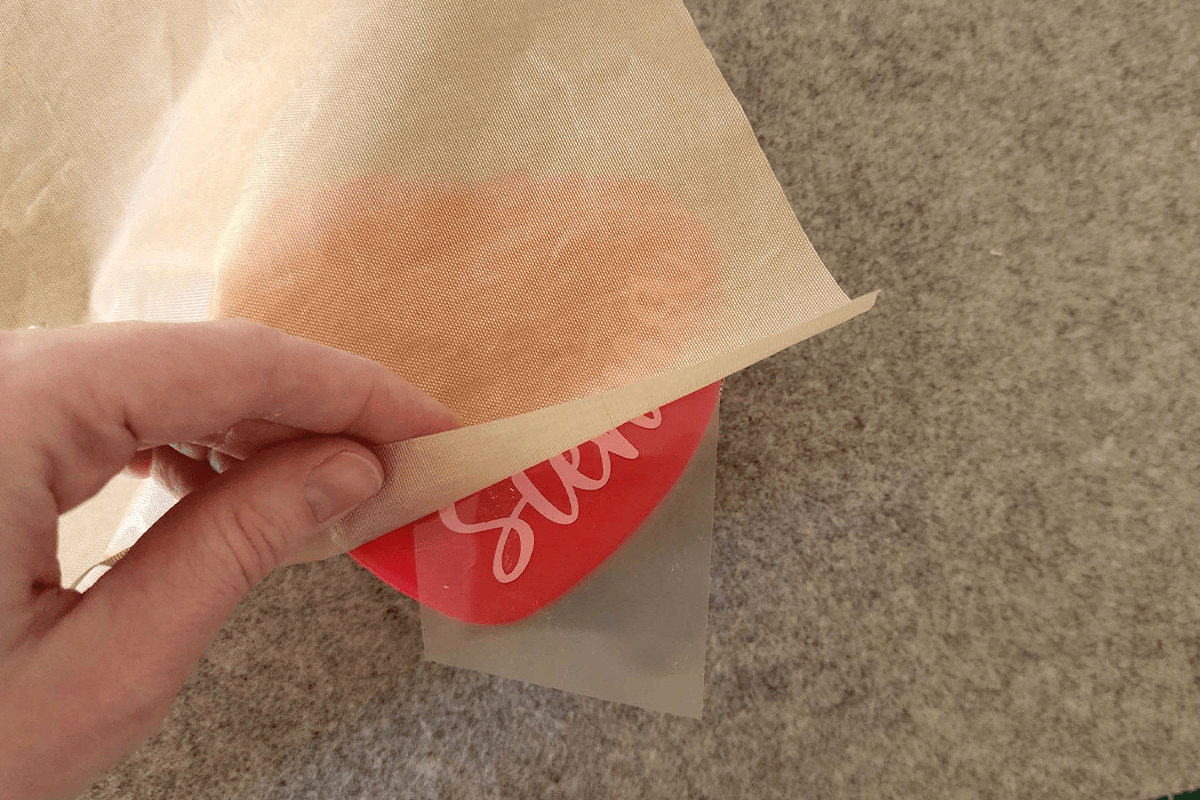
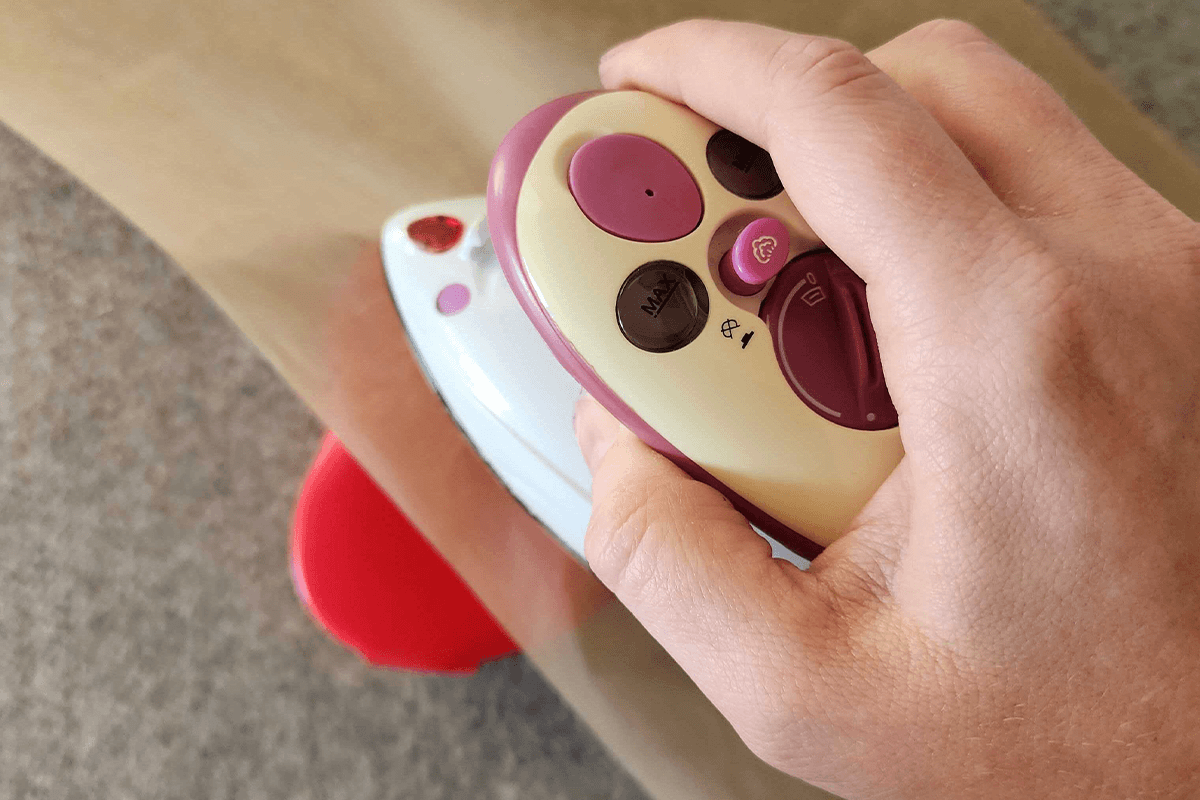
- Apply firm downward pressure, lifting and repositioning the mini iron rather than sliding it across the surface. This helps prevent the HTV from shifting while ensuring even heat is applied.
Remember PU leather is heat sensitive, so press in short bursts of around three seconds at a time, checking the HTV between presses. Repeat if required until the HTV has adhered correctly.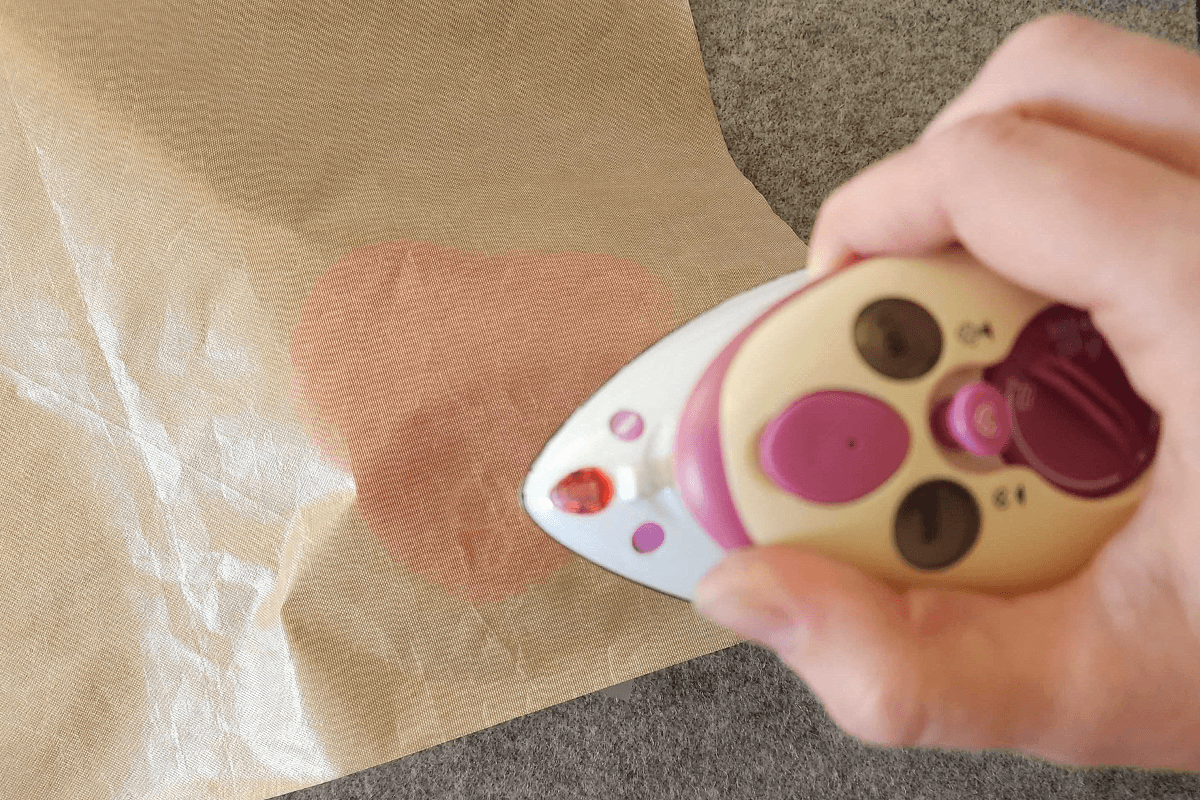
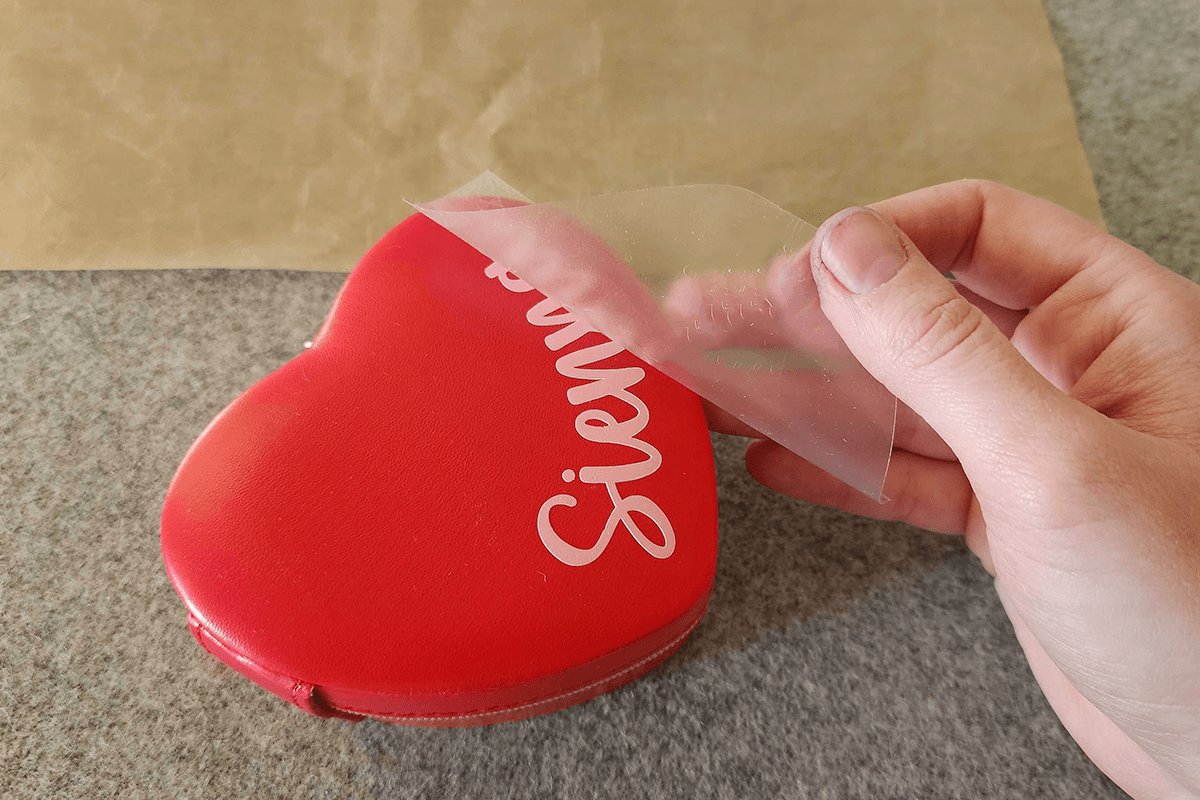
- Carefully peel away the clear carrier sheet, leaving the HTV adhered to the jewellery box.
- Reposition the Protective Heat-Resistant Sheet back on top of the jewellery box and give the design one final press for a few seconds to improve adhesion.
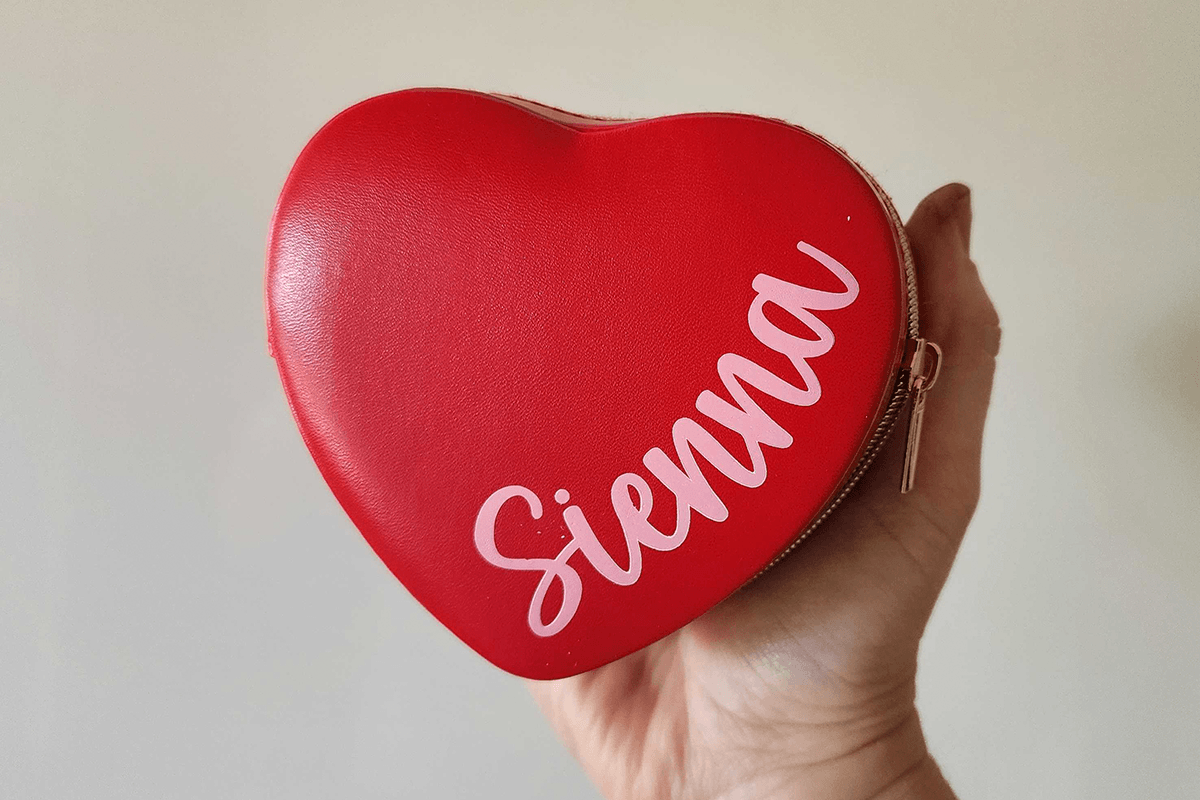
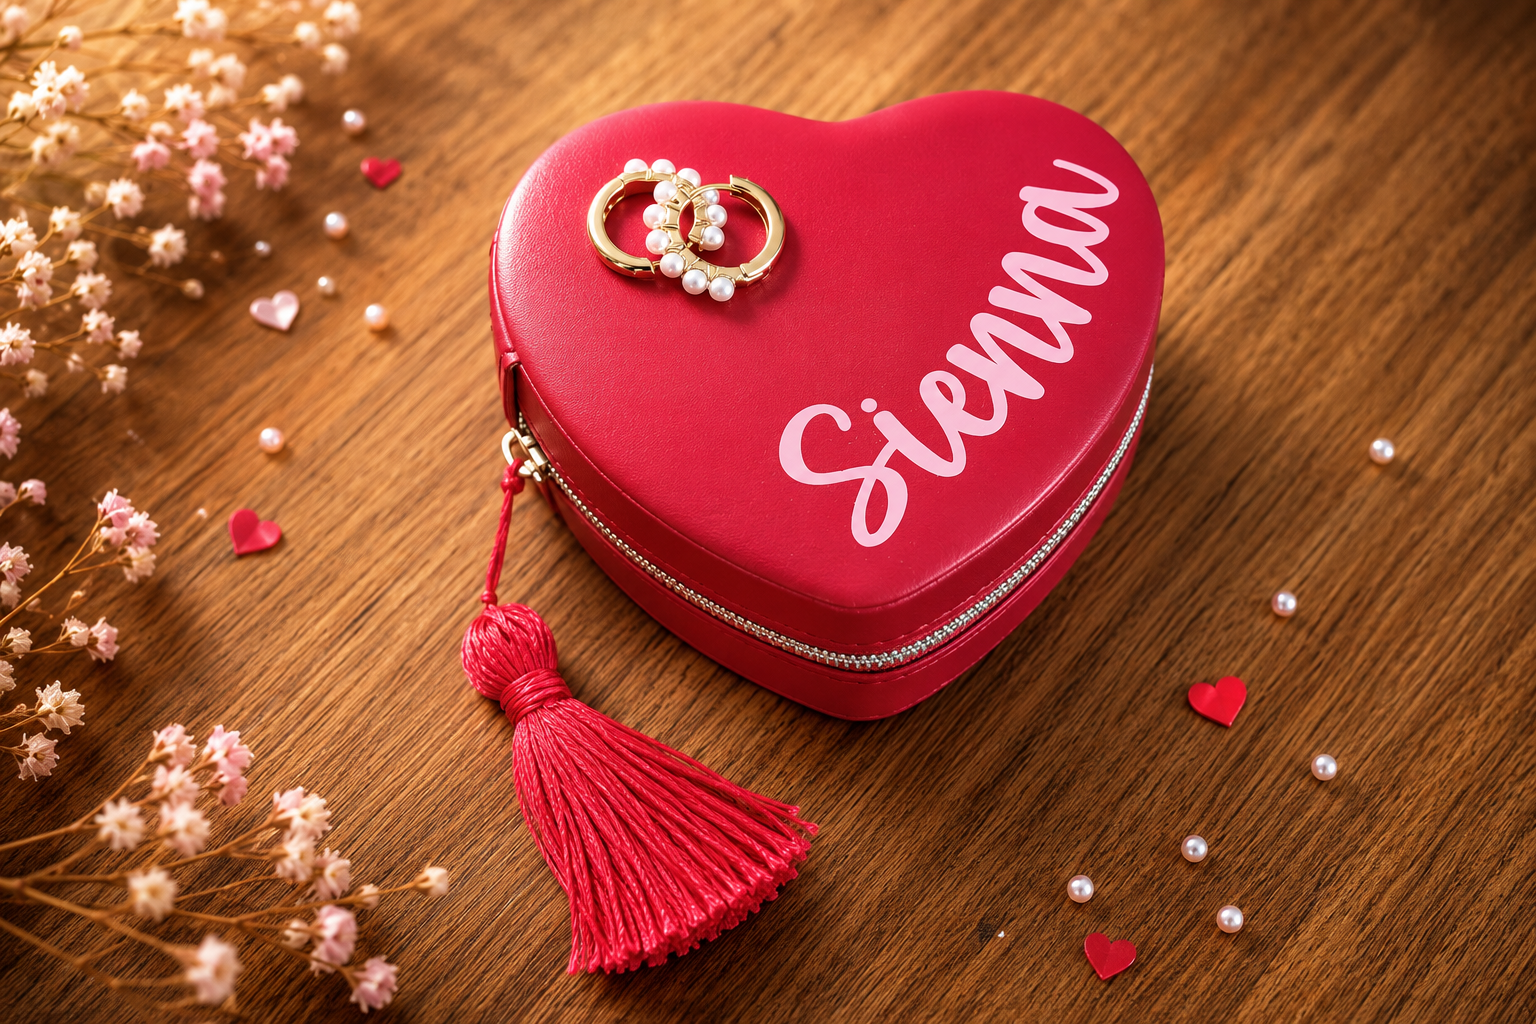
- Your personalised heart jewellery box is now complete and ready to gift or enjoy yourself.
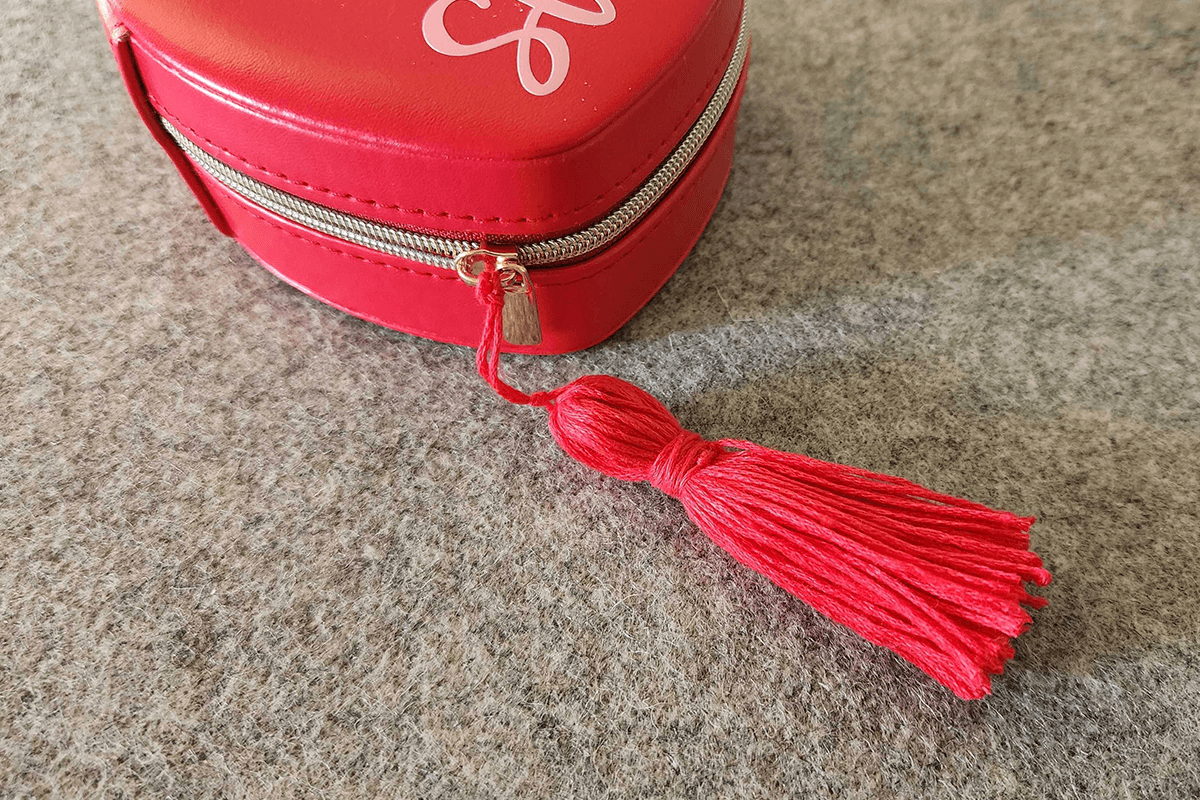
- For an extra finishing touch, add a handmade tassel to the zip pull. Follow our DIY Tassel Embellishment Tutorial to learn how to make one.
Free Embroidery Designs
We're excited to offer our free Echidna designs available for download. These free designs are perfect for those at a beginner or an advanced level. Add these designs to your stash and create incredible embroidery!
View all free designs >
Sewing, Quilting and Embroidery Machines
Interested in learning how to sew, quilt or embroider? Take a look at the innovative Brother machines available for purchase at Echidna Sewing. Wherever possible we will beat any deal and you will always receive ongoing service and support!
Find out more >
Learn to Sew or Embroider with Echidna Sewing
Come along to our fun-filled classes to learn more about sewing, embroidery and crafting. Classes cater for all skill levels, whether you're just starting out or already have advanced knowledge.
Find out more >
Echidna project material/ fabric requirements are an indication only and can seem to be generous. This has been intentional. Should you make a cutting or embroidery mistake you will have sufficient fabric to rectify your error.
This project may engage in affiliate marketing, which is done by embedding tracking links into the Website. If you click on a link for an affiliate partnership, a cookie will be placed on your browser to track any sales for purposes of commissions.