All Projects
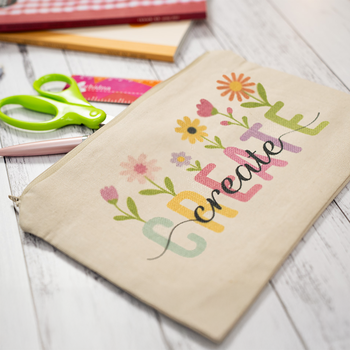


Create a Unique Dye-Sub Storage Pouch
Date Posted:11 March 2026
Add a creative and practical touch to your everyday essentials, travel bag, or gift collection with this fun sublimation project. In this tutorial, we’ll show you how to create a vibrant custom storage pouch using our 18cm x 12.5cm Polyester Sublimation Storage Pouch Blank — perfect for holding notions, pens, cables, cosmetics, and more.
For this project we’ll be using artwork from our Word Blossom collection, which features uplifting floral-themed word art. This artwork is free with any dye-sub blank purchase from Echidna. However, you can also use your own artwork or photos—just make sure it’s sized correctly for the pouch and prepared for sublimation printing. How to access provided artwork →
Whether you're looking to make a stylish storage solution or a heartfelt handmade gift, this pouch project is the perfect introduction to dye sublimation.
What you will need:
- Sublimation Printer & Inks (Sawgrass, Brother SP1)
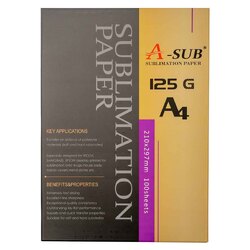
- Sublimation Transfer Paper
- 18cm x 12.5cm Polyester Sublimation Storage Pouch Blank
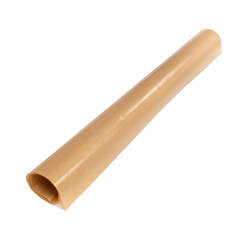
- Heat Resistant Tape
- Protective Heat Resistant Sheet x 2
- Plain Copy Paper
- Flat Heat Press
- Lint Roller
- Heat Gloves (Optional)
For more information on Essential Equipment for Dye Sublimation, take a look at our article →
Shop online:


Download the artwork:
This project uses artwork from our Word Blossom collection. This design is included free with any dye-sub blank purchase from Echidna.
Formats included: PNG / PDF (A4 & Letter Size), suitable for 18cm x 12.5cm Polyester Sublimation Storage Pouch Blank
Already purchased a blank? Learn how to access the artwork →
⚠️ Tip: Planning to use Artspira on your phone or tablet? Be sure to download the files straight from our website using that same device.
Printing help:
In this tutorial, we’re using the Brother SP1 with A4 paper and printing directly from the ready-made PDF template provided. If you prefer to use your own artwork or are working with a different blank size, you can use any sublimation printer and compatible software. Refer to the helpful links below for guidance tailored to your setup.
Helpful Links
Brother SP1 Users
- Creating your own artwork in Artspira? Learn how to Upload & Print from Artspira.
- Using a PDF with correct sizing? Refer to Brother's video on How to print from PC.
Sawgrass Users
- Creating your own artwork in CreativeStudio or printing directly via the Print Utility? Refer to the Sawgrass Knowledgebase for help.
Detailed instructions:
Pressing guide for instructions 18cm x 12.5cm Polyester Sublimation Storage Pouch Blank:
- Preheat your press to 190°C - 200°C
- Time: 60 seconds
- Pressure: Medium
- Print your design
Use the PDF template provided by Echidna, which is specifically designed to suit the 18cm x 12.5cm Sublimation Pouch Blank and includes a helpful alignment rectangle for easy positioning. The template is available in both A4 and Letter sizes, so be sure to select the version that matches the paper you are using. To ensure correct sizing and positioning, we recommend following Brother’s video guide on How to print from PC for the Brother SP1. Most importantly, don’t forget to enable the mirror image setting in your printer options before printing.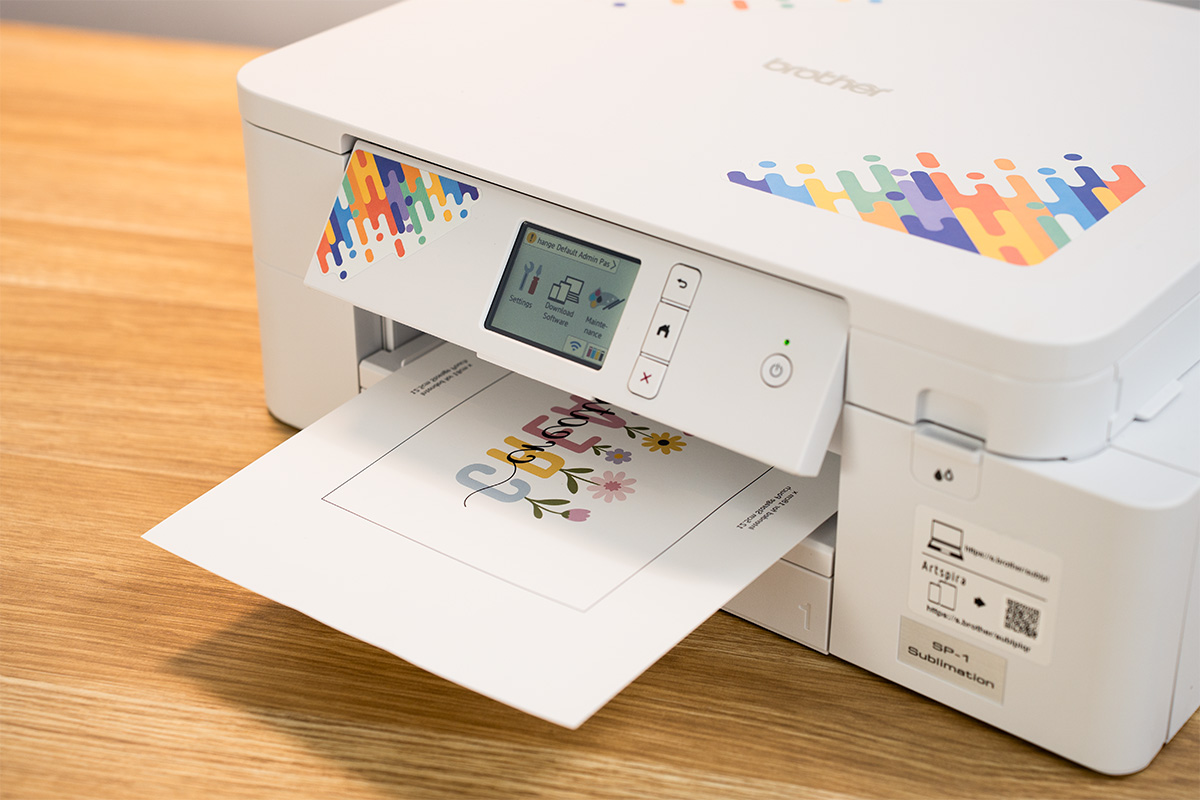
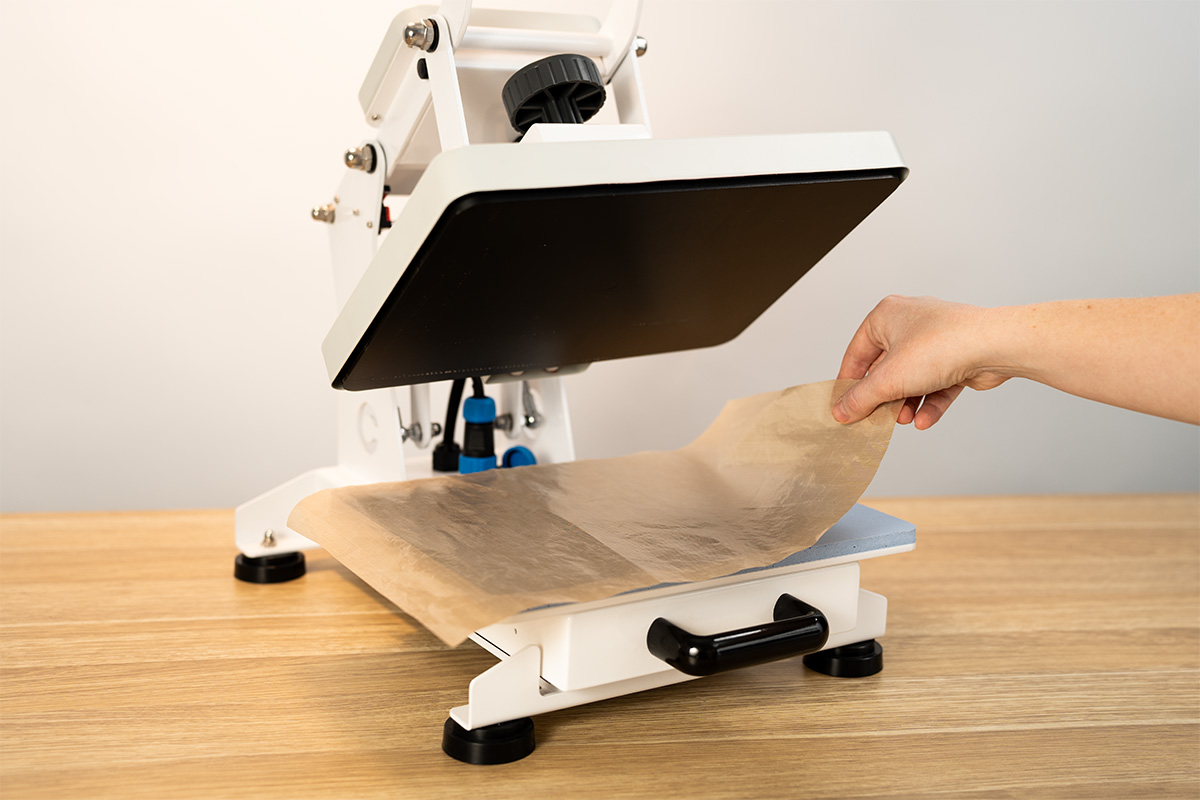
- Protect your press surface
Place a protective heat-resistant sheet on the bottom platen of your press. This shields your equipment from ink bleed during the pressing process.
Please note: This step is optional but not required. Using A4 paper, as mentioned in the next step, will sufficiently protect your heat press platen. A protective heat-resistant sheet is required for step 7.
- Protect your sheet
Place a plain sheet of copy paper on top of the protective sheet. This extra disposable layer absorbs any excess ink and helps keep your protective sheet clean.
- Prepare the pouch
Clean the surface of the pouch with a lint roller to remove any dust or debris that could affect the transfer.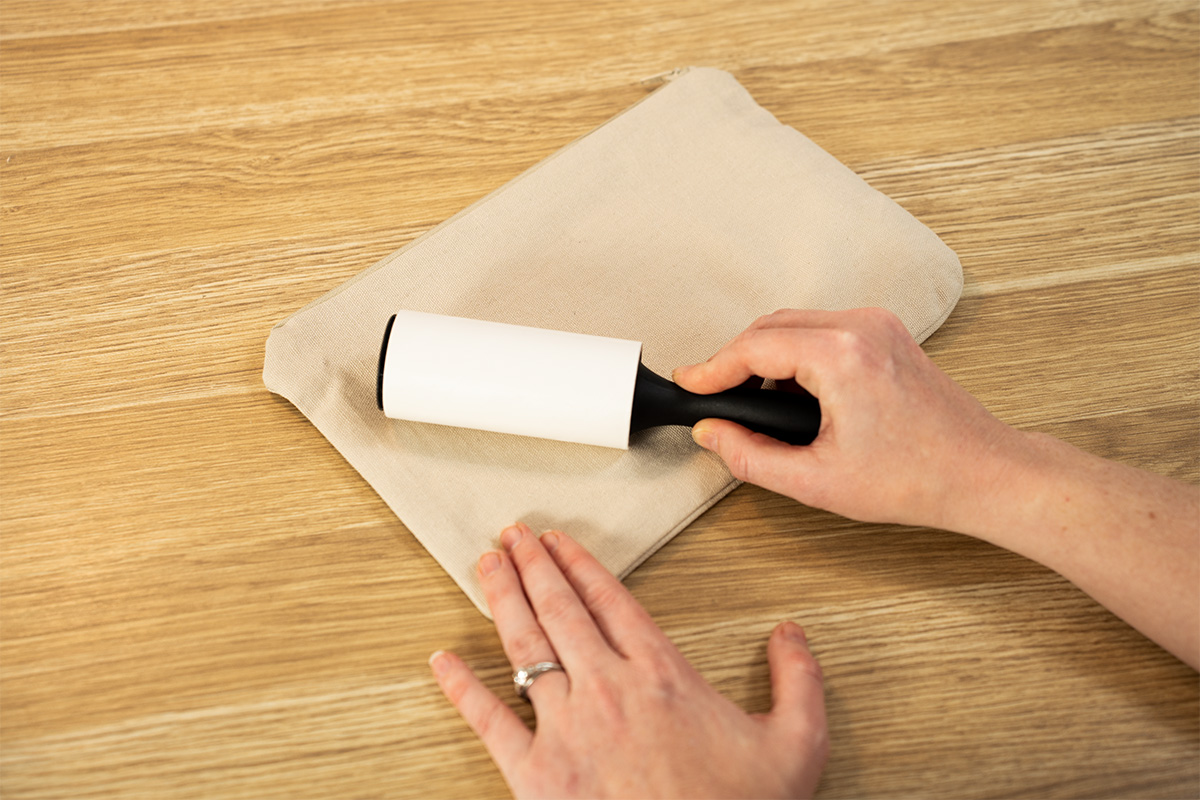
- Position and tape the design
Lay the pouch face up on your work surface. Then place your printed design face down on top of the pouch, aligning it carefully so the artwork covers the full area. Secure the paper to the back of the pouch using heat-resistant tape to prevent any shifting during pressing.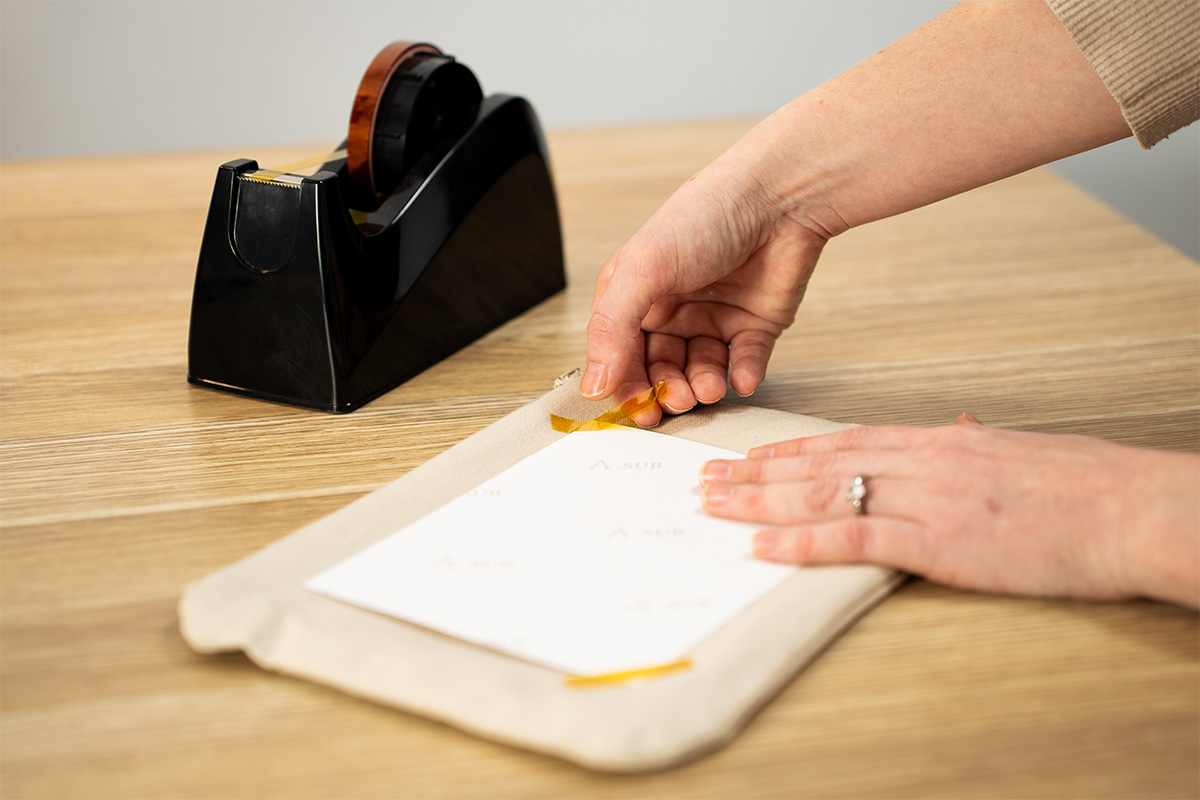
- Place pouch on heat press
Lay the taped pouch with the paper face up (printed side facing the heating element).
- Place protective sheet and press
Place a second protective sheet over the pouch and press according to your blank’s recommended settings (Refer to Pressing guide for instructions above for more information).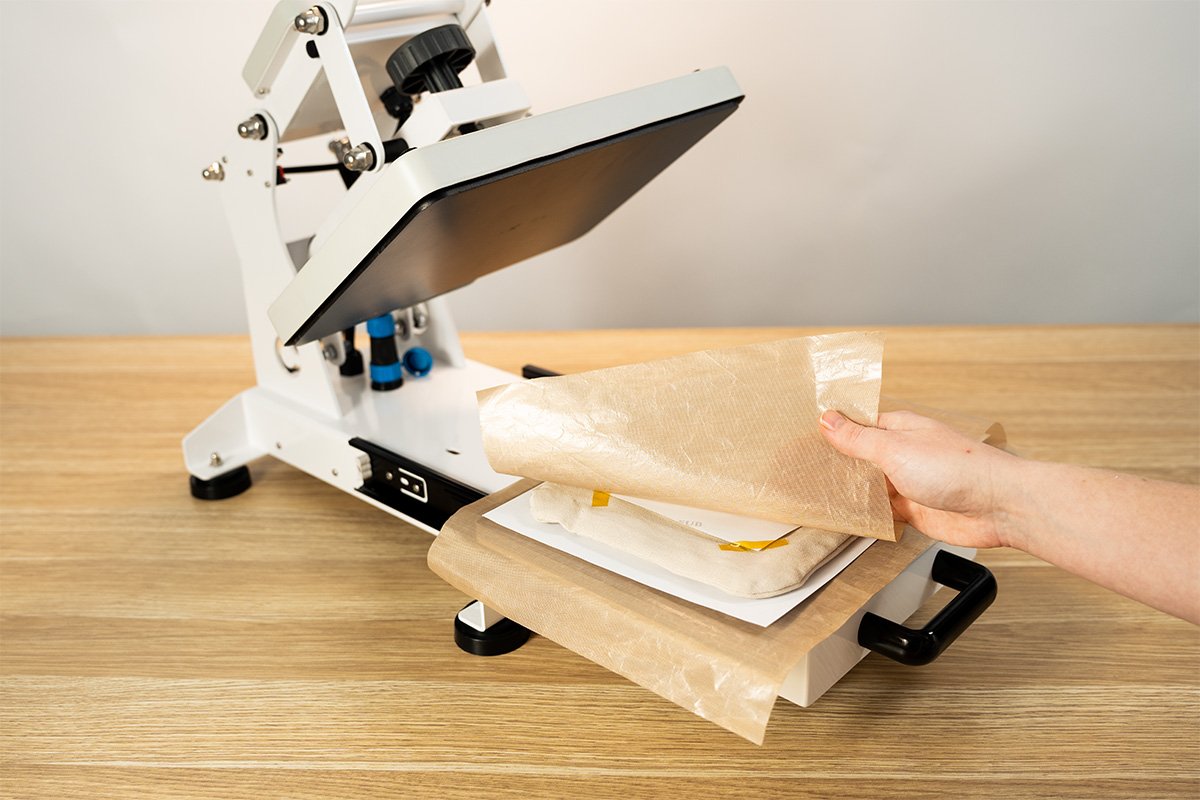
- Allow to cool
Carefully remove the pouch from the press to reveal the artwork and let it cool fully before handling.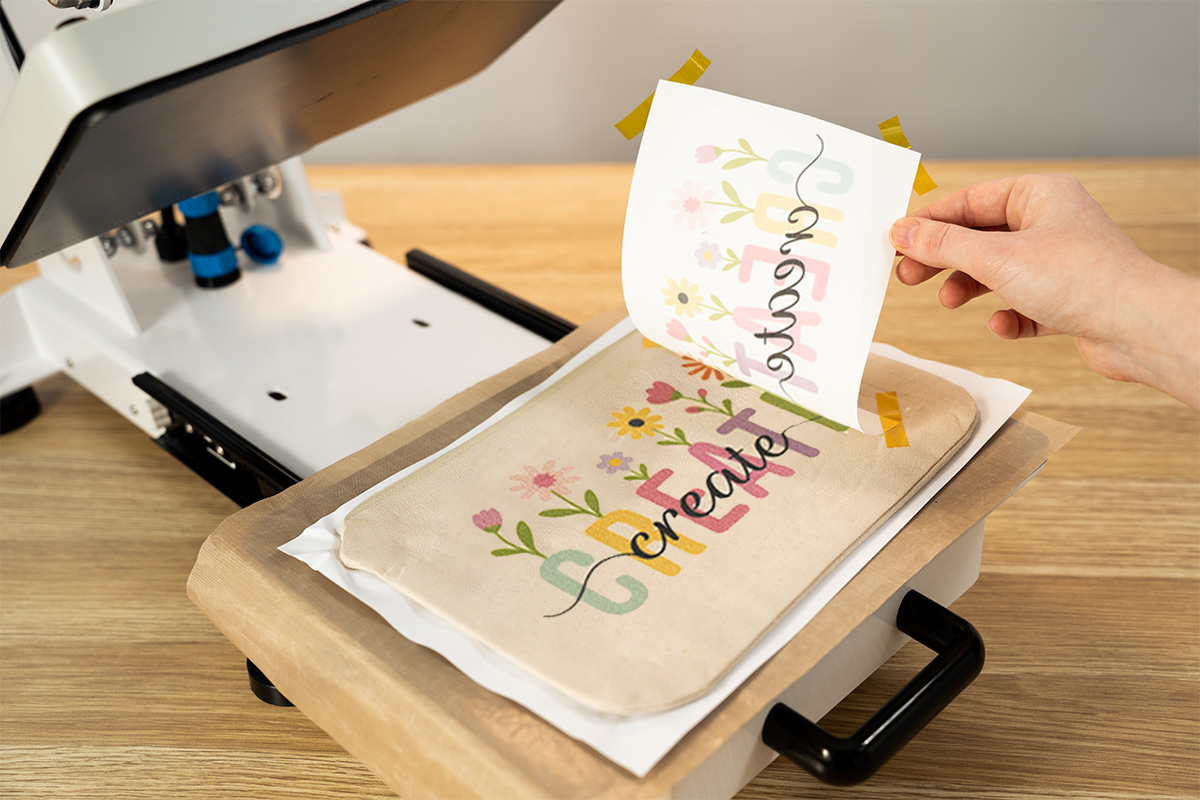
- Enjoy your custom creation!
Use your new pouch to store craft tools, stationery, makeup, or give it as a thoughtful handmade gift!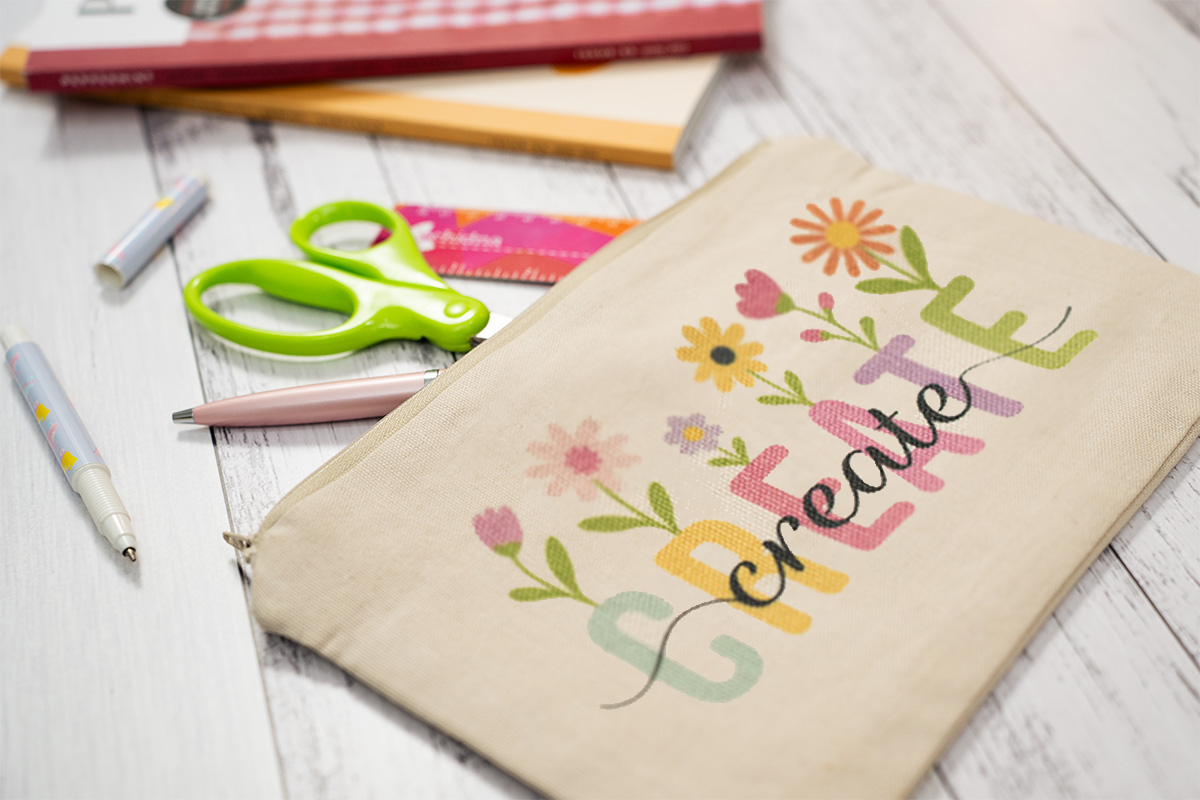
Free Embroidery Designs
We're excited to offer our free Echidna designs available for download. These free designs are perfect for those at a beginner or an advanced level. Add these designs to your stash and create incredible embroidery!
View all free designs >
Sewing, Quilting and Embroidery Machines
Interested in learning how to sew, quilt or embroider? Take a look at the innovative Brother machines available for purchase at Echidna Sewing. Wherever possible we will beat any deal and you will always receive ongoing service and support!
Find out more >
Learn to Sew or Embroider with Echidna Sewing
Come along to our fun-filled classes to learn more about sewing, embroidery and crafting. Classes cater for all skill levels, whether you're just starting out or already have advanced knowledge.
Find out more >
Echidna project material/ fabric requirements are an indication only and can seem to be generous. This has been intentional. Should you make a cutting or embroidery mistake you will have sufficient fabric to rectify your error.


