All Articles
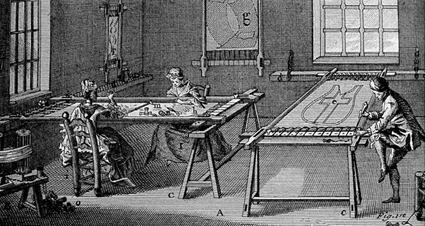 An illustration from L'Art du Brodeur (1770) by Charles Germain de Saint-Aubin, showing traditional hand embroidery techniques that predate modern machine embroidery and computer digitizing.
What Is Embroidery Digitizing?
Embroidery digitizing is the process of converting artwork into a stitch file that an embroidery machine can understand and sew.
While that may sound straightforward, digitizing is not about turning a picture into stitches. It is about creating precise instructions that tell the machine how to sew a design — stitch by stitch, in the correct order, and in a way that works on real fabric with real thread.
An embroidery machine does not "see" images. It follows commands. Digitizing is the step where those commands are created.
What Embroidery Digitizing Actually Does
When a design is digitized, decisions are made about:
- Where each stitch is placed
- What type of stitch is used
- The direction and angle of stitching
- Stitch density and coverage
- Colour order and sequencing
- Where the machine starts, stops, trims, and jumps
All of this information is saved into an embroidery file format that the machine can read.
Two designs may look identical on screen, but if one is digitized well and the other is not, they will sew very differently on fabric. That difference is digitizing.
Why Embroidery Machines Can’t Use Images
Common image files such as JPG, PNG, PDF, or even SVG contain visual information only. They describe what something looks like, not how it should be sewn.
Embroidery files are different. They contain:
- Stitch paths
- Stitch types
- Sewing order
- Machine commands
Without digitizing, an embroidery machine has no way of knowing:
- Which areas should be filled
- Which direction the stitches should run
- How dense the stitching should be
- How the design should behave on fabric
This is why artwork must be digitized before it can be embroidered.
A Brief History of Digitizing
You may still hear digitizing referred to as punching or programming, and embroidery designs called tapes or cards. These terms come from early industrial embroidery, where designs were physically punched into paper tapes without ever seeing the finished result until it was stitched.
As computers evolved, digitizing moved on screen and became more accessible. Home embroidery machines followed, first using memory cards, then USBs, and now direct computer connections.
While the tools have changed dramatically, the fundamentals have not. Fabric still moves, thread still stretches and breaks, and embroidery still relies on well-planned stitch construction.
An illustration from L'Art du Brodeur (1770) by Charles Germain de Saint-Aubin, showing traditional hand embroidery techniques that predate modern machine embroidery and computer digitizing.The Core Stages of Digitizing
Although software and workflows vary, embroidery digitizing generally follows three key stages.
- The Artwork
Every embroidery design starts with artwork. Clean, simple artwork produces better embroidery results. Artwork may be hand drawn, digitally created, or sourced from clipart libraries. Highly detailed artwork or photographs require advanced digitizing skills and are not ideal for beginners. The artwork forms the foundation of the entire design.
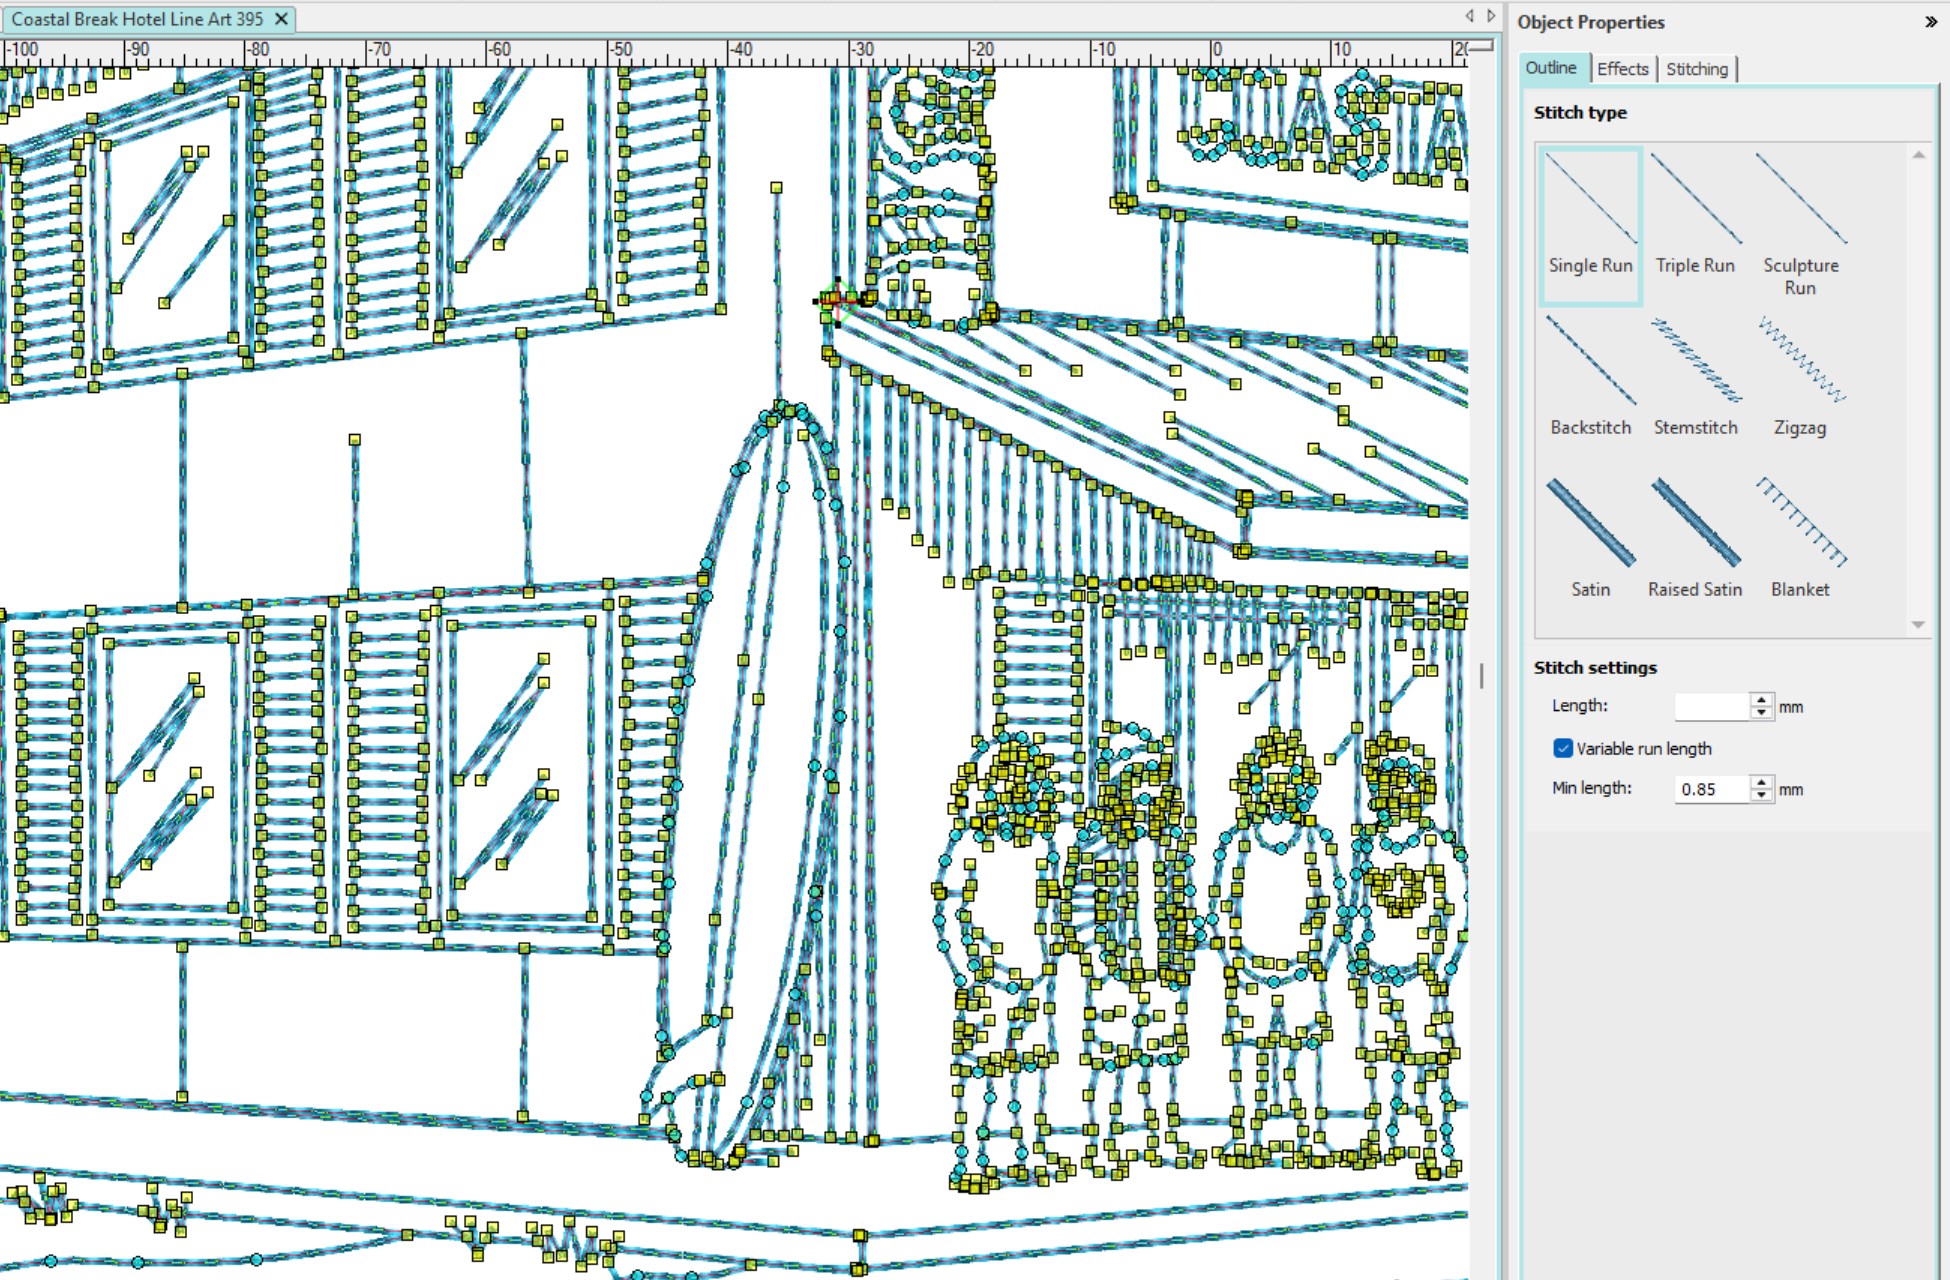
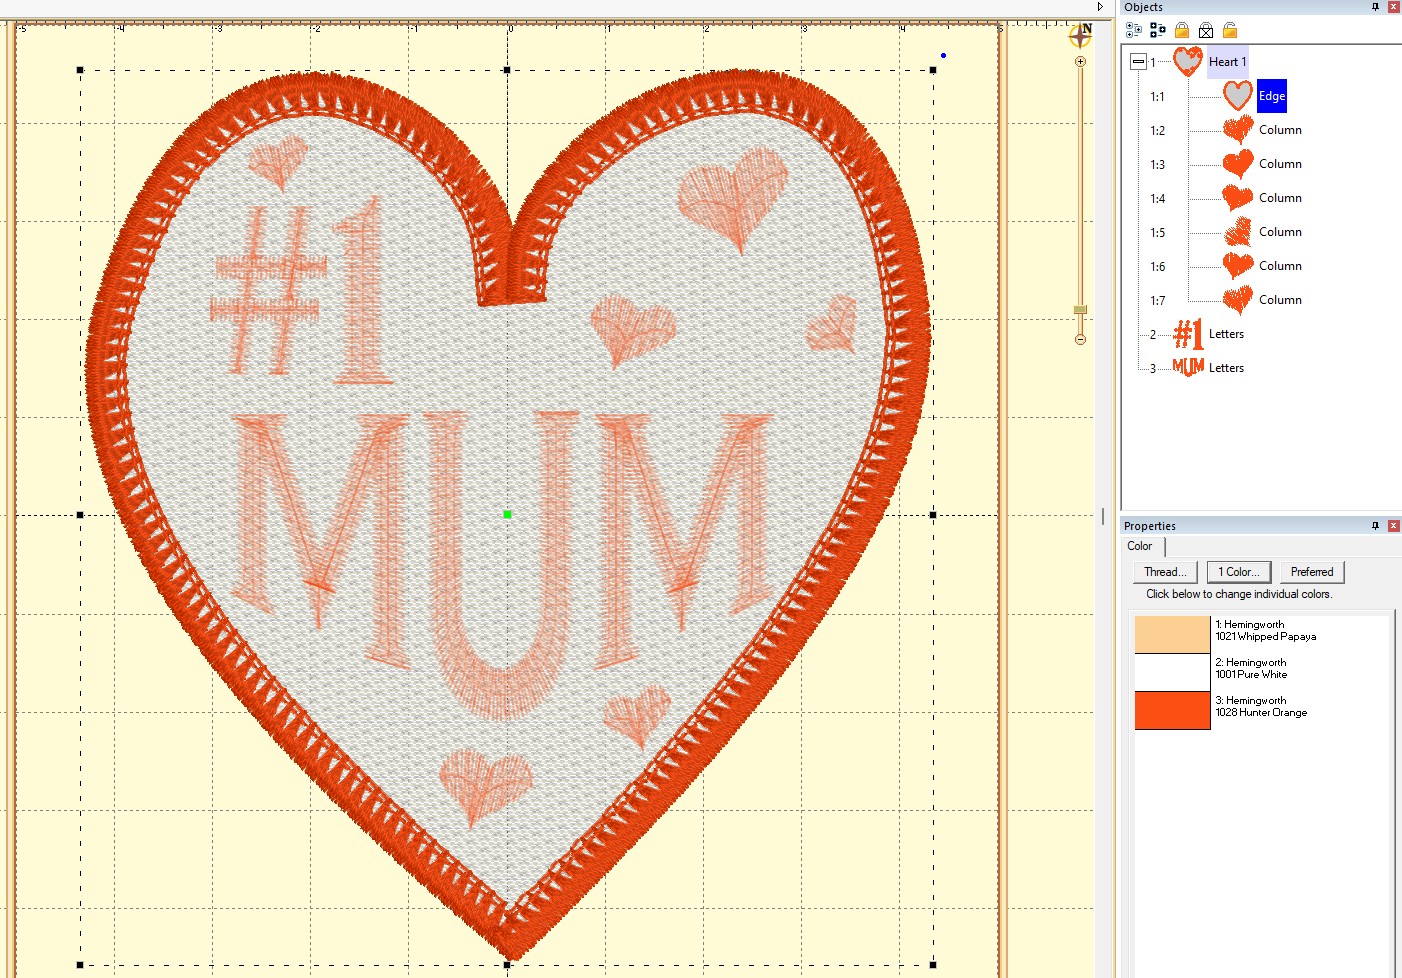
- Creating the Stitches
The artwork is imported into digitizing software, where stitches are created using the artwork as a visual guide. This step involves deliberate choices about stitch types, direction, density, layering, and sewing order. Some tools may automate parts of this process, but automation does not guarantee good results. Quality embroidery depends on how well these decisions suit the fabric, thread, and intended use of the design.
- Testing and Refining
A design is not finished when it looks good on screen. Proper digitizing includes test stitching the design on the intended fabric and checking for: gaps or poor coverage, distortion or puckering, excessive stiffness or thickness, thread breaks or inefficient stitching. Adjustments are often required to achieve a clean, reliable result.
Digitizing Is Not the Same as Design
Graphic design and embroidery digitizing are related, but they are not the same skill.
A strong logo or illustration does not automatically make a good embroidery design. Digitizing bridges the gap between visual design and real-world stitching by accounting for fabric behaviour, thread tension, and machine movement.
Embroidery digitizing is not about converting a picture into stitches. It is about engineering a design so it sews cleanly, consistently, and predictably on fabric. Once this is understood, many common embroidery frustrations — from poor stitch quality to incompatible files — begin to make sense.